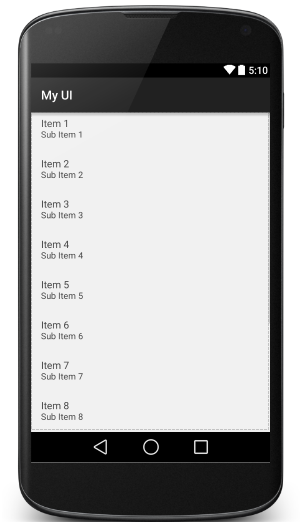
Android UI
ImageView
ImageView适用于在界面上展示图片的一种控件,通过它可以让我们的程序界面编的更加丰富多彩。
<?xml version="1.0" encoding="utf-8"?>
<ScrollView xmlns:android="http://schemas.android.com/apk/res/android"
    android:orientation="vertical"
    android:layout_width="match_parent"
    android:layout_height="match_parent">
    <LinearLayout
        android:layout_width="match_parent"
        android:layout_height="wrap_content"
        android:orientation="vertical">
        <ImageView
            android:layout_width="match_parent"
            android:layout_height="wrap_content"
            android:src="@mipmap/imageview"
            android:tint="#4F0000FF"/>

        <ImageView
            android:layout_width="match_parent"
            android:layout_height="wrap_content"
            android:src="@mipmap/imageview"
            android:scaleType="fitEnd"/>
        <ImageView
            android:layout_width="match_parent"
            android:layout_height="wrap_content"
            android:src="@mipmap/imageview"
            android:scaleType="centerInside"/>
        <ImageView
            android:layout_width="match_parent"
            android:layout_height="wrap_content"
            android:src="@mipmap/imageview"
            android:scaleType="fitXY"/>
        <ImageView
            android:layout_width="match_parent"
            android:layout_height="wrap_content"
            android:src="@mipmap/imageview"
            android:scaleType="matrix"/>
        <ImageView
            android:layout_width="match_parent"
            android:layout_height="wrap_content"
            android:src="@mipmap/imageview"
            android:scaleType="fitCenter"/>
        <ImageView

            android:layout_width="match_parent"
            android:layout_height="wrap_content"
            android:src="@mipmap/imageview"
            android:scaleType="centerCrop"/>
        <ImageView
            android:id="@+id/imageview_alpha"
            android:layout_width="match_parent"
            android:layout_height="wrap_content"
            android:src="@mipmap/imageview"
            android:background="@mipmap/background"
            android:scaleType="fitStart"/>
        <Button
            android:id="@+id/button_alpha_add"
            android:layout_width="match_parent"
            android:layout_height="wrap_content"
            android:text="增加透明度"/>
        <Button
            android:id="@+id/button_alpha_sub"
            android:layout_width="match_parent"
            android:layout_height="wrap_content"
            android:text="减小透明度"/>
    </LinearLayout>
</ScrollView>
public void onClick(View v) {
int code= Build.VERSION.SDK_INT;
switch (v.getId()){
case R.id.button_alpha_add:
mAlphaCount +=5;
if(code<16){
mImageViewAlpha.setAlpha(mAlphaCount);
}else{
mImageViewAlpha.setImageAlpha(mAlphaCount);
}
break;
case R.id.button_alpha_sub:
mAlphaCount -=5;
if(code<16){
mImageViewAlpha.setAlpha(mAlphaCount);
}else{
mImageViewAlpha.setImageAlpha(mAlphaCount);
}
break;
default:
break;
}
}这里列举了ImageView的一些属性,主要是用于位置的确定和图片的拉伸等 ,该程序中还写入了两个按钮,可以通过点击事件来改变图片的透明度。
CheckBox
CheckBox用于多项选择事件的时候使用。
<?xml version="1.0" encoding="utf-8"?>
<LinearLayout xmlns:android="http://schemas.android.com/apk/res/android"
    android:orientation="vertical" android:layout_width="match_parent"
    android:layout_height="match_parent">
    <EditText
        android:id="@+id/edittext_password"
        android:layout_width="match_parent"
        android:layout_height="wrap_content"
        android:hint="请输入密码"
        android:password="true"
        />
    <CheckBox
        android:id="@+id/checkbox_password"
        android:layout_width="wrap_content"
        android:layout_height="wrap_content"
        android:layout_gravity="right"
        android:text="显示密码"/>
    <LinearLayout
        android:layout_width="match_parent"
        android:layout_height="wrap_content"
        android:orientation="vertical">
        <TextView
            android:layout_width="match_parent"
            android:layout_height="wrap_content"
            android:text="科目:"/>
        <CheckBox
            android:id="@+id/checkbox_chinese"
            android:layout_width="wrap_content"
            android:layout_height="wrap_content"
            android:text="chinese"/>
        <CheckBox
            android:id="@+id/checkbox_math"
            android:layout_width="wrap_content"
            android:layout_height="wrap_content"
            android:text="math"/>
        <CheckBox
            android:id="@+id/checkbox_english"
            android:layout_width="wrap_content"
            android:layout_height="wrap_content"
            android:text="english"/>
    </LinearLayout>
</LinearLayout>
public class CheckBoxActivity extends Activity {
private CheckBox mCheckBoxShowPassword;
private EditText mEditTextPassword;
@Override
protected void onCreate(Bundle savedInstanceState) {
super.onCreate(savedInstanceState);
setContentView(R.layout.activity_checkbox);
mCheckBoxShowPassword= (CheckBox) findViewById(R.id.checkbox_password);
mEditTextPassword= (EditText) findViewById(R.id.edittext_password);
mCheckBoxShowPassword.setOnCheckedChangeListener(new CompoundButton.OnCheckedChangeListener() {
@Override
public void onCheckedChanged(CompoundButton buttonView, boolean isChecked) {
if(isChecked){
mEditTextPassword.setTransformationMethod(null);
}else{
mEditTextPassword.setTransformationMethod(new PasswordTransformationMethod());
}
}
});
}
}通过这段代码可以了解CheckBox的基本属性,并通过点击事件来获取选择结果。
ListView
由于手机屏幕空间都非常有限,能够一次性在屏幕上显示的内容并不多,当我们的程序中有大量的数据需要显示的时候,就可以借助ListView来实现。ListView允许用户通过手指上下滑动的方式将屏幕外的数据滚动到屏幕内,同时屏幕上的原有数据则会滚动出屏幕。
ListView的基础
既然ListView是用来展示大量数据的,就需要有数据内容,数据可以存储在数据库中,这里采用String数组来存放一些数据。不过数组中的数据是无法直接传递给ListView的,这里就用到了适配器。这里使用的是ArrayAdapter。他可以通过泛型来制定要适配的数据类型,然后在构造函数中把要适配的数据传入即可。ArrayAdapter的构造函数中依次传入当前上下文,ListView自相布局的id,以及要适配的数据。最后调用ListView的serAdapter()犯法,将构建号的适配器对象传递进去,这样ListView跟数据之间的关联就建立完成了。
public class ListViewActivity extends Activity {

    private ListView myListView;
    private String []array={"张三","李四","王五","赵六"};
    @Override
    protected void onCreate(Bundle savedInstanceState) {
        super.onCreate(savedInstanceState);
        setContentView(R.layout.activity_listview);
        myListView= (ListView) findViewById(R.id.listview);
        ArrayAdapter<String> adapter=new ArrayAdapter<String>(this,R.layout.activity_selflistview,array);
        myListView.setAdapter(adapter);
    }
}
R.layout.activity_selflistview是一个简单的线性布局。
定制ListView的界面
在这里,重新定义了一个布局,可以显示一个人的姓名性别年龄爱好等。
先定义一个Student的实体类,包括基本属性和set get方法。
package com.example1.administrator.myui.model;

/**
 * Created by Administrator on 2015/8/24.
 */
public class Student {
    private String name;
    private String age;
    private String sex;
    private String hobby;
    public Student(String name,String age,String sex,String hobby){
        this.name=name;
        this.age=age;
        this.sex=sex;
        this.hobby=hobby;
    }
    public String getName() {
        return name;
    }

    public String getHobby() {
        return hobby;
    }

    public String getSex() {
        return sex;
    }

    public String getAge() {
        return age;
    }

    public void setSex(String sex) {
        this.sex = sex;
    }

    public void setName(String name) {
        this.name = name;
    }

    public void setAge(String age) {
        this.age = age;
    }

    public void setHobby(String hobby) {
        this.hobby = hobby;
    }


}
定义一个布局,用来显示每个人的基本信息。
<?xml version="1.0" encoding="utf-8"?>
<LinearLayout xmlns:android="http://schemas.android.com/apk/res/android"
    android:orientation="horizontal"
    android:layout_width="match_parent"
    android:layout_height="match_parent">
    <TextView
        android:id="@+id/text_name"
        android:layout_width="wrap_content"
        android:layout_height="wrap_content"
        android:textColor="@color/red"
        android:text="name"/>
    <LinearLayout
        android:layout_width="wrap_content"
        android:layout_height="wrap_content"
        android:orientation="vertical">
        <TextView
            android:id="@+id/text_age"
            android:layout_width="match_parent"
            android:layout_height="wrap_content"
            android:textColor="@color/blue"
            android:text="age"/>
        <TextView
            android:id="@+id/text_sex"
            android:layout_width="wrap_content"
            android:layout_height="wrap_content"
            android:textColor="@color/blue"
            android:text="sex"/>
    </LinearLayout>
    <TextView
        android:id="@+id/text_hobby"
        android:layout_width="match_parent"
        android:layout_height="wrap_content"
        android:textColor="@color/green"
        android:text="hobby"/>

</LinearLayout>
接下来写一个自定义的适配器StudentAdapter
package com.example1.administrator.myui.adapter;

import android.view.LayoutInflater;
import android.view.View;
import android.view.ViewGroup;
import android.widget.BaseAdapter;
import android.widget.TextView;

import com.example1.administrator.myui.R;
import com.example1.administrator.myui.model.Student;

import org.w3c.dom.Text;

import java.util.HashMap;
import java.util.List;

/**
 * Created by Administrator on 2015/8/24.
 */
public class StudentAdapter extends BaseAdapter {
    private List<Student> mData;
    private LayoutInflater mInflater;
    public StudentAdapter(LayoutInflater inflater,List<Student>data){
        mInflater=inflater;
        mData=data;
    }
    @Override
    public int getCount() {
        return mData.size();
    }

    @Override
    public Object getItem(int position) {
        return position;
    }

    @Override
    public long getItemId(int position) {
        return position;
    }

    @Override
    public View getView(int position, View convertView, ViewGroup parent) {
     //使用inflate方法来载入layout的xml
        View view=mInflater.inflate(R.layout.activity_simplelist,null);
        Student student=mData.get(position);
        TextView textView_name= (TextView) view.findViewById(R.id.text_name);
        TextView textView_age= (TextView) view.findViewById(R.id.text_age);
        TextView textView_sex= (TextView) view.findViewById(R.id.text_sex);
        TextView textView_hobby= (TextView) view.findViewById(R.id.text_hobby);
        textView_name.setText(student.getName());
        textView_age.setText(student.getAge());
        textView_sex.setText(student.getSex());
        textView_hobby.setText(student.getHobby());
        return view;
    }
}
在这里重写了getView()方法,这个方法在每个子项被滚动到屏幕内的时候会被调用,在该方法中,首先得到Student的实例,然后使用LayoutInflater来为这个子项加载我们传入的布局,接着调用findViewById()方法分别获取到不居中每个控件的实例,并分别调用其setTest方法来设置显示的内容,最后将布局返回。
在Activity中进行MVC整合
package com.example1.administrator.myui;

import android.app.Activity;
import android.os.Bundle;
import android.view.LayoutInflater;
import android.widget.ListView;

import com.example1.administrator.myui.adapter.StudentAdapter;
import com.example1.administrator.myui.model.Student;

import java.util.AbstractCollection;
import java.util.ArrayList;
import java.util.HashMap;
import java.util.List;

/**
 * Created by Administrator on 2015/8/24.
 */
public class SelfAdapterActivity extends Activity {
    private List<Student> mData;
    private ListView mListView;
    @Override
    protected void onCreate(Bundle savedInstanceState) {
        super.onCreate(savedInstanceState);
        setContentView(R.layout.activity_listview);
        mListView= (ListView) findViewById(R.id.listview);
        //在Activity里面就使用了LayoutInflater来载入界面,
        // 通过LayoutInflater inflater = getLayoutInflater()一个LayoutInflater;来获得.
        //LayoutInflater这个类作用类似于 findViewById()
        LayoutInflater inflater=getLayoutInflater();
        initData();
        StudentAdapter adapter=new StudentAdapter(inflater,mData);
        mListView.setAdapter(adapter);
    }
    private void initData(){
        mData=new ArrayList<>();
        Student zhangsan=new Student("张三","18","男","玩");
        mData.add(zhangsan);
        Student lisi=new Student("李四","12","女","玩玩玩");
        mData.add(lisi);
        Student wangwu=new Student("王五","28","男","玩玩玩玩玩玩玩玩");
        mData.add(wangwu);
    }
}
在这里使用了一个初始化数据的一个方法,用于初始化所有的数据,在Student构造函数中将每个人的信息都传入,然后把创建好的对象添加到定义好的ArrayList中,然后在onCreate中创建了适配器对象,并将该适配器传递给了ListView。
ListView的点击事件
首先要说明的是ListView不允许使用OnClickListener,点击事件使用setOnitemClickListener
 mListView.setOnItemClickListener(new AdapterView.OnItemClickListener() {
            @Override
            public void onItemClick(AdapterView<?> parent, View view, int position, long id) {
                HashMap<String,String> itemdata=mData.get(position);
                Log.d("information", itemdata.get("name") + itemdata.get("age") + itemdata.get("sex") + itemdata.get("hobby"));
            }
        });
点击ListView中的任何一个子项是就会毁掉onItemClick()方法,在这个方法中可以通过position参数判断用户点击的是哪一个子项,然后得到该子项的信息。
Adapter
Adapter是连接后端数据和前端显示的适配器接口,是数据和UI(View)之间一个重要的纽带。在常见的View(ListView,GridView)等地方都需要用到Adapter。比较常用的有 BaseAdapter,SimpleAdapter,ArrayAdapter,SimpleCursorAdapter等。
BaseAdapter是一个抽象类,继承它需要实现较多的方法,所以也就具有较高的灵活性;
ArrayAdapter支持泛型操作,最为简单,只能展示一行字。
SimpleAdapter有最好的扩充性,可以自定义出各种效果。
SimpleCursorAdapter可以适用于简单的纯文字型ListView,它需要Cursor的字段和UI的id对应起来。如需要实现更复杂的UI也可以重写其他方法。可以认为是SimpleAdapter对数据库的简单结合,可以方便地把数据库的内容以列表的形式展示出来。


 751
751

 被折叠的 条评论
为什么被折叠?


