


在项目中,按键检测是我们最常用的功能;对于芯片资源比较富裕时,我们可以用独立按键,在功能上既可以被独立检测,也可以实现组合检测的功能;如果按键比较多时,我们可以考虑矩阵按键,比如将之前需要16个引脚实现的独立按键,通过8个引脚实现4*4的按键矩阵,这样在按键数量保持不变的情况下,减小了MCU使用引脚的资源;当然在MCU资源很紧张,又要实现多个按键功能的时候,我们可以使用ADC来实现按键检测,这种通过1个ADC通道的检测方式只能够实现每一个按键的独立检测,无法做按键组合的效果了;当然还有其它的按键检测方式,结合MCU资源和按键功能定义,总能找到一种适合你项目的按键检测方案。
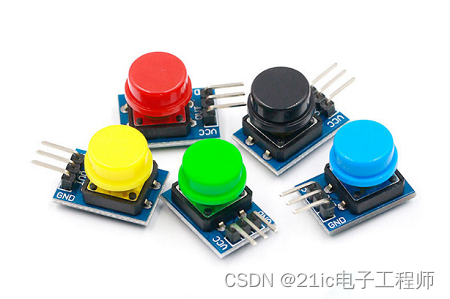
本文结合淘宝上买到的3个常用的按键模块,来分别讲述一下基于MM32F0140在不同方式下按键检测的实现:
1、独立按键
2、矩阵按键
3、ADC按键
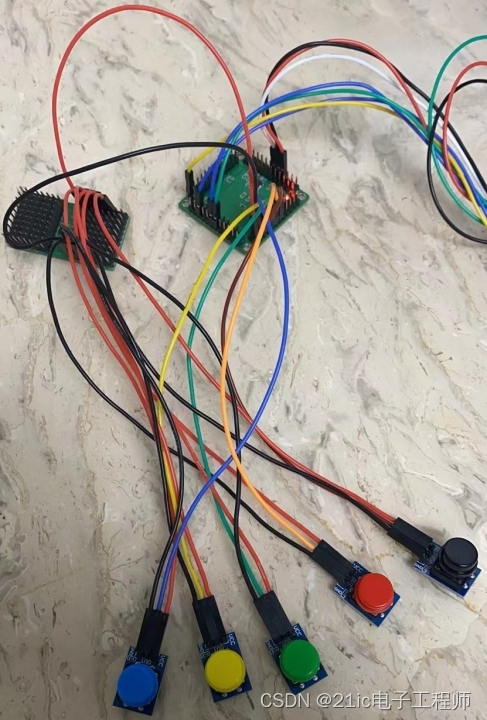
独立按键
独立按键方式每一个按键需要占用一个MCU引脚资源,根据硬件设计可以配置成上拉或下拉输入,通过检测按键是否处于低/高电平来判断按键是否被按下,检测按键是否处于高/低电平来判断按键是否又被释放;每一个按键都可以独立被检测,每个按键可以实现独立的个体功能,也可以同时检测两个或者多个按键来实现组合按键的功能,实现比较灵活,缺点就是随着按键数量的增多,所占用的MCU也会同步递增。
独立按键实现代码1:每个按键独立功能实现
void KEY_Init(void)
{
GPIO_InitTypeDef GPIO_InitStructure;
RCC_AHBPeriphClockCmd(RCC_AHBENR_GPIOB, ENABLE);
GPIO_StructInit(&GPIO_InitStructure);
GPIO_InitStructure.GPIO_Pin = GPIO_Pin_0 | GPIO_Pin_1 | GPIO_Pin_2 |
GPIO_Pin_10 | GPIO_Pin_11;
GPIO_InitStructure.GPIO_Mode = GPIO_Mode_IPD;
GPIO_Init(GPIOB, &GPIO_InitStructure);
TASK_Append(TASK_ID_KEY, KEY_Scan, 10);
}
void KEY_SubScan(uint8_t *State, uint8_t *Count, uint8_t Value, char *Name)
{
if(*State == 0)
{
if(Value != Bit_RESET) *Count += 1;
else *Count = 0;
if(*Count > 5)
{
*Count = 0; *State = 1;
printf("\r\n%s Pressed", Name);
}
}
else
{
if(Value == Bit_RESET) *Count += 1;
else *Count = 0;
if(*Count > 5)
{
*Count = 0; *State = 0;
printf("\r\n%s Release", Name);
}
}
}
void KEY_Scan(void)
{
static uint8_t KeyState[KEY_NUMBER] = {0, 0, 0, 0, 0};
static uint8_t KeyCount[KEY_NUMBER] = {0, 0, 0, 0, 0};
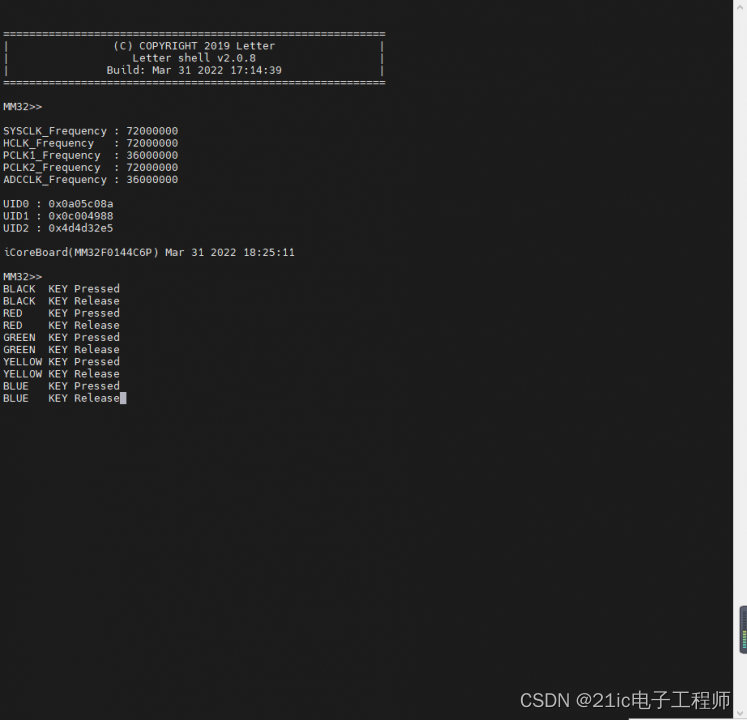
KEY_SubScan(&KeyState[0], &KeyCount[0], GPIO_ReadInputDataBit(GPIOB, GPIO_Pin_0), "BLACK KEY");
KEY_SubScan(&KeyState[1], &KeyCount[1], GPIO_ReadInputDataBit(GPIOB, GPIO_Pin_1), "RED KEY");
KEY_SubScan(&KeyState[2], &KeyCount[2], GPIO_ReadInputDataBit(GPIOB, GPIO_Pin_2), "GREEN KEY");
KEY_SubScan(&KeyState[3], &KeyCount[3], GPIO_ReadInputDataBit(GPIOB, GPIO_Pin_10), "YELLOW KEY");
KEY_SubScan(&KeyState[4], &KeyCount[4], GPIO_ReadInputDataBit(GPIOB, GPIO_Pin_11), "BLUE KEY");
}独立按键运行效果1:
独立按键实现代码2:每个按键独立功能实现,且支持长按、短按、连击上报功能
#define KEY_NUMBER          5


#define KEY_STATE_IDLE      0

#define KEY_STATE_PRESSED   1

#define KEY_STATE_RELEASE   2


typedef struct

{

    uint32_t            RCCn;

    GPIO_TypeDef       *GPIOn;

    uint16_t            PINn;

    GPIOMode_TypeDef    Mode;

    BitAction           IDLE;

    char               *Name;

} KEY_GROUP_TypeDef;


typedef struct

{

    uint8_t  State;

    uint8_t  Value;

    uint8_t  Count;

    uint16_t Debounce;

    uint16_t Interval;

    uint8_t  Trigger;

} KEY_TypeDef;


KEY_GROUP_TypeDef KEY_GROUP[KEY_NUMBER] =

{

    {RCC_AHBENR_GPIOB, GPIOB, GPIO_Pin_0 , GPIO_Mode_IPD, Bit_RESET, "BLACK  KEY"},

    {RCC_AHBENR_GPIOB, GPIOB, GPIO_Pin_1 , GPIO_Mode_IPD, Bit_RESET, "RED    KEY"},

    {RCC_AHBENR_GPIOB, GPIOB, GPIO_Pin_2 , GPIO_Mode_IPD, Bit_RESET, "GREEN  KEY"},

    {RCC_AHBENR_GPIOB, GPIOB, GPIO_Pin_10, GPIO_Mode_IPD, Bit_RESET, "YELLOW KEY"},

    {RCC_AHBENR_GPIOB, GPIOB, GPIO_Pin_11, GPIO_Mode_IPD, Bit_RESET, "BLUE   KEY"},

};


/* Private variables ---------------------------------------------------------*/

KEY_TypeDef UserKEY[KEY_NUMBER] =

{

    {0, 0, 0, 0, 0, 0},

    {0, 0, 0, 0, 0, 0},

    {0, 0, 0, 0, 0, 0},

    {0, 0, 0, 0, 0, 0},

    {0, 0, 0, 0, 0, 0},

};


void KEY_Init(void)

{

    GPIO_InitTypeDef GPIO_InitStructure;


    for(uint8_t i = 0; i < KEY_NUMBER; i++)

    {

        RCC_AHBPeriphClockCmd(KEY_GROUP[i].RCCn, ENABLE);


        GPIO_StructInit(&GPIO_InitStructure);

        GPIO_InitStructure.GPIO_Pin  = KEY_GROUP[i].PINn;

        GPIO_InitStructure.GPIO_Mode = GPIO_Mode_IPD;

        GPIO_Init(KEY_GROUP[i].GPIOn, &GPIO_InitStructure);

    }


    TASK_Append(TASK_ID_KEY, KEY_Scan, 10);

}


uint8_t KEY_Read(uint8_t Index)

{

    return GPIO_ReadInputDataBit(KEY_GROUP[Index].GPIOn, KEY_GROUP[Index].PINn);

}


void KEY_SubScan(uint8_t Index)

{

    /* 读取当前的按键值 */

    uint8_t Value = KEY_Read(Index);


    switch(UserKEY[Index].State)

    {

        /*

         * 在没有按键被按下的状态, 检测到有按键被按下, 进行消抖处理, 然后切换状态

         */

        case KEY_STATE_IDLE:

            if(Value != KEY_GROUP[Index].IDLE)

            {

                if(UserKEY[Index].Debounce++ == 1)

                {

                    UserKEY[Index].State    = KEY_STATE_PRESSED;

                    UserKEY[Index].Value    = Value;

                    UserKEY[Index].Debounce = 0;

                }

            }

            else

            {

                UserKEY[Index].Debounce = 0;

            }

            break;


        /*

         * 在确认有按键被按下的状态, 仍然检测到有按键被按下, 继续进行消抖处理, 然后切换状态

         * 如果没有检测到有按键被按下, 说明上一个状态读取到的按键值是误触发, 返回到按键IDLE

         */

        case KEY_STATE_PRESSED:

            if(Value == UserKEY[Index].Value)

            {

                if(UserKEY[Index].Debounce++ == 1)

                {

                    UserKEY[Index].State    = KEY_STATE_RELEASE;

                    UserKEY[Index].Debounce = 0;

                    UserKEY[Index].Interval = 100;     /* 长按触发时间 */

                    UserKEY[Index].Trigger  = 0;

                }

            }

            else

            {

                UserKEY[Index].State    = KEY_STATE_IDLE;

                UserKEY[Index].Debounce = 0;

            }

            break;


        /*

         * 在这个状态就是确认有按键被按下, 等待按键被释放的状态; 根据按键被按下的时间长短,

         * 来判断当前是短按还是长按, 是否触发长按检测和处理

         */

        case KEY_STATE_RELEASE:

            if(Value != UserKEY[Index].Value)

            {

                if(UserKEY[Index].Trigger == 0)

                {

                    printf("\r\n%s Short Click", KEY_GROUP[Index].Name);

                }


                UserKEY[Index].State    = KEY_STATE_IDLE;

                UserKEY[Index].Value    = 0;

                UserKEY[Index].Debounce = 0;

                UserKEY[Index].Interval = 0;

                UserKEY[Index].Trigger  = 0;

            }

            else

            {

                if(UserKEY[Index].Debounce++ == UserKEY[Index].Interval)

                {

                    printf("\r\n%s Long  Click", KEY_GROUP[Index].Name);


                    UserKEY[Index].Debounce = 0;

                    UserKEY[Index].Interval = 25;      /* 长按上键时间 */

                    UserKEY[Index].Trigger  = 1;

                }

            }

            break;


        default: break;

    }

}


void KEY_Scan(void)

{

    for(uint8_t i = 0; i < KEY_NUMBER; i++)

    {

        KEY_SubScan(i);

    }

}独立按键运行效果2: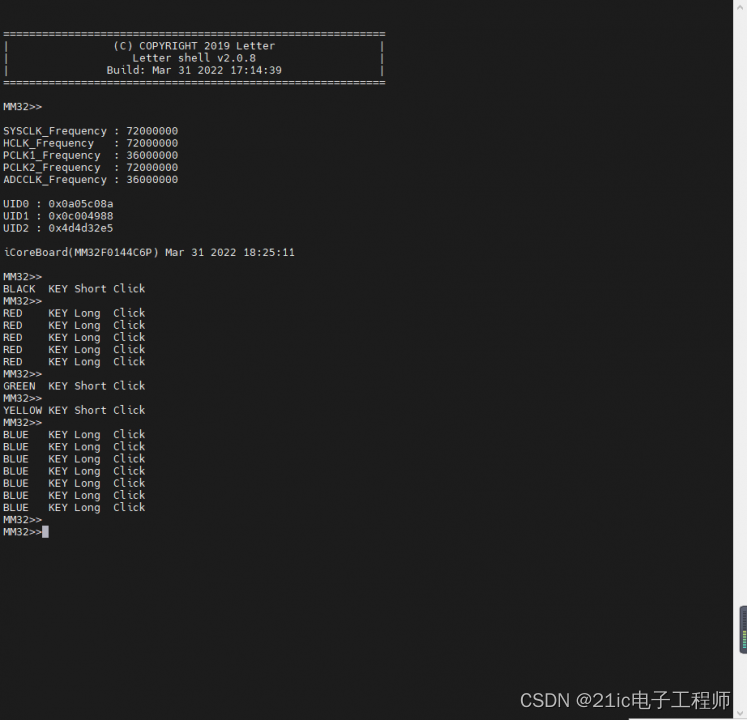
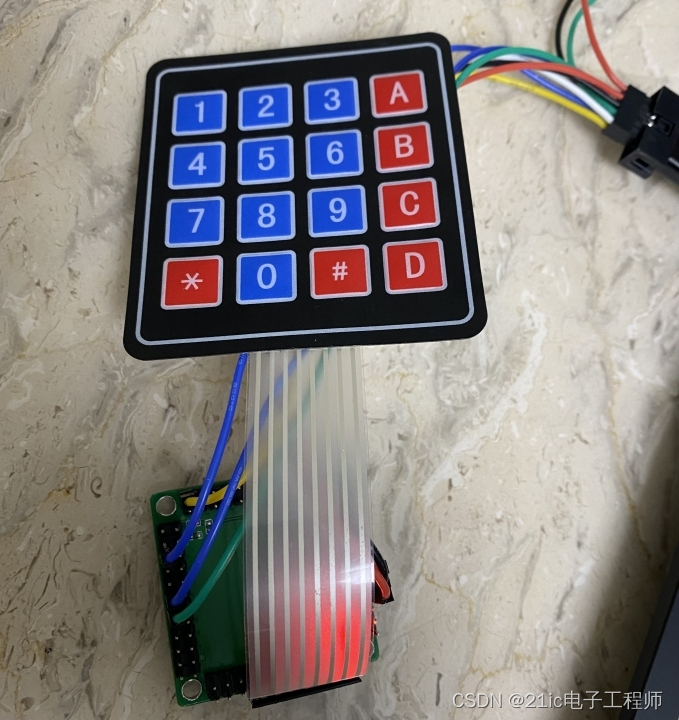
矩阵按键
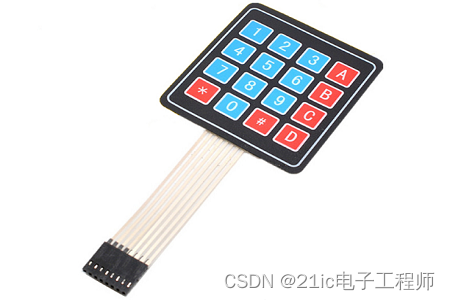
矩阵按键所使用的MCU资源相比于独立按键要节省很多,缺点就是在一个矩阵中的按键无法实现组合按键检测的功能,按键检测都需要逐一识别,如果真需要实现组合按键的功能,可以先按下某一按键松开后,再一定时间段内再按下其它按键的方式来实现,但这样做在检测单一按键功能的时候,肯定会增加检测单一按键的时长了,如何运用,需要结合项目来取舍了。
void KEY_Init(void)
{
TASK_Append(TASK_ID_KEY, KEY_Scan, 10);
}
uint8_t KEY_ScanX(void)
{
uint8_t Value = 0;
GPIO_InitTypeDef GPIO_InitStructure;
RCC_AHBPeriphClockCmd(RCC_AHBENR_GPIOA, ENABLE);
/* 配置X为下拉输入模式 */
GPIO_StructInit(&GPIO_InitStructure);
GPIO_InitStructure.GPIO_Pin = GPIO_Pin_4 | GPIO_Pin_5 | GPIO_Pin_6 | GPIO_Pin_7;
GPIO_InitStructure.GPIO_Mode = GPIO_Mode_IPD;
GPIO_Init(GPIOA, &GPIO_InitStructure);
RCC_AHBPeriphClockCmd(RCC_AHBENR_GPIOB, ENABLE);
/* 配置Y为输出模式 */
GPIO_StructInit(&GPIO_InitStructure);
GPIO_InitStructure.GPIO_Pin = GPIO_Pin_0 | GPIO_Pin_1 | GPIO_Pin_2 | GPIO_Pin_10;
GPIO_InitStructure.GPIO_Speed = GPIO_Speed_50MHz;
GPIO_InitStructure.GPIO_Mode = GPIO_Mode_Out_PP;
GPIO_Init(GPIOB, &GPIO_InitStructure);
/* Y输出高电平 */
GPIO_WriteBit(GPIOB, GPIO_Pin_0 | GPIO_Pin_1 | GPIO_Pin_2 | GPIO_Pin_10, Bit_SET);
if(GPIO_ReadInputDataBit(GPIOA, GPIO_Pin_4) == Bit_SET) Value |= 0x01;
if(GPIO_ReadInputDataBit(GPIOA, GPIO_Pin_5) == Bit_SET) Value |= 0x02;
if(GPIO_ReadInputDataBit(GPIOA, GPIO_Pin_6) == Bit_SET) Value |= 0x04;
if(GPIO_ReadInputDataBit(GPIOA, GPIO_Pin_7) == Bit_SET) Value |= 0x08;
return Value;
}
uint8_t KEY_ScanY(void)
{
uint8_t Value = 0;
GPIO_InitTypeDef GPIO_InitStructure;
RCC_AHBPeriphClockCmd(RCC_AHBENR_GPIOA, ENABLE);
/* 配置X为输出模式 */
GPIO_StructInit(&GPIO_InitStructure);
GPIO_InitStructure.GPIO_Pin = GPIO_Pin_4 | GPIO_Pin_5 | GPIO_Pin_6 | GPIO_Pin_7;
GPIO_InitStructure.GPIO_Speed = GPIO_Speed_50MHz;
GPIO_InitStructure.GPIO_Mode = GPIO_Mode_Out_PP;
GPIO_Init(GPIOA, &GPIO_InitStructure);
/* X输出低电平 */
GPIO_WriteBit(GPIOA, GPIO_Pin_4 | GPIO_Pin_5 | GPIO_Pin_6 | GPIO_Pin_7, Bit_RESET);
RCC_AHBPeriphClockCmd(RCC_AHBENR_GPIOB, ENABLE);
/* 配置Y为上拉输入模式 */
GPIO_StructInit(&GPIO_InitStructure);
GPIO_InitStructure.GPIO_Pin = GPIO_Pin_0 | GPIO_Pin_1 | GPIO_Pin_2 | GPIO_Pin_10;
GPIO_InitStructure.GPIO_Mode = GPIO_Mode_IPU;
GPIO_Init(GPIOB, &GPIO_InitStructure);
if(GPIO_ReadInputDataBit(GPIOB, GPIO_Pin_0 ) == Bit_RESET) Value |= 0x10;
if(GPIO_ReadInputDataBit(GPIOB, GPIO_Pin_1 ) == Bit_RESET) Value |= 0x20;
if(GPIO_ReadInputDataBit(GPIOB, GPIO_Pin_2 ) == Bit_RESET) Value |= 0x40;
if(GPIO_ReadInputDataBit(GPIOB, GPIO_Pin_10) == Bit_RESET) Value |= 0x80;
return Value;
}
void KEY_Scan(void)
{
uint8_t KEY_TABLE[16][2] =
{
{0x88, '1'}, {0x84, '2'}, {0x82, '3'}, {0x81, 'A'},
{0x48, '4'}, {0x44, '5'}, {0x42, '6'}, {0x41, 'B'},
{0x28, '7'}, {0x24, '8'}, {0x22, '9'}, {0x21, 'C'},
{0x18, '*'}, {0x14, '0'}, {0x12, '#'}, {0x11, 'D'},
};
uint8_t Value = KEY_ScanX() | KEY_ScanY();
for(uint8_t i = 0; i < 16; i++)
{
if(Value == KEY_TABLE[i][0])
{
printf("\r\nKEY[%c] : 0x%02x", KEY_TABLE[i][1], KEY_TABLE[i][0]);
}
}
while(KEY_ScanX() | KEY_ScanY()); /* 等待按键抬起 */
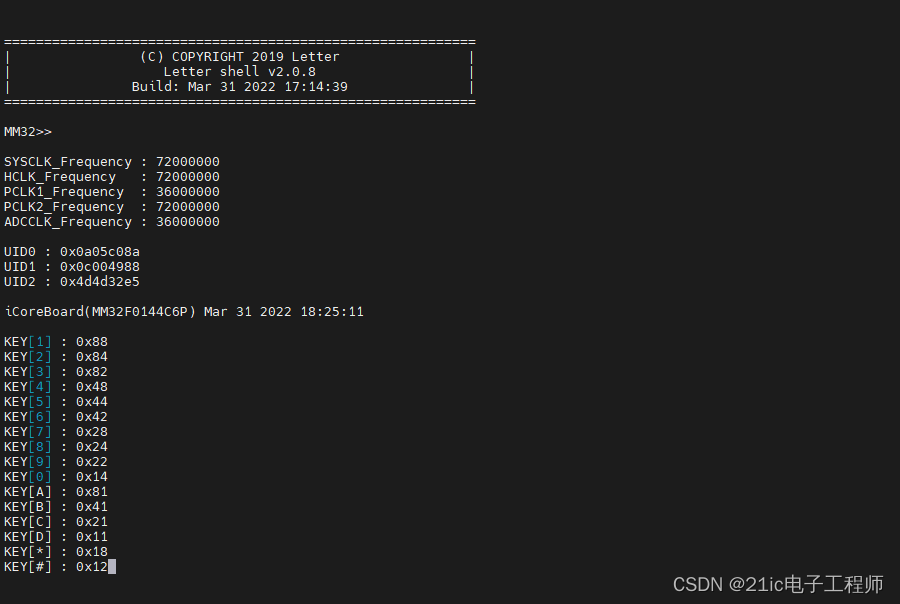
}矩阵按键运行效果:矩阵按键运行效果:
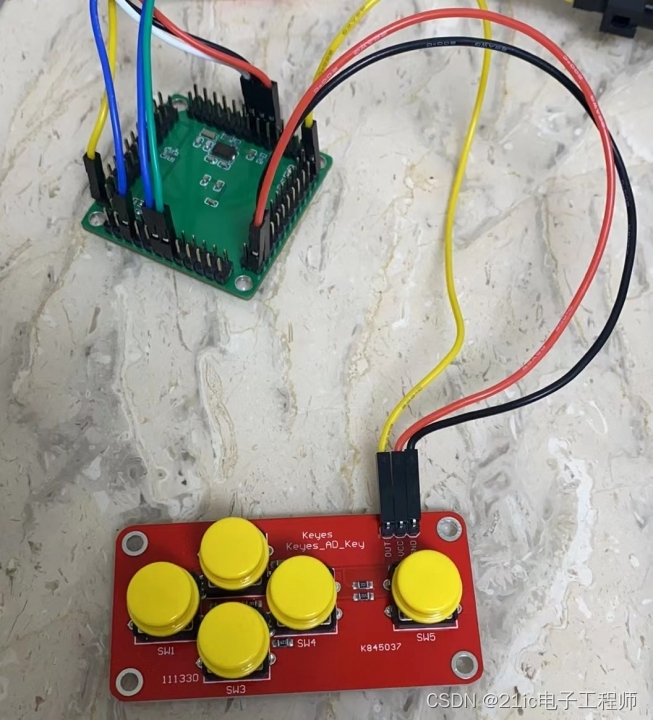
ADC按键
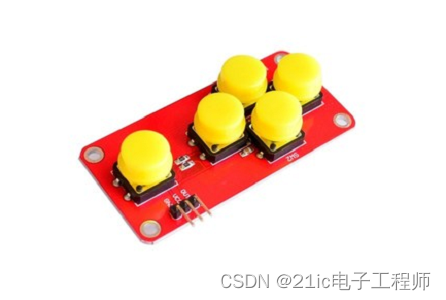
ADC按键是最节省MCU资源的一种按键检测方式,在一条ADC通道上按键被按下后,通过改变分压电阻的方式来改变ADC通道的采样电压,不同的电压对应一个按键;ADC按键方式一个ADC通道只占用一个MCU引脚资源,但这种方式虽说节省MCU资源,但在一个ADC通道上也不可以挂载太多的按键,因为在系统运行过程中,ADC的值是存在波动的,为了能够准确的检测出是哪个按键被按下,就需要将分压电阻后的电压值明显的区分开,不能因为系统电压的波动导致按键检测的重叠;在电路设计和元器件选型上,分压电阻需要使用高精度的,在布板时需要考虑系统或者外界的干扰源,尽量减小对按键电压采样的影响,通过合理的分配按键电压节点,可以提升按键挂载数量,以及按键检测的准确度。
ADC按键实现代码:
void KEY_Init(void)
{
ADC_InitTypeDef ADC_InitStructure;
GPIO_InitTypeDef GPIO_InitStructure;
RCC_APB2PeriphClockCmd(RCC_APB2ENR_ADC1, ENABLE);
ADC_StructInit(&ADC_InitStructure);
ADC_InitStructure.ADC_Resolution = ADC_Resolution_12b;
ADC_InitStructure.ADC_PRESCARE = ADC_PCLK2_PRESCARE_16;
ADC_InitStructure.ADC_Mode = ADC_Mode_Imm;
ADC_InitStructure.ADC_ContinuousConvMode = DISABLE;
ADC_InitStructure.ADC_DataAlign = ADC_DataAlign_Right;
ADC_Init(ADC1, &ADC_InitStructure);
ADC_RegularChannelConfig(ADC1, ADC_Channel_3, 0, ADC_Samctl_240_5);
ADC_Cmd(ADC1, ENABLE);
RCC_AHBPeriphClockCmd(RCC_AHBENR_GPIOA, ENABLE);
GPIO_StructInit(&GPIO_InitStructure);
GPIO_InitStructure.GPIO_Pin = GPIO_Pin_3;
GPIO_InitStructure.GPIO_Speed = GPIO_Speed_50MHz;
GPIO_InitStructure.GPIO_Mode = GPIO_Mode_AIN;
GPIO_Init(GPIOA, &GPIO_InitStructure);
TASK_Append(TASK_ID_KEY, KEY_Scan, 10);
}
uint8_t KEY_Read(void)
{
uint16_t Value = 0, Delta = 50;
ADC_SoftwareStartConvCmd(ADC1, ENABLE);
while(!ADC_GetFlagStatus(ADC1, ADC_IT_EOC));
ADC_ClearFlag(ADC1, ADC_FLAG_EOC);
Value = ADC_GetConversionValue(ADC1);
if(Value < (0 + Delta))
{
return 1;
}
else if((Value > (570 - Delta)) && (Value < (570 + Delta)))
{
return 2;
}
else if((Value > (1320 - Delta)) && (Value < (1370 + Delta)))
{
return 3;
}
else if((Value > (2020 - Delta)) && (Value < (2020 + Delta)))
{
return 4;
}
else if((Value > (2950 - Delta)) && (Value < (2950 + Delta)))
{
return 5;
}
else
{
return 0;
}
}
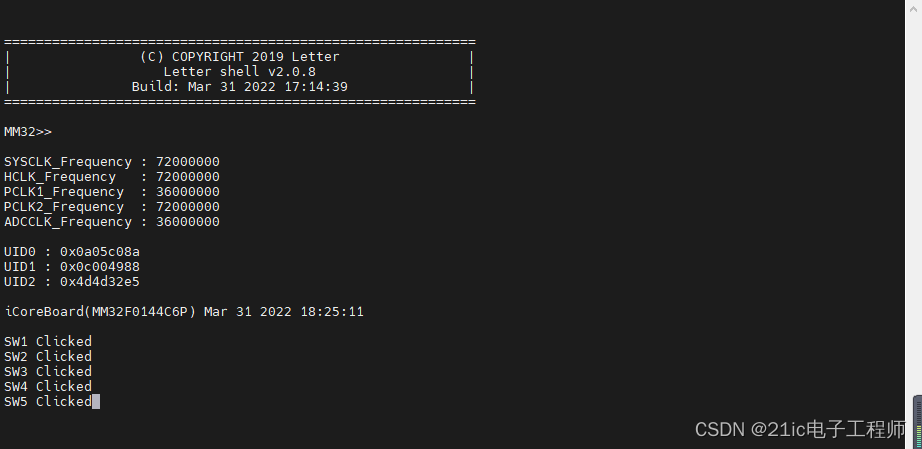
void KEY_Scan(void)
{
static uint8_t KeyCount = 0;
static uint8_t KeyState = 0;
static uint8_t KeyValue = 0;
char *KEY_NAME[6] = {"NUL", "SW1", "SW2", "SW3", "SW4", "SW5"};
uint8_t Value = KEY_Read();
if(KeyState == 0)
{
if(Value != 0)
{
if(KeyCount++ > 5)
{
KeyCount = 0;
KeyState = 1;
KeyValue = Value;
}
}
else
{
KeyCount = 0;
}
}
else
{
if(Value != KeyValue)
{
if(KeyCount++ > 5)
{
printf("\r\n%s Clicked", KEY_NAME[KeyValue]);
KeyCount = 0;
KeyState = 0;
KeyValue = 0;
}
}
else
{
KeyCount = 0;
}
}
}
---------------------
作者:xld0932
链接:https://bbs.21ic.com/icview-3210552-1-1.html
来源:21ic.com
此文章已获得原创/原创奖标签,著作权归21ic所有,任何人未经允许禁止转载。


 384
384


 被折叠的 条评论
为什么被折叠?
被折叠的 条评论
为什么被折叠?
 到【灌水乐园】发言


