


vue3组件间的通信方式
前言
vue中到底有哪些通信方式呢?让我们一起看看吧!
vue组件间的通信方式有如下:props、自定义事件、全局事件总线、pubsub、vuex、ref和$parent、slot、provide和inject、pinia、v-model组件通信详解
背景
在Vue项目开发过程中,无论是使用Vue2还是Vue3,组件间传值都是一个非常重要的概念。这是因为在一个大型的项目中,我们通常会将页面拆分成多个组件,每个组件负责不同的功能和展示。在这种情况下,组件之间需要相互协作,共享数据和状态,以便实现整个应用的功能。因此,掌握组件间的通信技巧对于提高开发效率和代码质量至关重要。掌握组件间通信是Vue项目开发的核心技能之一。在实际开发过程中,我们需要根据不同场景选择合适的通信方式,以提高代码的可维护性和可扩展性。同时,了解这些通信方式的原理和实现方式,也有助于我们在面试过程中更好地展示自己的技术实力。
那我们就一起看看组件间的通信都有哪些
组件间的通信方式
组件间的通信方式有如下方式:
- 父子组件通信:这是最常见的组件间通信方式。父组件可以通过props属性向子组件传递数据,子组件可以通过自定义事件向父组件传递数据。这种方式适用于父子关系明确的组件之间的通信。
- 兄弟组件通信:如果两个组件没有直接的父子关系,但它们需要共享一些数据,可以使用Vue的事件总线来实现。事件总线是一个全局的Vue实例,任何组件都可以将其作为事件触发器或事件监听器。通过这种方式,可以实现任意两个组件之间的通信。
- 跨层级组件通信:当两个组件之间存在多层嵌套关系时,可以使用provide和inject来实现跨层级的组件通信。provide可以在当前组件的上下文中注入一个值,这个值可以在其所有子孙组件中通过inject访问。这种方式适用于跨越多层级组件的数据传递。
- Vuex:Vuex是一个专为Vue.js应用程序设计的状态管理库。它采用集中式存储管理应用的所有组件的状态,使得各个组件之间的状态变化能够更加清晰和可控。通过使用Vuex,我们可以实现更复杂的组件间通信和状态管理。
- Provide/Inject:这是Vue2中提供的跨层级组件通信的方式,类似于Vue3中的provide/inject。通过在父组件中使用provide提供数据,然后在子组件中使用inject注入数据,可以实现跨层级的组件通信。
- props:父子组件通信,子父组件通信以及兄弟组件通信;
- 自定义事件:父子组件通信,子组件向父组件传值;
- 全局事件总线$bus:任意组件间通信;
- pubsub:发布与订阅方式实现任意组件间通信;
- vuex:全局集中式状态管理器,任意组件间通信;
- ref和$parent:通过获取子组件实例,可以拿到子组件数据和方法;
- slot:插槽方式实现父子组件通信;
- provide和inject:父子组件通信,跨层级组件通信;
- pinia: 和vuex相同,全局集中式状态管理,实现任意组件间通信;
- v-model:父子组件间通信;
- useAttrs:【VUE3适用】类似props,父子组件通信;
组件通信实现方式实例
1、props
- 可以在父子组件间通信,子组件内数据是只读的,不能修改父组件传递过来的数据!!!,需要修改只能父组件自己修改;
(1). vue2选项API方式
<template>
  <div>
    <h2>父组件</h2>
    <ChildComponent :message="message" />
  </div>
</template>

<script>
import ChildComponent from './ChildComponent.vue'

export default {
  components: {
    ChildComponent
  },
  data() {
    return {
      message: 'Hello World!'
    }
  }
}
</script>
<template>
 <div>
   <h3>子组件</h3>
   <p>{{ message }}</p>
 </div>
</template>

<script>
export default {
 props: {
   message: {
     type: String,
     required: true
   }
 }
}
</script>
(2). vue3组合API方式
<template>
    <div>
        <h1>props通信实例</h1>
        <div class="container">
            <h2>我是父组件,传给子组件的值:{{ message }} </h2>
            <child :message="message" />
        </div>
    </div>
</template>
<script setup lang="ts">
import { ref } from 'vue'
import child from './child.vue';
let message = ref('Hello props')
</script>
<style scoped>
.container {
    width: 100%;
    height: 300px;
    background: greenyellow;
}
</style>
<template>
    <div class="son">
        <h2>我是子组件,拿到父组件传值:{{ props.message }}</h2>
        <!-- props可以省略 -->
        <p>{{ message }}==={{ props.message }}</p>
        <button @click="editParentMessage">修改父组件值</button>
    </div>
</template>
<script setup lang="ts">
const props = defineProps(['message'])
const editParentMessage = () => {
    // 提示警告:[Vue warn] Set operation on key "message" failed: target is readonly. Proxy(Object) {message: 'Hello props'}
    // 数据是只读的,不可修改
    props.message = 'Hello World!'
}
</script>
<style scope>
.son {
    width: 300px;
    height: 200px;
    background: skyblue;
}
</style>
2、自定义事件
事件包含原生DOM事件和自定义事件;
DOM事件:click,onmouseenter,onmouseleave…
自定义事件:自定义名称的事件;
(1). vue2选项API方式
<template>
  <div>
    <button @click="showMessageFromChild">点击子组件显示消息</button>
    <child-component @showMessage="showMessageFromChild"></child-component>
  </div>
</template>

<script>
import ChildComponent from './ChildComponent.vue';

export default {
  components: {
    ChildComponent
  },
  methods: {
    showMessageFromChild(message) {
      console.log(message);
    }
  }
};
</script>
<template>
  <div>
    <button @click="showMessage">显示消息</button>
  </div>
</template>

<script>
export default {
  methods: {
    showMessage() {
      this.$emit('showMessage', 'Hello, Vue!');
    }
  }
};
</script>
(2). vue3组合API方式
<template>
    <div>
        <h1>自定义通信实例</h1>
        <div class="parent">
            <h2>我是父组件,接收子组件传来的值 {{ message }}</h2>
            <child @my-event-name="getParams" />
        </div>
    </div>
</template>
<script setup lang="ts">
import child from './child.vue';
import { ref } from 'vue'
let message = ref()
const getParams = (param1: any, param2: any) => {
    message.value = param1 + ' ' + param2
}
</script>
<style scoped>
.parent {
    width: 100%;
    height: 350px;
    background: goldenrod;
}
</style>
<template>
    <div class="son">
        <h2>我是子组件,我向父组件传值</h2>
        <button @click="handle">点我传值</button>
    </div>
</template>
<script setup lang="ts">
let $emit = defineEmits(['myEventName'])
const handle = () => {
    $emit('myEventName', 'hello', 'world')
}
</script>

<style scoped>
.son {
    width: 300px;
    height: 300px;
    background: pink;
}
</style>
3、全局事件总线$bus
- $bus来创建一个事件总线。事件总线可以用来在不同的组件之间进行通信。全局方式的事件总线$bus,你可以在Vue原型链上挂载一个Vue实例,并将其作为事件总线使用。同时呢也可以局部组件去使用事件总线。
(1)、vue2选项API方式
首先,在你的Vue实例的入口文件main.js中添加如下代码:
import Vue from 'vue';
Vue.prototype.$bus = new Vue();
这样,我们将一个新的Vue实例挂载在Vue的原型链上,并将其命名为$bus.
然后就可以在任何组件中使用$emit来触发一个事件,并使用$on来监听这个事件:
// 组件A
methods: {
  handleClick() {
    this.$bus.$emit('busEvent', 'Hello, from Component A!');
  }
}

// 组件B
mounted() {
  this.$bus.$on('busEvent', (data) => {
    console.log(data); // 输出:Hello, from Component A!
  });
}
同样,记得在组件被销毁时使用$off来移除事件监听器,以防止内存泄漏。
// 组件B
beforeDestroy() {
  this.$bus.$off('busEvent');
}
现在,你可以在任何组件中使用$bus进行全局的组件间通信了。当组件A中的handleClick方法被调用时,组件B中的事件监听器会接收到并执行相应的逻辑。
(2). vue3组合API方式
注意:vue3中的vue构造函数没有了,导致没有了vm,vue原型对象也没有了,所以在vue3中使用类似于vue2中的$bus事件总线,就得要用到一个插件mitt
- 安装依赖插件
npm ,yarn ,pnpm,cnpm方式都行,习惯用哪个用哪个
npm install mitt --save
yarn add mitt
pnpm install mitt --save
cnpm install mitt --save
- 创建bus文件夹和index.ts文件,index文件引入插件并暴露出去;
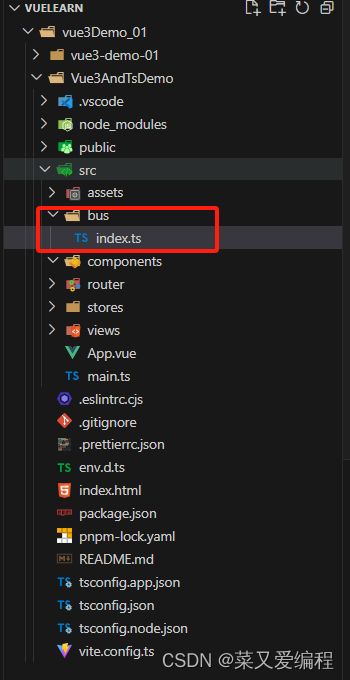
/**
 * index.ts
 * 1、引入mitt插件,
 * 2、执行mitt方法
 * 3、暴露方法执行结果$bus
 */
import mitt from 'mitt'
const $bus = mitt()
export default $bus
- 从父组件传值,在子组件中接收;
- 从子组件传值,父组件接收以及兄弟组件接收
<template>
    <div>
        <h1>全局事件总线$bus通信实例</h1>
        <div class="parent">
            <h2>我是父组件</h2>
            <button @click="passValue">点我给子组件1传值</button>
            <p>接收到子组件1传递来的值:{{ val }}</p>
            <div class="son-wrap">
                <child1 />
                <child2 />
            </div>
        </div>
    </div>
</template>
<script setup lang="ts">
import child1 from './child1.vue'
import child2 from './child2.vue'
import { ref, onMounted } from 'vue'
// 引入$bus
import $bus from '../../bus'
let val: any = ref('等待子组件1传值')
onMounted(() => {
    $bus.on('parentBrother', (params) => {
        val.value = params
    })
})
const passValue = () => {
    // 向子组件1传递值
    $bus.emit('child1Value', 10000)
}
</script>
<style scoped>
.parent {
    width: 100%;
    height: 500px;
    background-color: aqua;
}

.son-wrap {
    display: flex;
    align-items: center;
}
</style>
<template>
    <div class="son">
        <h2>我是子组件1</h2>
        <p>接收到父组件传来的值:{{ value }}</p>
        <button @click="brotherParentPassValue">点我给父组件和兄弟组件传值</button>
    </div>
</template>
<script setup lang="ts">
import { ref, reactive, onMounted } from "vue"
// 引入$bus
import $bus from '../../bus'
let value = ref()
onMounted(() => {
    // 接收父组件传值
    $bus.on('child1Value', (params) => {
        console.log(params)
        value.value = params
    })
})

const brotherParentPassValue = () => {
    $bus.emit('parentBrother', '我是child1传递过来的值')
}

</script>
<style scoped lang="scss">
.son {
    width: 300px;
    height: 300px;
    background-color: bisque;
}
</style>
<template>
    <div class="son">
        <h2>我是子组件2</h2>
        <p>接收到子组件1传递来的值:{{ val }}</p>
    </div>
</template>
<script setup lang="ts">
import { ref, reactive, onMounted } from "vue"
// 引入$bus
import $bus from '../../bus'
let val: any = ref('等待子组件1传值')
onMounted(() => {
    $bus.on('parentBrother', (params) => {
        val.value = params
    })
})
</script>
<style scoped lang="scss">
.son {
    margin-left: 20px;
    width: 300px;
    height: 300px;
    background-color: skyblue;
}
</style>
4、pubsub
消息订阅与发布和全局事件总线一样,也是一种组件间通信的方式,但pubsub需要安装一个插件才能使用。
(1)、vue2选项API方式
- 安装
npm ,yarn ,pnpm,cnpm方式都行,习惯用哪个用哪个
npm install pubsub-js --save
yarn add pubsub-js
pnpm install pubsub-js --save
cnpm install pubsub-js --save
- 全局安装,在main.js里面全局引入
import PubSub from 'pubsub-js'
Vue.prototype.$PubSub = PubSub
- 如此我们就可以像使用全局事件总线$bus一样去使用$PubSub了
// 组件A
methods: {
  handleClick() {
  	// 发布消息
    this.$PubSub.publish('msgName', '你要发布的消息');
  }
}

// 组件B
mounted() {
// 订阅组件A发布的消息
  this.$PubSub.subscribe('msgName', (data) => {
    console.log(data); // 输出:你要发布的消息
  });
}
同样,记得在订阅组件B被销毁时使用unsubcribe,clearAllSubscriptions来取消消息订阅,以防止内存泄漏。
// 组件B
beforeDestroy() {
  // 取消某一个订阅
  this.$PubSub.unsubcribe('msgName');
  // 清除所有订阅
  this.$PubSub.clearAllSubscriptions();
}
(2)、vue3组合API方式
- 安装
npm ,yarn ,pnpm,cnpm方式都行,习惯用哪个用哪个
npm install pubsub-js --save
yarn add pubsub-js
pnpm install pubsub-js --save
cnpm install pubsub-js --save
<!-- 父组件 -->
<template>
    <div class="">
        <h1>pubsub通信实例</h1>
        <div class="container">
            <h2>父组件</h2>
            <button @click="passValue">点我给子组件1传值:({{ message }})</button>
            <p>接收到子组件1传递来的值:{{ value }}</p>
            <div class="content">
                <child1 />
                <child2 />
            </div>
        </div>
    </div>
</template>
<script setup lang="ts">
import child1 from './child1.vue'
import child2 from './child2.vue'
import { ref, reactive, onMounted } from "vue"
let value = ref()
let message = ref('Hello pubsub-js')
// 引入pubsub
import pubsub from 'pubsub-js'
const passValue = () => {
	// 发布消息
    pubsub.publish('fatherMsg', message)
}
onMounted(() => {
	// 订阅消息
    pubsub.subscribe('parentBrother', (msgName: any, msg: string) => {
        console.log(msgName)
        value.value = msg
    })
})
</script>
<style scoped lang="scss">
.container {
    width: 100%;
    height: 500px;
    background-color: rebeccapurple;

    .content {
        display: flex;
    }
}
</style>
<!-- 子组件1 -->
<template>
    <div class="son">
        <h2>我是子组件1</h2>
        <p>订阅到父组件传来的消息:{{ value }}</p>
        <button @click="brotherParentPassValue">点我给父组件和兄弟组件发送消息</button>
    </div>
</template>
<script setup lang="ts">
import { ref, reactive, onMounted } from "vue"
// 引入pubsub
import pubsub from 'pubsub-js'
let value = ref()
onMounted(() => {
    // 订阅父组件消息
    /**
     * subscribe回调函数有两个参数
     * msgName: 消息名称
     * msg: 消息具体信息,传递过来的值
     */
    pubsub.subscribe('fatherMsg', (msgName: any, msg: string) => {
        console.log(msgName)
        value.value = msg
    })
})

const brotherParentPassValue = () => {
	// 发布消息
    pubsub.publish('parentBrother', '我是child1组件发送过来的消息')
}

</script>
<style scoped lang="scss">
.son {
    width: 300px;
    height: 300px;
    background-color: bisque;
}
</style>
<!-- 子组件2 -->
<template>
    <div class="son">
        <h2>我是子组件2</h2>
        <p>接收到子组件1传递来的值:{{ val }}</p>
    </div>
</template>
<script setup lang="ts">
import { ref, reactive, onMounted } from "vue"
// 引入pubsub
import pubsub from 'pubsub-js'
let val: any = ref('等待子组件1发布消息')
onMounted(() => {
	// 订阅消息
    pubsub.subscribe('parentBrother', (msgName: any, msg: string) => {
        val.value = msg
    })
})
</script>
<style scoped lang="scss">
.son {
    margin-left: 20px;
    width: 300px;
    height: 300px;
    background-color: skyblue;
}
</style>
5、vuex
Vuex是Vue.js的官方状态管理工具,用于管理应用程序中的状态(数据),vue2使用,在vue3中,我们是通过pinia依赖插件实现全局状态管理。
vuex中一共有五个状态 State Getter Mutation Action Module ;
- State : 提供唯一的公共数据源,所有共享的数据统一放到store的state进行储存,相似与data;
- Getter : 类似于vue中的computed,进行缓存,对于Store中的数据进行加工处理形成新的数据
- Mutation : 更改 Vuex 的 store 中的状态的唯一方法是提交 mutation。
- Action : 通常用于异步操作,比如请求后台接口
- Module : 大型项目开发时,数据量大,全都放到store就会显得很臃肿,为了解决以上问题,Vuex 允许我们将 store 分割成模块(module)。每个模块拥有自己的 state、mutation、action、getter;这样可以清晰管理我们项目中数据。
Vuex的实例使用步骤:
1、安装Vuex:在项目目录下执行以下命令安装Vuex:
npm install vuex --save
2、创建Vuex store:在项目的src目录下创建一个store目录,并在该目录下创建一个index.js文件,作为Vuex的store配置文件。
// store/index.js 文件内容
import Vue from 'vue'
import Vuex from 'vuex'

Vue.use(Vuex)

// 在state对象中定义应用程序的所有状态(数据)
const state = {
  count: 0
}

// 定义mutations(用于修改状态的方法)
const mutations = {
  increment(state) {
    state.count++
  },
  decrement(state) {
    state.count--
  }
}
// 创建Vuex store实例
export default new Vuex.Store({
  state,
  mutations
})
3、在Vue实例中使用store:在main.js文件中,引入store并使用store选项来注入store实例。
// main.js
import Vue from 'vue'
import store from './store'
import HelloWorld from './components/HelloWorld.vue'
new Vue({
  store,
  render: h => h(HelloWorld)
}).$mount('#app')
4、在Vue组件中使用Vuex:在需要使用Vuex的组件中,引入Vuex,并使用mapState和mapMutations辅助函数来映射状态和方法。
// HelloWorld.vue
<template>
  <div>
    <p>当前计数:{{ count }}</p>
    <p>当前计数:{{ $store.state.count }}</p>
    <button @click="increment">增加</button>
    <button @click="decrement">减少</button>
  </div>
</template>

<script>
import { mapState, mapMutations } from 'vuex'

export default {
  computed: {
    // 使用mapState辅助函数来映射state中的count属性
    ...mapState(['count'])
  },
  methods: {
    // 使用mapMutations辅助函数来映射mutations中的increment和decrement方法
    ...mapMutations(['increment', 'decrement'])
  }
}
</script>
6、ref和$parent
- 在Vue实例中,ref是一个用来在模板或者代码中引用子组件或HTML元素的属性。通过在子组件或HTML元素上添加ref属性,我们可以通过this.$refs来引用这个子组件或HTML元素。
- $parent是一个指向当前组件的父组件的指针。通过this.$parent可以访问父组件的属性和方法。
(1)、vue选项API方式
<template>
  <div>
    <child-component ref="child"></child-component>
  </div>
</template>

<script>
import ChildComponent from './ChildComponent.vue';

export default {
  components: {
    ChildComponent
  },
  mounted() {
    // 通过this.$refs来引用子组件
    this.$refs.child.doSomething();
  }
};
</script>
在子组件当中可以调用父组件方法和访问父组件属性(组件中data里面的值)
<template>
  <div>
  	<p>子组件</p>
    <p>获取父组件的属性: {{ $parent.parentProp }}</p>
    <button @click="$parent.parentMethod">调用父组件的方法</button>
  </div>
</template>
(2)、vue3组合API方式
<template>
    <div class="">
        <h2>父组件</h2>
        <div class="content">
            <p>父组件数据:{{ msg }}</p>
            <button @click="handle">点击修改子组件数据</button>
            <button @click="handle1">点击调用子组件方法</button>
            <child ref="childRef" />
        </div>
    </div>
</template>
<script setup lang="ts">
import { ref, reactive, onMounted } from "vue"
import child from "./child.vue";
let childRef = ref()
let msg = 'hello'
const handle = () => {
    childRef.value.msg = 'Hi'
}
const handle1 = () => {
    childRef.value.childFunction()
}
const parentFunction = () => {
    alert('$parent调用父组件方法,被调用')
}
onMounted(() => {
    childRef.value.msg = msg
})
/**
 * 组件内数据默认是被关闭的,
 * 需要使用defineExpose对外暴露,
 * 子组件才能访问子组件内的值以及修改
 */
defineExpose({
    msg,
    parentFunction
})
</script>
<style scoped lang="scss">
.content {
    width: 100%;
    height: 300px;
    background: green;
}
</style>
<template>
    <div class="son">
        <h2>子组件</h2>
        <p>拿到父组件数据:{{ msg }}</p>
        <button @click="handle($parent)">点我获取父组件数据</button>
        <button @click="handle1($parent)">点击调用父组件方法</button>
        <p>$parent获取父组件的值:{{ getParent }}</p>
    </div>
</template>
<script setup lang="ts">
import { ref, reactive, onMounted } from "vue"
let msg = ref()
let getParent = ref()

const childFunction = () => {
    alert('子组件内方法被调用了')
}

const handle = ($parent: any) => {
    getParent.value = $parent.msg
}
const handle1 = ($parent: any) => {
    $parent.parentFunction()
}
onMounted(() => {
})
/**
 * 组件内数据默认是被关闭的,
 * 需要使用defineExpose对外暴露,
 * 父组件才能访问子组件内的值以及修改
 */
defineExpose({
    msg,
    childFunction
})
</script>
<style scoped lang="scss">
.son {
    width: 50%;
    height: 200px;
    background: skyblue;
}
</style>
7、slot
- 插槽分为:默认插槽,具名插槽(带有名字的插槽),作用域插槽
- v-slot指令可以简化为#
- 作用域插槽:可以传递数据的插槽,子组件可以将数据回传给父组件,父组件可以决定回传的数据,数据是以何种结构或外观在子组件内展示。
- 作用域插槽可以和具名插槽一起使用,但是不能嵌套使用;
- 作用域插槽不能和默认插槽同时使用;
<template>
    <div>
        <h1>slot通信实例</h1>
        <div class="parent">
            <h2>父组件</h2>
            <child :todos="todos">
                <!-- 默认插槽结构 -->
                <!-- <div>默认插槽结构插入</div> -->
                <!-- 具名插槽a结构插入 -->
                <template v-slot:a>
                    <div>具名插槽a结构插入</div>
                </template>
                <!-- 具名插槽a结构插入 v-slot指令可以简化为# -->
                <template #b>
                    <div style="color: red;">具名插槽b结构插入</div>
                </template>
                <template v-slot="{ $item, $index }">
                    <span>{{ $item.name + $item.price }}元/kg -- {{ $index }}</span>
                </template>
            </child>
        </div>
    </div>
</template>
<script setup lang="ts">
import child from './child.vue'
import { ref } from 'vue'
let todos = ref([
    { name: '苹果', price: 10 },
    { name: '香蕉', price: 8 },
    { name: '芒果', price: 20 },
    { name: '梨子', price: 14 },
    { name: '大菠萝', price: 12 }
])
</script>
<style scoped lang="scss">
.parent {
    width: 70%;
    min-height: 400px;
    background: yellowgreen;
    padding: 10px 0;
}
</style>
<template>
    <div class="son">
        <h2>我是子组件</h2>
        <div class="top">
            <!-- <p>默认插槽</p>
            <slot></slot>
            <p>默认插槽</p> -->
            <p>具名插槽a</p>
            <slot name="a"></slot>
            <p>具名插槽a</p>
            <p>具名插槽b</p>
            <slot name="b"></slot>
            <p>具名插槽b</p>
        </div>
        <div>
            <!-- 作用域插槽 -->
            <ul>
                <li v-for="(item, index) in todos" :key="index">
                    <slot :$item="item" :$index="index"></slot>
                </li>
            </ul>
        </div>
    </div>
</template>
<script setup lang="ts">
import { ref, reactive } from "vue"
defineProps(['todos'])
</script>
<style scoped lang="scss">
.son {
    background: yellow;

    .top {
        display: flex;
        align-items: center;
        justify-content: space-between;
    }
}
</style>
8、provide和inject
- provide:提供数据,inject:接收注入数据;
- 可实现隔辈传值,父组件-子组件-孙子组件
- provide有两个参数:第一个参数是提供数据的key,第二个参数是提供的数据值
- 后代可以修改提供的数据
<template>
    <div class="">
        <h1>provide、inject通信实例</h1>
        <div class="content">
            <h2>父组件</h2>
            <p>提供给后代的数据:{{ msg }}</p>
            <child />
        </div>
    </div>
</template>
<script setup lang="ts">
import { ref, reactive, provide } from "vue"
import child from './child.vue'
let msg: any = ref('hello world')
provide('msgName', msg)
</script>
<style scoped lang="scss">
.content {
    background: skyblue;
}
</style>
<template>
    <div class="son">
        <h2>我是子组件</h2>
        <p>接收祖先提供的数据:{{ msg }}</p>
        <button @click="updateData">点我修改数据</button>
    </div>
</template>
<script setup lang="ts">
import { ref, reactive, inject } from "vue"
let msg: any = inject('msgName')
const updateData = () => {
    msg.value = '你好世界'
}
</script>
<style scoped lang="scss">
.son {
    height: 400px;
    background: red;
}
</style>
9、pinia
- 需要安装pinia依赖插件才能使用
- 两种API方式写法:选项式API和组合式API
– 选项式API核心: state,actions,getters
– 组合式API核心:ref,reactive 方式定义存储变量,自定义函数修改数据变量,计算属性使用compute - 可以实现任意组件间通信
1、安装pinia
pnpm install pinia --save
2、src下创建stores文件夹,stores文件夹下穿件index.ts文件和modules文件夹,modules文件夹创建我们数据管理摸文件,如:info.ts文件,todo.ts文件.
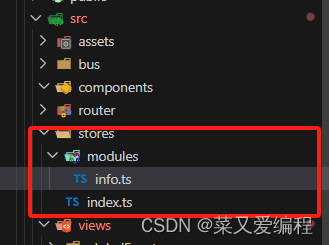
// stores/index.ts
// 创建入口仓库
import { createPinia } from 'pinia'
const store = createPinia()
export default store
// stores/modules/info.ts
// 选项式API写法
import { defineStore } from "pinia";
const userInfoStore = defineStore('info', {
    state: () => {
        return {
            count: 100,
            list: [1, 2, 3, 4, 5]
        }
    },
    actions: {
        updateCount() {
            this.count += 100
        }
    },
    getters: {
        total() {
            let num: any = this.list.reduce((prev, next) => {
                return prev + next
            }, 0)
            return num
        }
    }
})
export default userInfoStore
// stores/modules/todo.ts
// 组合式API写法
import { defineStore } from "pinia";
import { ref, reactive, computed } from 'vue'
const useTodoStore = defineStore('todo', () => {
    let msg = reactive([{ id: 1, name: '吃饭' }, { id: 2, name: '睡觉' }, { id: 3, name: '打豆豆' }])
    let arr = ref([1, 2, 3, 4, 5, 6, 7, 8, 9, 10])

    // 计算属性
    const total = computed(() => {
        let num = arr.value.reduce((prev, next) => {
            return prev + next
        }, 0)

        return num
    })
    // 修改更新msg数据
    const updateTodoMsg = () => {
        msg[1].name = '睡觉就睡觉'
        msg.push({ id: 4, name: '看电影' })
    }
    return {
        msg,
        updateTodoMsg,
        total
    }
})

export default useTodoStore
3、入口main.ts内引入store
// 引入store
import store from './stores'
app.use(store)
4、父子组件内使用
<template>
    <div class="">
        <h1>pinia通信实例</h1>
        <div class="content">
            <h2>父组件</h2>
            <p>组合API的store数据:{{ todoStore.msg }}</p>
            <p>组合API的store数据计算值为:{{ todoStore.total }}</p>
            <div>
                <button @click="todoStore.updateTodoMsg">点我修改组合式store数据</button>
            </div>
            <div class="com">
                <child />
                <child2 />
            </div>
        </div>
    </div>
</template>
<script setup lang="ts">
import { ref, reactive } from "vue"
import child from './child1.vue'
import child2 from './child2.vue'
// 引入组合式API方式的store
import useTodoStore from '../../stores/modules/todo'

let todoStore = useTodoStore()

</script>
<style scoped lang="scss">
.com {
    display: flex;
}
</style>
<template>
    <div class="son">
        <h2>子组件1</h2>
        <button @click="handle">点击修改store数据</button>
        <p>store数据: {{ infoStore.count }}</p>
        <p>getters计算的值是:{{ infoStore.total }}</p>
    </div>
</template>
<script setup lang="ts">
import { ref, reactive } from "vue"
import useInfoStore from '../../stores/modules/info'
let infoStore = useInfoStore()
const handle = () => {
    // 方式一:直接修改
    // infoStore.count = 10000
    // 方式二:利用$patch修改数据
    // infoStore.$patch({
    //     count: 99999
    // })
    // 方式三:调用actions内部修改方法修改
    infoStore.updateCount()
}
</script>
<style scoped lang="scss">
.son {
    width: 200px;
    height: 200px;
    background: skyblue;
}
</style>
10、v-model
- v-model除了在表单上收集数据,实现数据双向绑定之外,还可以实现父子组件之间的通信,让父子组件数据同步;
- 可以在同一组件上绑定多个v-model
- 在组件上使用
– 第一:相当于给子组件传递props[modelValue]
– 第二:相当于给子组件绑定自定义事件update:modelValue
<template>
    <div class="">
        <h1>v-modal通信实例</h1>
        <div class="content">
            <input type="text" v-model="inputVal">
            <p>input的数据:{{ inputVal }}</p>
            <p>num1:{{ num1 }}</p>
            <p>num2:{{ num2 }}</p>
            <h2>父组件</h2>
            <child v-model:num1="num1" v-model:num2="num2"></child>
        </div>
    </div>
</template>
<script setup lang="ts">
import { ref, reactive } from "vue"
import child from './child.vue'
let inputVal = ref('')
let num1: any = ref(1)
let num2: any = ref(10)
</script>
<style scoped lang="scss">
.content {
    width: 100%;
    background: green;
}
</style>
<template>
    <div class="son">
        <h2>子组件</h2>
        <button @click="handleNum1">num1:{{ num1 }}</button>
        <button @click="handleNum2">num2:{{ num2 }}</button>
    </div>
</template>
<script setup lang="ts">
import { ref, reactive } from "vue"
let props = defineProps(['num1', 'num2'])
let $emit = defineEmits(['update:num1', 'update:num2'])
const handleNum1 = () => {
    $emit('update:num1', props.num1 + 1)
}
const handleNum2 = () => {
    $emit('update:num2', props.num2 + 10)
}
</script>
<style scoped lang="scss">
.son {
    width: 600px;
    height: 200px;
    background: gold;
}
</style>
11、useAttrs
vue3组合API方式
- 类似props,都可以获取到父组件传的属性值和方法
- 注意:props不能和userAttrs同时获取同一个属性的值,若同时获取,props方式优先拿到值
<template>
  <div class="">
    <h1>useAttrs通信实例</h1>
    <div class="parent">
      <h2>父组件有这么一个值:{{ hello }}</h2>
      <!-- 将值传给子组件 -->
      <child :hello="hello" />
    </div>
  </div>
</template>
<script setup lang="ts">
import { ref, reactive } from "vue"
import child from './child.vue'
let hello = ref('hello world')
</script>
<style scoped lang="sass">

</style>
<template>
    <div class="son">
        <h2>子组件</h2>
        <p>接收到父组件的值:{{ attrs.hello }}</p>
    </div>
</template>
<script setup lang="ts">
import { ref, reactive, useAttrs } from "vue"
let attrs = useAttrs()

</script>
<style scoped lang="scss">
.son {
    width: 300px;
    height: 200px;
    background-color: yellow;
}
</style>
以上便是vue组件间通信方式了
学习参考: 2-12集
尚硅谷Vue项目实战硅谷甄选,vue3项目+TypeScript前端项目一套通关


 2242
2242

 被折叠的 条评论
为什么被折叠?
被折叠的 条评论
为什么被折叠?
 到【灌水乐园】发言


