


谷歌2013年的时候开源了espress,谷歌的思路是,等到它足够成熟和稳定以后,将其迁移到Android SDK中,以此可见对他的重视。Google使用Espresso测试了他们自己的超过30个应用程序,包括G+、Maps和Drive。
Espresso测试是非常容易实现的,由三步构成:
ViewMachers:寻找用来测试的View。
ViewActions:发送交互事件。
ViewAssertions:检验测试结果
先看下官方给的示例,就能理解以上的三个步骤:
onView(withId(R.id.my_view))  // withId(R.id.my_view) is a ViewMatcher
        .perform(click())    // click() is a ViewAction
        .check(matches(isDisplayed())); // matches(isDisplayed()) is a ViewAssertion
Espresso框架是google官方大力推荐的一套测试框架,所以无论如何都要学习一下的.另外,自Android Studio2.2版本开始,google就为Espresso框架内置了一个图形化界面,用来自动生成单元测试代码。
接下来一起写一demo测试,深入了解Espresso。
准备
支持Espresso:
dependencies {
    ...
    testCompile 'junit:junit:4.12'
    androidTestCompile 'com.android.support.test.espresso:espresso-core:2.2.2', {
        exclude group: 'com.android.support', module: 'support-annotations'
    }
}
在dependencies中添加,一般默认会有testCompile ‘junit:junit:4.12’,所以我们只需添加另一句即可。
defaultConfig{
    ...
    testInstrumentationRunner "android.support.test.runner.AndroidJUnitRunner"
}
在defaultConfig中添加如上语句,支持测试运行。
创建Test类
特别注意,该类应在androidTest文件夹下
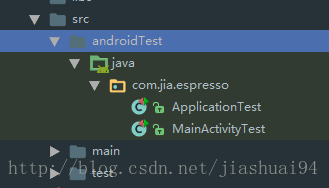
- androidTest:进行与Android相关(如调用Android设备等)测试;
- test:进行简单的只涉及java SE相关的测试。
举个简单例子:
@RunWith(AndroidJUnit4.class)
@LargeTest
最低0.47元/天 解锁文章


 4607
4607

 被折叠的 条评论
为什么被折叠?
被折叠的 条评论
为什么被折叠?
 到【灌水乐园】发言


