本文主要是对Quartz2D的基础使用做一个介绍,不求全面但求实用。
先看图
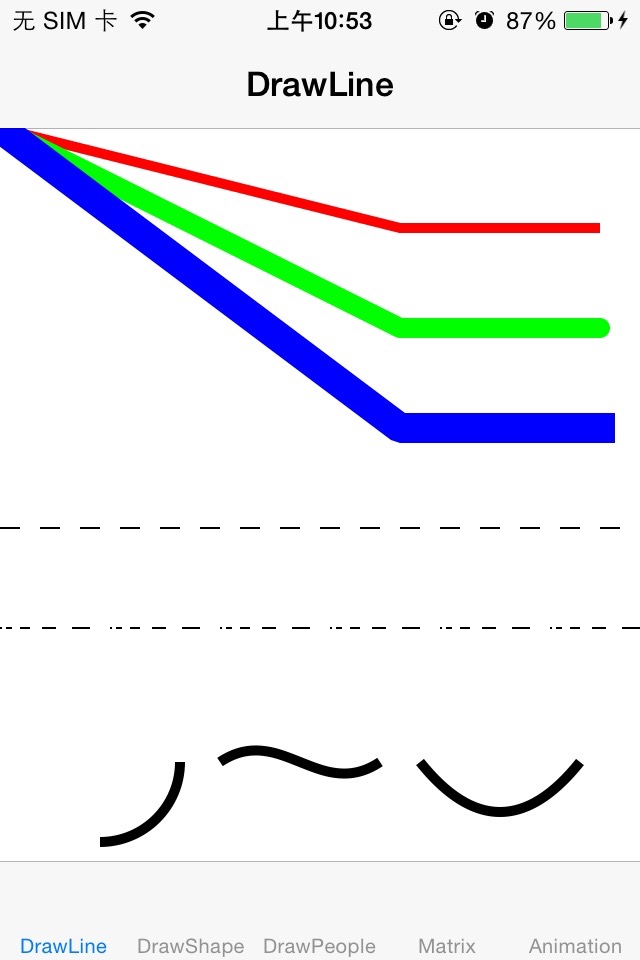
线的绘制
//1.获取图形上下文
    CGContextRef context = UIGraphicsGetCurrentContext();
    //保存图形上下文
    CGContextSaveGState(context);
    //2.拼接图形路径
    //设置线段宽度
    CGContextSetLineWidth(context, 5);
    //设置线段颜色
    CGContextSetRGBStrokeColor(context, 1, 0, 0, 1);
    //设置线段的头尾部样式
    /*
     kCGLineCapButt:锐利
     kCGLineCapRound:圆形
     kCGLineCapSquare:方形
     */
    CGContextSetLineCap(context, kCGLineCapButt);
    //设置线段转折点的样式
    /*
     kCGLineJoinMiter:尖角
     kCGLineJoinRound:圆角
     kCGLineJoinBevel:切角
     */
    CGContextSetLineJoin(context, kCGLineJoinMiter);
    CGContextMoveToPoint(context, 0, 0);
    CGContextAddLineToPoint(context, 200, 50);
    CGContextAddLineToPoint(context, 300, 50);
    //3.渲染图形
    CGContextStrokePath(context);

    CGContextSetLineWidth(context, 10);
    CGContextSetRGBStrokeColor(context, 0, 1, 0, 1);
    CGContextSetLineCap(context, kCGLineCapRound);
    CGContextSetLineJoin(context, kCGLineJoinRound);
    CGContextMoveToPoint(context, 0, 0);
    CGContextAddLineToPoint(context, 200, 100);
    CGContextAddLineToPoint(context, 300, 100);
    CGContextStrokePath(context);

    CGContextSetLineWidth(context, 15);
    CGContextSetRGBStrokeColor(context, 0, 0, 1, 1);
    CGContextSetLineCap(context, kCGLineCapSquare);
    CGContextSetLineJoin(context, kCGLineJoinBevel);
    CGContextMoveToPoint(context, 0, 0);
    CGContextAddLineToPoint(context, 200, 150);
    CGContextAddLineToPoint(context, 300, 150);
    CGContextStrokePath(context);

    //画虚线
    CGContextRestoreGState(context);
    CGContextSaveGState(context);
    CGContextMoveToPoint(context, 0, 200);
    CGContextAddLineToPoint(context, self.frame.size.width, 200);
    /*
     CGContextRef c:图形上下文,
     CGFloat phase:相位,
     const CGFloat *lengths:虚实相间的像素点(c语言的数组),
     size_t count:lengths数组中元素个数
     */
    float lengths[] = {10};
    CGContextSetLineDash(context, 0, lengths, 1);
    CGContextStrokePath(context);

    CGContextRestoreGState(context);
    CGContextSaveGState(context);
    CGContextMoveToPoint(context, 0, 250);
    CGContextAddLineToPoint(context, self.frame.size.width, 250);
    /*
     CGContextRef c:图形上下文,
     CGFloat phase:相位,
     const CGFloat *lengths:虚实相间的像素点(c语言的数组),
     size_t count:lengths数组中元素个数
     */
    float lengths1[] = {1,2,3,4,5,6,7,8,9,10};
    CGContextSetLineDash(context, 0, lengths1, 10);
    CGContextStrokePath(context);

    //画弧线
    CGContextRestoreGState(context);
    CGContextAddArc(context, 50, self.bounds.size.height -50, 40, 0, M_PI_2, 0);
    CGContextSetLineWidth(context, 5);
    CGContextStrokePath(context);

    //画三次曲线
    CGContextMoveToPoint(context, 110, self.bounds.size.height - 50);
    CGContextAddCurveToPoint(context, 140, self.bounds.size.height - 70, 160, self.bounds.size.height - 30, 190, self.bounds.size.height - 50);
    CGContextStrokePath(context);

    //画二次曲线
    CGContextMoveToPoint(context, 210, self.bounds.size.height - 50);
    CGContextAddQuadCurveToPoint(context, 250, self.bounds.size.height, 290, self.bounds.size.height - 50);
    CGContextStrokePath(context);
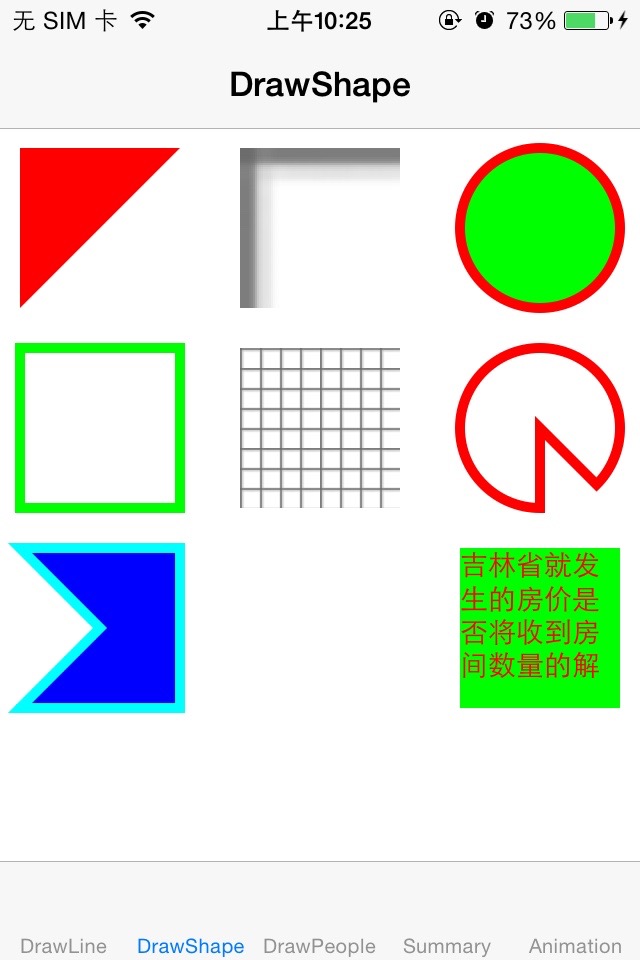
图形的绘制
- (void)drawRect:(CGRect)rect {
    draw3rect();
    draw4rect();
    draw5rect();
    drawCircle();
    drawArc();
    drawText();
    drawPicture();
    drawPictureTile();
}
/**
 *  画三边形
 */
void draw3rect()
{
    CGContextRef context = UIGraphicsGetCurrentContext();
    CGContextMoveToPoint(context, 10, 10);
    CGContextAddLineToPoint(context, 90, 10);
    CGContextAddLineToPoint(context, 10, 90);
    //设置填充颜色
    [[UIColor redColor] setFill];
    CGContextFillPath(context);
}
/**
 *  画四边形
 */
void draw4rect()
{
    CGContextRef context = UIGraphicsGetCurrentContext();
    CGContextAddRect(context, CGRectMake(10, 110, 80, 80));
    [[UIColor greenColor] setStroke];
    CGContextSetLineWidth(context, 5);
    CGContextStrokePath(context);
}
/**
 *  画五边形
 */
void draw5rect()
{
    CGContextRef context = UIGraphicsGetCurrentContext();
    CGContextMoveToPoint(context, 10, 210);
    CGContextAddLineToPoint(context, 90, 210);
    CGContextAddLineToPoint(context, 90, 290);
    CGContextAddLineToPoint(context, 10, 290);
    CGContextAddLineToPoint(context, 50, 250);
    CGContextClosePath(context);
    //设置填充颜色
    [[UIColor blueColor] setFill];
    [[UIColor cyanColor] setStroke];
    CGContextSetLineWidth(context, 5);
    /*
     kCGPathFill,
     kCGPathEOFill,
     kCGPathStroke,
     kCGPathFillStroke,
     kCGPathEOFillStroke
     */
    CGContextDrawPath(context, kCGPathFillStroke);
}
#define Screen_Width                   [UIScreen mainScreen].bounds.size.width
/**
 *  画圆
 */
void drawCircle()
{
    CGContextRef context = UIGraphicsGetCurrentContext();
    CGContextAddEllipseInRect(context, CGRectMake(Screen_Width - 90, 10, 80, 80));
    CGContextSetLineWidth(context, 5);
    CGContextSetRGBStrokeColor(context, 1, 0, 0, 1);
    CGContextSetRGBFillColor(context, 0, 1, 0, 1);
    CGContextDrawPath(context, kCGPathFillStroke);
}
/**
 *  画扇形
 */
void drawArc()
{
    CGContextRef context = UIGraphicsGetCurrentContext();
    CGPoint circleCenter = CGPointMake(Screen_Width - 50, 150);
    CGFloat radius = 40;
    CGContextMoveToPoint(context, circleCenter.x, circleCenter.y);
    CGContextAddLineToPoint(context, circleCenter.x, circleCenter.y);
    /*
     CGContextRef c:图形上下文
     CGFloat x:圆心x轴
     CGFloat y:圆心y轴
     CGFloat radius:半径
     CGFloat startAngle:起始角度(右方为0度)
     CGFloat endAngle:结束角度
     int clockwise:方向(0为顺时针,1为逆时针)
     */
    CGContextAddArc(context, circleCenter.x, circleCenter.y, radius, M_PI_2, M_PI_4, 0);
    CGContextClosePath(context);
    CGContextDrawPath(context, kCGPathStroke);
}
/**
 *  画文字
 */
void drawText()
{
    //画背景框
    CGContextRef context = UIGraphicsGetCurrentContext();
    CGRect rect = CGRectMake(Screen_Width - 90, 210, 80, 80);
    CGContextAddRect(context, rect);
    CGContextDrawPath(context, kCGPathFill);

    NSString *str = @"吉林省就发生的房价是否将收到房间数量的解放路口三季度副书记等方式的缴费";
    // NSForegroundColorAttributeName : 文字颜色
    // NSFontAttributeName : 字体
    [str drawInRect:rect withAttributes:@{NSFontAttributeName:[UIFont systemFontOfSize:14], NSForegroundColorAttributeName:[UIColor redColor]}];
}
/**
 *  画图像(图像伸缩)
 */
void drawPicture()
{
    UIImage *image = [UIImage imageNamed:@"smollPic"];
    [image drawInRect:CGRectMake(Screen_Width/2 - 40, 10, 80, 80)];
}
void drawPictureTile()
{
    UIImage *image = [UIImage imageNamed:@"smollPic"];
    [image drawAsPatternInRect:CGRectMake(Screen_Width/2 - 40, 110, 80, 80)];
}
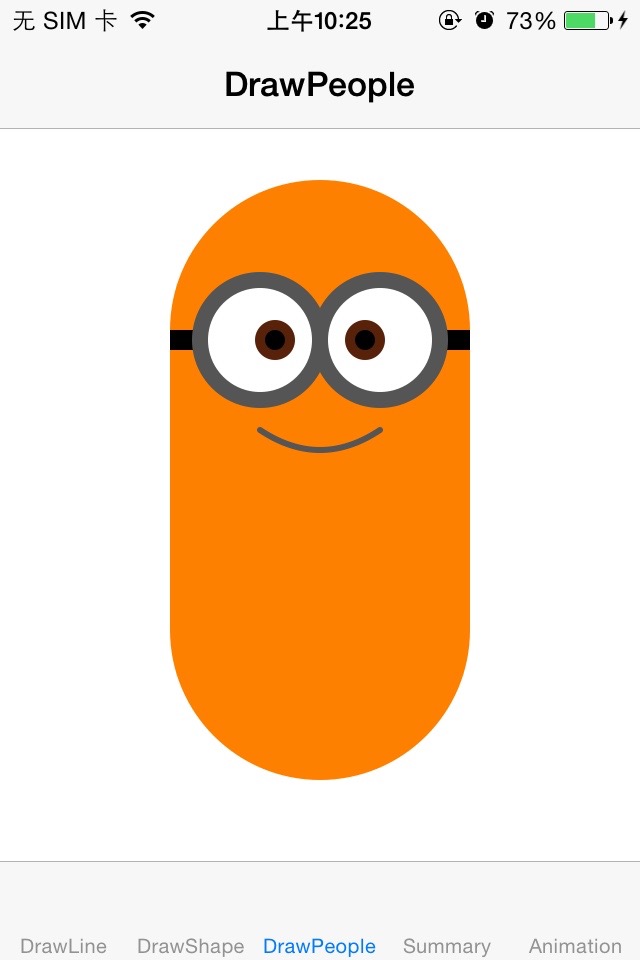
简单小人绘制
#define Self_Width     self.bounds.size.width
#define Self_Height    self.bounds.size.height

/*
    对称轴
 */
typedef NS_OPTIONS(NSInteger,DrawPeopleAxis)
{
    DrawPeople_X        = 0,
    DrawPeople_Y        = 1
};
/*
    处于屏幕的哪边
 */
typedef NS_OPTIONS(NSInteger, DrawOrbitDirection)
{
    DrawOrbitLeft      = -1,
    DrawOrbitRight     = 1
};
- (void)drawRect:(CGRect)rect {
    CGContextRef context = UIGraphicsGetCurrentContext();
    //脑袋半径
    CGFloat radius = 75;
    //身体高度
    CGFloat height = 150;
    //起始点
    CGFloat starX = Self_Width/2 - radius;
    CGFloat starY = (Self_Height - height)/2;

    CGContextAddArc(context, starX + radius, starY, radius, -M_PI, 0, 0);
    //起始点的X轴对称点
    CGPoint starPointY = [self getDuiChengPoint:CGPointMake(starX, starY) andZhouXian:DrawPeople_Y];
    //起始点的中心对称点
    CGPoint starpointM = [self getDuiChengPoint:starPointY andZhouXian:DrawPeople_X];
    //NSLog(@"\n%@\n%@\n%@\n%@",NSStringFromCGRect(self.bounds),NSStringFromCGPoint(CGPointMake(starX, starY)),NSStringFromCGPoint(starPointY),NSStringFromCGPoint(starpointM));


    //1.画身体
    CGContextAddLineToPoint(context, starpointM.x, starpointM.y);
    CGContextAddArc(context, starPointY.x + radius, starPointY.y, radius, 0, M_PI, 0);
    CGContextClosePath(context);
    [[UIColor orangeColor] setFill];
    CGContextDrawPath(context, kCGPathFill);

    //2.画嘴巴
    //嘴巴宽度
    CGFloat mouthWidth = 60;
    //嘴巴在起始点下面多远
    CGFloat mouthDownY = 50;
    //嘴巴起始点
    CGPoint mouthPoint = CGPointMake(starX + radius - mouthWidth/2, starY + mouthDownY);
    //嘴巴全重点在嘴巴下面多远
    CGFloat contrlY = 20;
    //嘴巴全重点
    CGPoint mouthContrl = CGPointMake(mouthPoint.x + mouthWidth/2, mouthPoint.y + contrlY);
    CGContextMoveToPoint(context, mouthPoint.x, mouthPoint.y);
    CGContextAddQuadCurveToPoint(context, mouthContrl.x, mouthContrl.y, mouthPoint.x + mouthWidth, mouthPoint.y);
    CGContextSetLineWidth(context, 3);
    CGContextSetLineCap(context, kCGLineCapRound);
    [[UIColor darkGrayColor] setStroke];
    CGContextDrawPath(context, kCGPathStroke);

    //3.画眼镜
    //眼镜高度
    CGFloat eyesH = 10;
    CGContextAddRect(context, CGRectMake(starX, starY, radius*2, eyesH));
    [[UIColor blackColor] setFill];
    CGContextDrawPath(context, kCGPathFill);

    //眼镜框半径
    CGFloat eyesR = 30;
    drawYanJingKuang(context, CGRectMake(starX + radius - eyesR*2, starY + eyesH/2 - eyesR, eyesR*2, eyesR*2), DrawOrbitLeft);
    drawYanJingKuang(context, CGRectMake(starX + radius, starY + eyesH/2 - eyesR, eyesR*2, eyesR*2), DrawOrbitRight);
}
void drawYanJingKuang(CGContextRef context, CGRect rect, DrawOrbitDirection direction)
{
    CGContextAddEllipseInRect(context, rect);
    CGContextSetLineWidth(context, 8);
    [[UIColor darkGrayColor] setStroke];
    [[UIColor whiteColor] setFill];
    CGContextDrawPath(context, kCGPathFillStroke);

    //画眼珠
    CGRect eyesRect;
    //眼珠的范围
    if (direction == DrawOrbitLeft) eyesRect = CGRectMake(rect.origin.x + rect.size.width/2, rect.origin.y + rect.size.height/2 - rect.size.height/8, rect.size.width/4, rect.size.height/4);
    else eyesRect = CGRectMake(rect.origin.x + rect.size.width/4, rect.origin.y + rect.size.height/2 - rect.size.height/8, rect.size.width/4, rect.size.height/4);
    CGContextAddEllipseInRect(context, eyesRect);
    [[UIColor colorWithRed:88/255.0 green:34/255.0 blue:10/255.0 alpha:1] setStroke];
    [[UIColor blackColor] setFill];
    CGContextSetLineWidth(context, rect.size.width/12);
    CGContextDrawPath(context, kCGPathFillStroke);
}
- (CGPoint)getDuiChengPoint:(CGPoint)point andZhouXian:(DrawPeopleAxis)axis
{
    if (axis == DrawPeople_X) return CGPointMake(Self_Width - point.x, point.y);
    else return CGPointMake(point.x, Self_Height - point.y);
}
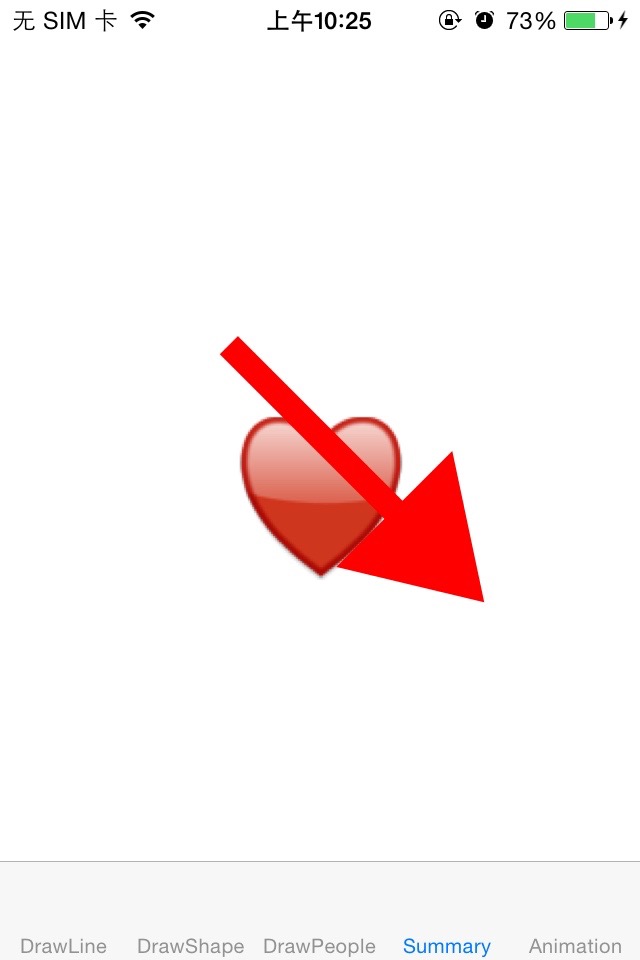
矩阵的使用
CGContextRef context = UIGraphicsGetCurrentContext();
    CGContextSaveGState(context);
    NSString *heartStr = @"♥️";
    CGRect heartRect = CGRectMake(Self_Width/2 - 50, Self_Height/2 - 50, 100, 100);
    [heartStr drawInRect:heartRect withAttributes:@{NSFontAttributeName:[UIFont systemFontOfSize:100]}];

    NSString *swordStr = @"→";
    CGRect swordRect = CGRectMake(heartRect.origin.x - 50, heartRect.origin.y - 100, heartRect.size.width + 100, heartRect.size.height + 200);
    // 矩阵操作
    CGContextTranslateCTM(context, Self_Width/1.5, -Self_Height/20);
    CGContextRotateCTM(context, M_PI_4);
    [swordStr drawInRect:swordRect withAttributes:@{NSFontAttributeName:[UIFont systemFontOfSize:200],NSForegroundColorAttributeName:[UIColor redColor]}];
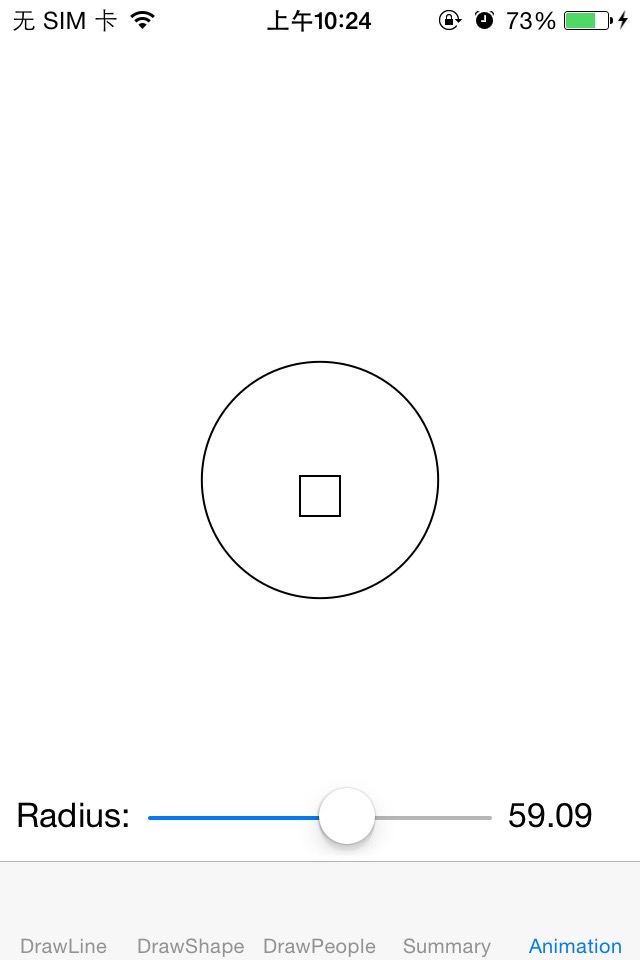
刷帧与动画
- (void)setRadius:(CGFloat)radius
{
    _radius = radius;
    [self setNeedsDisplay];
}
- (void)awakeFromNib
{
    //创建定时器
    CADisplayLink *link = [CADisplayLink displayLinkWithTarget:self selector:@selector(setNeedsDisplay)];
    //加入消息循环
    [link addToRunLoop:[NSRunLoop mainRunLoop] forMode:NSDefaultRunLoopMode];
}
#define Self_Width       self.bounds.size.width
#define Self_Height      self.bounds.size.height
- (void)drawRect:(CGRect)rect {
    CGContextRef context = UIGraphicsGetCurrentContext();
    CGContextAddArc(context, self.center.x, self.center.y, self.radius, 0, M_PI*2, 0);
    CGFloat width = 20;
    CGContextAddRect(context, CGRectMake((Self_Width - width)/2, self.Y, width, width));
    CGContextStrokePath(context);

    self.Y += 0.4;
    self.Y = self.Y > Self_Height - width - 49?0:self.Y;
}




 357
357

 被折叠的 条评论
为什么被折叠?


