


#前言
由于种种原因,例如下载速度慢、找不到所需应用等,我们经常需要修改debian系统的软件源文件/etc/apt/sources.list,之前一直是直接在网上搜索别人现有的源内容,然后复制粘贴过去···今天,我们来看看这个sources.list究竟是啥子一个格式来的。先通过一个示例文件,分析sources.list各个行的格式,然后依葫芦画瓢,我们尝试编写适合ubuntu18.04的sources.list。
sources.list的格式 探究
输入
cat /etc/apt/sources.list
可以看到类似如下的内容:
deb http://us.archive.ubuntu.com/ubuntu/ trusty main restricted
deb-src http://us.archive.ubuntu.com/ubuntu/ trusty main restricted

## Major bug fix updates produced after the final release of the
## distribution.
deb http://us.archive.ubuntu.com/ubuntu/ trusty-updates main restricted
deb-src http://us.archive.ubuntu.com/ubuntu/ trusty-updates main restricted

## N.B. software from this repository is ENTIRELY UNSUPPORTED by the Ubuntu
## team. Also, please note that software in universe WILL NOT receive any
## review or updates from the Ubuntu security team.
deb http://us.archive.ubuntu.com/ubuntu/ trusty universe
deb-src http://us.archive.ubuntu.com/ubuntu/ trusty universe
deb http://us.archive.ubuntu.com/ubuntu/ trusty-updates universe
deb-src http://us.archive.ubuntu.com/ubuntu/ trusty-updates universe
···
除了注释##外,核心的语句其实就是两类:
deb http://us.archive.ubuntu.com/ubuntu/ trusty universe
deb-src http://us.archive.ubuntu.com/ubuntu/ trusty unniverse
其中deb和deb-src的区别在于:
The lines starting with “deb” are binary package repositories (ie. the place where the “.deb” packages which get installed are downloaded from).
The ones starting with “deb-src” are source package repositories, which provide access to the source code of the applications and the files needed to create a “.deb” package out of them.
So, unless you are involved with packaging work, or you want this as a convenient way to access the application’s source code (if you have the appropriate “deb-src” lines you can get the code for, eg., gbrainy, by running “apt-get source gbrainy”), you can just comment out those lines.
If you don’t want to edit the sources.list file directly, you can disable them through a graphical interface by going to System -> Administration -> Software Sources, and in the first tab, under “Downloadable from the Internet”, uncheck the “Source code” box.
也就是说deb后面跟着的是二进制包仓库地址,而deb-src跟着的是源代码包仓库。通过deb-src可以下载源码版本的软件包。
deb-src 提供获取软件源码以及生成deb包之外的文件的能力。除非我们参与软件的打包中,或者我们想获取软件的源码,一般我们不适用deb-src
所以我们只看deb相关的那些行。
deb http://us.archive.ubuntu.com/ubuntu/ trusty universe
···
下面我们从已有的示例出发deb http://us.archive.ubuntu.com/ubuntu/ trusty universe,一步步分解这条完整的指令。
deb后面跟着的其实有三大部分:deb repos_path section1 section2
##1
repos_path: 源的路径,deb可支持http,ftp,以及本地文件cdrom等路径。
我们访问实例的源路径:http://us.archive.ubuntu.com/ubuntu/ 可以看到如下内容:
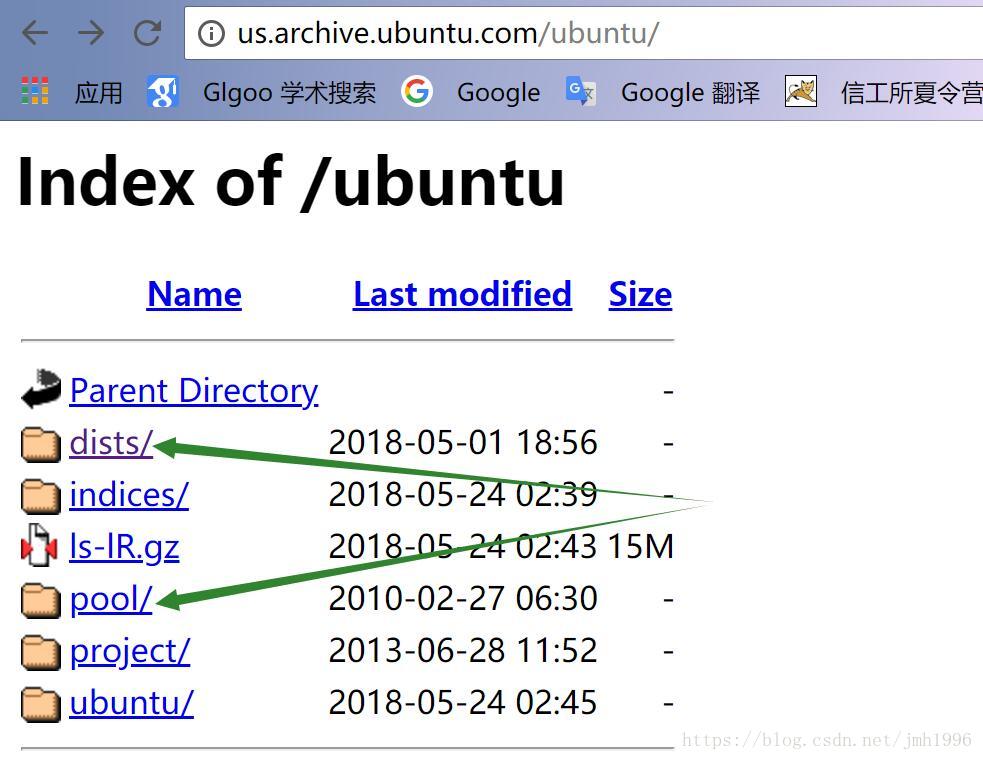
其中,比较重要的就是dists目录和pool目录。dists目录包含了当前源的所有软件包的索引。这些索引通过系统版本分类在不同的文件夹。
##2
进入dists目录,看到如下内容:
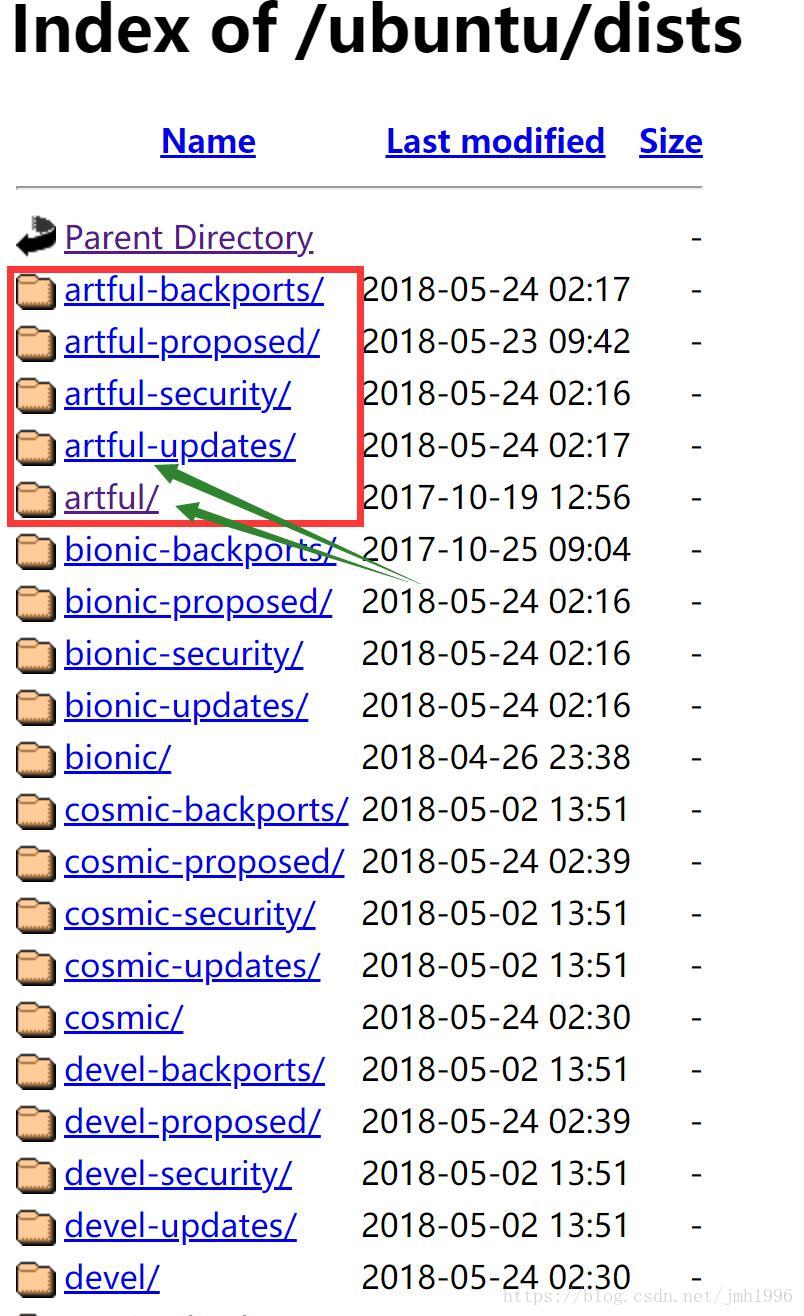
可以看到很多文件夹,这些文件夹都是以下格式命名的:
codename
codename-backports()
codename-proposed()
codename-security()
codename-updates ()
其中codename就是ubuntu不同发行版本的"代号",可在官网查询到不同版本对应的codename,下表显示了截止目前主要版本对应的codename。这一级的文件夹名其实就是对应了deb后面的section1。
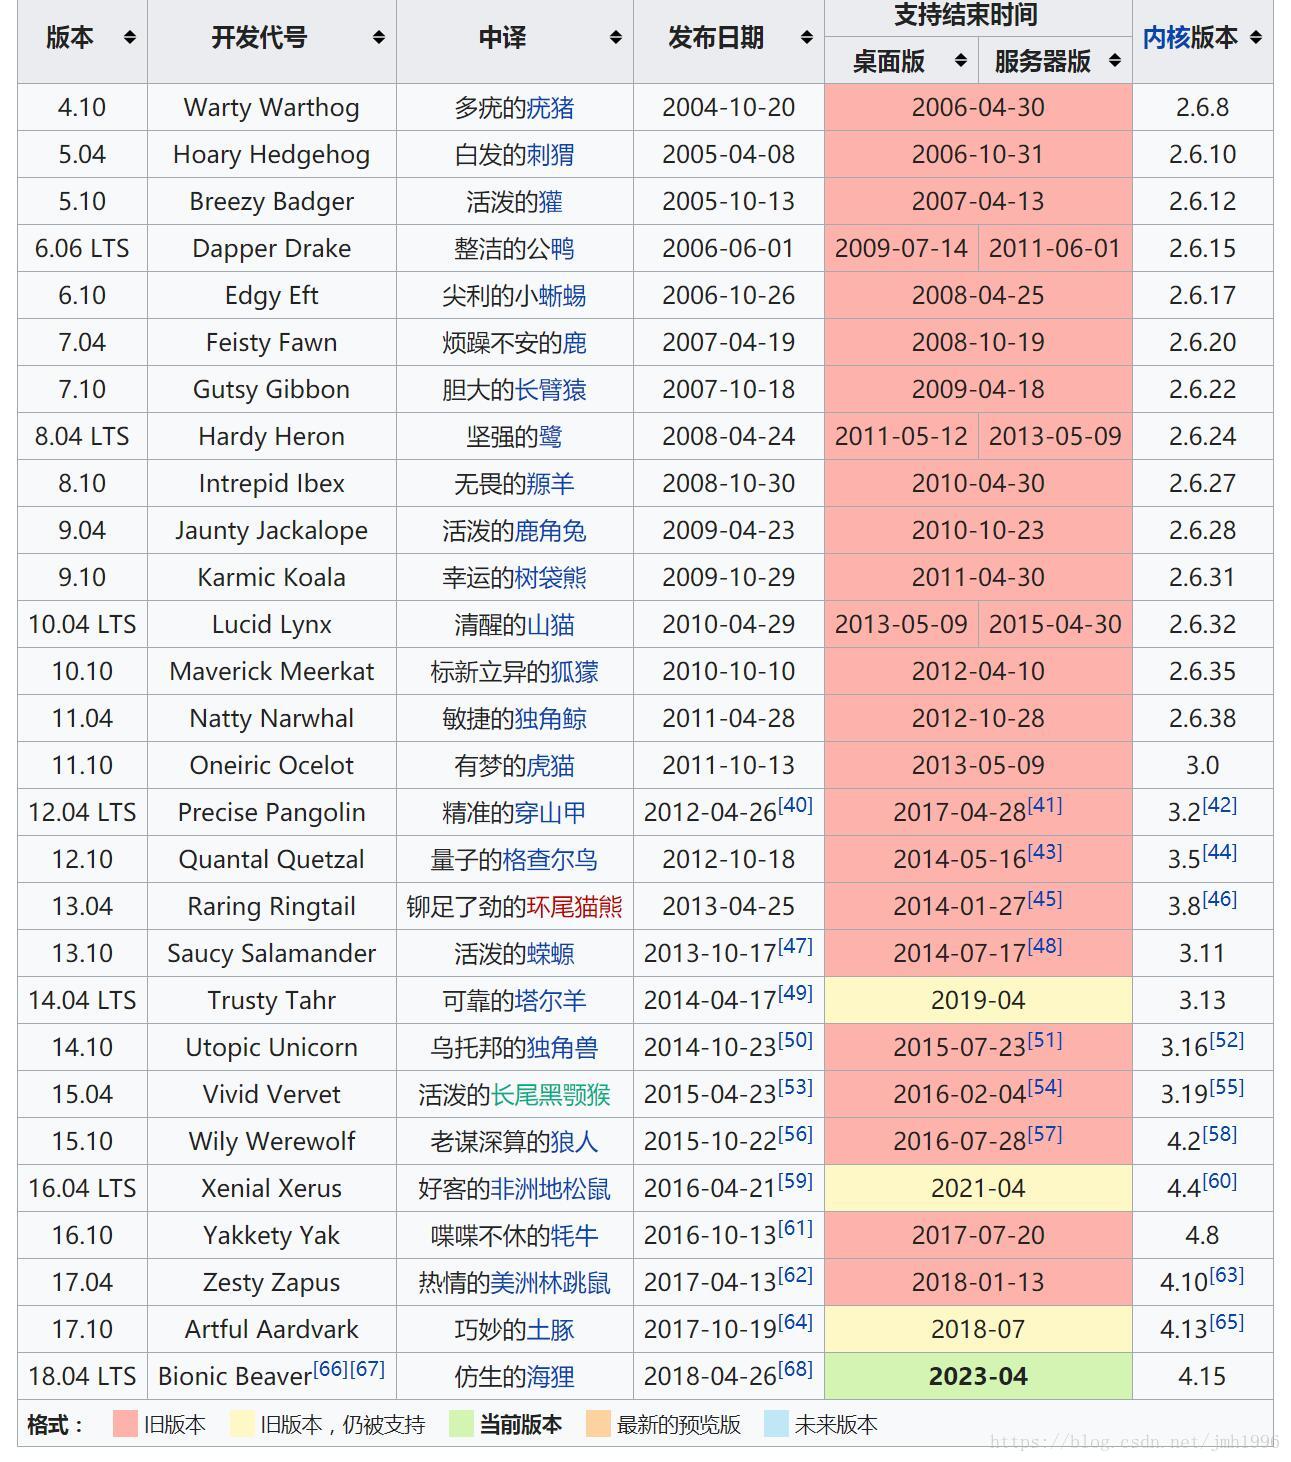
可以看到14.04版本对应的代号是trusty。
这几个文件夹的差别在于:
Security - Important Security Updates.

Updates - Recommended Updates.

Proposed - Pre-released Updates.

Backports - Unsupported Updates.
除了backports,其它文件的源其实都可以用上的。因为这个文件夹下面的软件是不支持更新维护的。
我们可以根据所需填写不同的section1。
##3
打开这一级的任意一个文件夹,可以看到如下内容:

有main,multiverse,restricted,universe等文件夹,这些文件夹名其实对应命令的section2。这些文件夹里面包含了不同软件包索引。这几个文件夹的包的区别在于
main:完全的自由软件。
restricted:不完全的自由软件。
universe:ubuntu官方不提供支持与补丁,全靠社区支持。
muitiverse:非自由软件,完全不提供支持和补丁。
##4 稍微再深入一步
我们打开main目录下的binary-i386子目录下的Packages.gz文件,可以看到如下内容:
Package: flashplugin-downloader
Architecture: i386
Version: 29.0.0.171ubuntu0.17.10.1
Multi-Arch: foreign
Priority: optional
Section: multiverse/web
Source: flashplugin-nonfree
Origin: Ubuntu
Maintainer: Ubuntu Developers <ubuntu-devel-discuss@lists.ubuntu.com>
Original-Maintainer: Bart Martens <bartm@knars.be>
Bugs: https://bugs.launchpad.net/ubuntu/+filebug
Installed-Size: 25
Depends: flashplugin-installer (>= 11.1.102.55ubuntu3)
Filename: pool/multiverse/f/flashplugin-nonfree/flashplugin-downloader_29.0.0.171ubuntu0.17.10.1_i386.deb
Size: 1894
MD5sum: a25f9bd19b8c6b4247e7b4f556f96eb5
SHA1: 08358cfd6a59f7724ef6fab66dc0cfabe4792c17
SHA256: 0ee2d3fa22cd37e80cd9180b5795c7dc8ac5de942b23c56252fde31276b93fe1
Homepage: http://www.adobe.com/products/flashplayer.html
Description: Adobe Flash Player plugin installer (transitional package)
Description-md5: 66ea91f4e504085408ea841953dc65d0


···
我们注意这个文件其实是一个“索引”文件,里面记录了各种包的包名Package、运行平台(Architecture)、版本号(Version)、依赖关系(Depends)、deb包地址(Filename)等
注意到Filename指向的是源服务器pool目录下的某个deb。
因此我们可以猜测,apt-get install 某个软件时,其实就是基于这些Packages来计算依赖关系,根据其中的Filename地址来下载所需的deb地址,然后再执行dpkg -i xxx.deb来完成软件包的安装。
编写适合18.04版本的sources.list
根据第二部分的分析,我们只要依葫芦画瓢填写好respos_path,section1和section2即可。具体步骤如下:
#deb源格式:
deb repos_path section1 section2
##1.
获取ubuntu 18.04的codename,根据Wiki可知ubuntu 18.04的代号为bionic
##2.
确定repos_path:如果觉得国外的官网软件源比较慢,那么可以选择国内的几大软件源。
国内源的url可参照ubuntu官网对国内源的介绍:http://wiki.ubuntu.org.cn/模板:18.04source
国内常用的几大源有:
Ubuntu 官方中國(目前是阿里云)http://cn.archive.ubuntu.com/ubuntu/
網易(廣東廣州電信/聯通千兆雙線接入)http://mirrors.163.com/ubuntu/
搜狐(山東聯通千兆接入)http://mirrors.sohu.com/ubuntu/
阿里云(北京萬網/浙江杭州) http://mirrors.aliyun.com/ubuntu/
開源鏡像文件搜索 http://ubuntu.mirrors.org.cn/

教育網专线:

中科大 LUG(合肥,電信/聯通/移動/教育網自動分流,同時也是 Deepin 官方)
https://mirrors.ustc.edu.cn/ubuntu/ (v4/v6) http://mirrors4.ustc.edu.cn/ubuntu/ (v4) http://mirrors6.ustc.edu.cn/ubuntu/ (v6)
中科院 OpenCAS
http://mirrors.opencas.cn/ubuntu/
清華 TUNA(教育網核心節點百兆接入,已計畫提高到千兆)
http://mirrors.tuna.tsinghua.edu.cn/ubuntu/ (v4/v6) http://mirrors.4.tuna.tsinghua.edu.cn/ubuntu/ (v4) http://mirrors.6.tuna.tsinghua.edu.cn/ubuntu/ (v6)
任选一下url,填入repos_path 即可。我们选择阿里的:http://cn.archive.ubuntu.com/ubuntu/
##3.
确定section1,
打开刚刚填入的 http://cn.archive.ubuntu.com/ubuntu/,如果看下如下目录结构(尤其是dists目录和pool目录),说明该源可用:

打开dists目录,检查该源是否包含可供18.04使用的软件包。
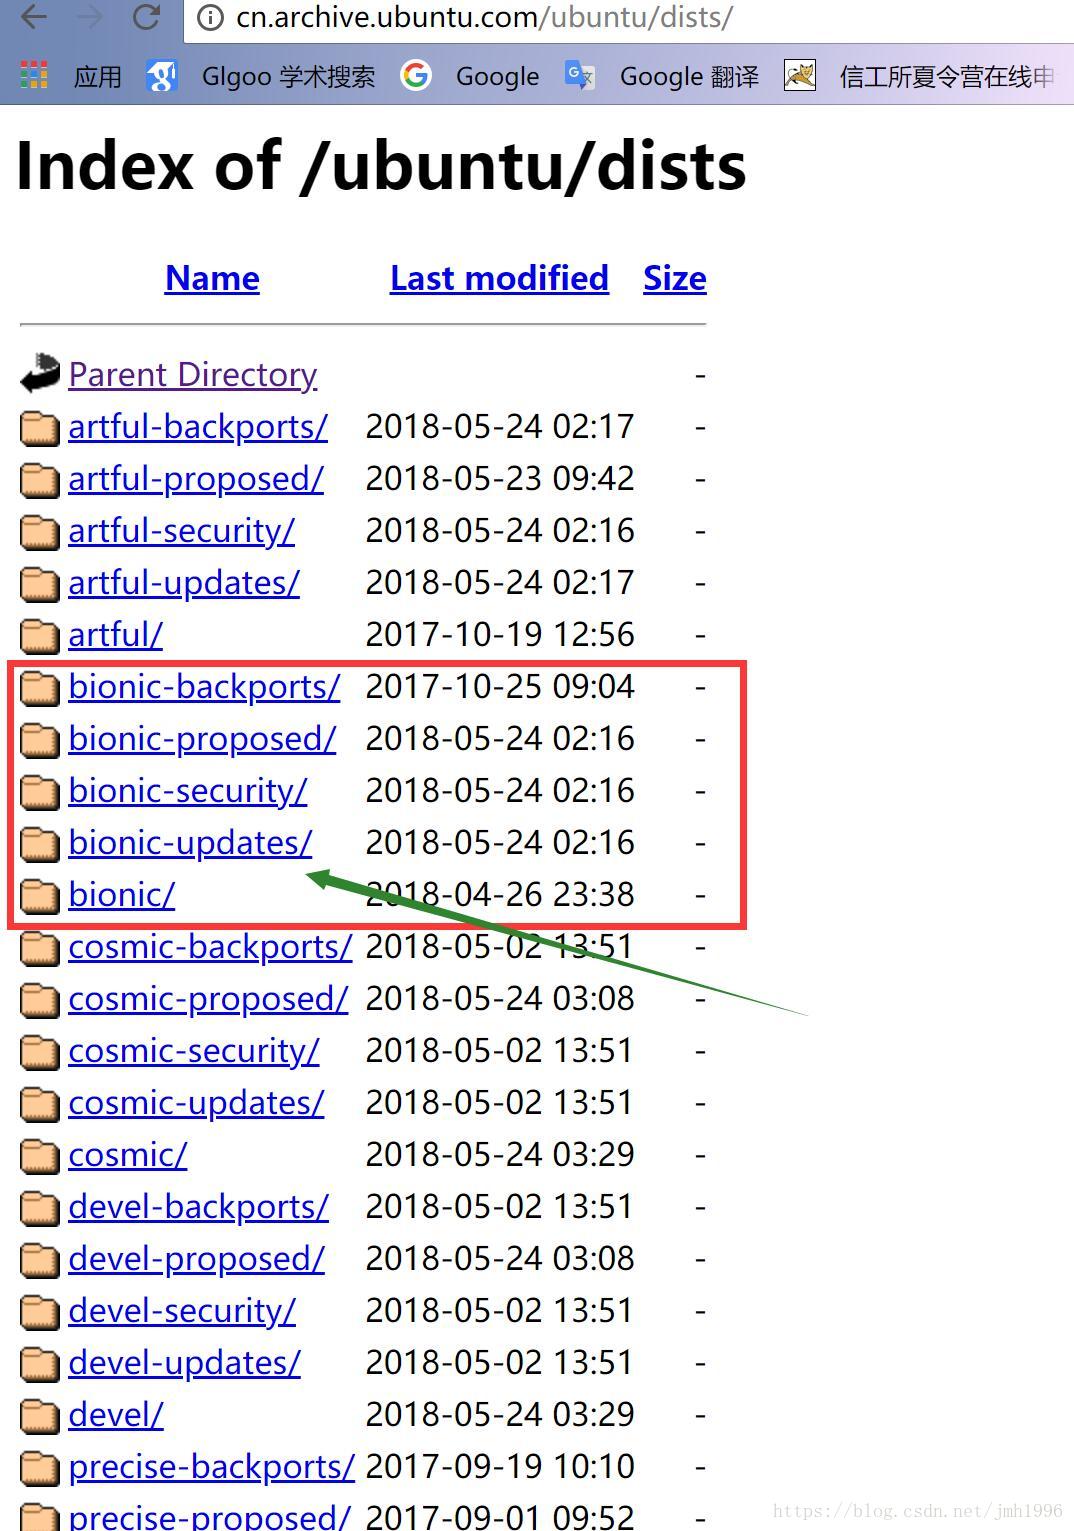
可以看到以 bionic-* 为名的文件夹,这说明阿里源现在支持18.04。
现在 我们可以将bionic-*填入section1了,值得注意的是 一条deb源只能填入一个section1,如果想添加多个源就需要另一行重新书写新的deb源。
于是我们目前确认以下sources.list的内容:
deb http://cn.archive.ubuntu.com/ubuntu bionic section2
deb http://cn.archive.ubuntu.com/ubuntu bionic-updates section2
deb http://cn.archive.ubuntu.com/ubuntu bionic-security section2
deb http://cn.archive.ubuntu.com/ubuntu bionic-proposed section2
可见 还有section2尚未确定。
4.
确定section2
依次打开bionic,bionic-updates,bionic-security,bionic-proposed目录,看包含那几大类属性的软件。
例如bionic目录,
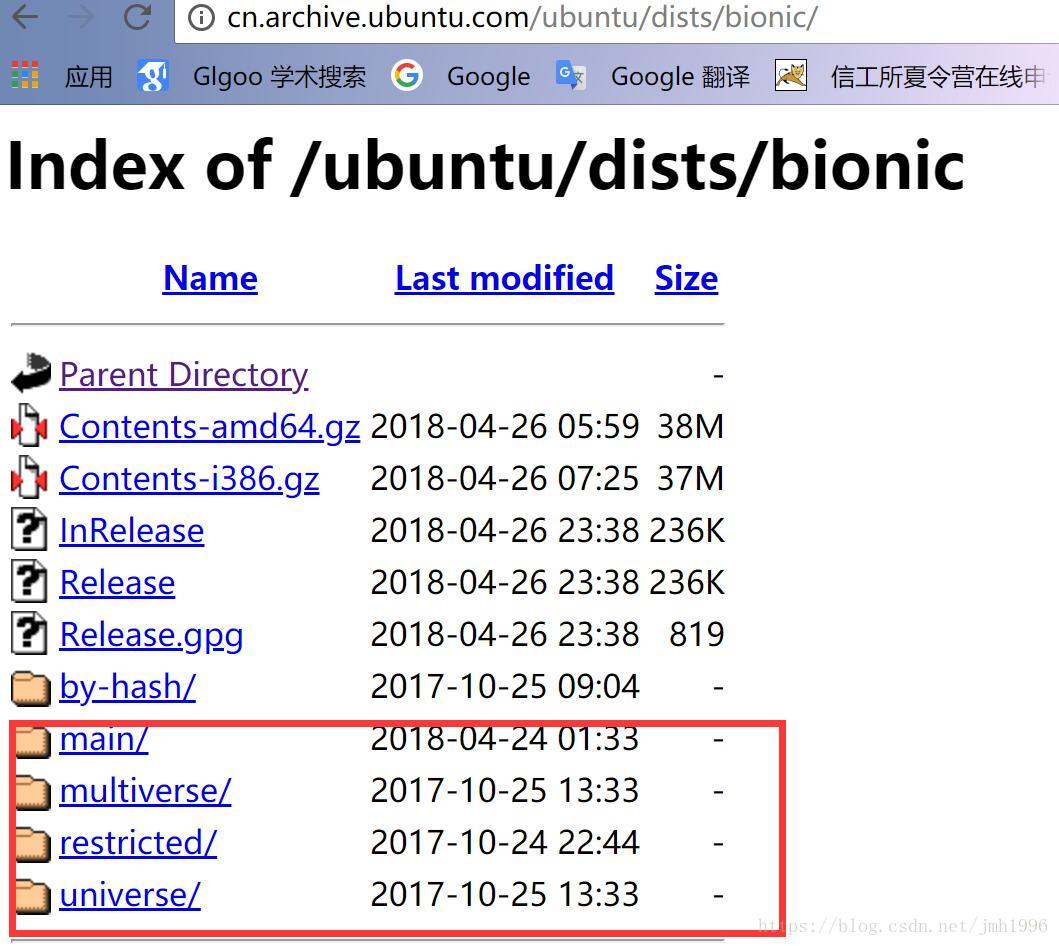
可见有main/multiverse/restricted/universe几大属性包。
于是将main multiverse restricted universe填入section2即可。
最终,可以确定sources.list的内容为:
deb http://cn.archive.ubuntu.com/ubuntu bionic main multiverse restricted universe
deb http://cn.archive.ubuntu.com/ubuntu bionic-updates main multiverse restricted universe
deb http://cn.archive.ubuntu.com/ubuntu bionic-security main multiverse restricted universe
deb http://cn.archive.ubuntu.com/ubuntu bionic-proposed main multiverse restricted universe
保存,然后执行sudo apt-get update 即可完成ubuntu 18.04 源的修改。


 2014
2014

 被折叠的 条评论
为什么被折叠?
被折叠的 条评论
为什么被折叠?
 到【灌水乐园】发言


