


(每次学习一点xamarin就做个学习笔记和视频来加深记忆巩固知识)
如有不正确的地方,请帮我指正。
Autolayout简介
Autolayout是一种自动布局技术,很方便进行屏幕适配。在这之前有Autoresizing技术,但只能设置控件自己和父控件之间的位置关系,有点类似于Winform中的Anchor。而Autolayout可以设置任意控件之间的位置关系。
Autolayout原理
原理就是通过公式 View1.Property = (View2.Property * multiplier) + constant 最终得到Frame值(X,Y,Width,Height)。
视图1的属性值 = (视图2的属性值乘以乘数)加上一个常量值。
举几个例子:
例A:UIImageView的宽为150,高为150,距离UIView的左边和上边都是10。那么:
imageView.Width=(0 * 1.0)+150
imageView.Height=(0 * 1.0)+150
imageView.X=(UIView.Left*1.0)+10
imageView.Y=(UIView.Top*1.0)+10
例B:UILabel的上边距离图片是7,下边距离UIView是8,左边距离UIView是10,右边距离UIView的右边是16。那么:
label.Y=(imageView.Bottom*1.0)+7
label.Height=((UIView.Bottom*1.0-8) – label.Y
label.X=(UIView.Left*1.0)+10
label.Width=(UIView.Right*1.0-16) – label.X
例C:UILabel的宽永远等于UIView的宽的一半。那么:
label.Width=(UIView.Width*0.5)+0
Autolayout基本使用
例如要实现下图这样的布局:
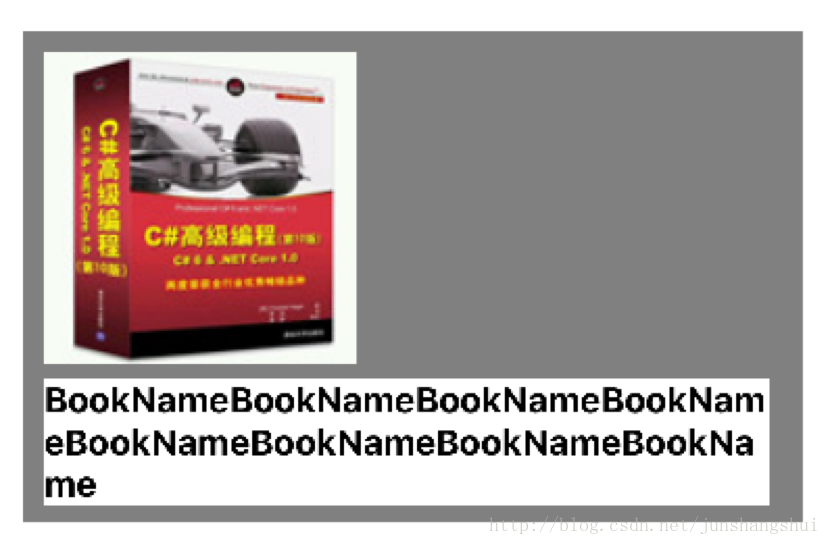
条件如下:
1. 有三个控件,图片控件UIImageView,文本控件UILabel,和它俩的父控件灰色的UIView。
2. UIImageView的宽为150,高为150,距离UIView的左边和上边都是10。
3. UILabel的上边距离图片是7,下边距离UIView是8,左边距离UIView是10,右边距离UIView的右边是16,宽度则是跟随UIView的宽度自动变化,高度则跟随文本内容自动变化。
4. UIView距离屏幕的左和右都是20,宽度跟随屏幕宽度自动变化,高度则跟随它里面的子控件的高度自动变化,即刚好包住它们。距离屏幕上边暂时随变吧。
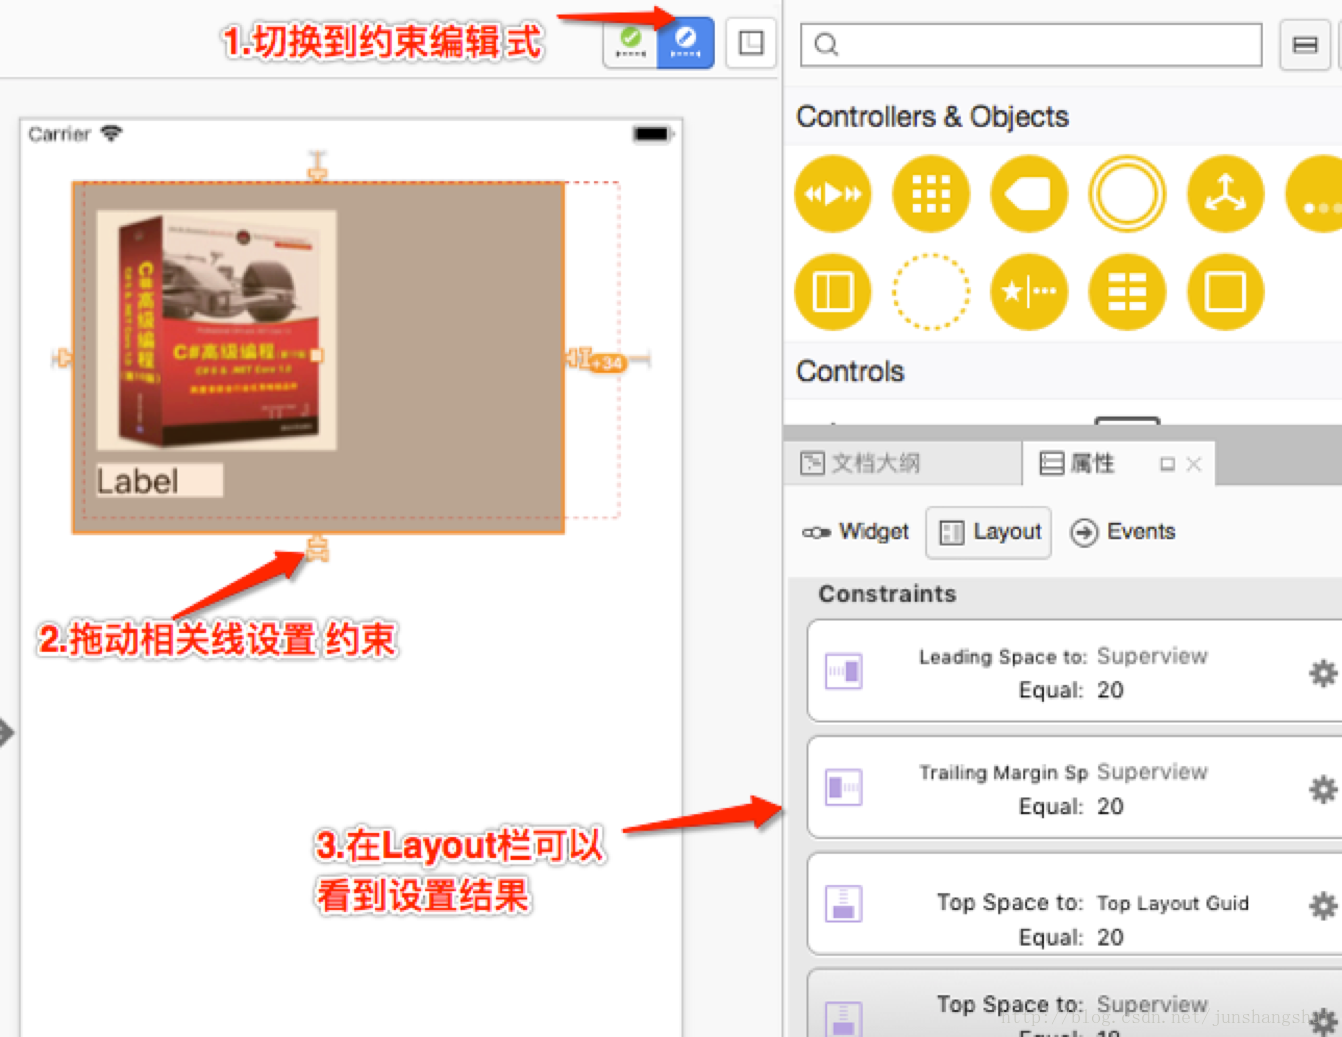
1. 通过界面设计工具来布局
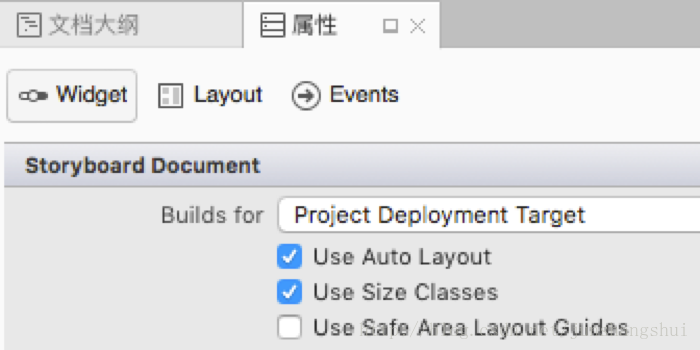
首先查看storyboard的属性,默认是勾选了“UseAutoLayout”的。
还得注意要加如下代码
//因为默认会有Autoresizing设置,所以要禁止IOS把默认的Autoresizing转成约束
            grayView.TranslatesAutoresizingMaskIntoConstraints = false;
            imageView.TranslatesAutoresizingMaskIntoConstraints = false;
            label.TranslatesAutoresizingMaskIntoConstraints = false;
分别拖三个控件并调好大概的位置。第一步是切换到约束编辑模式,下图少了一个“模”字。第二步则进行相关拖线来设置约束。第三步在Layout栏可看到结果,可以点击设置图标来进行修改或删除约束。
在使用下面三个方式之前先做好准备工作,通过代码先添加好三个控件
//1.添加灰色View
            UIView grayView2 = new UIView();
            grayView2.BackgroundColor = UIColor.Gray;
            grayView2.Frame = new CGRect(0, 400, 300, 300);
            this.View.AddSubview(grayView2);

            //2.添加图片View
            UIImage image = UIImage.FromBundle("a1");
            UIImageView imageView2 = new UIImageView(image);
            imageView2.BackgroundColor = UIColor.Cyan;
            imageView2.Frame = new CGRect(0, 0, 150, 150);
            grayView2.AddSubview(imageView2);

            //3.添加文本View
            UILabel label2 = new UILabel();
            label2.BackgroundColor = UIColor.White;
            label2.Frame = new CGRect(5, imageView2.Frame.Size.Height + 7, 200, 20);
            label2.Text = "BookName";
            label2.Font = UIFont.SystemFontOfSize(UIFont.LabelFontSize, UIFontWeight.Bold);
            label2.Lines = 0;//设置允许自动换行
            grayView2.AddSubview(label2);
            _label2 = label2;

//默认会有Autoresizing设置,禁止IOS把默认的Autoresizing转成约束
            grayView2.TranslatesAutoresizingMaskIntoConstraints = false;
            imageView2.TranslatesAutoresizingMaskIntoConstraints = false;
            label2.TranslatesAutoresizingMaskIntoConstraints = false;
2. 通过NSLayoutConstraint类来布局
直接上代码//4添加grayView2的约束
//4.1添加X值约束
NSLayoutConstraint grayView2CT_X = NSLayoutConstraint.Create(grayView2, NSLayoutAttribute.Left, NSLayoutRelation.Equal
, this.View, NSLayoutAttribute.Left, 1.0F, 20);
this.View.AddConstraint(grayView2CT_X);
//4.2添加Y值约束
NSLayoutConstraint grayView2CT_Y = NSLayoutConstraint.Create(grayView2, NSLayoutAttribute.Top, NSLayoutRelation.Equal
, this.View, NSLayoutAttribute.Top, 1.0F, 300);
this.View.AddConstraint(grayView2CT_Y);
//4.3添加Width约束(因为有X值约束了,所以再来个Trailing就行了)
NSLayoutConstraint grayView2CT_Trailing = NSLayoutConstraint.Create(grayView2, NSLayoutAttribute.Trailing, NSLayoutRelation.Equal
, this.View, NSLayoutAttribute.Trailing, 1.0F, -20);
this.View.AddConstraint(grayView2CT_Trailing);
//4.4添加Height约束
//不需添加高约束,因为可以根据里面的imageView和label自动计算出来
//5.添加imageView2的约束
//4.1添加X值约束
NSLayoutConstraint imageView2CT_X = NSLayoutConstraint.Create(imageView2, NSLayoutAttribute.Left, NSLayoutRelation.Equal
, imageView2.Superview, NSLayoutAttribute.Left, 1.0F, 10);
grayView2.AddConstraint(imageView2CT_X);
//5.2添加Y值约束
NSLayoutConstraint imageView2CT_Y = NSLayoutConstraint.Create(imageView2, NSLayoutAttribute.Top, NSLayoutRelation.Equal
, imageView2.Superview, NSLayoutAttribute.Top, 1.0F, 10);
grayView2.AddConstraint(imageView2CT_Y);
//5.3添加Width约束
NSLayoutConstraint imageView2CT_W = NSLayoutConstraint.Create(imageView2, NSLayoutAttribute.Width, NSLayoutRelation.Equal
, null, NSLayoutAttribute.NoAttribute, 1.0F, 150);
imageView2.AddConstraint(imageView2CT_W);
//5.4添加Height约束
NSLayoutConstraint imageView2CT_H = NSLayoutConstraint.Create(imageView2, NSLayoutAttribute.Height, NSLayoutRelation.Equal
, null, NSLayoutAttribute.NoAttribute, 1.0F, 150);
imageView2.AddConstraint(imageView2CT_H);
//6.添加label2的约束
//6.1添加X值约束
NSLayoutConstraint label2CT_X = NSLayoutConstraint.Create(label2, NSLayoutAttribute.Left, NSLayoutRelation.Equal
, label2.Superview, NSLayoutAttribute.Left, 1.0F, 10);
grayView2.AddConstraint(label2CT_X);
//6.2添加Y值约束
NSLayoutConstraint label2CT_Y = NSLayoutConstraint.Create(label2, NSLayoutAttribute.Top, NSLayoutRelation.Equal
, imageView2, NSLayoutAttribute.Bottom, 1.0F, 7);
grayView2.AddConstraint(label2CT_Y);
//6.3添加Width约束(因为有X值约束了,所以再来个Trailing就行了)
NSLayoutConstraint label2CT_Trailing = NSLayoutConstraint.Create(label2, NSLayoutAttribute.Trailing, NSLayoutRelation.Equal
, label2.Superview, NSLayoutAttribute.Trailing, 1.0F, -16);
grayView2.AddConstraint(label2CT_Trailing);
//6.4添加Height约束所以再来个Bottom就行了(因为有Y值约束了,所以再来个Bottom就行了)
NSLayoutConstraint label2CT_Bottom = NSLayoutConstraint.Create(label2, NSLayoutAttribute.Bottom, NSLayoutRelation.Equal
, label2.Superview, NSLayoutAttribute.Bottom, 1.0F, -8);
grayView2.AddConstraint(label2CT_Bottom);3. 通过VFL(VisualFormatLanguage可视化格式语言)来布局
直接上代码。
NSDictionary viewDict = NSDictionary.FromObjectsAndKeys(new UIView[] { grayView2, imageView2, label2 },
                                                                   new string[] { "grayView", "imageView", "label" });
            string grayView2VFL_H = "H:|-20-[grayView]-20-|";//距父控件左边和右边都是20(X值和With值也就确定了)
            string grayView2VFL_V = "V:|-350-[grayView]";  //距父控件上边是350,下边自动计算(Y值和Height值也就确定了)
            NSLayoutConstraint[] grayView2VFLArray_H=NSLayoutConstraint.FromVisualFormat(grayView2VFL_H, 0
                                                                                         , null, viewDict);
            NSLayoutConstraint[] grayView2VFLArray_V =NSLayoutConstraint.FromVisualFormat(grayView2VFL_V,0
                                                                                          ,null, viewDict);
            this.View.AddConstraints(grayView2VFLArray_H);
            this.View.AddConstraints(grayView2VFLArray_V);


            string imageView2VFL_H = "H:|-10-[imageView(150)]";//距父控件左边为10,自已宽为150(X值和With值也就确定了)
            string imageView2VFL_V = "V:|-10-[imageView(150)]";//距父控件上边是10,自已高为150(Y值和Height值也就确定了)
            NSLayoutConstraint[] imageView2VFLArray_H =NSLayoutConstraint.FromVisualFormat(imageView2VFL_H, 0
                                                                                         , null, viewDict);
            NSLayoutConstraint[] imageView2VFLArray_V =NSLayoutConstraint.FromVisualFormat(imageView2VFL_V, 0
                                                                                         , null, viewDict);
            imageView2.Superview.AddConstraints(imageView2VFLArray_H);
            imageView2.Superview.AddConstraints(imageView2VFLArray_V);


            string label2VFL_H = "H:|-10-[label]-16-|";//距父控件左边为10,右边为16(X值和With值也就确定了)
            string label2VFL_V = "V:[imageView]-7-[label]-8-|";//距上边(imageView)是7,下边(grayView)是8(Y值和Height值也就确定了)
            NSLayoutConstraint[] label2VFLArray_H =NSLayoutConstraint.FromVisualFormat(label2VFL_H, 0
                                                                                         , null, viewDict);
            NSLayoutConstraint[] label2VFLArray_V =NSLayoutConstraint.FromVisualFormat(label2VFL_V, 0
                                                                                         , null, viewDict);
            label2.Superview.AddConstraints(label2VFLArray_H);
            label2.Superview.AddConstraints(label2VFLArray_V);
4. 通过第三方开源框架Masonry来布局
从Nuget中下载安装Masonry这个包。grayView2.MakeConstraints((ConstraintMaker obj) => {
obj.Left.EqualTo(this.View.Left()).Offset(20);
obj.Right.EqualTo(this.View.Right()).Offset(-20);
obj.Top.EqualTo(this.View.Top()).Offset(350);
});
imageView2.MakeConstraints((ConstraintMaker obj) => {
obj.Left.EqualTo(imageView2.Superview.Left()).Offset(10);
obj.Width.EqualTo(new NSNumber(150));
obj.Top.EqualTo(imageView2.Superview.Top()).Offset(10);
obj.Height.EqualTo(new NSNumber(150));
});
label2.MakeConstraints((ConstraintMaker obj) =>{
obj.Left.EqualTo(label2.Superview.Left()).Offset(10);
obj.Right.EqualTo(label2.Superview.Right()).Offset(-16);
obj.Top.EqualTo(imageView2.Bottom()).Offset(7);
obj.Bottom.EqualTo(label2.Superview.Bottom()).Offset(-8);
});
注意,最后记得注掉这三个控件的Frame代码。
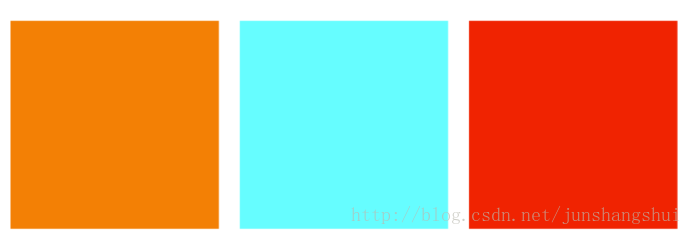
Autolayout的约束的优先级
约束可以设置优先级,优先级高的生效。
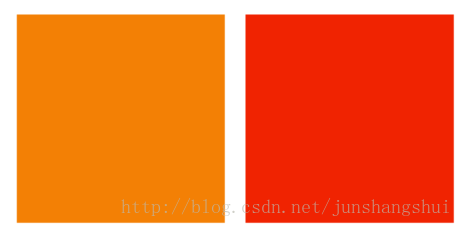
例如有三个UIView,它们之间的水平间距都是10,当删掉中间青色的视图后,红色要自动贴到橙色的右边来且间距还是10。
上代码
//约束优先级
            UIView orangeView = new UIView();
            orangeView.BackgroundColor = UIColor.Orange;

            UIView cyanView = new UIView();
            cyanView.BackgroundColor = UIColor.Cyan;

            UIView redView = new UIView();
            redView.BackgroundColor = UIColor.Red;

            this.View.AddSubview(orangeView);
            this.View.AddSubview(cyanView);
            this.View.AddSubview(redView);
            _cyanView1 = cyanView;

            orangeView.MakeConstraints((ConstraintMaker obj) => {
                obj.Left.EqualTo(this.View.Left()).Offset(10);
                obj.Bottom.EqualTo(this.View.Bottom()).Offset(-5);
                obj.Width.EqualTo(new NSNumber(100));
                obj.Height.EqualTo(new NSNumber(100));
            });
            cyanView.MakeConstraints((ConstraintMaker obj) => {
                obj.Left.EqualTo(orangeView.Right()).Offset(10).Priority(260);
                obj.Bottom.EqualTo(this.View.Bottom()).Offset(-5);
                obj.Width.EqualTo(new NSNumber(100));
                obj.Height.EqualTo(new NSNumber(100));
            });
            redView.MakeConstraints((ConstraintMaker obj) => {
                obj.Left.EqualTo(cyanView.Right()).Offset(10);
                obj.Bottom.EqualTo(this.View.Bottom()).Offset(-5);
                obj.Width.EqualTo(new NSNumber(100));
                obj.Height.EqualTo(new NSNumber(100));
                obj.Left.EqualTo(orangeView.Right()).Offset(10).Priority(250);
            });
public override void TouchesBegan(Foundation.NSSet touches, UIEvent evt)
        {
            base.TouchesBegan(touches, evt);
            //label.Text = "BookNameBookNameBookNameBookNameBookNameBookNameBookNameBookName";
            //_label2.Text = "BookNameBookNameBookNameBookNameBookNameBookNameBookNameBookName";
            _cyanView1.RemoveFromSuperview();
        }
注意cyanView的Left约束的优先级
obj.Left.EqualTo(orangeView.Right()).Offset(10).Priority(260);
和redView的Left约束的优先级
obj.Left.EqualTo(orangeView.Right()).Offset(10).Priority(250);
由于redView的优先级250低于cyanView的优先级260,所以开始显示出来不会生效,当删掉cyanView后,cyanView的约束也没了,所以redView约束中的第一句就失效了并且最后一句的就生效了。
结果如下图


 1271
1271

 被折叠的 条评论
为什么被折叠?
被折叠的 条评论
为什么被折叠?
 到【灌水乐园】发言


