


一、准备数据集
1.1 数据集标注
这时候使用labelimg工具标注自己的数据集,一定要分清楚自己的类别信息
安装完anconda之后打开命令框输入以下命令进入标注页面
conda activate labelimglabelimg 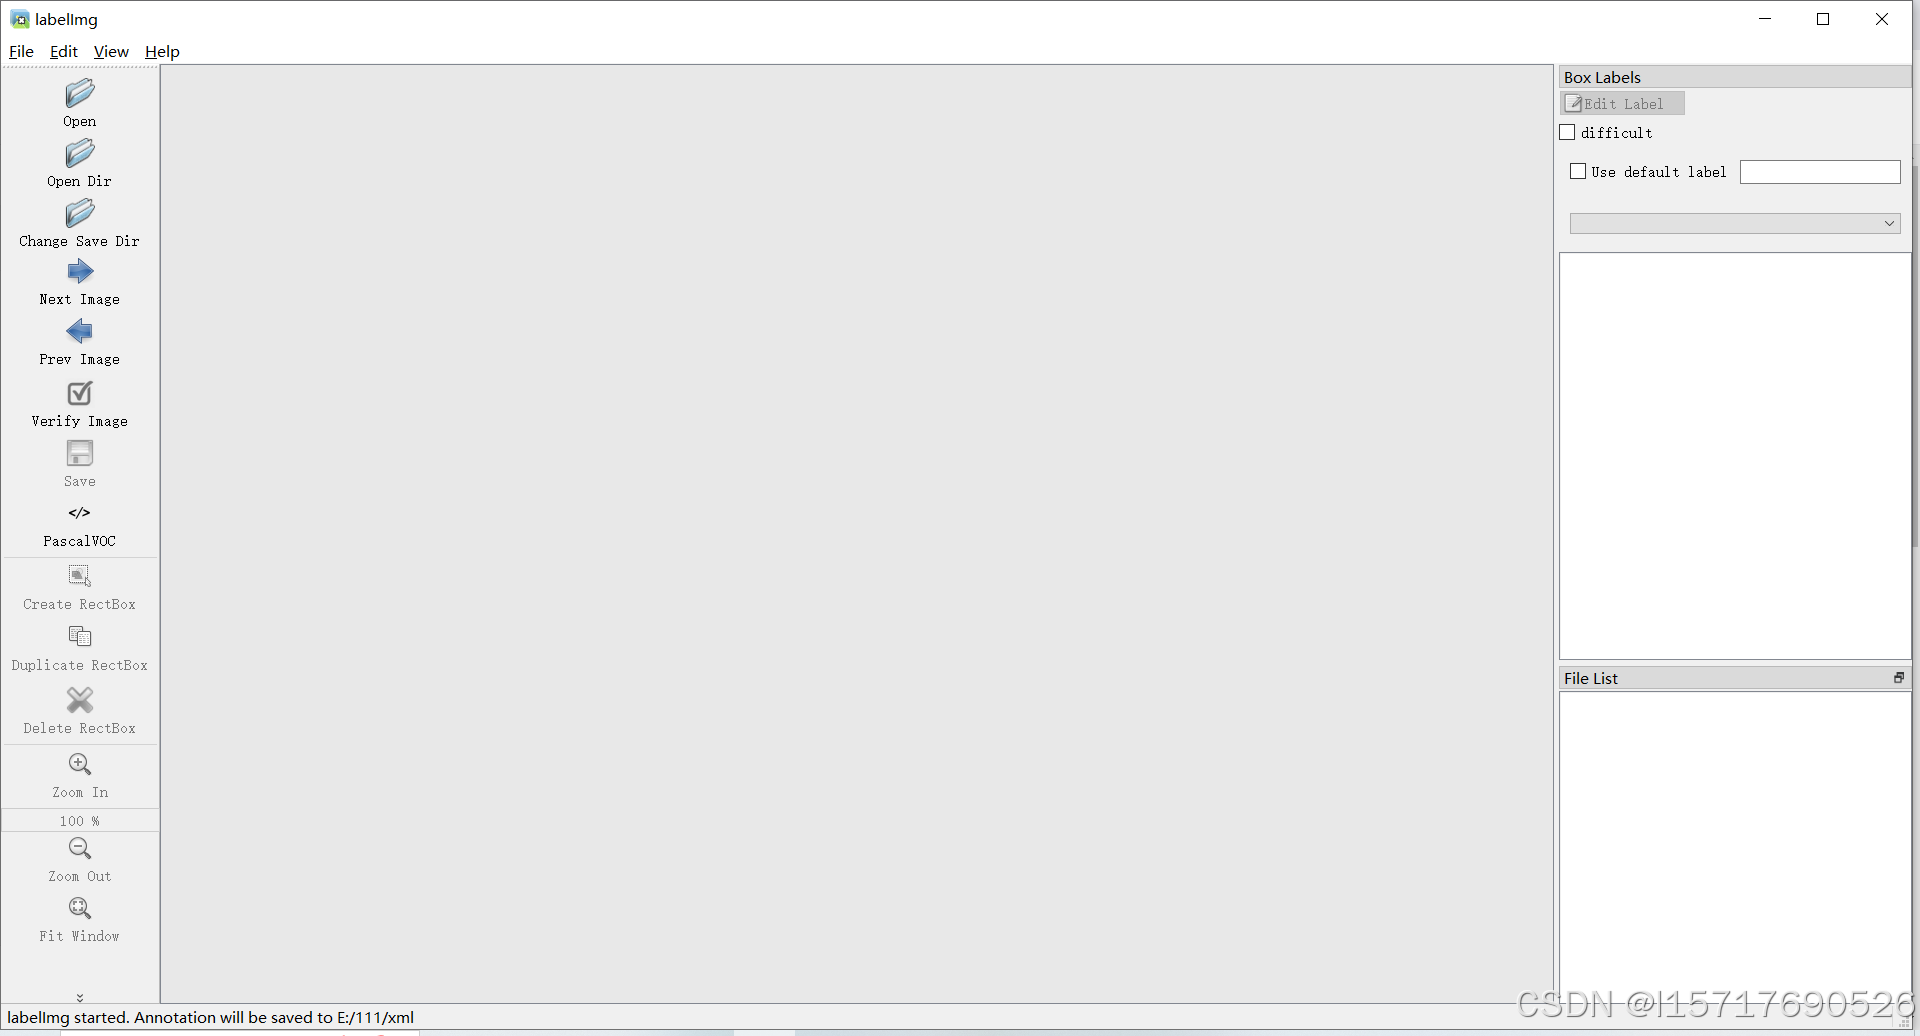
然后标注自己的数据集就行。
1.2 数据集划分
使用以下代码可以按照比例划分自己的数据集
import os
import random
import shutil

# 设置路径
image_folder = ''  # 图像文件夹路径
label_folder = ''  # 标签文件夹路径
train_image_folder = ''  # 训练集图像文件夹路径
train_label_folder = ''  # 训练集标签文件夹路径
val_image_folder = ''  # 验证集图像文件夹路径
val_label_folder = ''  # 验证集标签文件夹路径

# 创建训练集和验证集文件夹
os.makedirs(train_image_folder, exist_ok=True)
os.makedirs(train_label_folder, exist_ok=True)
os.makedirs(val_image_folder, exist_ok=True)
os.makedirs(val_label_folder, exist_ok=True)

# 获取所有的图像文件(假设图像是.jpg 格式,标签是 .txt 格式)
image_files = [f for f in os.listdir(image_folder) if f.endswith('.jpg')]
label_files = [f for f in os.listdir(label_folder) if f.endswith('.txt')]

# 确保每个图像都有一个对应的标签
assert len(image_files) == len(label_files), "图像和标签数量不匹配"

# 打乱文件顺序
data = list(zip(image_files, label_files))
random.shuffle(data)

# 按照 9:1 划分数据集
train_size = int(0.9 * len(data))
train_data = data[:train_size]
val_data = data[train_size:]

# 复制文件到训练集和验证集目录
for image, label in train_data:
    shutil.copy(os.path.join(image_folder, image), os.path.join(train_image_folder, image))
    shutil.copy(os.path.join(label_folder, label), os.path.join(train_label_folder, label))

for image, label in val_data:
    shutil.copy(os.path.join(image_folder, image), os.path.join(val_image_folder, image))
    shutil.copy(os.path.join(label_folder, label), os.path.join(val_label_folder, label))

print(f"数据集划分完成:{len(train_data)} 张图像用于训练,{len(val_data)} 张图像用于验证。")只需要输入好自己数据集的路径就可以开始划分数据集了,到此数据集准备完毕。
二、训练yolov8的权重
2.1 修改训练用的yaml文件
在训练yolov8权重的时候一定要注意将类别信息改成自己的信息
将代码里面的nc改成自己的真实类别
# Ultralytics YOLO 🚀, AGPL-3.0 license
# YOLOv8 object detection model with P3-P5 outputs. For Usage examples see https://docs.ultralytics.com/tasks/detect

# Parameters
nc: 80 # number of classes
scales: # model compound scaling constants, i.e. 'model=yolov8n.yaml' will call yolov8.yaml with scale 'n'
  # [depth, width, max_channels]
  n: [0.33, 0.25, 1024] # YOLOv8n summary: 225 layers,  3157200 parameters,  3157184 gradients,   8.9 GFLOPs

# YOLOv8.0n backbone
backbone:
  # [from, repeats, module, args]
  - [-1, 1, Conv, [64, 3, 2]] # 0-P1/2
  - [-1, 1, Conv, [128, 3, 2]] # 1-P2/4
  - [-1, 3, C2f, [128, True]]
  - [-1, 1, Conv, [256, 3, 2]] # 3-P3/8
  - [-1, 6, C2f, [256, True]]
  - [-1, 1, Conv, [512, 3, 2]] # 5-P4/16
  - [-1, 6, C2f, [512, True]]
  - [-1, 1, Conv, [1024, 3, 2]] # 7-P5/32
  - [-1, 3, C2f, [1024, True]]
  - [-1, 1, SPPF, [1024, 5]] # 9

# YOLOv8.0n head
head:
  - [-1, 1, nn.Upsample, [None, 2, "nearest"]]
  - [[-1, 6], 1, Concat, [1]] # cat backbone P4
  - [-1, 3, C2f, [512]] # 12

  - [-1, 1, nn.Upsample, [None, 2, "nearest"]]
  - [[-1, 4], 1, Concat, [1]] # cat backbone P3
  - [-1, 3, C2f, [256]] # 15 (P3/8-small)

  - [-1, 1, Conv, [256, 3, 2]]
  - [[-1, 12], 1, Concat, [1]] # cat head P4
  - [-1, 3, C2f, [512]] # 18 (P4/16-medium)

  - [-1, 1, Conv, [512, 3, 2]]
  - [[-1, 9], 1, Concat, [1]] # cat head P5
  - [-1, 3, C2f, [1024]] # 21 (P5/32-large)

  - [[15, 18, 21], 1, Detect, [nc]] # Detect(P3, P4, P5)
2.2 创建yaml文件
自己创建一个.yaml文件用于自己数据集的路径选择
# Ultralytics YOLO 🚀, AGPL-3.0 license
# COCO8 dataset (first 8 images from COCO train2017) by Ultralytics
# Documentation: https://docs.ultralytics.com/datasets/detect/coco8/
# Example usage: yolo train data=coco8.yaml
# parent
# ├── ultralytics
# └── datasets
#     └── coco8  ← downloads here (1 MB)

# Train/val/test sets as 1) dir: path/to/imgs, 2) file: path/to/imgs.txt, or 3) list: [path/to/imgs1, path/to/imgs2, ..]
path: ../datasets/coco8 # dataset root dir
train: images/train # train images (relative to 'path') 4 images
val: images/val # val images (relative to 'path') 4 images
test: # test images (optional)

# Classes
names:
  0: person
  1: bicycle
  2: car
  3: motorcycle
  4: airplane
  5: bus
  6: train
  7: truck
  8: boat
  9: traffic light
  10: fire hydrant
  11: stop sign
  12: parking meter
  13: bench
  14: bird
  15: cat
  16: dog
  17: horse
  18: sheep
  19: cow
  20: elephant
  21: bear
  22: zebra
  23: giraffe
  24: backpack
  25: umbrella
  26: handbag
  27: tie
  28: suitcase
  29: frisbee
  30: skis
  31: snowboard
  32: sports ball
  33: kite
  34: baseball bat
  35: baseball glove
  36: skateboard
  37: surfboard
  38: tennis racket
  39: bottle
  40: wine glass
  41: cup
  42: fork
  43: knife
  44: spoon
  45: bowl
  46: banana
  47: apple
  48: sandwich
  49: orange
  50: broccoli
  51: carrot
  52: hot dog
  53: pizza
  54: donut
  55: cake
  56: chair
  57: couch
  58: potted plant
  59: bed
  60: dining table
  61: toilet
  62: tv
  63: laptop
  64: mouse
  65: remote
  66: keyboard
  67: cell phone
  68: microwave
  69: oven
  70: toaster
  71: sink
  72: refrigerator
  73: book
  74: clock
  75: vase
  76: scissors
  77: teddy bear
  78: hair drier
  79: toothbrush

# Download script/URL (optional)
download: https://github.com/ultralytics/assets/releases/download/v0.0.0/coco8.zip
把类比什么的改成自己的数据集,数据集的路径也要替换自己的路径。
2.3 创建一个train.py文件
import warnings
warnings.filterwarnings('ignore')
from ultralytics import YOLOv8

if __name__ == '__main__':
    model = YOLOv8('yolov8n.yaml')
   #  model.load('yolov8n.pt') # loading pretrain weights
    model.train(data='创建的.yaml',
                cache=False,
                imgsz=640,
                epochs=100,
                batch=32,
                close_mosaic=0,
                workers=8,
                device='0',
                optimizer='SGD', # using SGD
                project='runs/train',
                name='exp',
                )
2.4 训练数据集
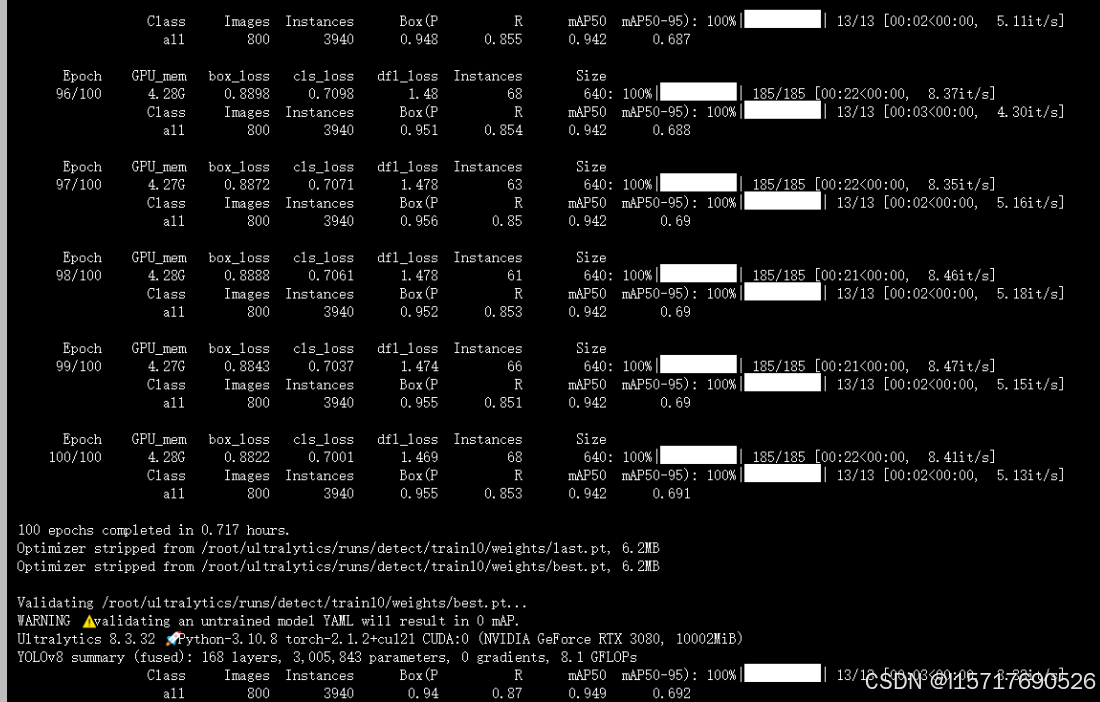
修改完之后,运行train.py
就可以训练自己的数据集了,训练完之后得到自己的权重文件。
三、deepsortsort多目标跟踪
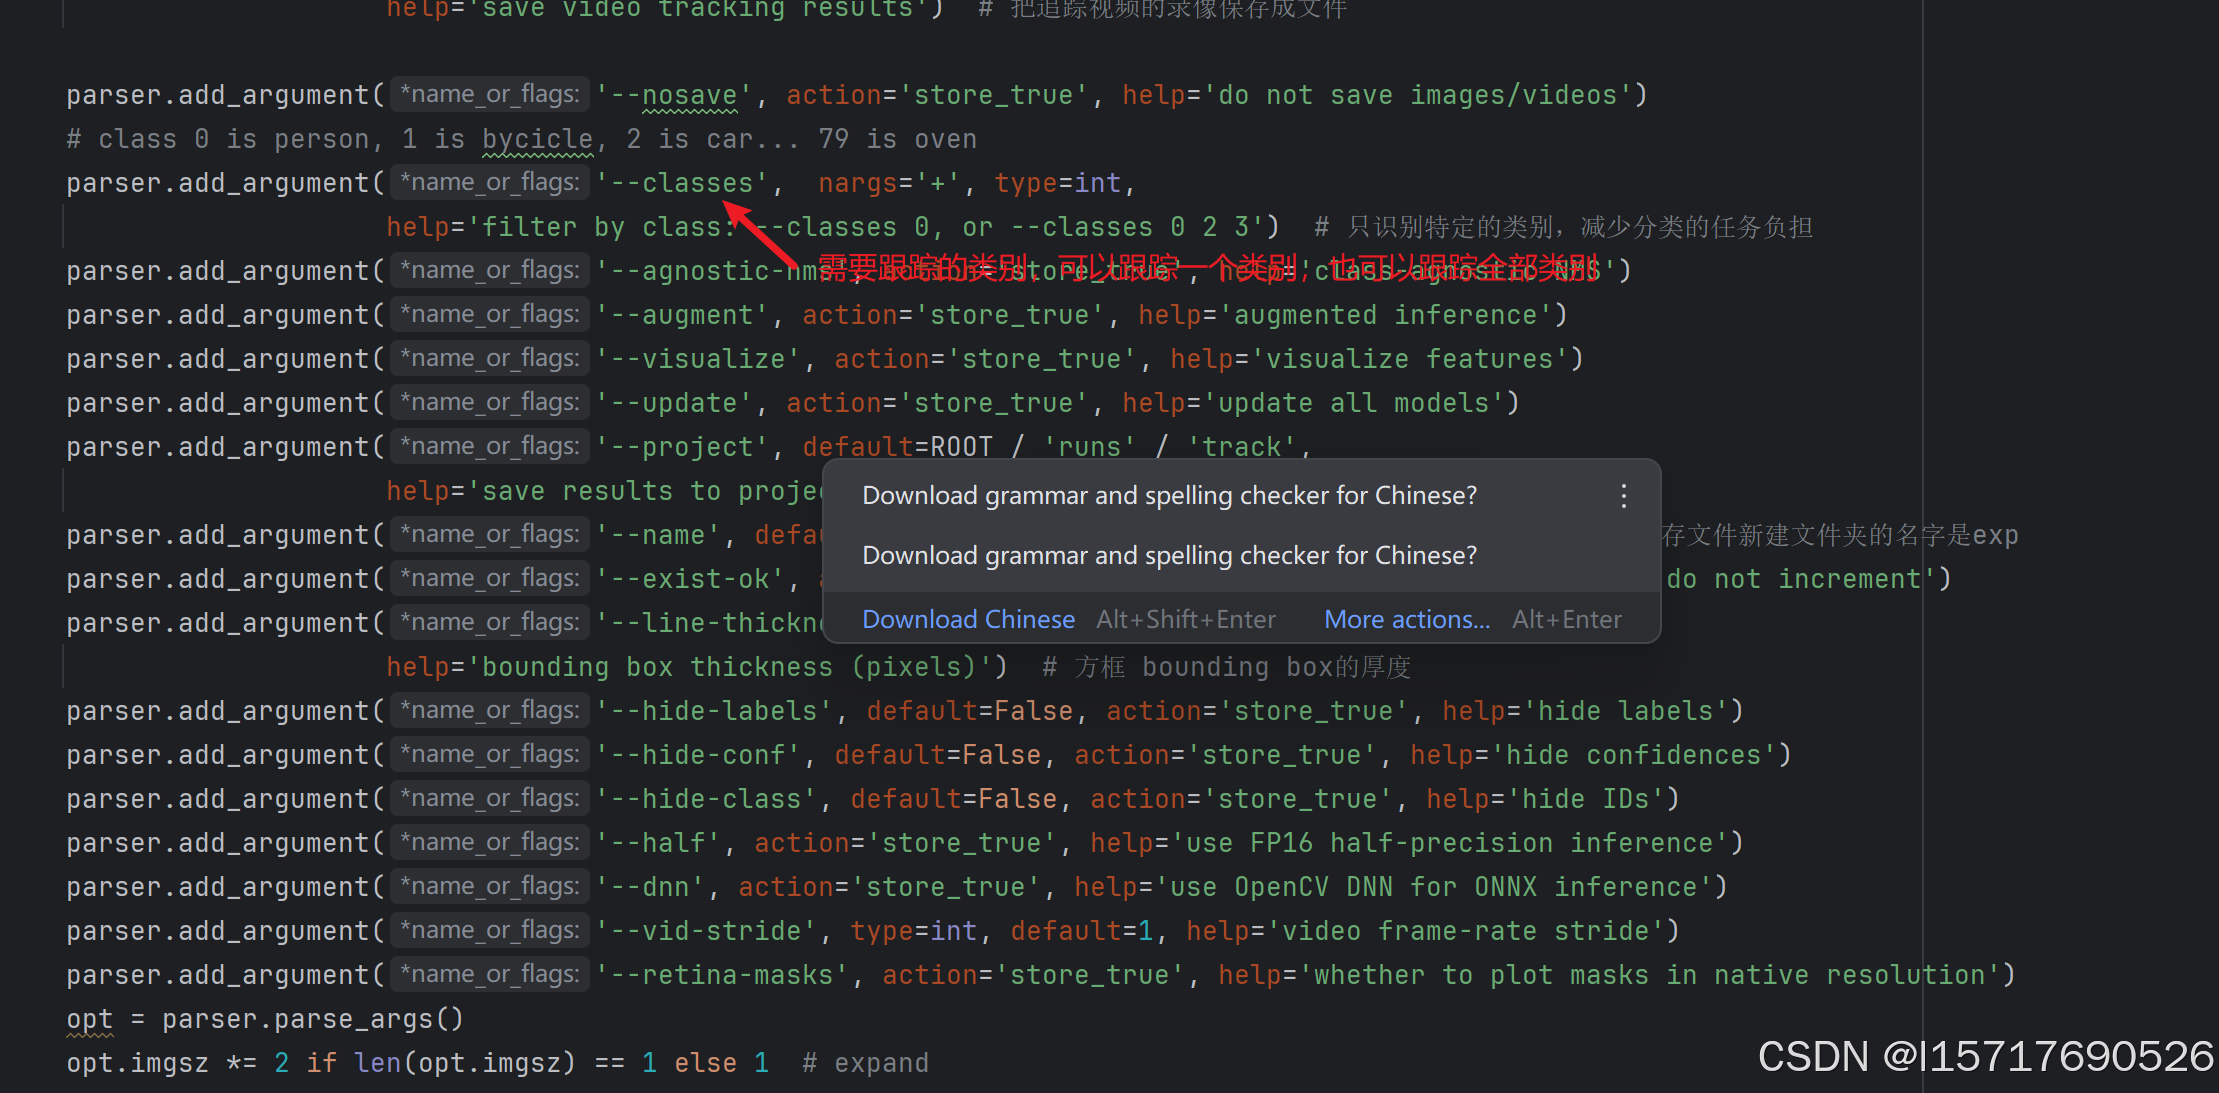
3.1 修改完track.py里面的参数
然后运行文件就行
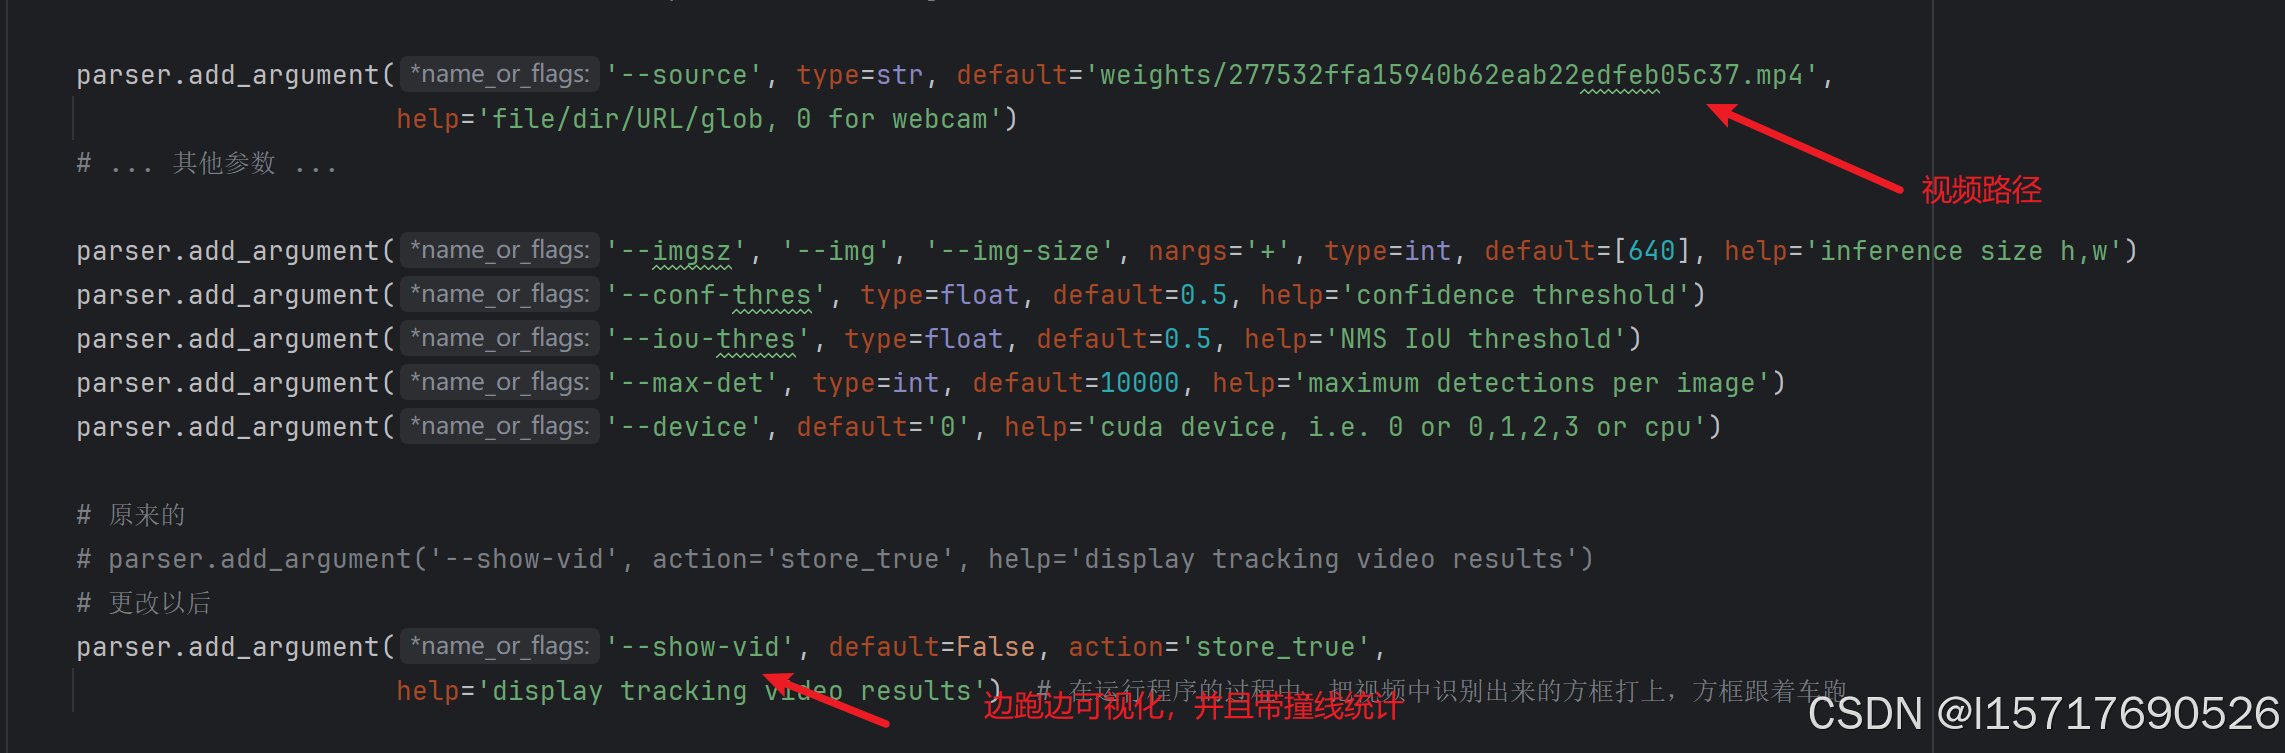
跟踪可视化结果在runs/track里面
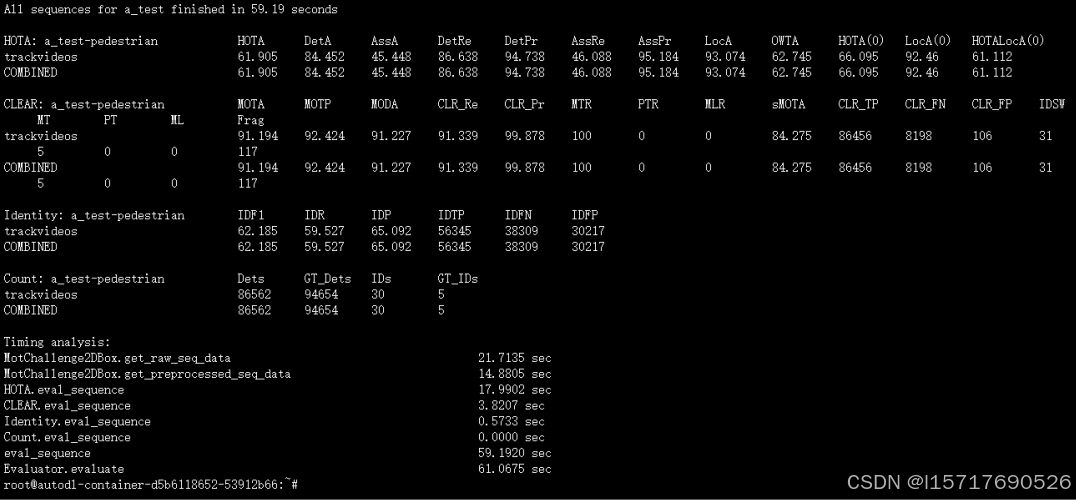
3.2 得到用于评估的跟踪文本
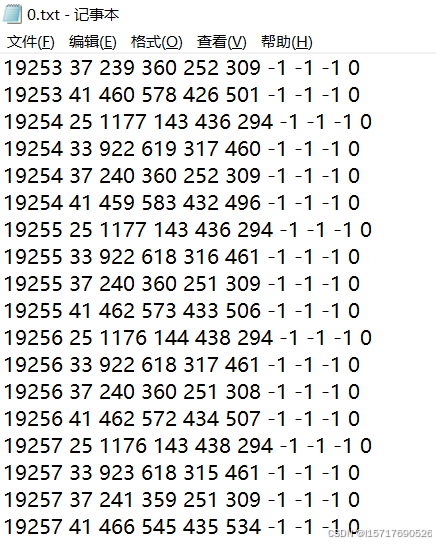
3.3 得到跟踪的结果


 2613
2613

 被折叠的 条评论
为什么被折叠?
被折叠的 条评论
为什么被折叠?
 到【灌水乐园】发言


