


目录
前言
这里记录定制产品RK3568,RK3588,文件系统rootfs的过程。文件系统制作比较麻烦,有很多的安装包,还有很多驱动,但是很影响系统的性能和产品外观体验。
这里总结一下制作ubuntu 18.04文件系统的方法,使用ubuntu官网提供的base系统,制作自己的rootfs系统。
一、为什么定制?
RK3568,RK3588的SDK里面,ubuntu,debian 文件系统都是厂商提供好的,内置的内容可能不适合产品需要,我们可以自己定制文件系统,灵活满足产品界面和性能的差异。
二、定制步骤
1.准备工作
安装 qemu, 在 Linux PC 主机上安装模拟器:
sudo apt-get install qemu-user-static
2.下载 Ubuntu base
RK3568 Ubuntu 根文件系统是基于 Ubuntu base 18.04 来创建的。20,22的都可以。
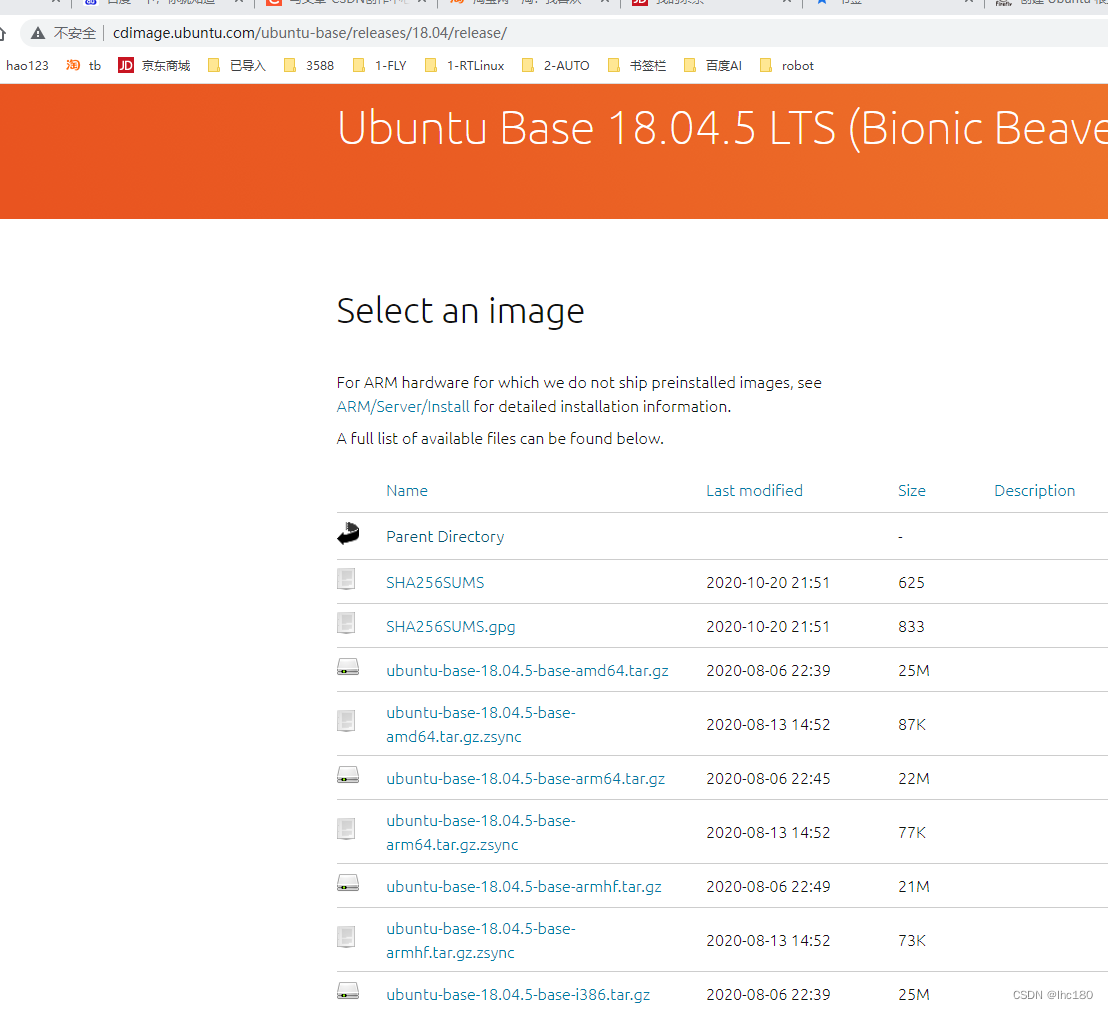
用户可以到 ubuntu 官网 下载,选择下载 uubuntu-base-18.04.5-base-arm64.tar.gz。
这是官网界面,有很多格式,这里选择 arm64,与RK3568 CPU一致,其他的
mkdir  ub18
 cd    ub18
 mkdir  ub18-rootfs
wget http://cdimage.ubuntu.com/ubuntu-base/releases/18.04/release/ubuntu-base-18.04.5-base-amd64.tar.gzls .
ubuntu-base-18.04-base-arm64.tar.gz ub18-rootfs
sudo tar -xpf ubuntu-base-18.04-base-arm64.tar.gz -C ub18-rootfs
这里一定要在普通用户下用sudo,对这个ub18-rootfs文件系统里面的内容进行保护,防止随便更改
$ sudo cp /usr/bin/qemu-aarch64-staticub18-rootfs/usr/bin
$ sudo cp -b /etc/resolv.confub18-rootfs/etc/
在这里我们要注意的是我们针对arm64的qemu-user-static,需要文件是qemu-aarch64-staticresolv.conf 是复制PC的DNS的地址文件,方便上网
3.进入rootfs的目录:
直接进入ub18-rootfs是不能用的,不能上网也不能安装,需要按这个方法:
写一个简单的mount-rootfs.sh脚本mount及unmount
#!/bin/bash
#

#这几个目录都是链接;
function mnt() {
    echo "MOUNTING"
    sudo mount -t proc /proc ${2}proc
    sudo mount -t sysfs /sys ${2}sys
    sudo mount -o bind /dev ${2}dev
    sudo mount -o bind /dev/pts ${2}dev/pts
    sudo chroot ${2}
}

function umnt() {
    echo "UNMOUNTING"
    sudo umount ${2}proc
    sudo umount ${2}sys
    sudo umount ${2}dev/pts
    sudo umount ${2}dev

}

#使用参数要 -m;
#参数$2 要带 rootf目录/
if [ "$1" == "-m" ] && [ -n "$2" ] ;
then
    mnt $1 $2


#使用参数 -u 是退出mount;
elif [ "$1" == "-u" ] && [ -n "$2" ];
then
    umnt $1 $2
else

#不带参数,显示帮助提示;
    echo ""
    echo "Either 1'st, 2'nd or both parameters were missing"
    echo ""
    echo "1'st parameter can be one of these: -m(mount) OR -u(umount)"
    echo "2'nd parameter is the full path of rootfs directory(with trailing '/')"
    echo ""
    echo "For example: ch-mount -m /media/sdcard/"
    echo ""
    echo 1st parameter : ${1}
    echo 2nd parameter : ${2}
fi
进入rootfs:这个至少执行一次,使目录mount成功
sudo mount-rootfs.sh -m ub18-rootfs
或者
sudo chroot ub18-rootfs
4.更新软件
使用下面的源:也可以找科大,网易的;注意是ubuntu-ports 目录
华为源:
sudo wget -O /etc/apt/sources.list https://repo.huaweicloud.com/repository/conf/Ubuntu-Ports-bionic.list清华源;
自己手工替换下面的内容到 /etc/apt/sources.list
# 默认注释了源码镜像以提高 apt update 速度,如有需要可自行取消注释
deb https://mirrors.tuna.tsinghua.edu.cn/ubuntu-ports/ bionic main restricted universe multiverse
# deb-src https://mirrors.tuna.tsinghua.edu.cn/ubuntu-ports/ bionic main restricted universe multiverse
deb https://mirrors.tuna.tsinghua.edu.cn/ubuntu-ports/ bionic-updates main restricted universe multiverse
# deb-src https://mirrors.tuna.tsinghua.edu.cn/ubuntu-ports/ bionic-updates main restricted universe multiverse
deb https://mirrors.tuna.tsinghua.edu.cn/ubuntu-ports/ bionic-backports main restricted universe multiverse
# deb-src https://mirrors.tuna.tsinghua.edu.cn/ubuntu-ports/ bionic-backports main restricted universe multiverse
deb https://mirrors.tuna.tsinghua.edu.cn/ubuntu-ports/ bionic-security main restricted universe multiverse
# deb-src https://mirrors.tuna.tsinghua.edu.cn/ubuntu-ports/ bionic-security main restricted universe multiverse
5.安装系统软件
下面的软件是必须的
sudo apt-get install dialog language-pack-en-base rsyslog
sudo apt-get install tzdata
#网络功能
sudo apt-get install ssh net-tools ethtool ifupdown network-manager apt-utils#网络功能
sudo apt-get install wireless-tools htop
下面是可选的
sudo apt-get install git build-essential gcc g++
#GUI界面
sudo apt-get install lxde
sudo apt-get install xfce4
sudo apt-get install ubuntu-desktop
sudo apt-get install xubuntu
下面是 不同的桌面环境,ubuntu桌面有5种不同风格的版本,我们ARM嵌入式比较适合xubuntu,lubuntu;系统精简,性能有限。大家根据不同的需求定制自己的界面。
具体详细参考 Ubuntu、kubuntu、xUbuntu、lubuntu等版本区别及界面样式
6 安装各种桌面(可选)
按需ubuntu各种桌面环境,通过systemd选择开机启动的登录管理器来登录对应的桌面。
安装Lubuntu的定制LXDE
sudo apt-get install lubuntu-desktop
安装xfce桌面环境
xfce 是一款轻量级桌面.其登录管理器为xdm,需要先安装xdn。
apt-get install -y xdm
安装Xubuntu桌面环境
apt-get install -y --no-install-recommends xubuntu-desktop

7.基础系统改造
添加用户
# useradd -s '/bin/bash' -m -G adm,sudo test
# passwd test
# passwd root
设置主机名
# echo 'ub18.ROS' > /etc/hostname
设置自动更新DNS
# apt-get install resolvconf
添加主机入口到/etc/hosts:
echo “127.0.0.1 localhost” >>/etc/hosts
可选:启动serial console登录
我们可以创建/etc/init/ttyS0.conf文件,并写入如下的内容:
start on stopped rc or RUNLEVEL=[12345]
stop on runlevel [!12345]
respawn
exec /sbin/getty -L 115200 ttyS0 vt102
在host中可以同如下的命令来登录:
$ sudo start ttyS0
可选:配置串口调试服务
sudo cp etc/init/tty1.conf UB18/etc/init/ttyS2.conf
sudo vi UB18/etc/init/ttyS2.conf
sudo vi UB18/etc/rc.local 加上start ttyS2
可选:以太网配置;设置固定MAC
sudo vi etc/network/interfaces
添加:
auto eth0
iface eth0 inet dhcp hwaddress ether 7e:8d:a5:3a:ce:9e
8.添加产品定制内容
不同产品有不同的驱动,还有一些企业demo文件,这里单独处理一个用户分区,
sudo mkdir ub18/oem
sudo mount ub18/dev/nvme0 /oem
cp -rf demo ub18/oem/
cp -rf gpu-driver ub18/oem/driver
添加自启动
在/etc/profile 添加自启动脚本
./runAPP.sh &
./runAPP.sh内容如下:
#!bin/bash
#runAPP.sh 启动客户定制程序
/home/user/runDemo &
退出rootfs
root@user:/# exit
9.系统打包成rootfs
user@user:~$ ./mount-rootfs.sh -u ub18-rootfs

#使用dd指令制作空的固件容器ub18-fs-rom.img 6G
#count=6000 这里是镜像大小,你根据自己需要修改,不用这么大
$ dd if=/dev/zero of=ub18-fs-rom.img bs=1M count=6000
$ sudo  mkfs.ext4  ub18-fs-rom.img

#将arm64文件系统内容制作到ub18-fs-rom.img
$ mkdir  ub18-fs-ok

$ sudo mount ub18-fs-rom.img  ub18-fs-ok/
$ sudo cp -rfp ub18-rootfs/*  ub18-fs-ok/
$ sudo umount ub18-fs-ok/

$ e2fsck -p -f ub18-fs-rom.img
$ resize2fs -M ub18-fs-rom.img
系统制作完成,可以使用 RKDevTool_Release,进行分区烧写了,直接替换原有的rootfs。
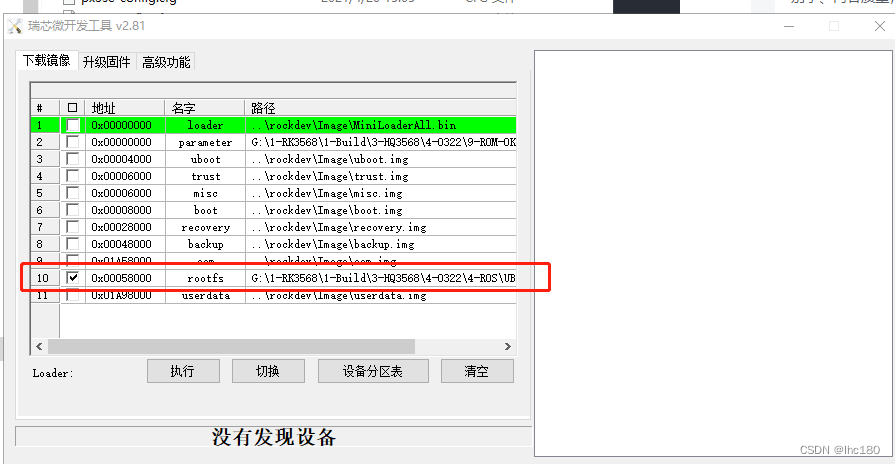
也可以在系统编译时打包,替换SDK目录下的ubuntu/ubuntu-rootfs.img 文件。
用编译命令./build.sh 直接打包一键刷机。
10.自动测试脚本
进行系统运行测试
这里让机器运行10000次,测试bug,记录日志

在/etc/profile 添加自启动脚本

./runTEST.sh &

./runTEST.sh内容如下:

#!bin/bash

echo “test running bug”

sleep 40

#//创建/etc/stop 就停止测试

if [ !-f  /etc/stop ];then

        echo "reboot"

         reboot

else

        echo "stop reboot"

fi
11.错误处理
1 apt无法安装,需要按照mount-rootfs脚本运行一次
总结
这里用RK3568进行了举例,制作rootfs的方法,可以极大节省时间,定制的软件系统极其灵活。
其他的产品,RK3588,RK3288方法类似。


 3047
3047


 被折叠的 条评论
为什么被折叠?
被折叠的 条评论
为什么被折叠?
 到【灌水乐园】发言


