


中断是什么?
就是程序运行过程中,打断,执行打断的东西,然后继续运行原来的程序
例如
主程序 做作业
{
不断做作业(循环)
{
正在做。。。。
当(肚子饿)
}
}
肚子饿了
{
吃饭
}
实验效果
当我按下按键,改变了PIN 2的电平,触发中断,执行中断的程序
BOM表
Arduino Uno *1
按键 *1
跳线若干
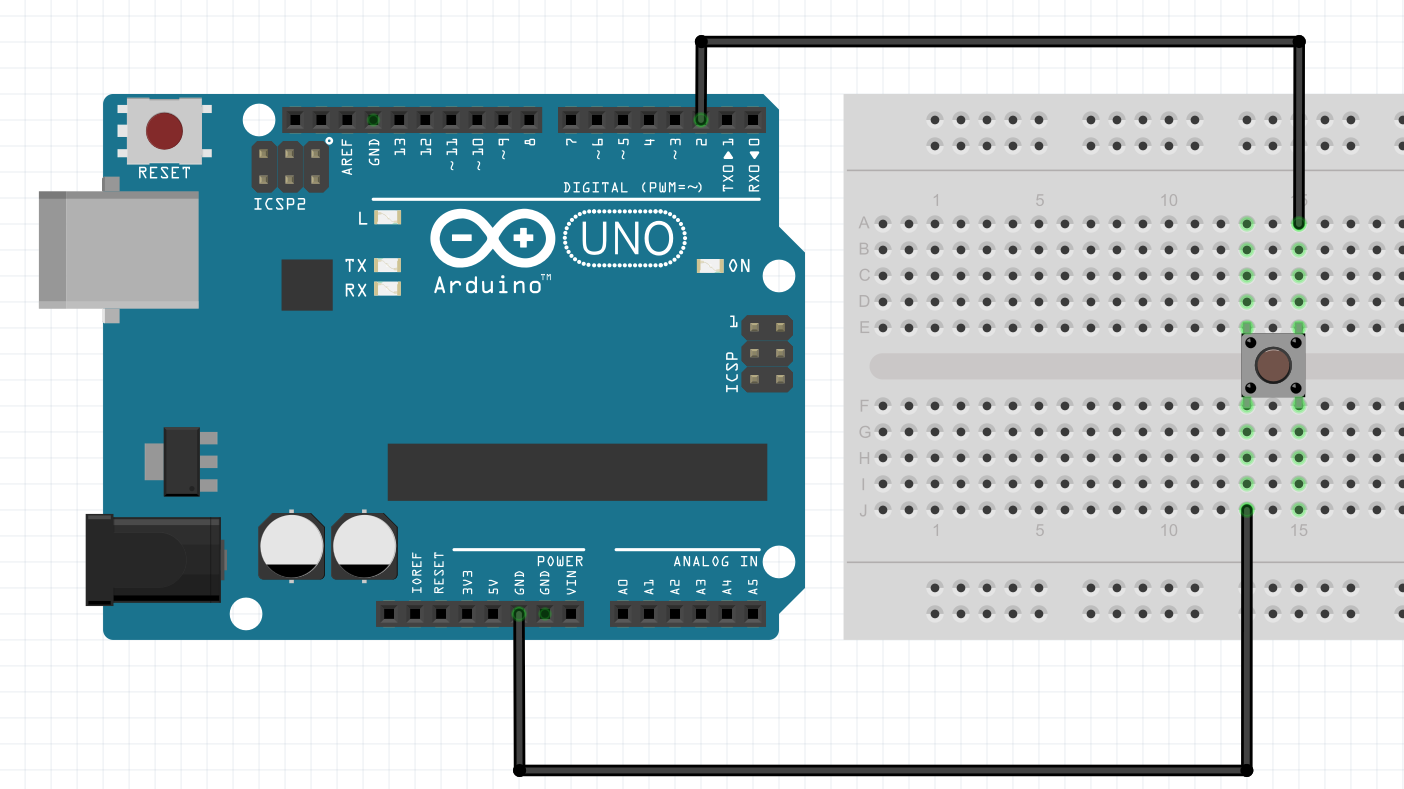
接线
程序
官方提供的程序
const byte ledPin = 13;  //定义LED PIN为 IO 13,即板载的LED灯
const byte interruptPin = 2;   //定义 用于中断的PIN 为 IO 2
volatile byte state = LOW;    //设置默认状态为LOW 意思指灯上电的时候是熄灭状态

void setup() {
  pinMode(ledPin, OUTPUT);        //设置ledPin 为输出状态
  pinMode(interruptPin, INPUT_PULLUP);  //设置interruptPin 为输入模式并且拉高
  attachInterrupt(digitalPinToInterrupt(interruptPin), blink, CHANGE);   //用attachInterrupt设置触发中断的指令
}

void loop() {   // 在程序不断循环当中,只要IO 2的电平发生改变就会触发中断的程序
  digitalWrite(ledPin, state);
}

void blink() {   //中断时执行的的程序
  state = !state;   // 反转当前状态
}
程序实现思路讲解
主要在void setup{} 程序里 使用attachInterrupt()函数添加中断设置
attachInterrupt(digitalPinToInterrupt(interruptPin), blink, CHANGE);
//                             pin                    ISR    MODE
// 设置 pin 2 为触发引脚 blink为中断时执行的程序 模式为CHANGE 当引脚电平发生改变时触发
Syntax 句法
| attachInterrupt(digitalPinToInterrupt(pin), ISR, mode); 本例子使用的句法 | (recommended)推荐本句法使用 |
| attachInterrupt(interrupt, ISR, mode); | (not recommended) 不推荐 |
| attachInterrupt(pin, ISR, mode) ; | (not recommended Arduino Due, Zero,MKR1000, 101 only) 不推荐 |
Parameters
| interrupt: 中断 | the number of the interrupt (int) | |
| pin: 引脚 | the pin number | (Arduino Due, Zero, MKR1000 only) |
| ISR: 调用的函数 | the ISR to call when the interrupt occurs; this function must take no parameters and return nothing. This function is sometimes referred to as aninterrupt service routine. | |
| mode: 中断模式 | defines when the interrupt should be triggered. Four constants are predefined as valid values:
| |
| The Due board allows also: | ||
| (Arduino Due, Zero, MKR1000 only) 仅Due, Zero, MKR1000 适用 |
还有中断的其他函数
digitalPinToInterrupt()
Interrupt() 可以被中断的代码
noInterrupt() 不可以被中断的代码


 680
680


 被折叠的 条评论
为什么被折叠?
被折叠的 条评论
为什么被折叠?
 到【灌水乐园】发言


