


cudnn的配置
更新安装cudnn7.4+cuda10
https://medium.com/@zhanwenchen/install-cuda-and-cudnn-for-tensorflow-gpu-on-ubuntu-79306e4ac04e
以下是网站截图:
从NVIDIA下载cudnn的文件,仍然是把include和lib64中的文件复制到本地的/usr/local/cuda10.0/下,这里的步骤同下面的内容,但是在测试./mnistCUDNN时,刚开始提示找不到:
./mnistCUDNN: error while loading shared libraries: libcudart.so.10.0: cannot open shared object file: No such file or directory
解决方案是:
export PATH=$PATH:/usr/local/cuda-10.0/bin
export LD_LIBRARY_PATH=$LD_LIBRARY_PATH:/usr/local/cuda-10.0/lib64
export LIBRARY_PATH=$LIBRARY_PATH:/usr/local/cuda-10.0/lib64

把以上三句话加进 /etc/profile 中
然后
source /etc/profile

~/Library/cudnn/cudnn_samples_v7/mnistCUDNN$ ./mnistCUDNN cudnnGetVersion() : 7402 , CUDNN_VERSION from cudnn.h : 7402 (7.4.2)
Host compiler version : GCC 5.4.0
There are 1 CUDA capable devices on your machine :
device 0 : sms 13  Capabilities 5.2, SmClock 1316.5 Mhz, MemSize (Mb) 4041, MemClock 3505.0 Mhz, Ecc=0, boardGroupID=0
Using device 0

Testing half precision (math in single precision)
Loading image data/one_28x28.pgm
Performing forward propagation ...
Testing cudnnGetConvolutionForwardAlgorithm ...
Fastest algorithm is Algo 1
Testing cudnnFindConvolutionForwardAlgorithm ...
^^^^ CUDNN_STATUS_SUCCESS for Algo 0: 0.017536 time requiring 0 memory
^^^^ CUDNN_STATUS_SUCCESS for Algo 2: 0.043168 time requiring 28800 memory
^^^^ CUDNN_STATUS_SUCCESS for Algo 1: 0.051296 time requiring 3464 memory
^^^^ CUDNN_STATUS_SUCCESS for Algo 4: 0.095904 time requiring 207360 memory
^^^^ CUDNN_STATUS_SUCCESS for Algo 7: 0.145216 time requiring 2057744 memory
Resulting weights from Softmax:
0.0000001 1.0000000 0.0000001 0.0000000 0.0000563 0.0000001 0.0000012 0.0000017 0.0000010 0.0000001
Loading image data/three_28x28.pgm
Performing forward propagation ...
Resulting weights from Softmax:
0.0000000 0.0000000 0.0000000 1.0000000 0.0000000 0.0000714 0.0000000 0.0000000 0.0000000 0.0000000
Loading image data/five_28x28.pgm
Performing forward propagation ...
Resulting weights from Softmax:
0.0000000 0.0000008 0.0000000 0.0000002 0.0000000 1.0000000 0.0000154 0.0000000 0.0000012 0.0000006

Result of classification: 1 3 5

Test passed!

cuDNN是GPU加速计算深层神经网络的库。
在cudnn下载链接和英伟达官网可以下载不同版本的cudnn;
因为之前主机上安装好了cuda8.0,所以我这里下载的是cudnn5.0
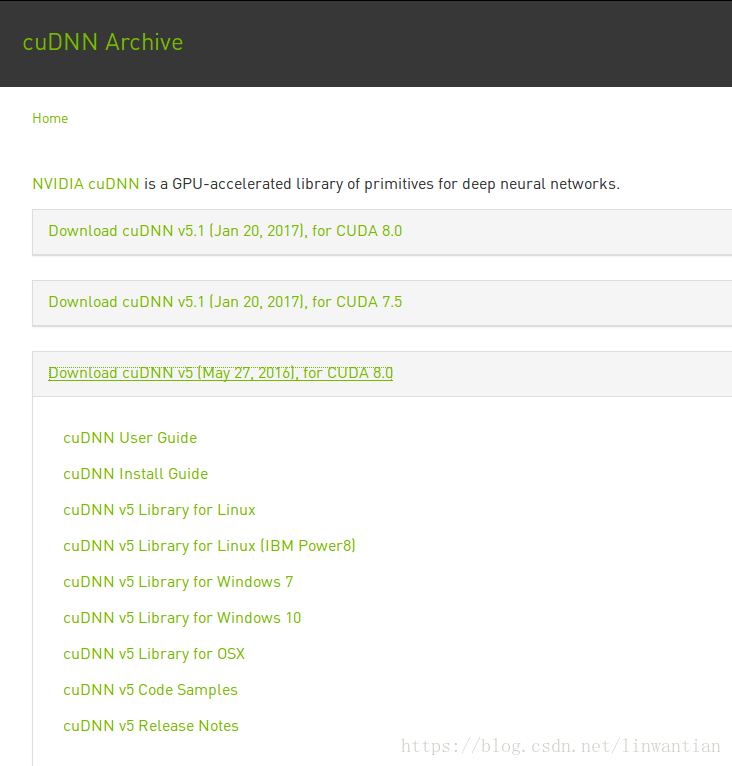
这是官网的下载cudnn的说明文件:
PREREQUISITES

    CUDA 8.0 and a GPU of compute capability 3.0 or higher are required.
    #必备的一些条件

ALL PLATFORMS

    Extract the cuDNN archive to a directory of your choice, referred to below as <installpath>.
    #将cuDNN压缩文件解压缩到您选择的目录中,以下称为<安装路径>。
    Then follow the platform-specific instructions as follows.

LINUX

    cd <installpath>
    export LD_LIBRARY_PATH=`pwd`:$LD_LIBRARY_PATH
    #pwd是输出当前目录
    #这里是添加环境变量

    Add <installpath> to your build and link process by adding -I<installpath> to your compile
    line and -L<installpath> -lcudnn to your link line.
    #通过将-I 添加到您的编译行并将-L<安装路径> -lcudnn添加到您的链接行,将<安装路径>添加到您的构建和链接过程中。
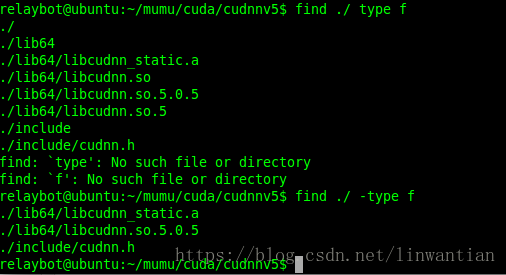
下载文件:
文件夹下所有文件为:
将cudnn文件夹下面的文件复制到cuda文件夹中:

sudo cp cuda/include/cudnn.h /usr/local/cuda/include/
sudo cp cuda/lib64/libcudnn* /usr/local/cuda/lib64/
sudo chmod a+r /usr/local/cuda/include/cudnn.h
sudo chmod a+r /usr/local/cuda/lib64/libcudnn*
#下面是建立软链接关系
relaybot@ubuntu:/usr/local/cuda$ sudo ln -sf lib64/libcudnn.so.5.0.5 lib64/libcudnn.so.5
relaybot@ubuntu:/usr/local/cuda$ sudo ln -sf lib64/libcudnn.so.5 lib64/libcudnn.so
relaybot@ubuntu:/usr/local/cuda$ sudo ldcongig #更新一下
(libcudnn.so.5.0.5这些文件的版本与你下载的文件版本要对应好,按目录找到对应文件看一下版本对不对就行了)
我是这样子将文件复制到cuda中,因为cuda的文件夹被链接到环境变量中过,不过后来想到官网的guide其实更加好,直接将cudnn的文件夹链接复制到环境变量中,这样编译自己的代码时就能自动找到cudnn.h的头文件和libcudnn的动态链接文件。
所以推荐以后的同学在需要cudnn的时候这样子:
sudo gedit /etc/profile
#这个文件里我的已经有:
export PATH=/usr/local/cuda-8.0/bin:$PATH
export LD_LIBRARY_PATH=/usr/local/cuda-8.0/lib64:$LD_LIBRARY_PATH
#再添加一个:
export LD_LIBRARY_PATH=<cudnn---installpath>:$LD_LIBRARY_PATH
##caffe的安装和配置
1. 下载BVLC/caffe github上有源码直接下载即可;
2. 进入caffe目录,修改Makefile.config.example文件
## Refer to http://caffe.berkeleyvision.org/installation.html
# Contributions simplifying and improving our build system are welcome!

# cuDNN acceleration switch (uncomment to build with cuDNN).
# 去掉注释符号,使用cudnn加速
 USE_CUDNN := 1

# CPU-only switch (uncomment to build without GPU support).
# CPU_ONLY := 1

# uncomment to disable IO dependencies and corresponding data layers
# USE_OPENCV := 0
# USE_LEVELDB := 0
# USE_LMDB := 0

# uncomment to allow MDB_NOLOCK when reading LMDB files (only if necessary)
#	You should not set this flag if you will be reading LMDBs with any
#	possibility of simultaneous read and write
# ALLOW_LMDB_NOLOCK := 1

# Uncomment if you're using OpenCV 3
# opencv版本是2.4.13
# OPENCV_VERSION := 3

# To customize your choice of compiler, uncomment and set the following.
# N.B. the default for Linux is g++ and the default for OSX is clang++
# CUSTOM_CXX := g++

# CUDA directory contains bin/ and lib/ directories that we need.
CUDA_DIR := /usr/local/cuda
# On Ubuntu 14.04, if cuda tools are installed via
# "sudo apt-get install nvidia-cuda-toolkit" then use this instead:
# CUDA_DIR := /usr

# CUDA architecture setting: going with all of them.
# For CUDA < 6.0, comment the *_50 through *_61 lines for compatibility.
# For CUDA < 8.0, comment the *_60 and *_61 lines for compatibility.
# For CUDA >= 9.0, comment the *_20 and *_21 lines for compatibility.
CUDA_ARCH := -gencode arch=compute_20,code=sm_20 \
		-gencode arch=compute_20,code=sm_21 \
		-gencode arch=compute_30,code=sm_30 \
		-gencode arch=compute_35,code=sm_35 \
		-gencode arch=compute_50,code=sm_50 \
		-gencode arch=compute_52,code=sm_52 \
		-gencode arch=compute_60,code=sm_60 \
		-gencode arch=compute_61,code=sm_61 \
		-gencode arch=compute_61,code=compute_61

# BLAS choice:
# atlas for ATLAS (default)
# mkl for MKL
# open for OpenBlas
BLAS := atlas
# Custom (MKL/ATLAS/OpenBLAS) include and lib directories.
# Leave commented to accept the defaults for your choice of BLAS
# (which should work)!
# BLAS_INCLUDE := /path/to/your/blas
# BLAS_LIB := /path/to/your/blas

# Homebrew puts openblas in a directory that is not on the standard search path
# BLAS_INCLUDE := $(shell brew --prefix openblas)/include
# BLAS_LIB := $(shell brew --prefix openblas)/lib

# This is required only if you will compile the matlab interface.
# MATLAB directory should contain the mex binary in /bin.
# MATLAB_DIR := /usr/local
# MATLAB_DIR := /Applications/MATLAB_R2012b.app

# NOTE: this is required only if you will compile the python interface.
# We need to be able to find Python.h and numpy/arrayobject.h.
PYTHON_INCLUDE := /usr/include/python2.7 \
		/usr/lib/python2.7/dist-packages/numpy/core/include
# Anaconda Python distribution is quite popular. Include path:
# Verify anaconda location, sometimes it's in root.
# ANACONDA_HOME := $(HOME)/anaconda
# PYTHON_INCLUDE := $(ANACONDA_HOME)/include \
		# $(ANACONDA_HOME)/include/python2.7 \
		# $(ANACONDA_HOME)/lib/python2.7/site-packages/numpy/core/include

# Uncomment to use Python 3 (default is Python 2)
# PYTHON_LIBRARIES := boost_python3 python3.5m
# PYTHON_INCLUDE := /usr/include/python3.5m \
#                 /usr/lib/python3.5/dist-packages/numpy/core/include

# We need to be able to find libpythonX.X.so or .dylib.
PYTHON_LIB := /usr/lib
# PYTHON_LIB := $(ANACONDA_HOME)/lib

# Homebrew installs numpy in a non standard path (keg only)
# PYTHON_INCLUDE += $(dir $(shell python -c 'import numpy.core; print(numpy.core.__file__)'))/include
# PYTHON_LIB += $(shell brew --prefix numpy)/lib

# Uncomment to support layers written in Python (will link against Python libs)
# 不注释掉以支持python编写的图层
 WITH_PYTHON_LAYER := 1

# Whatever else you find you need goes here.
#INCLUDE_DIRS := $(PYTHON_INCLUDE) /usr/local/include
INCLUDE_DIRS := $(PYTHON_INCLUDE) \
                /usr/local/include \
                /usr/include/x86_64-linux-gnu/python2.7 \
                /usr/include/python2.7
#LIBRARY_DIRS := $(PYTHON_LIB) /usr/local/lib /usr/lib
LIBRARY_DIRS := $(PYTHON_LIB) \
                /usr/local/lib \
                /usr/lib \
                /usr/lib/x86_x64-linux-gnu \

# If Homebrew is installed at a non standard location (for example your home directory) and you use it for general dependencies
# INCLUDE_DIRS += $(shell brew --prefix)/include
# LIBRARY_DIRS += $(shell brew --prefix)/lib

# NCCL acceleration switch (uncomment to build with NCCL)
# https://github.com/NVIDIA/nccl (last tested version: v1.2.3-1+cuda8.0)
# USE_NCCL := 1

# Uncomment to use `pkg-config` to specify OpenCV library paths.
# (Usually not necessary -- OpenCV libraries are normally installed in one of the above $LIBRARY_DIRS.)
# USE_PKG_CONFIG := 1

# N.B. both build and distribute dirs are cleared on `make clean`
BUILD_DIR := build
DISTRIBUTE_DIR := distribute

# Uncomment for debugging. Does not work on OSX due to https://github.com/BVLC/caffe/issues/171
# DEBUG := 1

# The ID of the GPU that 'make runtest' will use to run unit tests.
TEST_GPUID := 0

# enable pretty build (comment to see full commands)
Q ?= @
$ cd ~/caffe
$ cp Makefile.config.example Makefile.config
$ make all -j6
#修改完Makefile.config文件
编译caffe 出现的问题:/usr/bin/ld: cannot find -lcudnn
CXX src/caffe/layers/conv_layer.cpp
CXX src/caffe/layers/dummy_data_layer.cpp
CXX src/caffe/net.cpp
AR -o .build_release/lib/libcaffe.a
LD -o .build_release/lib/libcaffe.so.1.0.0
/usr/bin/ld: cannot find -lcudnn
collect2: error: ld returned 1 exit status
make: *** [.build_release/lib/libcaffe.so.1.0.0] Error 1
relaybot@ubuntu:~/mumu/caffe/BVLC_Caffe/caffe$
解决方法:
这里是动态链接库没链接好,按照Group-Caffe-Issues
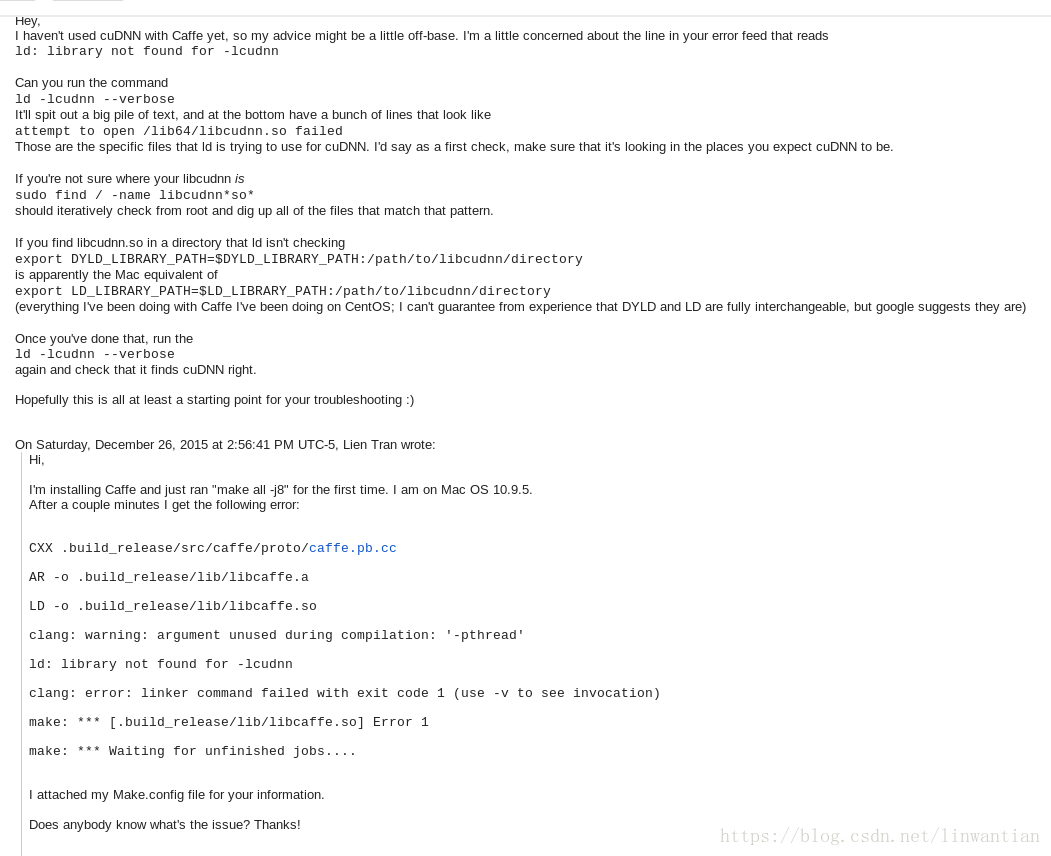
尝试下面的方法,进入/cuda/lib64/ 文件夹,重新链接
并将/usr/local/cuda-8.0/lib64 export
relaybot@ubuntu:/usr/local/cuda/lib64$ sudo ln -sf libcudnn.so.5.0.5 libcudnn.so.5
relaybot@ubuntu:/usr/local/cuda/lib64$ sudo ln -sf libcudnn.so.5 libcudnn.so
relaybot@ubuntu:/usr/local/cuda/lib64$ sudo ldconfig /usr/local/cuda/lib64
relaybot@ubuntu:/usr/local/cuda/lib64$ export LD_LIBRARY_PATH=/usr/local/cuda-8.0/lib64:$LD_LIBRARY_PATH

relaybot@ubuntu:~/mumu/caffe/BVLC_Caffe/caffe$ make all -j6
LD -o .build_release/lib/libcaffe.so.1.0.0
CXX/LD -o .build_release/tools/compute_image_mean.bin
CXX/LD -o .build_release/tools/caffe.bin
CXX/LD -o .build_release/tools/upgrade_net_proto_text.bin
CXX/LD -o .build_release/tools/extract_features.bin
CXX/LD -o .build_release/tools/convert_imageset.bin
CXX/LD -o .build_release/tools/upgrade_solver_proto_text.bin
CXX/LD -o .build_release/tools/upgrade_net_proto_binary.bin
CXX/LD -o .build_release/examples/cpp_classification/classification.bin
CXX/LD -o .build_release/examples/mnist/convert_mnist_data.bin
CXX/LD -o .build_release/examples/cifar10/convert_cifar_data.bin
CXX/LD -o .build_release/examples/siamese/convert_mnist_siamese_data.bin
虽然成功了,但是新开一个终端窗口,执行:
ld -lcudnn --verbose
#显示:
GNU ld (GNU Binutils for Ubuntu) 2.24
  Supported emulations:
   elf_x86_64
   elf32_x86_64
   elf_i386
   i386linux
   elf_l1om
   elf_k1om
   i386pep
   i386pe
using internal linker script:
==================================================
/* Script for -z combreloc: combine and sort reloc sections */
OUTPUT_FORMAT("elf64-x86-64", "elf64-x86-64",
	      "elf64-x86-64")
OUTPUT_ARCH(i386:x86-64)
ENTRY(_start)
SEARCH_DIR("/usr/x86_64-linux-gnu/lib64"); SEARCH_DIR("=/usr/local/lib/x86_64-linux-gnu"); SEARCH_DIR("=/usr/local/lib64"); SEARCH_DIR("=/lib/x86_64-linux-gnu"); SEARCH_DIR("=/lib64"); SEARCH_DIR("=/usr/lib/x86_64-linux-gnu"); SEARCH_DIR("=/usr/lib64"); SEARCH_DIR("=/usr/local/lib"); SEARCH_DIR("=/lib"); SEARCH_DIR("=/usr/lib");
SECTIONS
{
 .................
================================
attempt to open /usr/x86_64-linux-gnu/lib64/libcudnn.so failed
attempt to open /usr/x86_64-linux-gnu/lib64/libcudnn.a failed
attempt to open //usr/local/lib/x86_64-linux-gnu/libcudnn.so failed
attempt to open //usr/local/lib/x86_64-linux-gnu/libcudnn.a failed
attempt to open //usr/local/lib64/libcudnn.so failed
attempt to open //usr/local/lib64/libcudnn.a failed
attempt to open //lib/x86_64-linux-gnu/libcudnn.so failed
attempt to open //lib/x86_64-linux-gnu/libcudnn.a failed
attempt to open //lib64/libcudnn.so failed
attempt to open //lib64/libcudnn.a failed
attempt to open //usr/lib/x86_64-linux-gnu/libcudnn.so failed
attempt to open //usr/lib/x86_64-linux-gnu/libcudnn.a failed
attempt to open //usr/lib64/libcudnn.so failed
attempt to open //usr/lib64/libcudnn.a failed
attempt to open //usr/local/lib/libcudnn.so failed
attempt to open //usr/local/lib/libcudnn.a failed
attempt to open //lib/libcudnn.so failed
attempt to open //lib/libcudnn.a failed
attempt to open //usr/lib/libcudnn.so failed
attempt to open //usr/lib/libcudnn.a failed
ld: cannot find -lcudnn
可见当前系统其实还是未寻找到**lcudnn**,未能链接上;
再开一个终端:
relaybot@ubuntu:~/mumu/cuda$ cd cudnnv5/
relaybot@ubuntu:~/mumu/cuda/cudnnv5$ ls
include  lib64

relaybot@ubuntu:~/mumu/cuda/cudnnv5$ sudo cp lib64/libcudnn* /usr/local/lib/

relaybot@ubuntu:~/mumu/cuda/cudnnv5$ sudo ln -sf /usr/local/lib/libcudnn.so.5.0.5 /usr/local/lib/libcudnn.so.5
relaybot@ubuntu:~/mumu/cuda/cudnnv5$ sudo ln -sf /usr/local/lib/libcudnn.so.5 /usr/local/lib/libcudnn.so
relaybot@ubuntu:~/mumu/cuda/cudnnv5$ sudo ldconfig /usr/local/lib/
relaybot@ubuntu:~/mumu/cuda/cudnnv5$
注意这里是把cudnn的lib文件放进/usr/local/lib64文件夹下,以便ld搜寻能够找到libcudnn.so
此时终端信息为:
relaybot@ubuntu:~$ ld -lcudnn --verbose
GNU ld (GNU Binutils for Ubuntu) 2.24
  Supported emulations:

using internal linker script:
==================================================
ENTRY(_start)
SEARCH_DIR("/usr/x86_64-linux-gnu/lib64"); SEARCH_DIR("=/usr/local/lib/x86_64-linux-gnu"); SEARCH_DIR("=/usr/local/lib64"); SEARCH_DIR("=/lib/x86_64-linux-gnu"); SEARCH_DIR("=/lib64"); SEARCH_DIR("=/usr/lib/x86_64-linux-gnu"); SEARCH_DIR("=/usr/lib64"); SEARCH_DIR("=/usr/local/lib"); SEARCH_DIR("=/lib"); SEARCH_DIR("=/usr/lib");
SECTIONS
{
..................
===================================================
attempt to open /usr/x86_64-linux-gnu/lib64/libcudnn.so failed
attempt to open /usr/x86_64-linux-gnu/lib64/libcudnn.a failed
attempt to open //usr/local/lib/x86_64-linux-gnu/libcudnn.so failed
attempt to open //usr/local/lib/x86_64-linux-gnu/libcudnn.a failed
attempt to open //usr/local/lib64/libcudnn.so failed
attempt to open //usr/local/lib64/libcudnn.a failed
attempt to open //lib/x86_64-linux-gnu/libcudnn.so failed
attempt to open //lib/x86_64-linux-gnu/libcudnn.a failed
attempt to open //lib64/libcudnn.so failed
attempt to open //lib64/libcudnn.a failed
attempt to open //usr/lib/x86_64-linux-gnu/libcudnn.so failed
attempt to open //usr/lib/x86_64-linux-gnu/libcudnn.a failed
attempt to open //usr/lib64/libcudnn.so failed
attempt to open //usr/lib64/libcudnn.a failed
attempt to open //usr/local/lib/libcudnn.so succeeded
-lcudnn (//usr/local/lib/libcudnn.so)
###成功找到ldcudnn.so
所以以后编译caffe记得要把cudnn的lib64文件放在/usr/local/lib64等ld能够搜寻到的文件夹下面;
而猜想之前cuda的lib64文件夹是不是不能被搜寻到,所以
sudo gedit .bashrc

#在文件中添加如下语句
export LD_LIBRARY_PATH="$LD_LIBRARY_PATH:/usr/local/cuda-8.0/lib64"
export LD_LIBRARY_PATH="$LD_LIBRARY_PATH:/usr/local/cuda-8.0/extras/CUPTI/lib64"
export CMAKE_PREFIX_PATH="$CMAKE_PREFIX_PATH:/usr/local/cuda-8.0/include"
export CPPFLAGS='-I/usr/local/cuda-8.0/include/'
export LDFLAGS='-L/usr/local/cuda-8.0/lib64/'
export LIBS='-lcudnn'
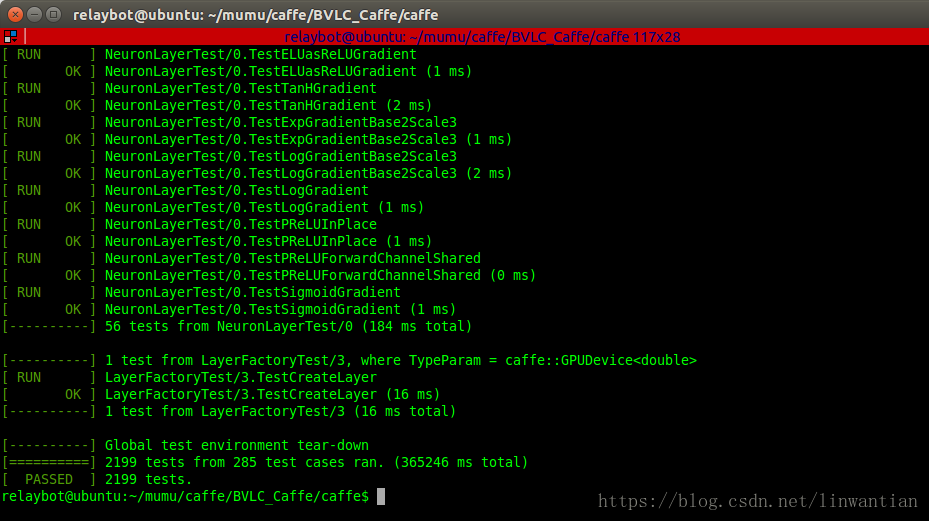
###编译Caffe
make all
make test -j4
make runtest -j4
###配置Python-Caffe
安装依赖库:
注意前面安装caffe好像也是要装依赖库的,我的电脑因为已经自带一些环境,也没具体写了,网上可以搜到这部分内容;
sudo apt-get install python-numpy python-scipy python-matplotlib python-sklearn python-skimage python-h5py python-protobuf python-leveldb python-networkx python-nose python-pandas python-gflags Cython ipython
sudo apt-get install protobuf-c-compiler protobuf-compiler
编译pycaffe
make pycaffe
添加环境变量
sudo gedit /etc/profile
#打开文件后,在末尾添加:
export PYTHONPATH=/home/relaybot/mumu/caffe/BVLC_Caffe/caffe/python:$PYTHONPATH
source /etc/profile
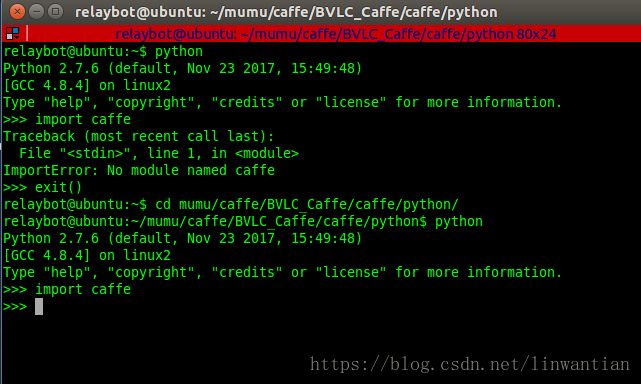
测试Python-Caffe
relaybot@ubuntu:~/mumu/caffe/BVLC_Caffe/caffe$ source /etc/profile
relaybot@ubuntu:~/mumu/caffe/BVLC_Caffe/caffe$ python
Python 2.7.6 (default, Nov 23 2017, 15:49:48)
[GCC 4.8.4] on linux2
Type "help", "copyright", "credits" or "license" for more information.
>>> import caffe
Traceback (most recent call last):
  File "<stdin>", line 1, in <module>
  File "/home/relaybot/mumu/caffe/BVLC_Caffe/caffe/python/caffe/__init__.py", line 1, in <module>
    from .pycaffe import Net, SGDSolver, NesterovSolver, AdaGradSolver, RMSPropSolver, AdaDeltaSolver, AdamSolver, NCCL, Timer
  File "/home/relaybot/mumu/caffe/BVLC_Caffe/caffe/python/caffe/pycaffe.py", line 13, in <module>
    from ._caffe import Net, SGDSolver, NesterovSolver, AdaGradSolver, \
ImportError: libcudart.so.8.0: cannot open shared object file: No such file or directory
>>>
打开一个新的终端窗口,
**sudo gedit /etc/profile**仔细检查发现:
/etc/profile中LD_LIBRARY_PATH有一个冒号是中文字符;
修改好
重新source /etc/profile
在此终端窗口下
cd mumu/caffe/BVLC_Caffe/caffe/python/
python

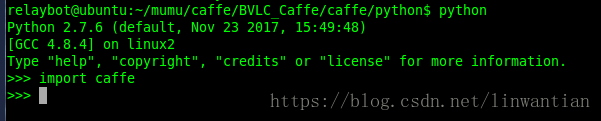
成功有了,虽然原来那个终端窗口照这样做还是不行~
不过把所有终端关闭,重新打开一个新的,可以了:
参考链接:
1.ubuntu14.04安装caffe+cuda7.5+cudnn5.0+opencv3.0(亲测有效)
2.CUDA8.0+Ubuntu14.04+Caffe安装过程之Caffe安装教程
【https://blog.csdn.net/u010733679/article/details/52249503】


 1635
1635


 被折叠的 条评论
为什么被折叠?
被折叠的 条评论
为什么被折叠?
 到【灌水乐园】发言


