


Flask是一个轻量版的python框架。本文从以下两部分描述怎么连接sqlite3数据库。
一、创建新table到sqlite3
1. 新建一个.sql文件(可以先建txt文档,修改后缀名,比如改成schema.sql)
schema.sql是模式数据库文件,内容是创建table的语句。如果数据已经存在同名的table会先删除再创建。
DROP TABLE IF EXISTS students;
CREATE TABLE students(
    name TEXT PRIMARY KEY,
    address TEXT,
    city TEXT,
    pin TEXT
);
2.在启动文件里添加初始化的函数init_db()(我的启动文件是hello.py)
init_db()是创建table到数据库,其他可是连接和关闭数据库连接,可根据自己的需求改动。
init_db()需要在python解释器中运行一次就好了。
from flask import g #g对象可以使用before_request()和teardown_request(),即请求开始前和结束后
import sqlite3
DATABASE_INITFILE = os.path.join(PROJECT_ROOT, "schema.sql")
def connect_db():
db = getattr(g, 'db', None)
if db is None:
db = g.db = sqlite3.connect(DATABASE)
return db
def init_db(): #使用数据库建模文件初始化数据库,在命令行中使用一次即可。
print(".sql file path:{}".format(DATABASE_INITFILE))
with app.app_context():
db = connect_db()
with app.open_resource(DATABASE_INITFILE, mode='r') as f:
db.cursor().executescript(f.read())
db.commit()
@app.before_request
def before_request():
g.db=connect_db()
@app.teardown_request
def close_db(exception):
if hasattr(g, 'db'):
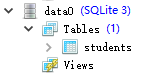
g.db.close()启动flask项目,在python解释器里输入一下命令,没有报错,基本上查看数据库就有了创建的table(我用的是pycharm)

二、查询sqlite3的table数据
1.如果只是查询数据库,sqlite3客户端连接数据库的时候会生成一个.db后缀的文件,找到这个文件,复制到flask项目中。(注意连接数据库的时候,类型选择SQLite3)
2.插入、查询数据,函数定义如下:(hello.py文件添加如下代码)
DATABASE = os.path.join(PROJECT_ROOT, "data.db")

def insert(name, addr, city, pin):
    sql = "insert into students values (?, ?, ?, ?)"
    conn = g.db
    cursor = conn.cursor()
    try:
        cursor.execute(sql, (name, addr, city, pin))
        conn.commit()
    except Exception as e:
        conn.rollback()
        raise TypeError("insert error:{}".format(e)) #抛出异常

def query_db(query, args=(), one=False):
    cur=g.db.execute(query, args)
    rv=[dict((cur.description[idx][0], value) for idx,value in enumerate(row)) for row in cur.fetchall()]
    return (rv[0] if rv else None) if one else rv
3.定义模板和视图访问数据库数据
hello.py文件添加如下代码:
@app.route('/student') #增加学生信息页面
def student():
    return render_template('student.html')

@app.route('/add', methods=['POST','GET'])
def add():
    if request.method=='POST':
        name = request.form['name']
        address = request.form['address']
        city = request.form['city']
        pin = request.form['pin']

        try:
            insert(name, address, city, pin)
            return redirect(url_for('result'))
        except Exception as e:
            flash("{}".format(e))
            return redirect(url_for('student'))

@app.route('/result') #所有学生信息list页面
def result():
    rows=query_db("select * from students")
    return render_template('result.html', rows=rows)
student.html文件代码如下:
<!DOCTYPE html>
<html lang="en">
<head>
    <meta charset="utf-8">
    <title>学生信息</title>
</head>
<body>
    <form action="{{ url_for('add') }}" method="post">
        <h3>学生信息
            {% with msgs=get_flashed_messages() %}
                {% if msgs %}
                    {% for msg in msgs %}
                        <p style="color:red;">{{ msg }}</p>
                    {% endfor %}
                {% endif %}
            {% endwith %}
        </h3>
        <p>Name <input type = "text" name = "name" /></p>
        <p>address <textarea type = "text" name = "address"></textarea></p>
        <p>city <input type = "text" name = "city" /></p>
        <p>pin <input type ="text" name = "pin" /></p>
        <p><input type = "submit" value = "submit" /></p>
    </form>
</body>
</html>
result.html文件代码如下:
<!DOCTYPE html>
<html lang="en">
<head>
    <meta charset="utf-8">
    <title>学生信息清单</title>
</head>
<body>
    <table border="1">
        <thead>
            <td>Name</td>
            <td>Address</td>
            <td>City</td>
            <td>Pin</td>
        </thead>
        {% for row in rows %}
        <tr>
            <th>{{ row["name"] }}</th>
            <td>{{ row["address"] }}</td>
            <td>{{ row["city"] }}</td>
            <td>{{ row["pin"] }}</td>
        </tr>
        {% endfor %}
    </table>

    <a href = "/student">Go back to add page</a>
</body>
</html>
启动flask项目,访问网址http://localhost:5000/student,填写学生信息,提交即新增数据。成功自动跳转到http://localhost:5000/result页面;不成功,在当前页面显示error。
直接访问http://localhost:5000/result页面,查看所有学生信息


 2882
2882


 被折叠的 条评论
为什么被折叠?
被折叠的 条评论
为什么被折叠?
 到【灌水乐园】发言


