


用 NSIS 制作安装程序
最近要给自己写的一个小程序做个安装程序。我的程序是用Qt开发的,所以本来想研究一下 Qt Installer Framework。 但是用 Qt Installer Framework 做安装程序好像还挺麻烦,研究了一会儿没有什么头绪,所以就暂时放弃了。然后就在网上随便搜了搜,发现有个 NSIS,看介绍还比较简单,就试着用了用,感觉还可以。这篇其实就是我学习 NSIS 时的一个学习笔记。
NSIS(Nullsoft Scriptable Install System)是一个开源的 Windows 系统下安装程序制作程序。它提供了安装、卸载、系统设置、文件解压缩等功能。NSIS 通过它的脚本语言来描述安装程序的行为和逻辑的。
NSIS 的主页在:http://nsis.sourceforge.net
在这里可以找到最近版本的 NSIS。 我使用的版本是 3.0b2。
Hello world!
前面已经说过 NSIS 通过它的脚本语言来描述安装程序的行为和逻辑的。下面就先来看一个最简单的脚本文件: 1.nsi
    # name the installer
    OutFile "Installer.exe"

    # default section start; every NSIS script has at least one section.
    Section

    # default section end
    SectionEnd
文件中,所有 # 开始的行都是注释。除了这些注释外,这个脚本其实什么也没做。但是却给出了 NSI 脚本的框架。
利用 NSIS 提供的工具 MakeNSISW 可以编译这个脚本。编译成功后会有类似这样的输出:
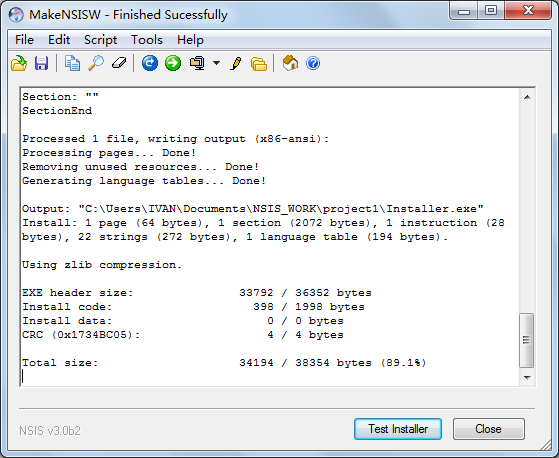
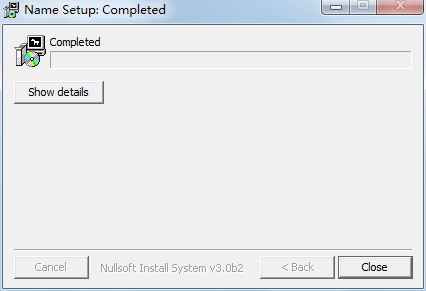
点击 Test Installer 可以直接运行刚才生成的安装文件。运行后的结果如下:
这个安装程序现在还什么都做不了。下面将这个安装脚本扩充一点。
# set the name of the installer
Outfile "helloworld.exe"
# create a default section.
Section
# create a popup box, with an OK button and the text "Hello world!"
MessageBox MB_OK "Hello world!"
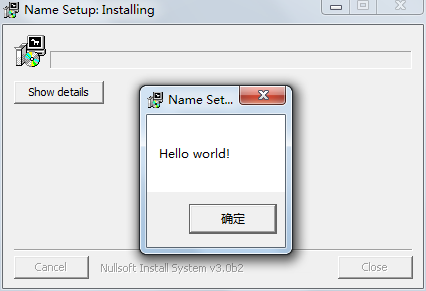
SectionEnd生成的安装文件改名为 helloworld.exe。运行这个安装文件后会弹出一个对话框:
到这里,我们的安装程序至少有点功能了。
文本文件读写
下面的例子要让我们的 NSIS 脚本做些文件读写的工作。这种类型的操作在安装程序中还是经常要用到的。比如生成个配置文件一类的工作都是要文件读写的。
    # declare name of installer file
    Outfile "hello world.exe"

    # open section
    Section

    # create a popup box, with an OK button and some text
    MessageBox MB_OK "Now We are Creating Hello_world.txt at Desktop!"

    # open an output file called "Hello_world.txt",
    # on the desktop in write mode. This file does not need to exist
    # before script is compiled and run

    FileOpen $0 "$DESKTOP\Hello_world.txt" w

    # write the string "hello world!" to the output file
    FileWrite $0 "hello world!"

    # close the file
    FileClose $0
    # Show Success message.
    MessageBox MB_OK "Hello_world.txt has been created successfully at Desktop!"

    # end the section
    SectionEnd
上面的脚本很简单,其中 FileOpen、FileWrite、FileClose 是三个文件操作函数。
$0 是一个变量,这里相当于文件句柄。
$DESKTOP 是 NSIS 预定义的常量。表示的是桌面所在的目录,类似的常量还有很多。比较常用的有:
$PROGRAMFILES, $PROGRAMFILES32,
$PROGRAMFILES64
这三个表示程序的默认安装路径。在 64 位系统中, $PROGRAMFILES 和 $PROGRAMFILES32 通常表示 C:\Program Files (x86)。如果程序是 64 位的,应该安装在 $ROGRAMFILES64 目录下。
$WINDIR 是 windows 系统个安装路径。通常是 C:\Windows 。
$TEMP 是临时文件所在目录。通常是 C:\Windows\Temp。
$STARTMENU 开始菜单所在的目录。
$SMPROGRAMS 指向 $STARTMENU\Programs。
文件拷贝
安装程序最重要的功能是将我们的文件拷贝到安装路径下。所以这一部分内容要仔细讲讲。
还是先从一个最简单的例子程序开始,将一个文本文件安装到指定的安装路径下。在这里,安装路径设为桌面。后面的例子还会交给大家如何让安装程序可以自定义安装路径。
我们的文本文件名为 test.txt。这个文件需要和我们的脚本放在一个目录中,这样 NSIS 才能找到。通常我们会为每一个安装程序项目建立一个文件夹,文件夹中放置 NSIS 脚本和我们的程序的相关文件。
    # define the name of the installer
    Outfile "simple installer.exe"

    # define the directory to install to, the desktop in this case as specified
    # by the predefined $DESKTOP variable
    InstallDir $DESKTOP

    # default section
    Section

    # define the output path for this file
    SetOutPath $INSTDIR

    # define what to install and place it in the output path
    File test.txt

    SectionEnd
File 命令也是支持通配符的。因此可以写为:
File *.txt
File \*.\*
等多种形式。
如果要将子目录下的文件一起拷贝,可以写为:
File \r *.*
安装完程序之后还应该提供卸载功能。下面就把这部分功能添加上。
    # define installer name
    OutFile "installer.exe"

    # set desktop as install directory
    InstallDir $DESKTOP

    # default section start
    Section

    # define output path
    SetOutPath $INSTDIR

    # specify file to go in output path
    File test.txt

    # define uninstaller name
    WriteUninstaller $INSTDIR\uninstaller.exe


    #-------
    # default section end
    SectionEnd

    # create a section to define what the uninstaller does.
    # the section will always be named "Uninstall"
    Section "Uninstall"

    # Always delete uninstaller first
    Delete $INSTDIR\uninstaller.exe

    # now delete installed file
    Delete $INSTDIR\test.txt

    SectionEnd
这部分代码也很简单,但是我没有搞明白为啥要先删除自己,再删除其他文件。把这两个删除语句调换一下位置,运行的也挺正常。这里的原理还请高手们指导。
Delete 命令还支持通配符。因此也可以写成下面的形式。
Delete $INSTDIR\*.*
相关的命令还有 RMDir,这个可以删除一个空目录(注意:只有空目录才能删除)。下面是个例子, 其中的 /r 表明删除指定目录及其所有子目录,如果子目录中还有子目录也会一并删除。 r 的含义是递归(recusive)。
RMDir /r $INSTDIR
删除开始菜单的条目时可能会需要管理员权限。我们可以在脚本的最开头加上:
RequestExecutionLevel admin
开始菜单增加条目
下面的代码会在开始菜单的应用程序条目中增加一个快捷方式,指向我们的 uninstall.exe。 为了简单,我们的安装路径还是在桌面。
    # define name of installer
    OutFile "installer.exe"

    # define installation directory
    InstallDir $DESKTOP

    # For removing Start Menu shortcut in Windows 7
    RequestExecutionLevel admin

    # start default section
    Section

        # set the installation directory as the destination for the following actions
        SetOutPath $INSTDIR

        # create the uninstaller
        WriteUninstaller "$INSTDIR\uninstall.exe"

        # create a shortcut named "new shortcut" in the start menu programs directory
        # point the new shortcut at the program uninstaller
        CreateShortCut "$SMPROGRAMS\new shortcut.lnk" "$INSTDIR\uninstall.exe"
    SectionEnd

    # uninstaller section start
    Section "uninstall"

        # first, delete the uninstaller
        Delete "$INSTDIR\uninstall.exe"

        # second, remove the link from the start menu
        Delete "$SMPROGRAMS\new shortcut.lnk"

    # uninstaller section end
    SectionEnd
这段脚本编译之后生成的安装文件的作用是在桌面放一个 uninstall.exe,然后再开始菜单的应用程序中增加一个 new shortcut.lnk。这个 new shortcut.lnk 指向 uninstall.exe。
需要多说一句
    # For removing Start Menu shortcut in Windows 7
    RequestExecutionLevel user
如果忘了写,则每次卸载时都需要用户做权限确认。 其实这样也挺好,多些提醒也没什么坏处。
读取注册表
注册表操作也是安装程序经常要做的工作。
下面这段脚本通过读取注册表中相关的字段来判断系统中是否安装了 JRE 环境。
    # name the installer
    OutFile "installer.exe"

    #default section start
    Section

        # read the value from the registry into the $0 register
        ReadRegStr $0 HKLM "SOFTWARE\JavaSoft\Java Runtime Environment" CurrentVersion

        # print the results in a popup message box
        MessageBox MB_OK "version: $0"

    # default section end
    SectionEnd
有了上面这些知识,就可以写个简单的安装程序。实际上 NSIS 的功能远不止这些。等以后用到那些功能时我再写博客来记录。
另外,准备一台“干净”的电脑也非常重要。所以干净,指的是这台电脑最好只安装了操作系统。这样才比较容易确定安装程序是否落下一些文件。当然,干这事情虚拟机是最适合的了。


 6875
6875

 被折叠的 条评论
为什么被折叠?
被折叠的 条评论
为什么被折叠?
 到【灌水乐园】发言


