


参考链接:
http://www.cnblogs.com/hxsyl/archive/2014/05/14/3727291.html
环境:
MyEclipse + 局域网
pc在局域网中的IP地址:
在控制面板---网络和Internet---网络和共享中心,点击本地连接---详细信息,其中IPv4地址即为局域网IP地址。
1.服务器端
新建一个web project,命名为UpdateServer,然后开启tomcat服务器,并把UpdateServer部署在服务器上。然后在UpdateServer/WebRoot下新建一个json文件,命名为version,添加如下的内容:
{
"version":"2.0",
"apk":"http://172.25.225.24:8080/UpdateServer/UpdateClient.apk",
"description":"检测到最新版本2.0,请及时更新!"
}
然后在浏览器输入:http://172.25.225.24:8080/UpdateServer/version.json,如果访问成功,则浏览器会出现下载json文件的提示。
172.25.225.24是pc在局域网中的IP地址,8080是tomcat的端口号
新建一个android project,命名为UpdateClient,然后在strings.xml中添加:
<string name="version_server">http://172.25.225.24:8080/UpdateServer/version.json</string>在AndroidManifest.xml中添加访问网络和sd卡的权限:
<uses-permission android:name="android.permission.INTERNET"/>
<uses-permission android:name="android.permission.WRITE_EXTERNAL_STORAGE"/>
package com.example.updateclient;

public class VersionInfo {

	private String version;
	private String apk;
	private String description;

	public String getVersion() {
		return version;
	}
	public void setVersion(String version) {
		this.version = version;
	}

	public String getApk() {
		return apk;
	}
	public void setApk(String apk) {
		this.apk = apk;
	}

	public String getDescription() {
		return description;
	}
	public void setDescription(String description) {
		this.description = description;
	}

}
package com.example.updateclient;

import java.io.BufferedInputStream;
import java.io.File;
import java.io.FileOutputStream;
import java.io.InputStream;
import java.net.HttpURLConnection;
import java.net.URL;

import android.app.ProgressDialog;
import android.os.Environment;

public class DownLoadManager {

	public static File getFileFromServer(String path, ProgressDialog pd) throws Exception {
		//如果相等的话表示当前的sdcard挂载在手机上并且是可用的
		if(Environment.getExternalStorageState().equals(Environment.MEDIA_MOUNTED)){
			URL url = new URL(path);
			HttpURLConnection conn =  (HttpURLConnection) url.openConnection();
			conn.setConnectTimeout(5000);
			//获取到文件的大小
			pd.setMax(conn.getContentLength());

			File file = new File(Environment.getExternalStorageDirectory(), "update.apk");
			FileOutputStream fos = new FileOutputStream(file);

			InputStream is = conn.getInputStream();
			BufferedInputStream bis = new BufferedInputStream(is);
			byte[] buffer = new byte[1024];
			int len;
			int total = 0;
			while((len =bis.read(buffer)) != -1){
				fos.write(buffer, 0, len);
				total += len;
				//获取当前下载量
				pd.setProgress(total);
			}
			fos.close();
			bis.close();
			is.close();
			return file;
		}
		else {
			return null;
		}
	}
}
package com.example.updateclient;
import java.io.File;
import org.json.JSONException;
import org.json.JSONObject;
import com.android.volley.RequestQueue;
import com.android.volley.Response;
import com.android.volley.Response.Listener;
import com.android.volley.VolleyError;
import com.android.volley.toolbox.JsonObjectRequest;
import com.android.volley.toolbox.Volley;
import android.app.Activity;
import android.app.AlertDialog;
import android.app.AlertDialog.Builder;
import android.app.ProgressDialog;
import android.content.DialogInterface;
import android.content.Intent;
import android.content.pm.PackageInfo;
import android.content.pm.PackageManager;
import android.content.pm.PackageManager.NameNotFoundException;
import android.net.Uri;
import android.os.Bundle;
import android.util.Log;
import android.view.View;
import android.view.View.OnClickListener;
import android.widget.Button;
import android.widget.Toast;
public class MainActivity extends Activity {
private RequestQueue requestQueue;
private VersionInfo versionInfo;
@Override
protected void onCreate(Bundle savedInstanceState) {
super.onCreate(savedInstanceState);
setContentView(R.layout.activity_main);
requestQueue = Volley.newRequestQueue(getApplicationContext());
versionInfo = new VersionInfo();
((Button)findViewById(R.id.checkUpdate)).setOnClickListener(new OnClickListener() {
@Override
public void onClick(View v) {
checkVersion();
}
});
}
//获取客户端的版本信息
private String getClientVersion()
{
//getPackageName()是你当前类的包名,0代表是获取版本信息
PackageManager packageManager = getPackageManager();
PackageInfo packInfo = null;
try {
packInfo = packageManager.getPackageInfo(getPackageName(),0);
} catch (NameNotFoundException e) {
e.printStackTrace();
}
return packInfo.versionName;
}
//检查版本信息
private void checkVersion()
{
String url = getResources().getString(R.string.version_server);
JsonObjectRequest jor = new JsonObjectRequest(url, null, new Listener<JSONObject>() {
@Override
public void onResponse(JSONObject response) {
try {
versionInfo.setVersion(response.getString("version"));
versionInfo.setApk(response.getString("apk"));
versionInfo.setDescription(response.getString("description"));
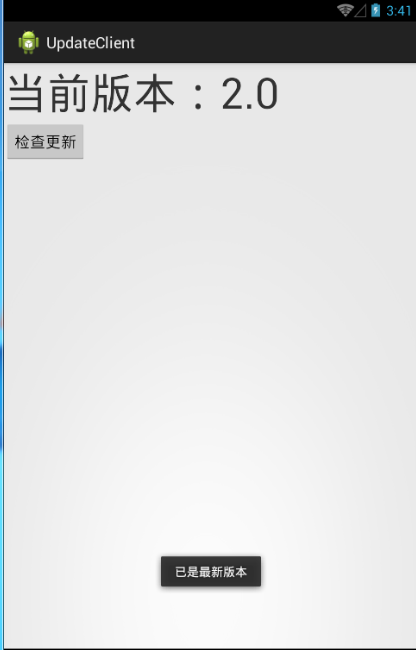
if(getClientVersion().equalsIgnoreCase(versionInfo.getVersion())) {
Toast.makeText(getApplicationContext(), "已是最新版本", Toast.LENGTH_SHORT).show();
} else {
showUpdataDialog();
}
} catch (JSONException e) {
e.printStackTrace();
}
}
}, new Response.ErrorListener() {
@Override
public void onErrorResponse(VolleyError error) {
Log.v("error", error.toString());
}
});
requestQueue.add(jor);
}
/*
* 弹出对话框的步骤:
* 1.创建alertDialog的builder.
* 2.要给builder设置属性, 对话框的内容,样式,按钮
* 3.通过builder 创建一个对话框
* 4.对话框show()出来
*/
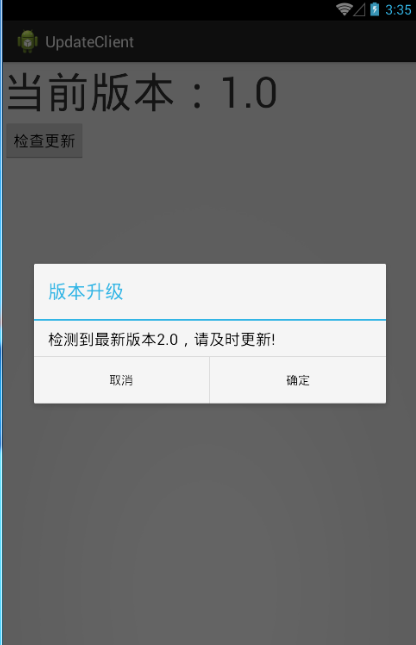
private void showUpdataDialog() {
AlertDialog.Builder builer = new Builder(MainActivity.this);
builer.setTitle("版本升级");
builer.setMessage(versionInfo.getDescription());
builer.setPositiveButton("确定", new DialogInterface.OnClickListener() {
@Override
public void onClick(DialogInterface dialog, int which) {
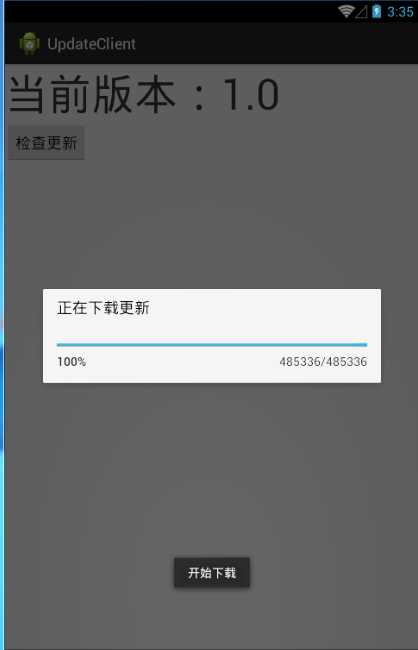
Toast.makeText(getApplicationContext(), "开始下载", Toast.LENGTH_SHORT).show();
downLoadApk();
}
});
builer.setNegativeButton("取消", new DialogInterface.OnClickListener() {
@Override
public void onClick(DialogInterface dialog, int which) {
Toast.makeText(getApplicationContext(), "取消下载", Toast.LENGTH_SHORT).show();
}
});
AlertDialog dialog = builer.create();
dialog.show();
}
private void downLoadApk() {
final ProgressDialog pd = new ProgressDialog(MainActivity.this);
pd.setProgressStyle(ProgressDialog.STYLE_HORIZONTAL);
pd.setMessage("正在下载更新");
pd.show();
new Thread() {
public void run() {
try {
File file = DownLoadManager.getFileFromServer(versionInfo.getApk(), pd);
sleep(3000);
installApk(file);
pd.dismiss();//结束掉进度条对话框
} catch (Exception e) {
e.printStackTrace();
}
};
}.start();
}
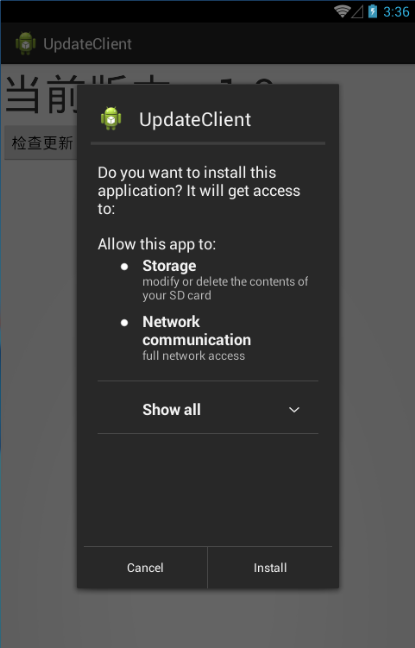
private void installApk(File file) {
Intent intent = new Intent();
//执行动作
intent.setAction(Intent.ACTION_VIEW);
//执行的数据类型
intent.setDataAndType(Uri.fromFile(file), "application/vnd.android.package-archive");
startActivity(intent);
}
}
<LinearLayout xmlns:android="http://schemas.android.com/apk/res/android"
    xmlns:tools="http://schemas.android.com/tools"
    android:layout_width="match_parent"
    android:layout_height="match_parent"
    android:orientation="vertical" >

    <TextView
        android:layout_width="wrap_content"
        android:layout_height="wrap_content"
        android:text="当前版本:1.0"
        android:textSize="50sp" />

    <Button
        android:id="@+id/checkUpdate"
        android:layout_width="wrap_content"
        android:layout_height="wrap_content"
        android:text="检查更新" />

</LinearLayout>
需要用到volley的jar包,下载地址:
http://pan.baidu.com/s/1c0HiMnY
3.测试
在AndroidManifest.xml中修改android:versionName为2.0,然后修改布局文件的TextView为"当前版本:2.0",打包android工程,把apk放在UpdateServer/WebRoot下。这个就是新版的apk了。
在AndroidManifest.xml中修改android:versionName为1.0,然后修改布局文件的TextView为"当前版本:1.0",打包android工程,把apk运行在模拟器上。


 2140
2140

 被折叠的 条评论
为什么被折叠?
被折叠的 条评论
为什么被折叠?
 到【灌水乐园】发言


