


目标: 在Centos 下封装源码
1 系统环境是CentOS Linux release 7.6.1810 (Core)
使用命令:cat /etc/redhat-release
2 将已有的工程拷贝到/home/xxx/下,重新编译
报错1
/usr/bin/ld: warning: libopencv_core.so.3.2, needed by /usr/local/lib/libopencv_highgui.so, may conflict with libopencv_core.so.2.4

因为只是warning所以并没有管他,应该只是版本冲突的问题,就接着往下做了。
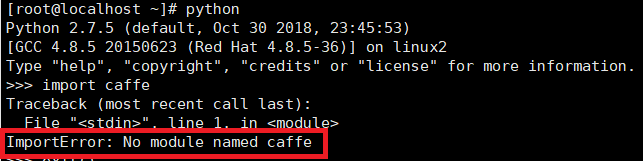
全部编译完,配置完以后,发现在python下import caffe 会报错,
报错2
重新配置路径,重启服务都不管用
原因是,我参考的手册上写的 是文件最后一行添加,结果我将export 和下面的路径分为两行了。
更改为一行

报错3
ImportError: libopencv_core.so.2.4: cannot open shared object file: No such file or directory

解决https://blog.csdn.net/qq_38451119/article/details/81117470
报错4
ImportError: No module named suds.client

解决:
pip install client
pip install suds
报错5
No module named dlib
解决:
pip install dlib
报错6
No module named xgboost.sklearn
解决:
git clone --recursive https://github.com/dmlc/xgboost
cd xgboost
sudo cp make/minimum.mk ./config.mk;
sudo make -j4;
sh build.sh
cd python-package
python setup.py install
报错7
报错:
xgboost.libpath.XGBoostLibraryNotFound: Cannot find XGBoost Library in the candidate path, did you install compilers and run build.sh in root path?
解决:
参考https://blog.csdn.net/maqunfi/article/details/83070183
但是顺序如下
第一步:在dist下的主目录下执行:
-
git clone --recursive https://github.com/dmlc/xgboost.git
第二步:在链接http://www.picnet.com.au/blogs/guido/2016/09/22/xgboost-windows-x64-binaries-for-download/中下载最新版本的xgboost.dll.
把下载好的xgboost.dll丢到xgboost下面

第三步 :这个时候还可能缺一个VERSION的文件,在xgboost下新建一个VESRION的空文件就可以了
第四步执行:
-
cd xgboost
-
./build.sh
-
cd python-package
-
python setup.py install
完成
顺利完成,开心,20:01


 1029
1029


 被折叠的 条评论
为什么被折叠?
被折叠的 条评论
为什么被折叠?
 到【灌水乐园】发言


