


1.静态资源处理
我们之前在ssm里面要使用静态资源css/jquery/bootstrap等,要么手动下载要么导入cdn,但是cdn是要联网的,而且要加载,在springboot里面我们怎么导入呢?
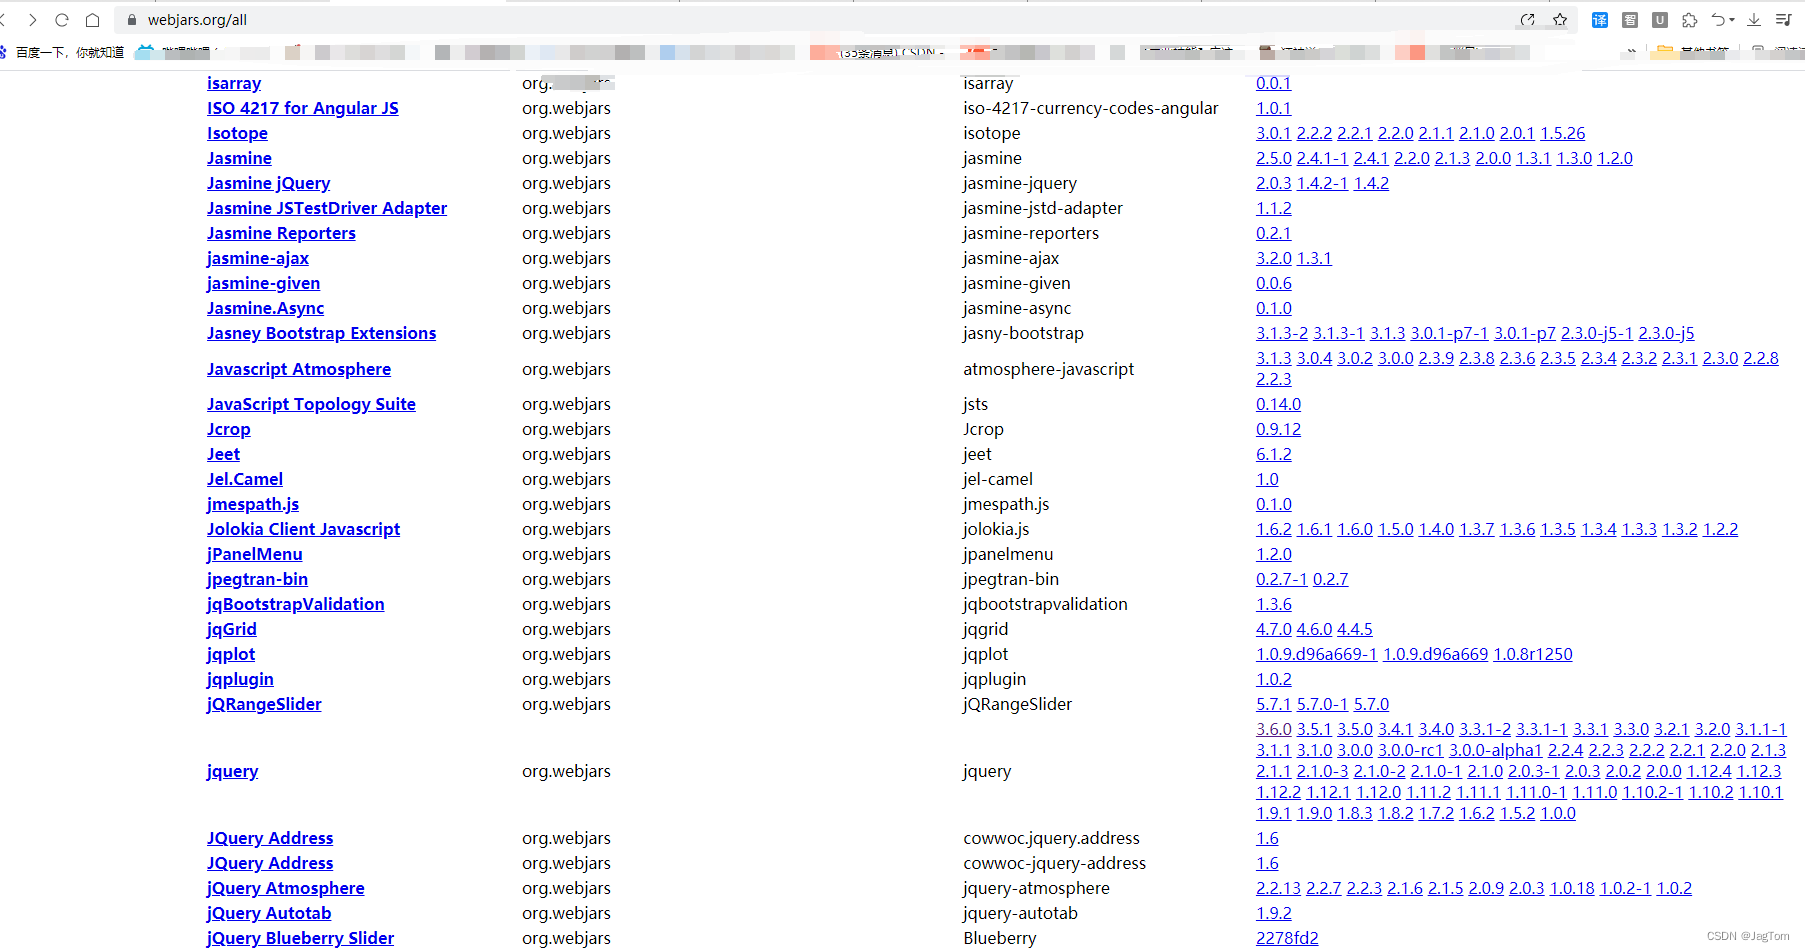
方法一:用maven的方式导入webjars的包
<dependency>
    <groupId>org.webjars</groupId>
    <artifactId>bootstrap</artifactId>
    <version>4.5.3</version>
</dependency>
<dependency>
    <groupId>org.webjars</groupId>
    <artifactId>jquery</artifactId>
    <version>3.5.1</version>
</dependency>
<dependency>
    <groupId>org.webjars</groupId>
    <artifactId>webjars-locator</artifactId>
    <version>0.40</version>
</dependency>
一般不这么用
方法二: 静态资源映射规则
我们去找staticPathPattern发现第二种映射规则 :/** , 访问当前的项目任意资源,它会去找 resourceProperties 这个类,我们可以点进去看一下分析:
// 进入方法public String[] getStaticLocations() {return this.staticLocations;}// 找到对应的值private String[] staticLocations = CLASSPATH_RESOURCE_LOCATIONS;// 找到路径private static final String[] CLASSPATH_RESOURCE_LOCATIONS = {"classpath:/META-INF/resources/","classpath:/resources/","classpath:/static/","classpath:/public/"};
ResourceProperties 可以设置和我们静态资源有关的参数;这里面指向了它会去寻找资源的文件夹,即上面数组的内容。
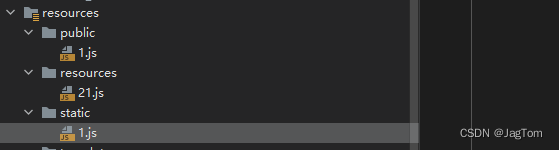
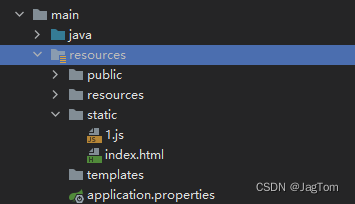
所以得出结论,以下四个目录存放的静态资源可以被我们识别:
"classpath:/META-INF/resources/""classpath:/resources/""classpath:/static/""classpath:/public/"
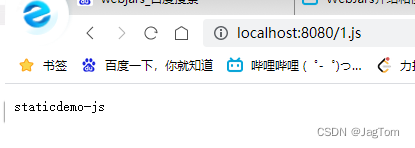
优先级: resources>static(默认的文件夹)>public
如何修改欢迎页面
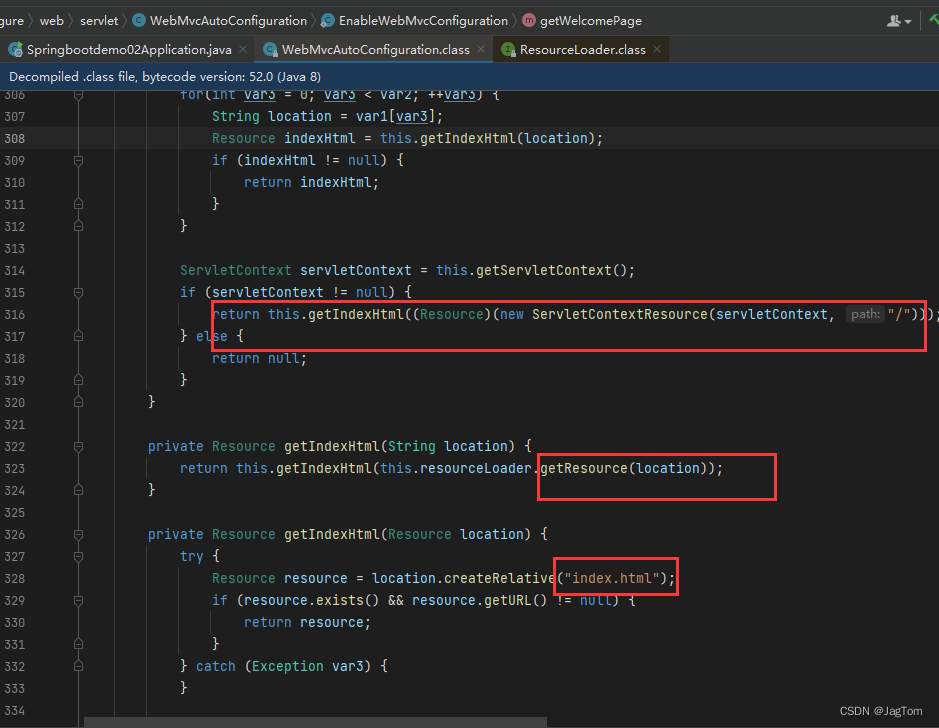
欢迎页,静态资源文件夹下的所有 index.html 页面;被 /** 映射。
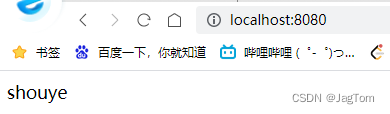
比如我访问 http://localhost:8080 ,就会找静态资源文件夹下的 index.html
注意:在tempLates目录下的所有页面,只能通过controller来跳转!并且需要导入模板引擎thymeleaf的依赖
2.Thymeleaf
  <dependency>
            <groupId>org.springframework.boot</groupId>
            <artifactId>spring-boot-starter-thymeleaf</artifactId>
            <version>2.7.0</version>
        </dependency>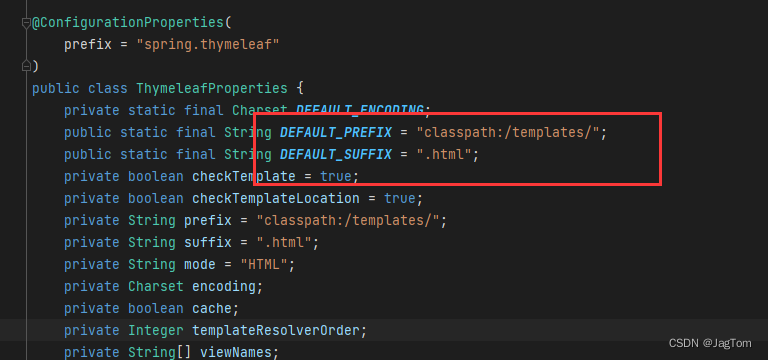
这样就可以访问templates文件夹下的html了
注意一定要注意包的目录问题啊。。。一开始controller包建错地方了。跳转不了,找了半天,头疼。
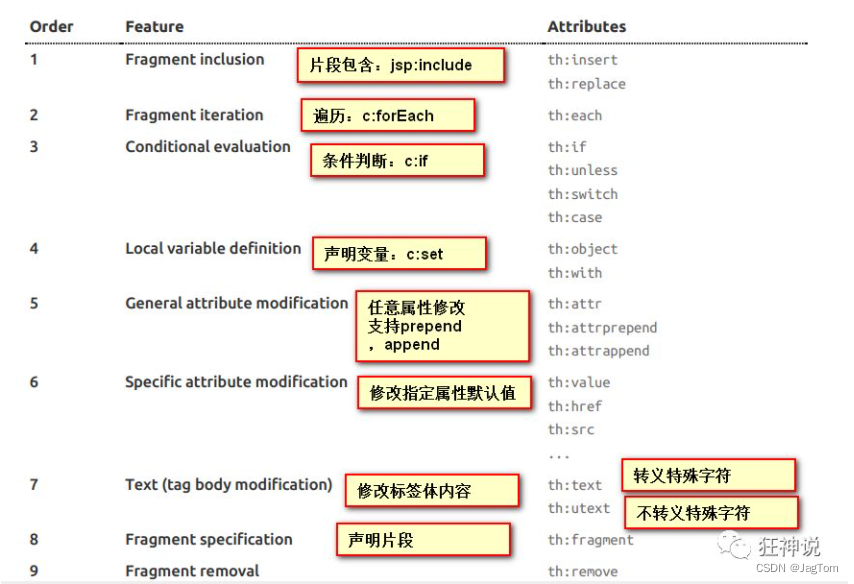
thymeleaf常用命名空间
xmlns:th="http://www.thymeleaf.org"
xmlns:sec="http://www.thymeleaf.org/extras/spring-security"
xmlns:shiro="http://www.pollix.at/thymeleaf/shiro"
<html lang="en" xmlns:th="http://www.thymeleaf.org"
xmlns:sec="http://www.thymeleaf.org/extras/spring-security"
xmlns:shiro="http://www.pollix.at/thymeleaf/shiro">
案例测试
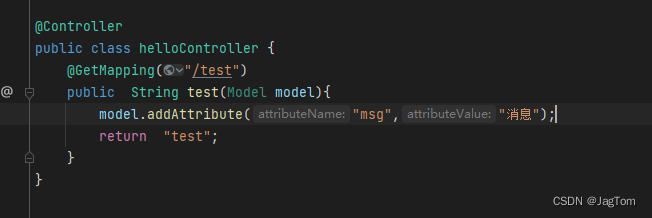

其他的一些语法
测试

<!DOCTYPE html>
<html lang="en" xmlns:th="http://www.thymeleaf.org">
<head>
<meta charset="UTF-8">
<title>test</title>
</head>
<body>
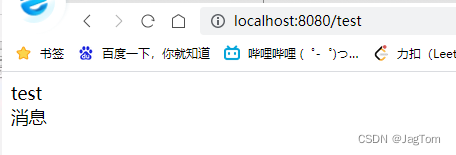
<h1>测试页面</h1>
<!--不转义-->
<div th:text="${msg}"></div>
<!--转义,解析成html-->
<div th:utext="${msg}"></div>
<!--遍历数据-->
<!--th:each每次遍历都会生成当前这个标签:官网#9-->
<h4 th:each="user :${users}" th:text="${user}"></h4>
<h4>
<!--行内写法:官网#12-->
<span th:each="user:${users}">[[${user}]]</span>
</h4>
</body>
</html>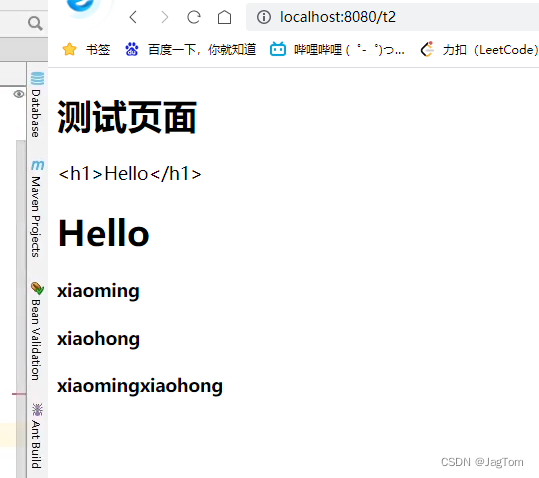
在使用thymeleaf的时候推荐配置关闭缓存
spring:
  thymeleaf:
    cache: false
3.装配扩展SpringMVC
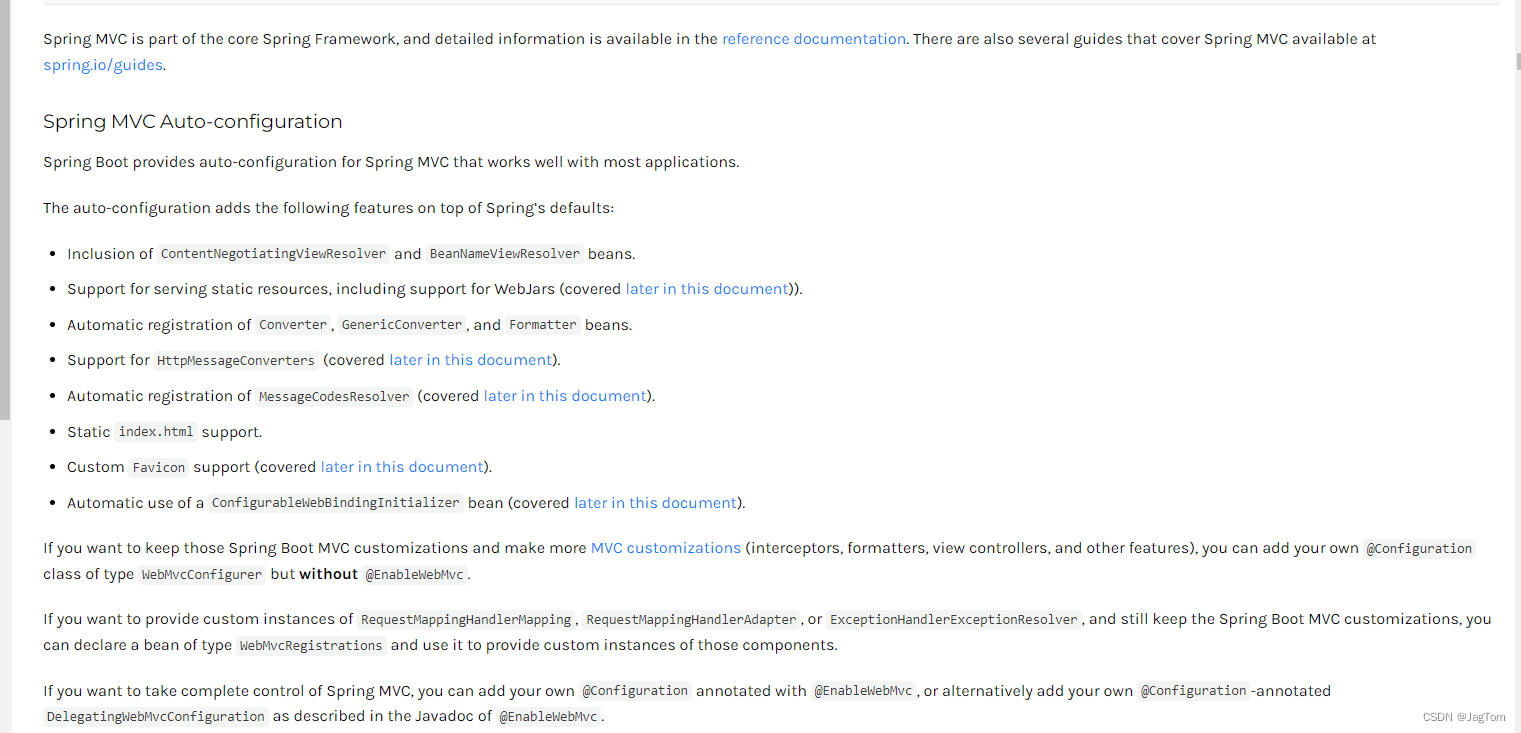
Spring MVC 自动配置
Spring Boot 为 Spring MVC 提供了自动配置,适用于大多数应用程序。
自动配置在 Spring 的默认值之上添加了以下特性:
包括
ContentNegotiatingViewResolver和BeanNameViewResolver豆类。支持提供静态资源,包括对 WebJars 的支持(本文档后面会介绍))。
自动注册
Converter、GenericConverter和Formatterbean。支持
HttpMessageConverters(本文档稍后介绍)。自动注册
MessageCodesResolver(本文档稍后介绍)。静态
index.html支持。自定义
Favicon支持(本文档稍后介绍)。
ConfigurableWebBindingInitializerbean的自动使用(本文档稍后会介绍)。如果您想保留那些 Spring Boot MVC 自定义并进行更多MVC 自定义(拦截器、格式化程序、视图控制器和其他功能),您可以添加自己
@Configuration的类型类WebMvcConfigurer但不@EnableWebMvc添加.如果您想提供、 或的自定义实例
RequestMappingHandlerMapping,并且仍然保留 Spring Boot MVC 自定义,则可以声明一个类型的 bean并使用它来提供这些组件的自定义实例。RequestMappingHandlerAdapterExceptionHandlerExceptionResolverWebMvcRegistrations如果你想完全控制 Spring MVC,你可以添加你自己的
@Configuration注释@EnableWebMvc,或者添加你自己的@Configuration-annotatedDelegatingWebMvcConfiguration,如@EnableWebMvc.
划重点:扩展MVC,将它标志为@Configuration配置类,实现WebMvcConfigurer接口,并且不加
@EnableWebMvc
//扩展MVC
@Configuration
public class MyMvcConfig implements WebMvcConfigurer {
//可以在里面重写各种方法来扩展功能,拦截器。。日志。。什么的
    @Override
    public void addInterceptors(InterceptorRegistry registry) {
        WebMvcConfigurer.super.addInterceptors(registry);
    }
}@EnableWebMvc
表示全面接管SpringMVC,SpringBoot对SpringMVC的自动配置不需要了,所有的都是我们自己配,所有默认配置都没了!有时会导致很多请求进不来,或者参数转换出错之类的,因为spring mvc默认的转换器已经不生效了,所以在大多数情况下我们需要的是在其基础配置上添加自定义配置。
深入Spring Boot:显式配置 @EnableWebMvc 导致静态资源访问失败 | 横云断岭的专栏

总结:加了这个注解会导入一个类,spring识别到该类,会使你的扩展配置全部失效
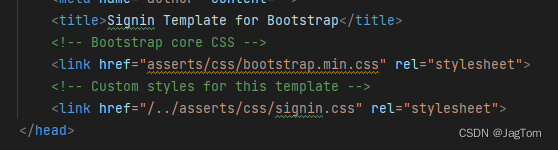
导入静态资源css的出现了个离奇的错误,这里记录一下
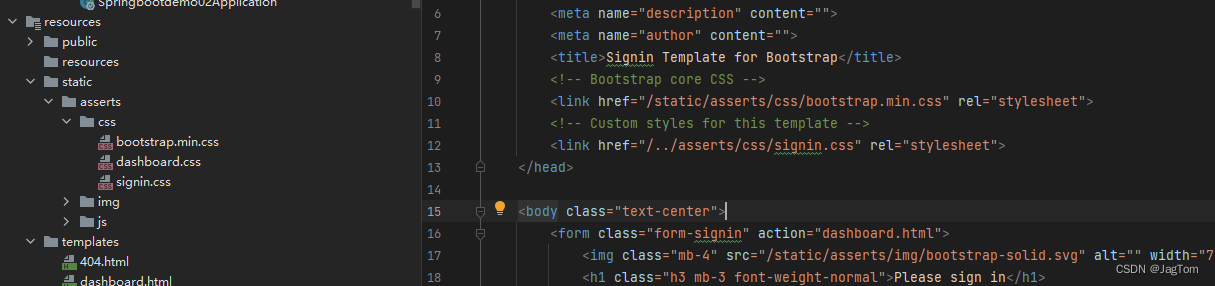
这里加了static目录,是找不到bootstrap的,而第二个路径css却能加载到,不知道为什么。或者实现不行还是用相对路径比较好。
4.国际化
创建目录
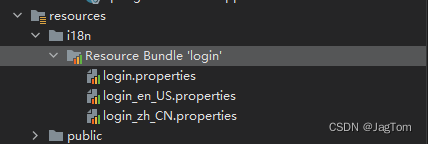
idea非常智能,我们可以直接可视化界面操作
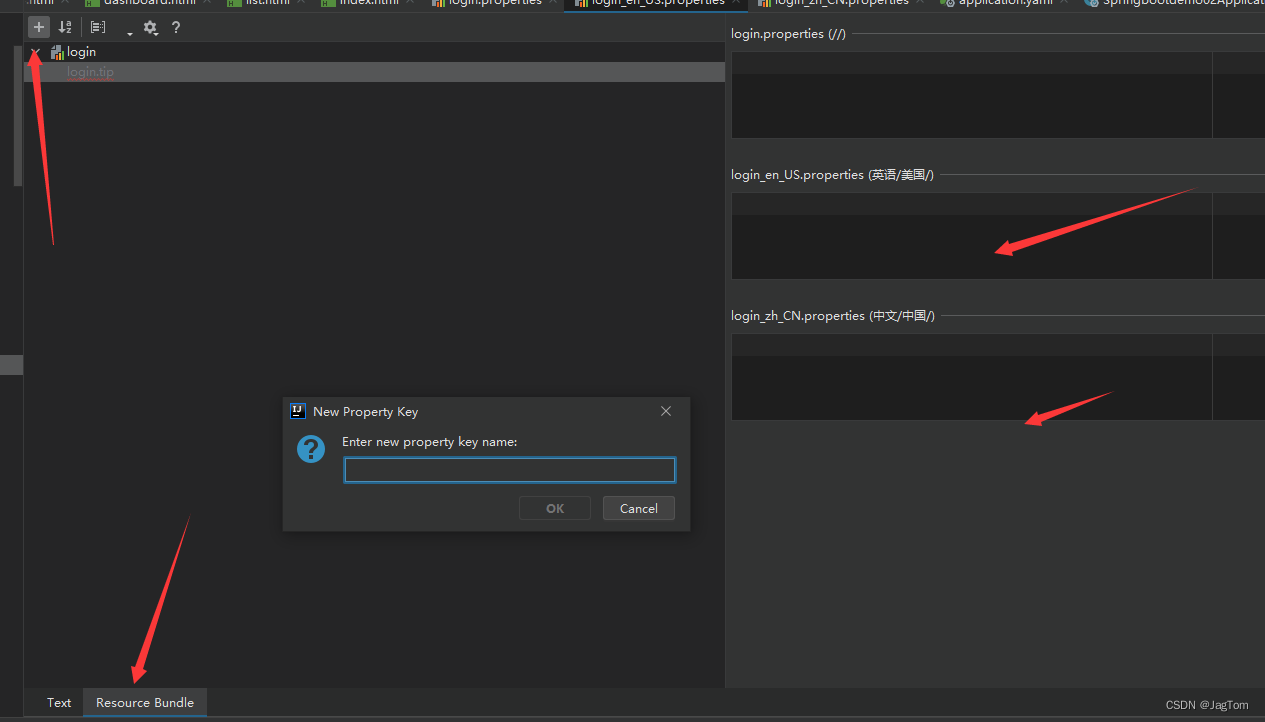
修改配置文件

这里写的时候发现会有提示了
import org.springframework.util.StringUtils;
import org.springframework.web.servlet.LocaleResolver;


import javax.servlet.http.HttpServletRequest;
import javax.servlet.http.HttpServletResponse;
import java.util.Locale;

/**
 * 可以在连接上携带区域信息
 */
public class MyLocaleResolver implements LocaleResolver {

    @Override
    public Locale resolveLocale(HttpServletRequest request) {
        String language = request.getParameter("l");

        System.out.println("debug====>"+language);

        Locale locale = Locale.getDefault();  //如果没有就默认为空

        if(StringUtils.hasText(language)){
            String[] split = language.split("_");
            locale = new Locale(split[0],split[1]);
        }
        return locale;
    }

    @Override
    public void setLocale(HttpServletRequest request, HttpServletResponse response, Locale locale) {

    }
}
import org.springframework.context.annotation.Bean;
import org.springframework.context.annotation.Configuration;
import org.springframework.web.servlet.LocaleResolver;
import org.springframework.web.servlet.config.annotation.ViewControllerRegistry;
import org.springframework.web.servlet.config.annotation.WebMvcConfigurer;
//扩展MVC
@Configuration
public class MyMvcConfig implements WebMvcConfigurer {
@Override
public void addViewControllers(ViewControllerRegistry registry) {
//仅仅需要页面跳转而没有具体的业务逻辑的代码,如下所示
registry.addViewController("/").setViewName("index");
registry.addViewController("/index.html").setViewName("index");
}
@Bean
public LocaleResolver localeResolver(){ //方法名必须是:localeResolver 因为@ConditionalOnMissingBean(name = {"localeResolver"}
return new MyLocaleResolver() ;
}
}

<a class="btn btn-sm" th:href="@{/index.html(l='zh_CN')}">中文</a>
			<a class="btn btn-sm" th:href="@{/index.html(l='en_US')}">English</a>
测试,运行成功!


 629
629


 被折叠的 条评论
为什么被折叠?
被折叠的 条评论
为什么被折叠?
 到【灌水乐园】发言


