


目录
一、下载YOLACT代码及预训练权重文件
要在GitHub上下载YOLACT源代码,首先你需要会翻墙,不然登录Github会很慢,假设你已经会这一步,那么直接看下面。
给出YOLACT代码下载链接:https://github.com/dbolya/yolact/
进入链接后,你会看到如下界面。
我们按照如下图所示步骤下载项目文件。

解压项目文件夹
使用pycharm打开解压后的项目文件夹。
-
进入项目目录
.\yolact-master\ -
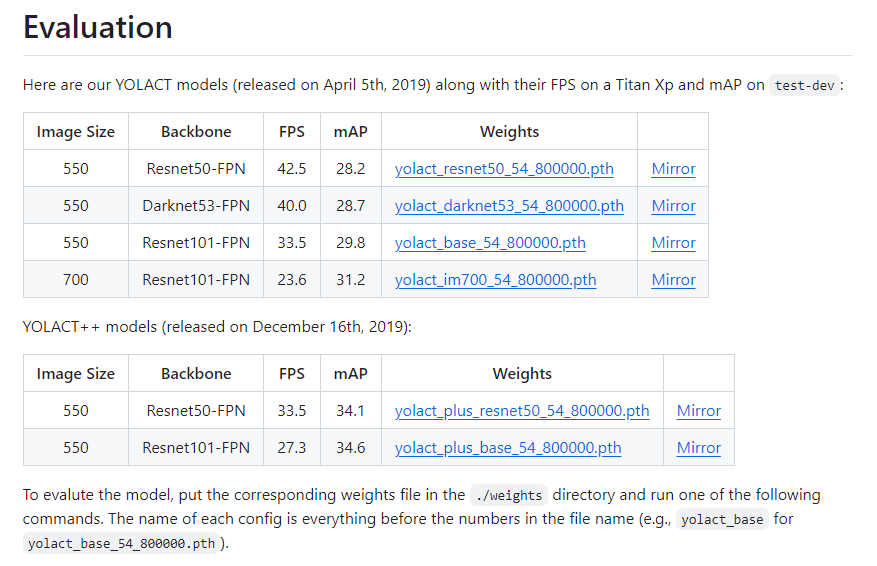
下载 预训练权重 至
.\yolact-master\weights\文件夹。预训练权重所在位置为:https://github.com/dbolya/yolact/
二、图像、视频测试
2.1 图像输入测试
- 将自己的测试图像放在该目录下
.\yolact-master\test.jpg,test.jpg如下所示。

- 执行命令
官方给出的图片测试命令如下所示:
# Display qualitative results on the specified image.
python eval.py --trained_model=weights/yolact_base_54_800000.pth --score_threshold=0.15 --top_k=15 --image=my_image.png

# Process an image and save it to another file.
python eval.py --trained_model=weights/yolact_base_54_800000.pth --score_threshold=0.15 --top_k=15 --image=input_image.png:output_image.png

# Process a whole folder of images.
python eval.py --trained_model=weights/yolact_base_54_800000.pth --score_threshold=0.15 --top_k=15 --images=path/to/input/folder:path/to/output/folder
1.第一条命令用于测试具体的图片(一张图片),处理后的图片不保存成文件,如下所示。
python eval.py --trained_model=weights/yolact_base_54_800000.pth --score_threshold=0.15 --top_k=15 --image=test.jpg 得到结果如下图所示。

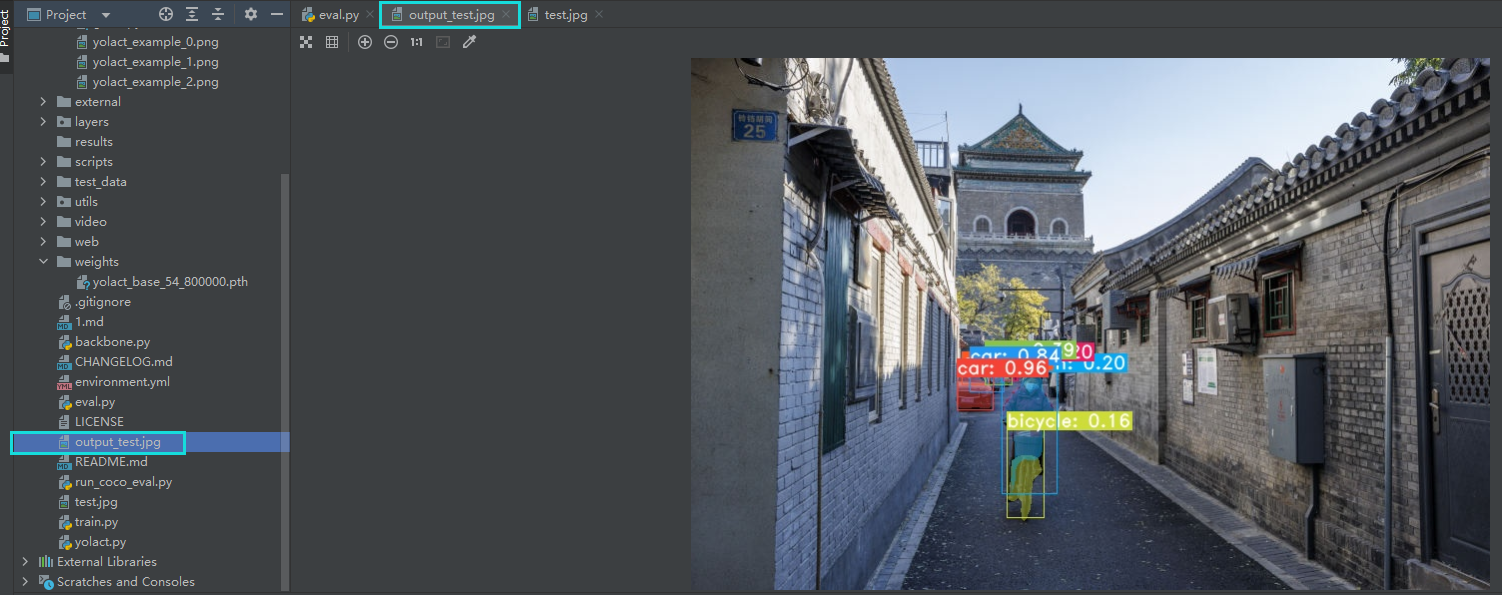
2.第二条命令用于处理一张图片并且将处理后的图片保存成指定文件。
我们在pycharm中的Terminal中输入以下指令:
python eval.py --trained_model=weights/yolact_base_54_800000.pth --score_threshold=0.15 --top_k=15 --image=test.jpg:output_test.jpg

将test.jpg图片进行处理并将处理后的图片保存为out_put.jpg。

3.第三条命令用于处理一批图片。
我们在项目文件夹中创建名为test_data文件夹,在该文件夹中创建名为input以及output的文件夹。

在input文件夹中放入我们要测试的图片, 我们在input文件夹中放入两张图片,当然也可以放更多的图片。

运行下述指令:
python eval.py --trained_model=weights/yolact_base_54_800000.pth --score_threshold=0.15 --top_k=15 --images=test_data/input:test_data/output
运行结果:
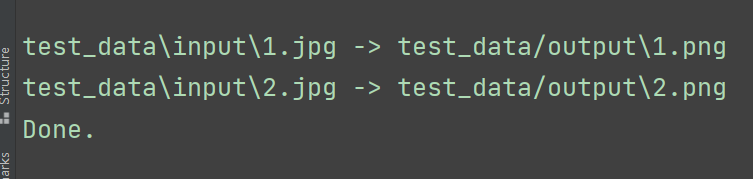
我们在output文件夹中就可以看到处理后的图片啦!

2.2 视频输入测试
官方提供了三条指令,如下所示:
# Display a video in real-time. "--video_multiframe" will process that many frames at once for improved performance.
# If you want, use "--display_fps" to draw the FPS directly on the frame.
python eval.py --trained_model=weights/yolact_base_54_800000.pth --score_threshold=0.15 --top_k=15 --video_multiframe=4 --video=my_video.mp4

# Display a webcam feed in real-time. If you have multiple webcams pass the index of the webcam you want instead of 0.
python eval.py --trained_model=weights/yolact_base_54_800000.pth --score_threshold=0.15 --top_k=15 --video_multiframe=4 --video=0

# Process a video and save it to another file. This uses the same pipeline as the ones above now, so it's fast!
python eval.py --trained_model=weights/yolact_base_54_800000.pth --score_threshold=0.15 --top_k=15 --video_multiframe=4 --video=input_video.mp4:output_video.mp4
第一条指令用于处理一个视频,但不会将处理后的文件进行保存。
第二条指令用于网络摄像头测试。
第三条指令用于处理一个视频,然后将处理后的视频保存成文件。
待更新!!!


 751
751


 被折叠的 条评论
为什么被折叠?
被折叠的 条评论
为什么被折叠?
 到【灌水乐园】发言


