


本节内容出处来源于https://www.ituring.com.cn/book/2744,第一行代码——Android(第3版)作者:郭霖
Android开发入门1
前言
本文章的更新日期为2021-7-30,使用Android Studio的版本为4.2.2

在使用之前需要进行以下的设置:
- 项目目录结构选择Project.
- 初次运行时出现以下问题:
Installed Build Tools revision 31.0.0 is corrupted. Remove and install again using the SDK Manager.
解决方案如下:找到app目录下的build.gradle文件,将31改成30。
android {
    compileSdkVersion 30
    buildToolsVersion "30.0.2"

    defaultConfig {
        applicationId "com.example.filetest"
        minSdkVersion 21
        targetSdkVersion 30
        versionCode 1
        versionName "1.0"
      }
   ...
}
- kotlin-android-extensions插件的使用
新版本的Android Studio已经不再默认配置该插件,为了方便学习,我们可以手动进行添加。
plugins {
    id 'com.android.application'
    id 'kotlin-android'
    id 'kotlin-android-extensions'  //添加该行
}
Activity
1.1 onCreate
override fun onCreate(savedInstanceState: Bundle?) {
    super.onCreate(savedInstanceState)
}
1.2 布局
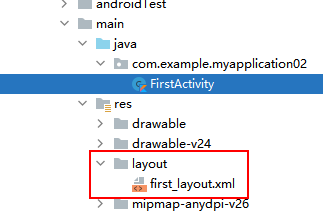
在res下新建layout目录,新建Layout resource file
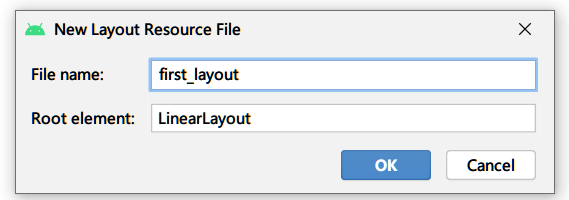
first_layout.xml
<?xml version="1.0" encoding="utf-8"?>
<LinearLayout xmlns:android="http://schemas.android.com/apk/res/android"
    android:orientation="vertical"
    android:layout_width="match_parent"
    android:layout_height="match_parent">
</LinearLayout>
1.3 添加元素
1.3.1 Button
在刚刚新建的Layout resource file(first_layout.xml)中添加按钮组件。
<Button
    android:id="@+id/button1"
    android:layout_width="match_parent"
    android:layout_height="wrap_content"
    android:text="Button 1"
    />
1.4 加载布局
setContentView(R.layout.first_layout)
1.5 注册
所有的Activity都要在AndroidManifest.xml中进行注册才能生效,这一步不用手动操作,IDE自动帮我们生成。
<application
             android:allowBackup="true"
             android:icon="@mipmap/ic_launcher"
             android:label="@string/app_name"
             android:roundIcon="@mipmap/ic_launcher_round"
             android:supportsRtl="true"
             android:theme="@style/Theme.MyApplication02">
    <activity android:name=".FirstActivity"></activity>
</application>
配置主Activity,为程序运行时首先启动的Activity.
label指定标题栏内容,也是启动其中app的名称
在标签中加入intent-filter标签,添加一下2行标签。
<application
	android:allowBackup="true"
	android:icon="@mipmap/ic_launcher"
	android:label="@string/app_name"
	android:roundIcon="@mipmap/ic_launcher_round"
	android:supportsRtl="true"
	android:theme="@style/Theme.MyApplication02">
	<activity android:name=".FirstActivity"
		android:label="This is FirstActivity">
	<intent-filter>
		<action android:name="android.intent.action.MAIN"/>
		<category android:name="android.intent.category.LAUNCHER"/>
	</intent-filter>
	</activity>
</application>
1.6 Toast
在onCreate中进行添加。
override fun onCreate(savedInstanceState: Bundle?) {
    super.onCreate(savedInstanceState)
    setContentView(R.layout.first_layout)
    val Button1:Button = findViewById(R.id.button1)
    Button1.setOnClickListener{
        Toast.makeText(this, "点击了按钮", Toast.LENGTH_SHORT).show()
    }
}
1.7 Menu
在res目录下新建menu文件夹,创建文件main.xml
1.7.1 创建布局
<menu xmlns:android="http://schemas.android.com/apk/res/android">
    <item
          android:id="@+id/add_item"
          android:title="添加"/>
    <item
          android:id="@+id/remove_item"
          android:title="移除"/>
</menu>
1.7.2 重写onCreateOptionMenu方法(在onCreate所在的Activity中)
override fun onCreateOptionsMenu(menu: Menu?): Boolean {
    menuInflater.inflate(R.menu.main, menu)
    return true
}
1.7.3 添加功能
override fun onOptionsItemSelected(item: MenuItem): Boolean {
    when(item.itemId){
        R.id.add_item->Toast.makeText(this,"添加按钮被点击",Toast.LENGTH_SHORT).show()
        R.id.remove_item->Toast.makeText(this,"移除按钮被点击",Toast.LENGTH_SHORT).show()
    }
    return true
}
1.8 销毁Activity
同样是在监听器中进行操作。
Button1.setOnClickListener{
    Toast.makeText(this, "点击了按钮", Toast.LENGTH_SHORT).show()
    finish()
}
1.9 跳转到其他Activity
1.9.1 创建第二个Activity
编辑activity_second.xml
<?xml version="1.0" encoding="utf-8"?>
<LinearLayout xmlns:android="http://schemas.android.com/apk/res/android"
    android:orientation="vertical"
    android:layout_width="match_parent"
    android:layout_height="match_parent">
    <Button
        android:id="@+id/button2"
        android:layout_width="match_parent"
        android:layout_height="wrap_content"
        android:text="Button 2"
        />

</LinearLayout>
1.9.2 Intent
显式Intent
我们把之前button1中的内容清空,填写以下内容:
Button1.setOnClickListener{
    val intent = Intent(this,SecondActivity::class.java)
    startActivity(intent)
}
Intent函数:(上下文,目标Activity)
原理:首先构建一个Intent对象,传入this作为上下文,第二个参数传入SecondActivity::class.java作为目标Activity。然后通过startActivity方法进行执行,实现在FirstActivity的基础上打开SecondActivity。
效果:点击按钮后跳到SecondActivity
隐式Intent
隐式intent不明确指出启动的Activity,却指定了一系列action和category,交由系统去分析启动哪一个Activity。
在标签中配置intent-filter内容指定action和category。
打开AndroidManifest.xml:
**注意:**com.example.activitytest.ACTION_START为项目地址,并不能照抄。

<activity android:name=".SecondActivity">
    <intent-filter>
        <action android:name="com.example.myapplication003.ACTION_START"/>
        <category android:name="android.intent.category.DEFAULT" />
    </intent-filter>
 </activity>
修改FirstActivity中的button事件:
Button1.setOnClickListener{
    val intent = Intent("com.example.myapplication003.ACTION_START")
    startActivity(intent)
}
原理:使用Intent的构造函数将action字符串传进去,表明要启动的Activity(能响应这个com.example.com.example.myapplication003.ACTION_START的Activity),在调用startActivity方法时会自动将category添加到Intent。
Intent只能够指定一个action,但能指定多个category,现在尝试使用多个category。
找到FirstActivity的按钮点事件:
Button1.setOnClickListener{
    val intent = Intent("com.example.myapplication003.ACTION_START")
    intent.addCategory("com.example.myapplication003.MY_CATEGORY")
    startActivity(intent)
}
这时候运行程序,点击按钮。
错误信息
点击按钮后程序崩溃了,控制台提示报错信息:

并没有Activity能够响应Intent,刚刚新增的category并没有在SecondActivity中的intent-filter中声明,现在我们修正错误,添加声明。

<activity android:name=".SecondActivity">
    <intent-filter>
        <action android:name="com.example.myapplication003.ACTION_START"/>
        <category android:name="android.intent.category.DEFAULT" />
        <category android:name="com.example.myapplication003.MY_CATEGORY" />
    </intent-filter>
</activity>
更多隐式Intent
使用隐式intent可以启动自己程序内的Activity,还可以启动其他程序的Activity,这里我们尝试调用浏览器打开一个网页。
Button1.setOnClickListener{
    val intent = Intent(Intent.ACTION_VIEW)
    intent.data = Uri.parse("https://www.qq.com")
    startActivity(intent)
}
原理:指定了action为Intent.ACTION_VIEW,这是一个系统内置的动作,通过Uri.parse()方法将字符串解析成Uri对象,调用setData()方法将该对象传递过去(这里依旧是用了语法糖)
data标签
为了更精确指定当前Activity能够响应的数据,我们在intent-filter标签中再配置一个标签。可配置的内容如下:
android:scheme  指定协议
android:host    指定主机名
android:port    指定端口
android:path    指定主机名和端口后面的部分
android:mimeType  指定可以处理的数据类型
这次我们尝试自己写一个Activity,让其响应打开网页的Intent(刚刚是系统浏览器响应)
新建empty Activity,起名为ThirdActivity。
修改xml:
<?xml version="1.0" encoding="utf-8"?>
<LinearLayout xmlns:android="http://schemas.android.com/apk/res/android"
    android:orientation="vertical"
    android:layout_width="match_parent"
    android:layout_height="match_parent">

    <Button
        android:id="@+id/button3"
        android:layout_width="match_parent"
        android:layout_height="wrap_content"
        android:text="Button 3"
        />

</LinearLayout>
修改Androidmanifest.xml
<activity android:name=".ThirdActivity">
    <intent-filter tools:ignore="AppLinkUrlError">
        <action android:name="android.intent.action.VIEW" />
        <category android:name="android.intent.category.DEFAULT /" />
        <data android:scheme="https" />
    </intent-filter>
</activity>
此处Android Stdio认为能够响应action.VIEW的Activity都应该加上BROWSABLE的category,否则会出现警告,此处我们在标签中加入tools:ignore将忽略警告。
实现系统拨号
Button1.setOnClickListener{
    val intent = Intent(Intent.ACTION_DIAL)
    intent.data = Uri.parse("tel:10010")
    startActivity(intent)
}


 554
554


 被折叠的 条评论
为什么被折叠?
被折叠的 条评论
为什么被折叠?
 到【灌水乐园】发言


