


✅💖⚠️▶️➡️🌿🍀🍄🌟⭐❄️✅💖⚠️▶️➡️🌿🍀🍄🌟⭐❄️✅💖⚠️▶️➡️🌿🍀🍄🌟⭐❄️✅💖⚠️
这篇博客是深度学习环境搭建笔记(一),主要介绍了在 cuda 10.2 环境下 detectron2 的安装过程,具体步骤如下:
- 安装 python:使用
conda create -n detectron python=3.7命令创建名为 detectron 的虚拟环境并安装 Python 3.7。 - 安装 pycocotools:根据 Python 版本从 PyPI 下载对应的
pycocotools_windows版本,如pip install pycocotools_windows-2.0.0.2-cp37-cp37m-win_amd64.whl。 - 安装 Torch 和 Torchvision:分别执行
pip install “torch-1.10.1+cu102-cp37-cp37m-win_amd64.whl”和pip install “torchvision-0.11.2+cu102-cp37-cp37m-win_amd64.whl”进行安装。 - 安装 fvcore:从 GitHub 下载链接 https://github.com/facebookresearch/fvcore 获取源码,进入 setup.py 所在目录,执行
python setup.py build --force develop安装,安装后在 cmd 中输入import fvcore无报错即为成功。 - 安装 detectron2
- 修改 pytorch 代码:按照官方文档对两个文件进行修改,一是将
{your evn path}\Lib\site-packages\torch\include\torch\csrc\jit\runtime\argumenta_spec.h中的static constexpr size_t DEPTH_LIMIT = 128;改为static const size_t DEPTH_LIMIT = 128;;二是将{your evn path}\Lib\site-packages\torch\include\pybind11\cast.h中的explicit operator type&() { return *(this->value); }改为explicit operator type&() { return ((type)this->value); }。 - 修改 detectron2 代码:将
detectron2\detectron2\layers\csrc\deformable文件夹下三个文件中的全部AT_CHECK替换为TORCH_CHECK。
- 修改 pytorch 代码:按照官方文档对两个文件进行修改,一是将
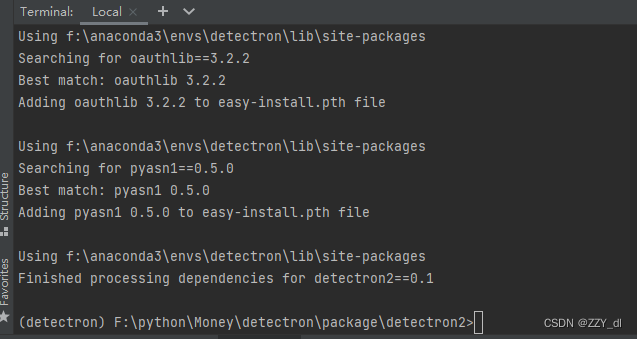
- 开始安装:进入解压后 setup.py 的路径,执行
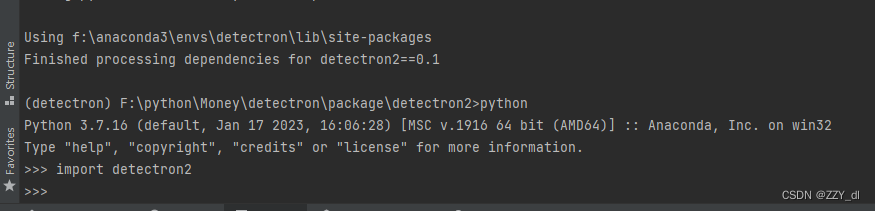
python setup.py build --force develop完成 detectron2 的安装,安装完成后在 Python 环境中输入import detectron2验证安装成功。
第一步 安装python🌿
cuda 10.2 环境下
- conda create -n detectron python=3.7
第二步 安装pycocotools🌿
- 下载对应的pycocotools-windows · PyPI根据python版本,然后pip安装
- pip install pycocotools_windows-2.0.0.2-cp37-cp37m-win_amd64.whl
第三步 安装Torch和Torchvision🌿
- pip install “torch-1.10.1+cu102-cp37-cp37m-win_amd64.whl”
- pip install “torchvision-0.11.2+cu102-cp37-cp37m-win_amd64.whl”
第四步 安装fvcore🌿
下载链接:https://github.com/facebookresearch/fvcore 点击跳转.
然后cd到setup.py所在目录,用以下指令安装
python setup.py build --force develop
打开cmd输入 import fvcore 没报错即成功
第五步 安装detectron2🌿
在安装detectron2前需要先修改detectron2与pytorch的代码以保证顺利安装。
下载地址:https://github.com/conansherry/detectron2 点击跳转.
1)根据官方文档对pytorch进行如下修改(觉得难找可以下载Everything)
file1:
{your evn path}\Lib\site-packages\torch\include\torch\csrc\jit\argument_spec.h
example:
{C:\Miniconda3\envs\py36}\Lib\site-packages\torch\include\torch\csrc\jit\argument_spec.h(190)
   static constexpr size_t DEPTH_LIMIT = 128;
      change to -->
   static const size_t DEPTH_LIMIT = 128;
file2:
{your evn path}\Lib\site-packages\torch\include\pybind11\cast.h
example:
{C:\Miniconda3\envs\py36}\Lib\site-packages\torch\include\pybind11\cast.h(1449)
    explicit operator type&() { return *(this->value); }
      change to -->
   explicit operator type&() { return ((type)this->value); }

第一个文件的位置有变动为:{your evn path}\Lib\site-packages\torch\include\torch\csrc\jit\runtime\argumenta_spec.h

<font color='red'>2)</font>将detectron2\detectron2\layers\csrc\deformable 文件夹下三个文件中全部的 AT_CHECK 全部替换为 TORCH_CHECK
第六步 开始安装🌿
- 进入解压后setup.py的路径
cd detectron2 - 安装
python setup.py build --force develop
- 验证
✅💖⚠️▶️➡️🌿🍀🍄🌟⭐❄️✅💖⚠️▶️➡️🌿🍀🍄🌟⭐❄️✅💖⚠️▶️➡️🌿🍀🍄🌟⭐❄️✅💖⚠️


 2223
2223

 被折叠的 条评论
为什么被折叠?
被折叠的 条评论
为什么被折叠?
 到【灌水乐园】发言


