


一、什么是ajax
AJAX = 异步 JavaScript 和 XML。
AJAX 是一种用于创建快速动态网页的技术。
通过在后台与服务器进行少量数据交换,AJAX 可以使网页实现异步更新。这意味着可以在不重新加载整个网页的情况下,对网页的某部分进行更新。
二、ajxa的创建使用
 const xhr=new XMLHttpRequest()//实例化
           xhr.open("POST","http://127.0.0.1:3101/server")//确定发请求的类型和url
           xhr.send("123")//响应体的内容
           xhr.onreadystatechange=function(){//响应之后的渲染
            if(xhr.readyState===4){
                if(xhr.status>=200&&xhr.status<300){
                    result.innerText=xhr.response
                }
            }
           }
事件绑定 处理服务器返回的结果
on 当…的时候
readystate是xhr的属性,表示状态,0初始化,1open,2send,3服务端返回部分结果,4服务端返回全部结果
change 改变
三、原生的ajax的实例
1、http报文的格式
//事件绑定 处理服务器返回的结果
            //on 当...的时候
            //readystate是xhr的属性,表示状态,0初始化,1open,2send,3服务端返回部分结果,4服务端返回全部结果
            //change 改变
            /*
             请求报文
             行 post url http/1.1
             头 host :baidu.com
             cookie :name=...
             user-agent :chrome 83

             空行

             体 username=admin&password=123
            */
            //响应报文
            /*
                行 http/1.1 200 ok

                头 Content-Type: text/html;charset=utf-8
                   Content-length:1024
                   Content-encoding:gzip

                空行

                体 <html>
                        <head>
                        </head>
                        <body>
                        </body>
                    </html>

            */
2、客户端的html
<!DOCTYPE html>
<html lang="en">
<head>
    <meta charset="UTF-8">
    <meta http-equiv="X-UA-Compatible" content="IE=edge">
    <meta name="viewport" content="width=device-width, initial-scale=1.0">
    <title>ajax</title>
    <style>
        #result{
            width: 150px;
            height: 110px;
            border: 1px yellow solid;
        }
    </style>
</head>
<body>
    <button>点击发送请求</button>
    <div id="result"></div>
    <script>
        const Btn=document.getElementsByTagName("button")[0]
        const result=document.getElementById("result")
        Btn.onclick=function(){
            //创建对象
            const xhr=new XMLHttpRequest()
            //初始化
            xhr.open('GET',"http://127.0.0.1:3101/server")
            //发送
            xhr.send('123');
            xhr.onreadystatechange=function(){
            if( xhr.readyState==4){
                if(xhr.status>=200&&xhr.status<300){
                    // console.log(xhr.status)//相应的状态码
                    // console.log(xhr.statusText)//响应的状态字符串
                    // console.log(xhr.getAllResponseHeaders())//响应头
                    // console.log(xhr.response)//响应体
                    result.innerText=xhr.response;
                }

            }
            }

        }
    </script>
</body>
</html>
服务器端js
引入express
const express=require("express")
const app=express()//实例化app
app.get("/server",(require,response)=>{//设置get响应的方法
    //允许跨域的
    response.setHeader("Access-Control-Allow-Origin","*")
    //运行自定义头属性
    response.setHeader("Access-Control-Allow-Headers","*")
    //发送响应的报文
    response.send("hello ajax的get")
})
app.all("/server",(require,response)=>{// 允许自定义头的,要用all。
    //允许跨域的
    response.setHeader("Access-Control-Allow-Origin","*")
    //允许自定义头的
    response.setHeader("Access-Control-Allow-Headers","*")
    //发送响应的报文
    response.send("hello ajax的post")
})
app.listen(3101,()=>{//设置端口号
    console.log("服务器已经启动")
})
app.all适配所有
浏览器刷新和输入网址响应默认是get请求
服务器肯能会启动失败,那是因为需要node_model文件终端输入 npm link list即可
运行截图:
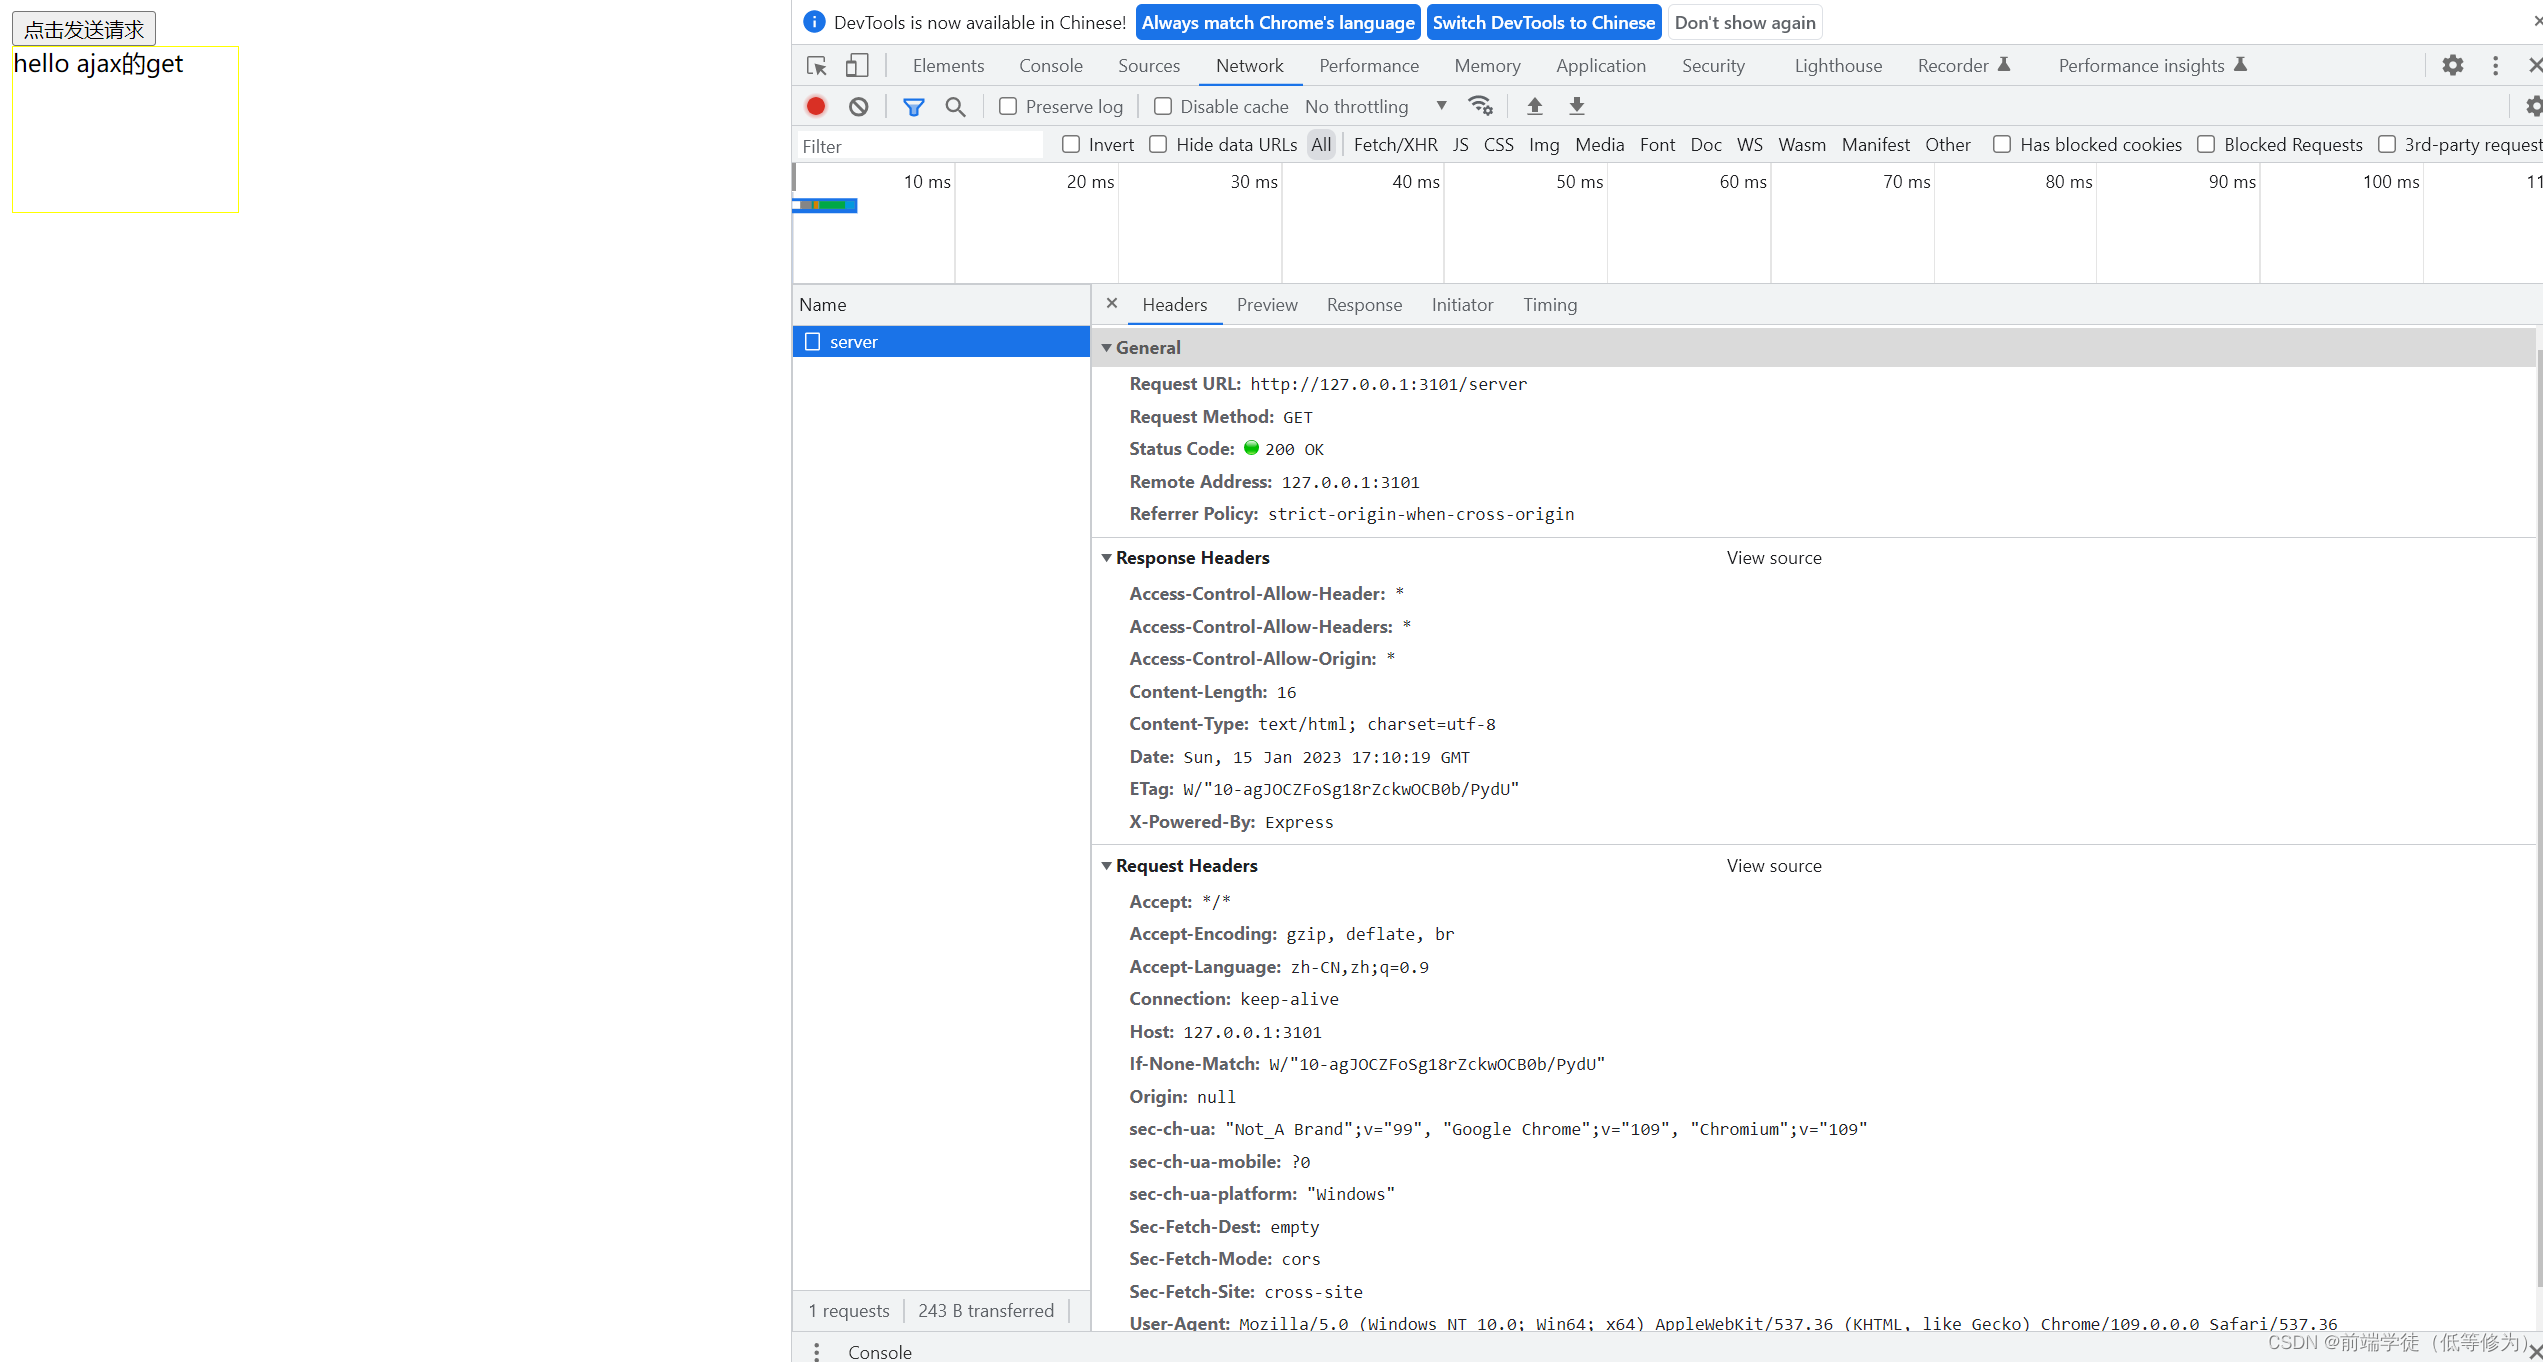
用谷歌浏览器,dege看不到一些网络的数据
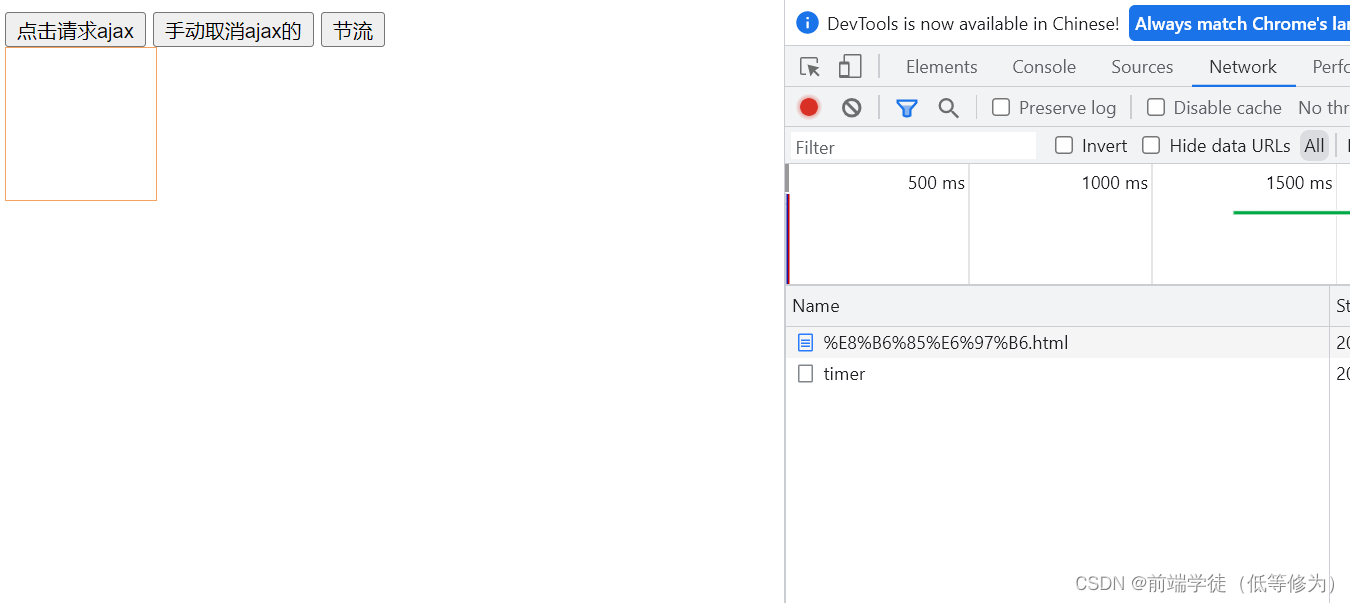
四、ajax的一些属性
服务器的html:
<!DOCTYPE html>
<html lang="en">
<head>
<meta charset="UTF-8">
<meta http-equiv="X-UA-Compatible" content="IE=edge">
<meta name="viewport" content="width=device-width, initial-scale=1.0">
<title>Document</title>
<style>
#result{
width: 100px;
height: 101px;
border:1px sandybrown solid;
}
</style>
</head>
<body>
<button id="btn1">点击请求ajax</button>
<button id="btn2">手动取消ajax的</button>
<button id="btn3">节流</button>
<div id="result"></div>
<script>
let btn1=document.getElementById("btn1")
let btn2=document.getElementById("btn2")
let btn3=document.getElementById("btn3")
let result1=document.getElementById("result")
let isSending=false //是否正在发这个请求
let xhr=null
btn1.addEventListener("click",function(){
xhr=new XMLHttpRequest()
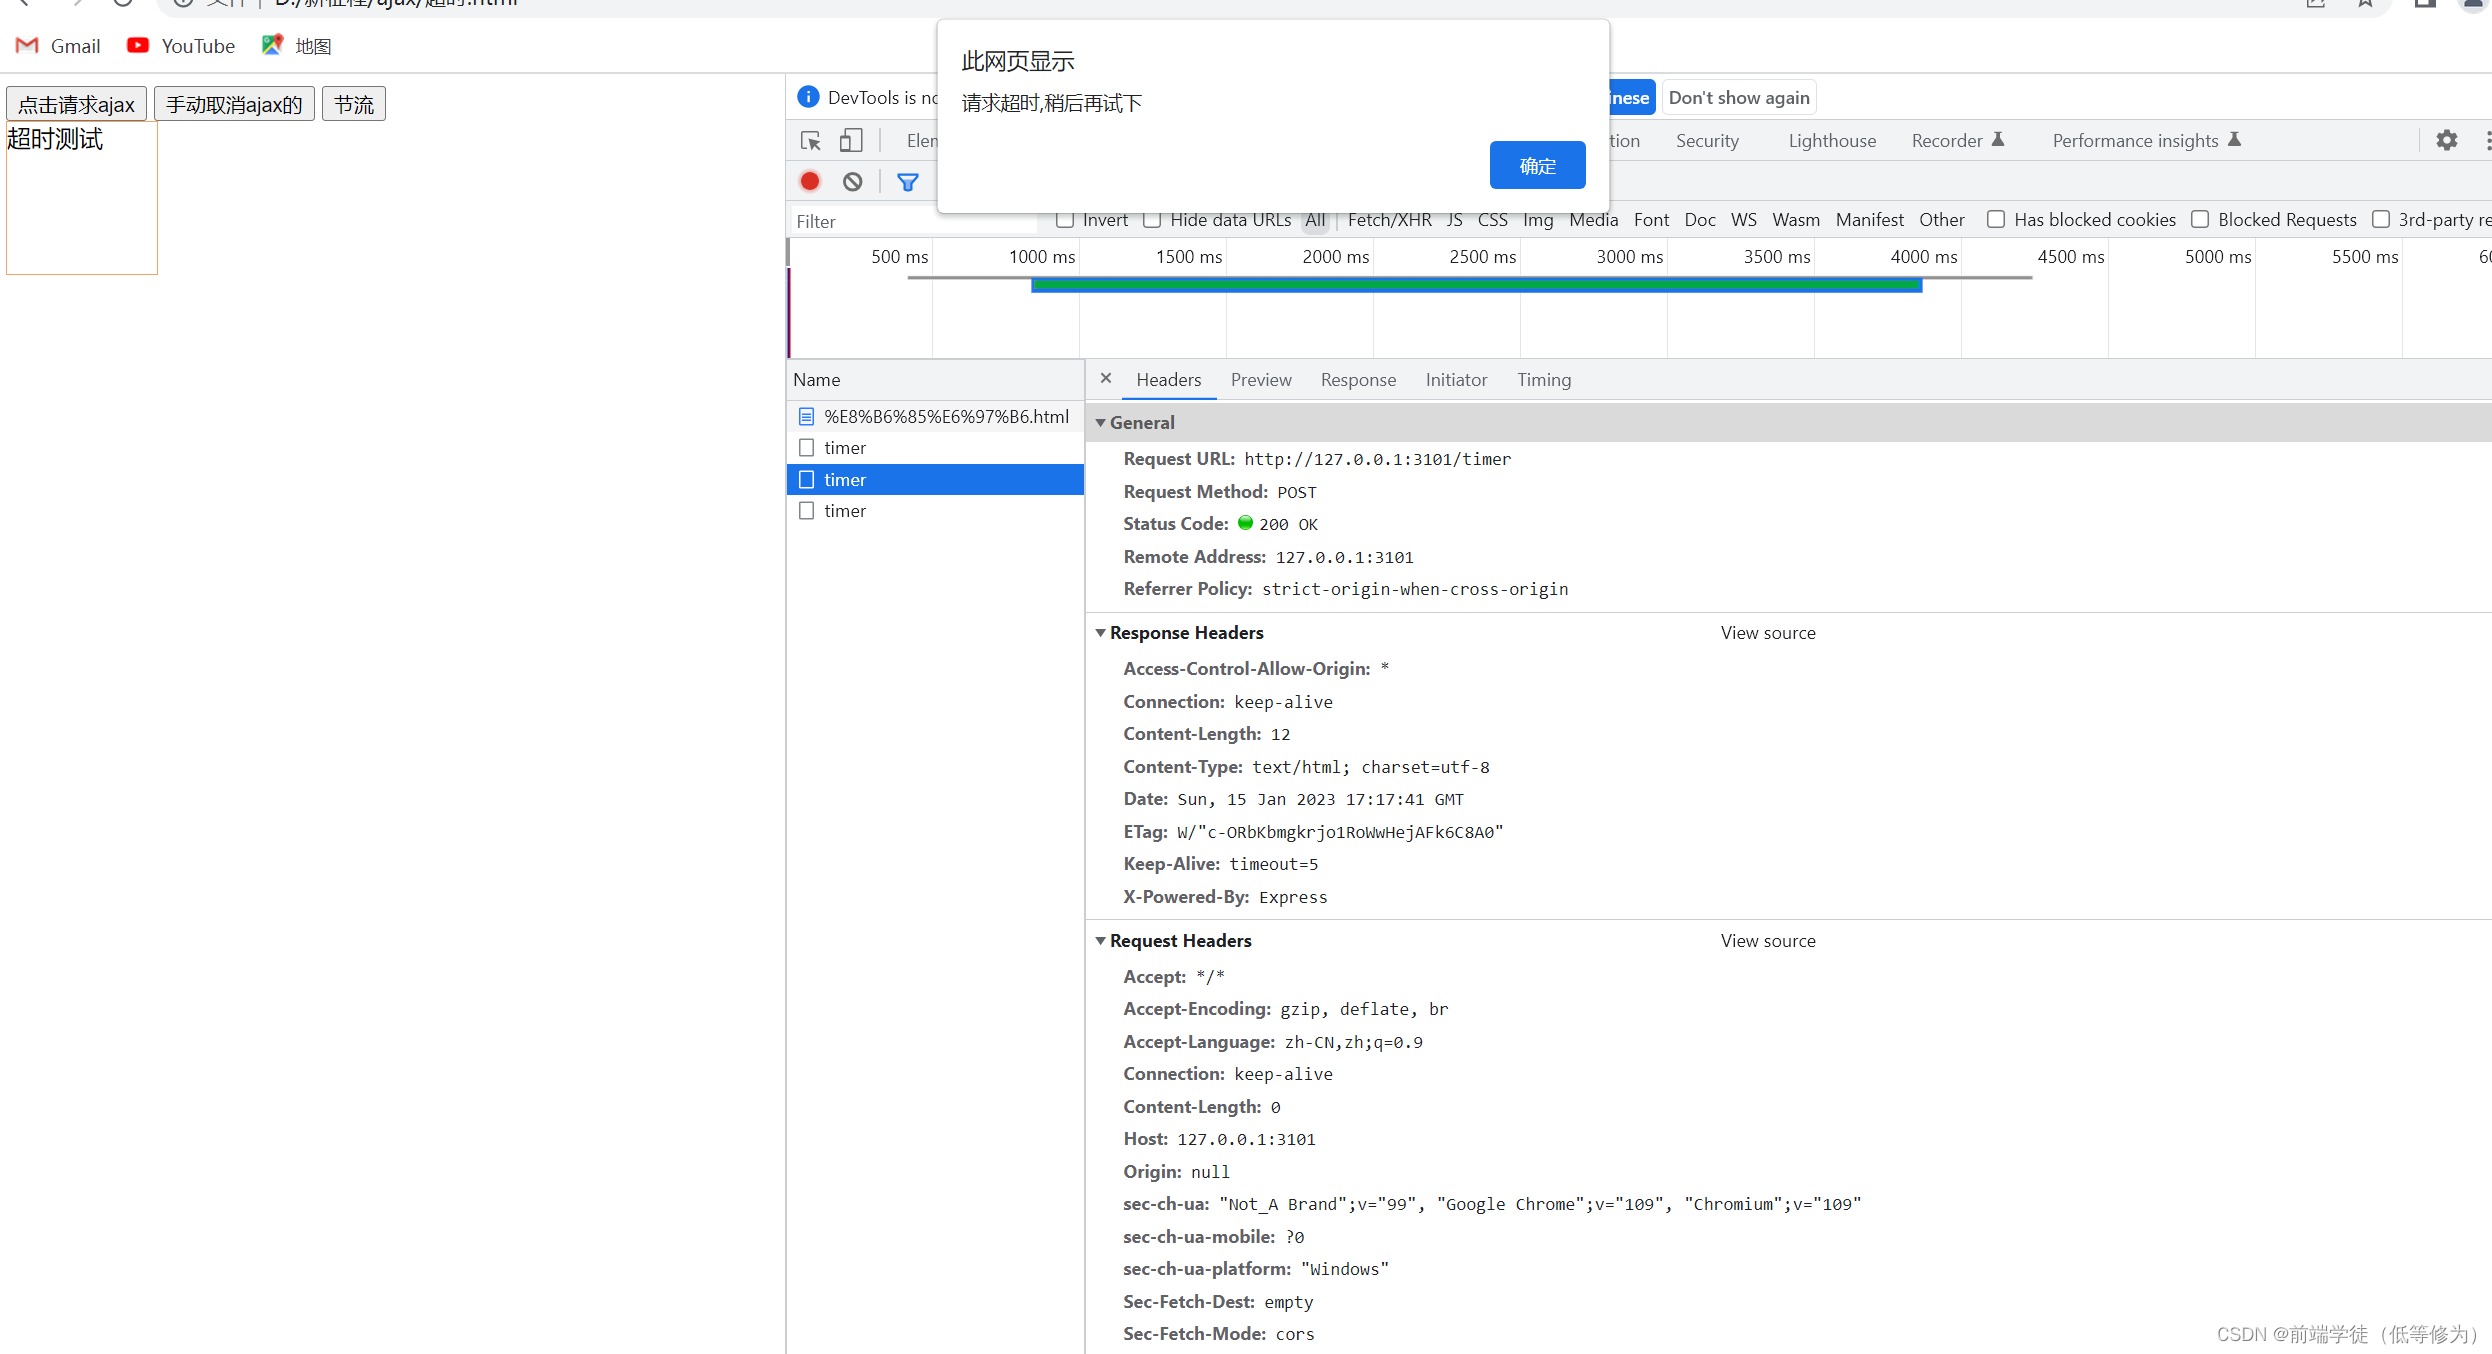
xhr.timeout=2000//设置超过2秒后取消此次请求
xhr.ontimeout=function(){
alert("请求超时,稍后再试下")
}
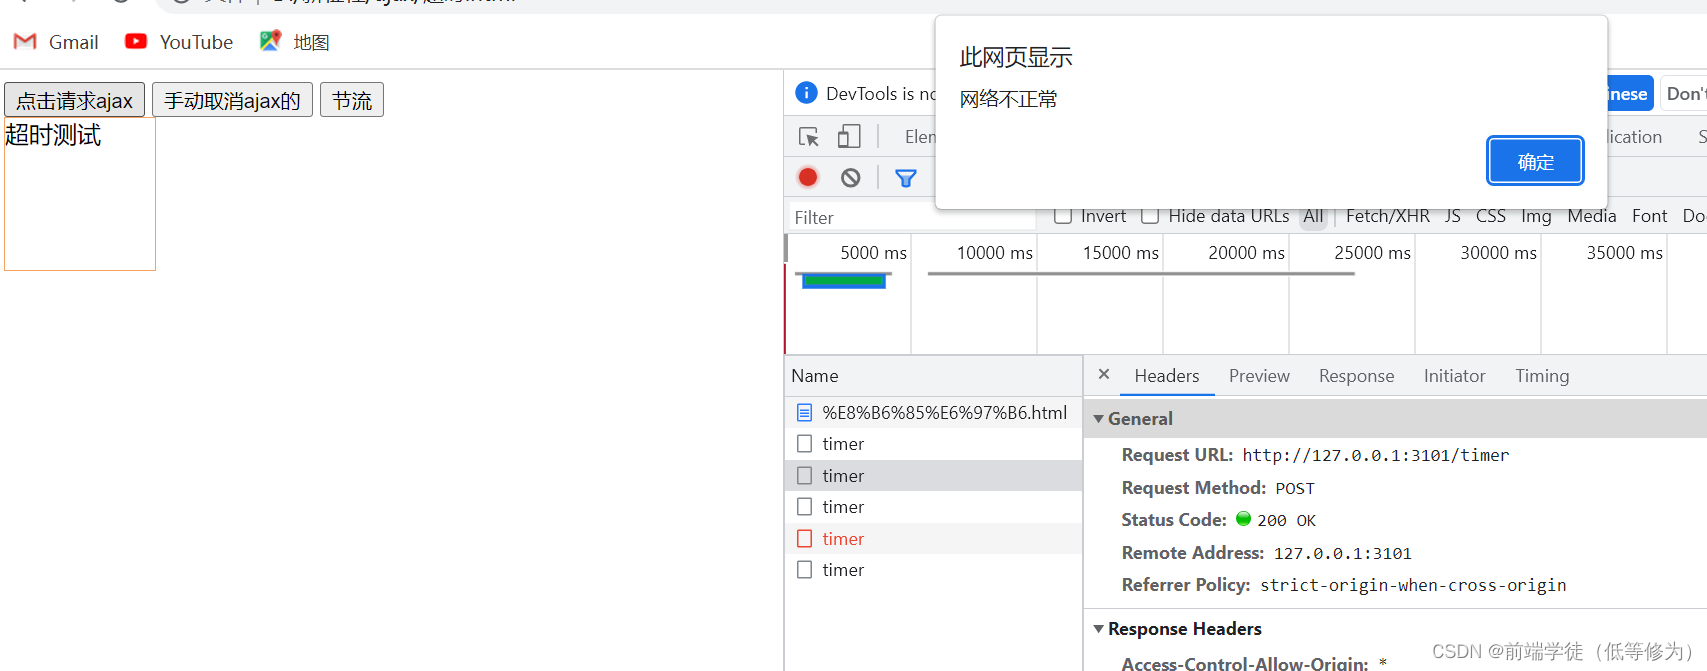
xhr.onerror=function(){//设置网络错误的提示
alert("网络不正常")
}
xhr.open("POST","http://127.0.0.1:3101/timer")
xhr.send()
xhr.onreadystatechange=function(){
if(xhr.readyState==4){
if(xhr.status>=200&&xhr.status<300){
result1.innerText=xhr.response
}
}
}
})
btn2.addEventListener("click",function(){
xhr.abort()//取消ajax的请求
})
btn3.addEventListener("click",function(){
if(isSending==false){
xhr=new XMLHttpRequest()
isSending=true;
xhr.open("POST","HTTP://127.0.0.1:3101/timer")
xhr.send()
xhr.onreadystatechange=function(){
if(xhr.readyState==4){
isSending=false
}
}
}
})
</script>
</body>
</html>
服务器的js
const express=require("express")
const app= express()
app.post("/timer",(require,response)=>{
    response.setHeader("Access-Control-Allow-Origin","*")
    setTimeout(() => {
        response.send("超时测试")
    }, 3000);

})
app.get("/timer",(require,response)=>{
    response.setHeader("Access-Control-Allow-Origin","*")

    setTimeout(() => {
    let data={name:"hwk"}
    data=JSON.stringify(data)
    response.send(data)
    }, 3000);

})
app.all("/timer",(require,response)=>{
    response.setHeader("Access-Control-Allow-Origin","*")
     //运行自定义头属性
     response.setHeader("Access-Control-Allow-Headers","*")


    setTimeout(() => {
        response.send("超时测试")
    }, 3000);

})
app.listen(3101,()=>{
    console.log("3101服务器启动成功")
})
运行截图:
可以设置断网来检测网络异常
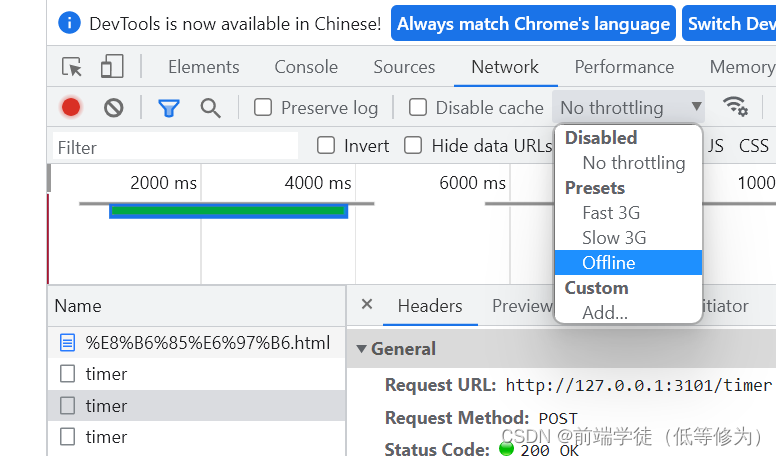
选offline
防止发送重复的请求,减小服务器的压力(节流)
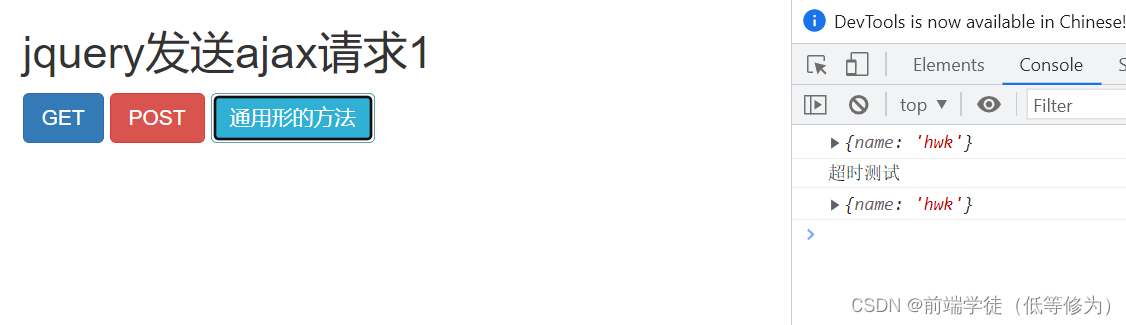
四、用jquery发送ajax(了解即可)
客户端(bootstarp)
记得引入jquery和bootstarp
<!DOCTYPE html>
<html lang="en">
<head>
    <meta charset="UTF-8">
    <meta http-equiv="X-UA-Compatible" content="IE=edge">
    <meta name="viewport" content="width=device-width, initial-scale=1.0">
    <script src="https://cdn.staticfile.org/jquery/1.10.2/jquery.min.js"></script>
    <link rel="stylesheet" href="https://maxcdn.bootstrapcdn.com/bootstrap/3.3.7/css/bootstrap.min.css">
    <title>Document</title>
</head>
<body>
    <div class="container">
        <h2 class="page-heade">jquery发送ajax请求1</h2>
        <button class="btn btn-primary">GET</button>
        <button class="btn btn-danger">POST</button>
        <button class="btn btn-info">通用形的方法</button>
    </div>
    <script>
         $("button").eq(0).click(function(){
            $.get("http://127.0.0.1:3101/timer",{a:100},function(data){
                console.log(data)
            },"json")//加json这个可以将服务器发来的json数据直接变成对象
        })
        $("button").eq(1).click(function(){
            $.post("http://127.0.0.1:3101/timer",{a:100},function(data){
                console.log(data)
            })
        })
        $("button").eq(2).click(function(){
            $.ajax({url:"http://127.0.0.1:3101/timer",
            data:{a:100},
            type:"GET",
            dataType:"json",
            success:function(data){
                console.log(data)
            }}
            )
        })
    </script>
</body>
</html>
服务端:
const express=require("express")
const app= express()
app.post("/timer",(require,response)=>{
    response.setHeader("Access-Control-Allow-Origin","*")
    setTimeout(() => {
        response.send("超时测试")
    }, 3000);

})
app.get("/timer",(require,response)=>{
    response.setHeader("Access-Control-Allow-Origin","*")

    setTimeout(() => {
    let data={name:"hwk"}
    data=JSON.stringify(data)
    response.send(data)
    }, 3000);

})
app.all("/timer",(require,response)=>{
    response.setHeader("Access-Control-Allow-Origin","*")
     //运行自定义头属性
     response.setHeader("Access-Control-Allow-Headers","*")


    setTimeout(() => {
        response.send("超时测试")
    }, 3000);

})
app.listen(3101,()=>{
    console.log("3101服务器启动成功")
})
运行截图:
相继按下这几个按钮
五、axios的写法
Axios 是一个基于 promise 的 HTTP 库,简单的讲就是可以发送get、post请求。vue里面用到也是axios。
客户端的三个按钮分别对应axios的3种请求方式axios.get,axios.post,axios
因为服务端用的是command.js,为了避免影响故这里的axios是用的link(cdn)
客户端:
<!DOCTYPE html>
<html lang="en">
<head>
<meta charset="UTF-8">
<meta http-equiv="X-UA-Compatible" content="IE=edge">
<meta name="viewport" content="width=device-width, initial-scale=1.0">
<script src="https://unpkg.com/axios/dist/axios.min.js"></script>
<title>axios</title>
</head>
<body>
<button id="b1">GET</button>
<button id="b2">POST</button>
<BUtton id="b3">ajax</BUtton>
</body>
<script>
const b1=document.getElementById("b1")
const b2=document.getElementById("b2")
const b3=document.getElementById("b3")
axios.defaults.baseURL="http://127.0.0.1:3101"
b1.onclick=function(){
axios.get("/timer",{
//url参数
params:{
id:1
},
//头信息
headers:{
name:"123",
age:"801"
}//axios返回的是promise的对象
}).then(value=>{
console.log(value)
})
}
b2.onclick=function(){
axios.post("/timer",{//第一个参数为url,第二个为请求体的数据,第三个为其他配置,如果只有两个参数,第二个为请求体
name:"hwk",
pwd:123
},{
//url参数
params:{
id:2
},
//头信息
headers:{
name:"123",
age:"801"
},
}).then(value=>{
console.log(value)
})
}
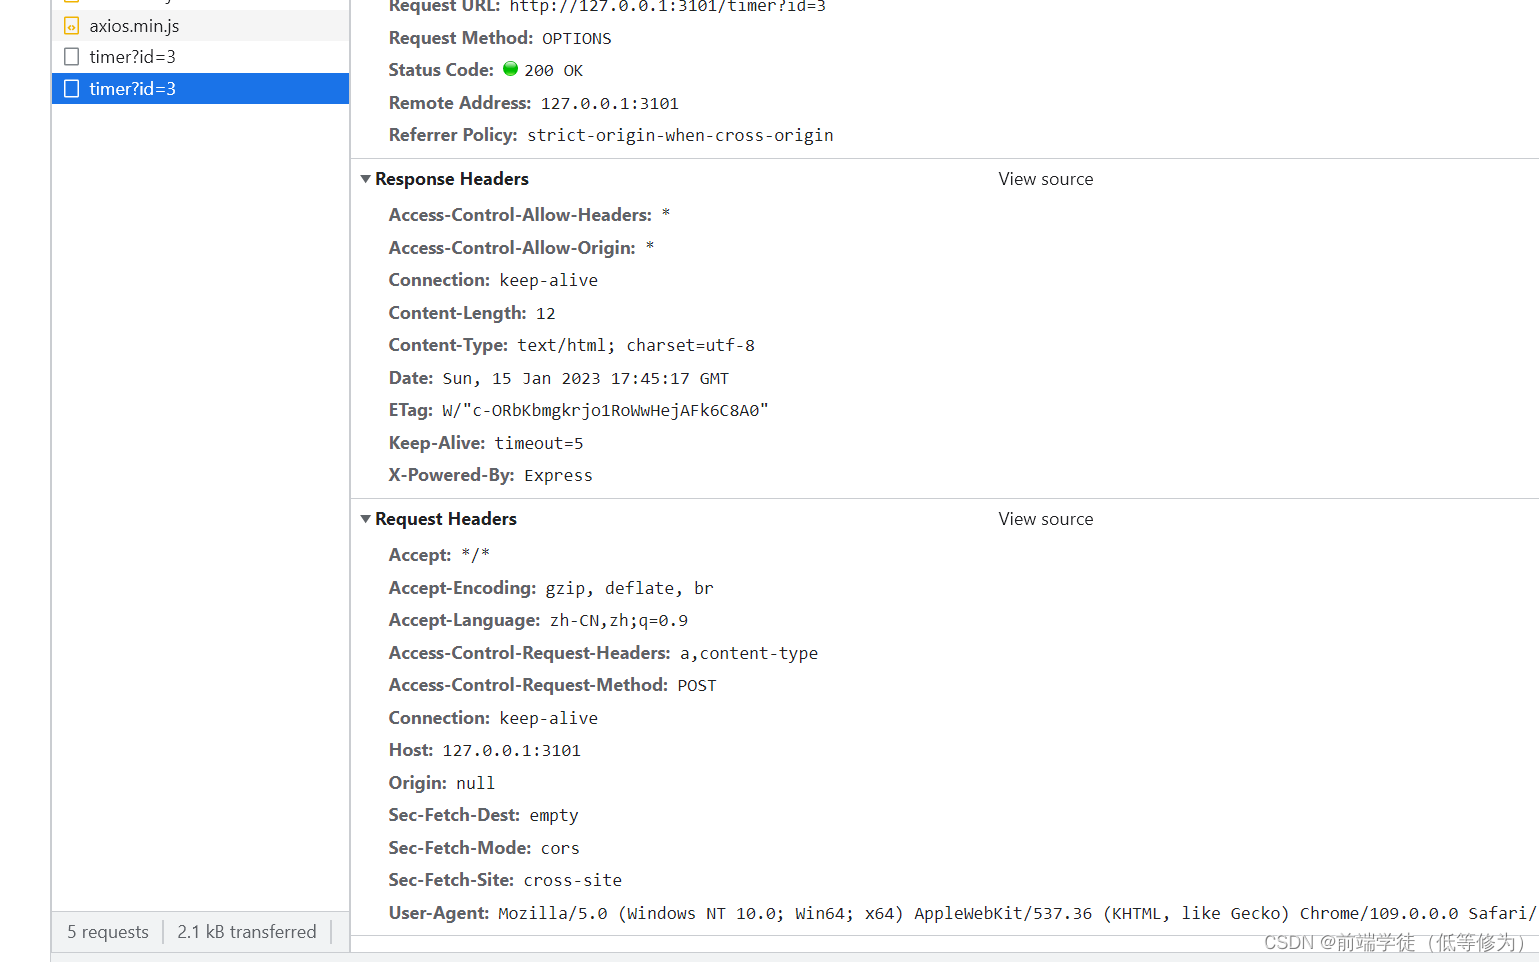
b3.onclick=function(){
axios({
url:"/timer",
params:{
id:"3"
},
headers:{
a:1,
},
data:{
name:"hwk",
pwd:123
},
method:"POST"
}).then((response)=>{
console.log(response)
})
}
</script>
</html>
注意axios()函数如果是一个形参,那个形参就是配置;
两个形参,写法第一个参数是url,第二个是其他配置;
三个形参的话,就是第一个是url,的、第二个是请求体,第三个是其他配置。(params,headers
服务器端和上面的是一模一样的。
运行截图:
发get
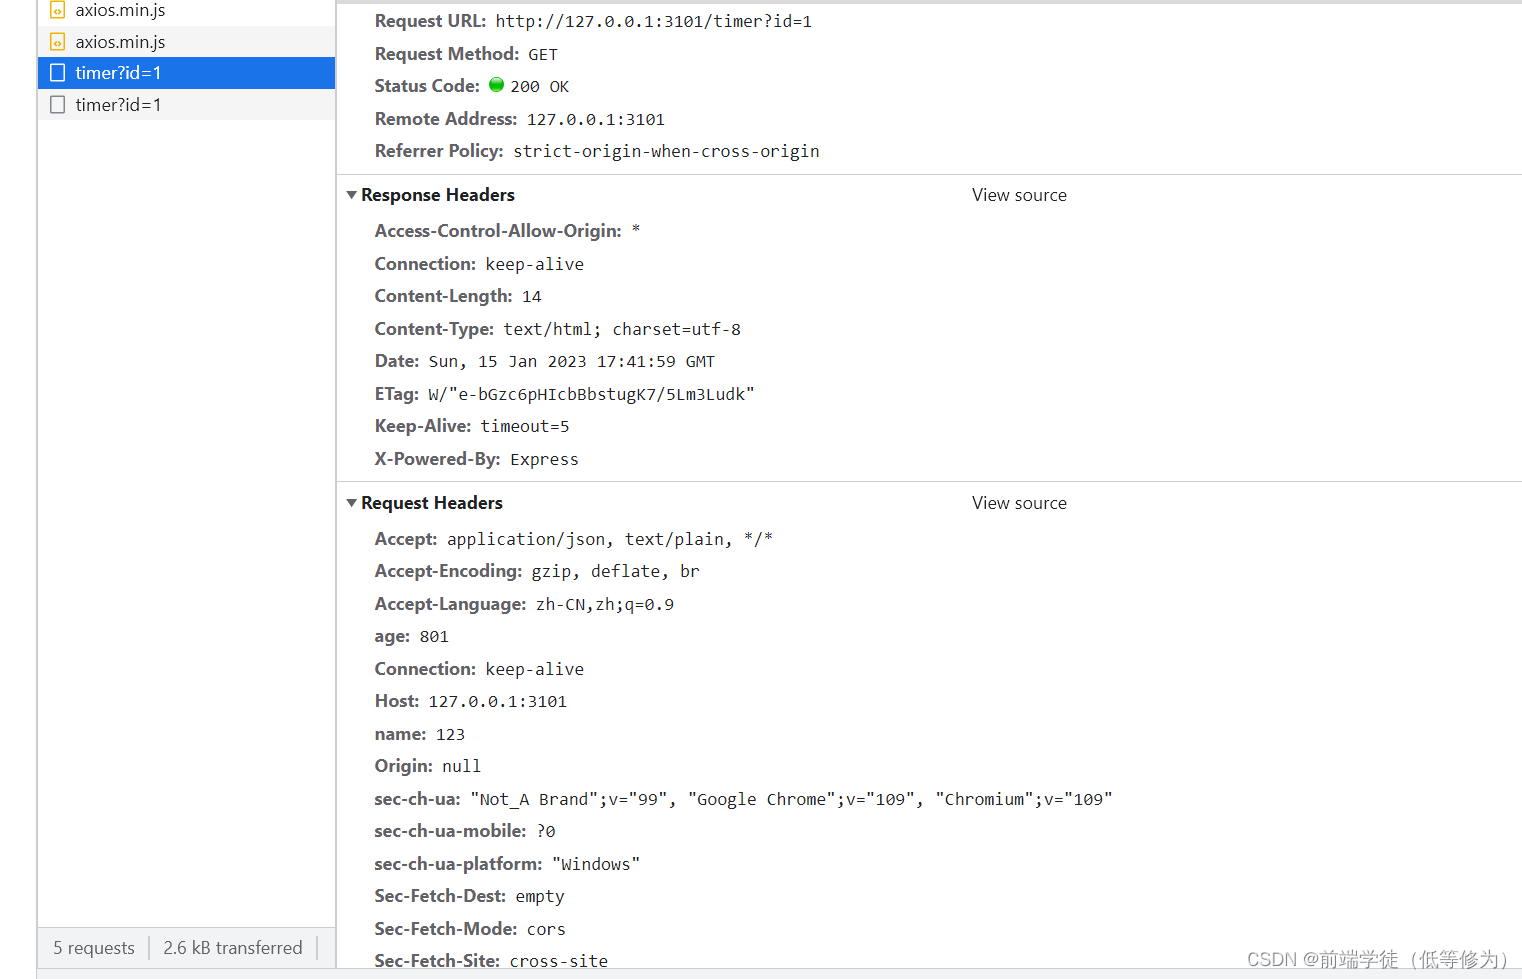
发post
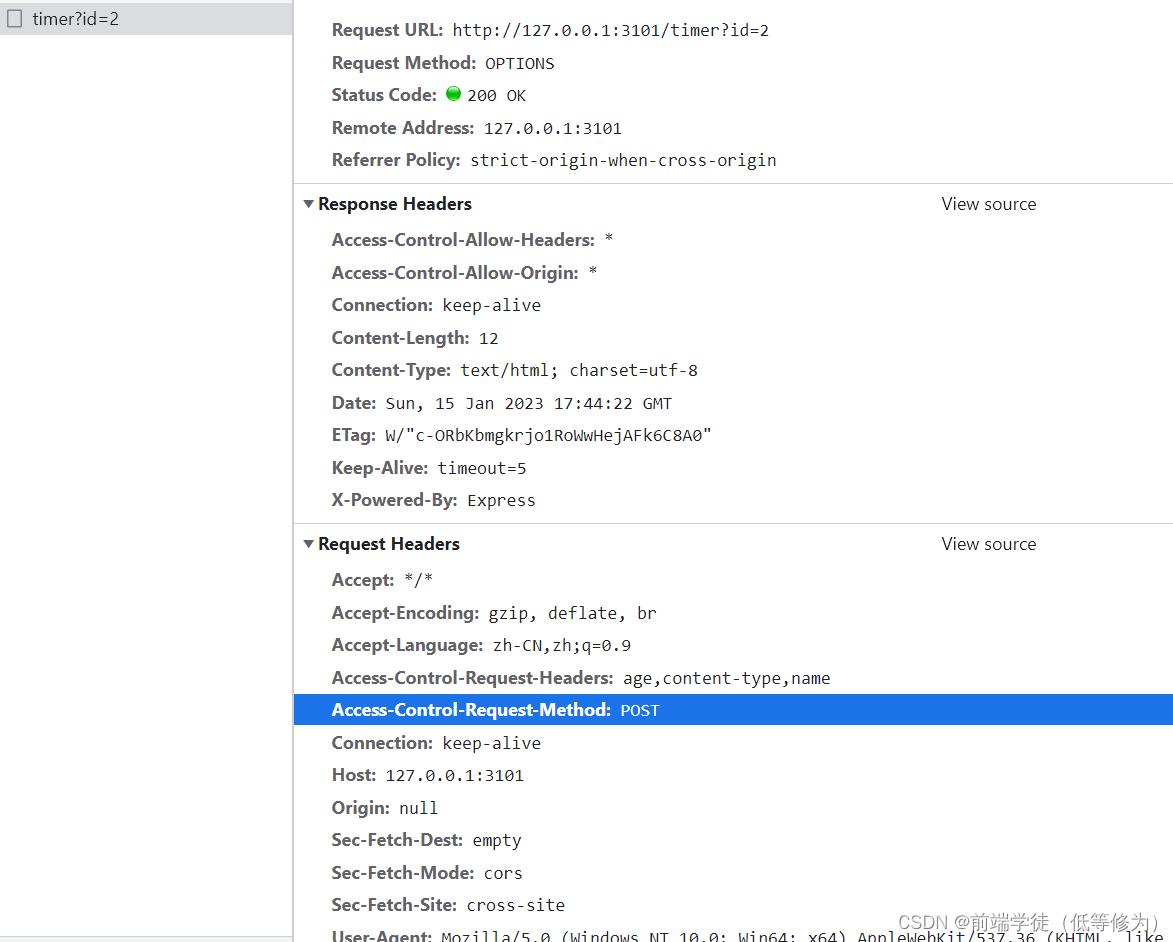
发axios方法的"POST"
六、fetch的普通使用
Fetch API 提供了一个 JavaScript 接口,用于访问和操纵 HTTP 管道的一些具体部分,例如请求和响应。它还提供了一个全局 fetch() 方法,该方法提供了一种简单,合理的方式来跨网络异步获取资源。
这种功能以前是使用 XMLHttpRequest 实现的。Fetch 提供了一个更理想的替代方案,可以很容易地被其他技术使用,例如 Service Workers。Fetch 还提供了专门的逻辑空间来定义其他与 HTTP 相关的概念,例如 CORS 和 HTTP 的扩展。
客户端
<!DOCTYPE html>
<html lang="en">
<head>
<meta charset="UTF-8">
<meta http-equiv="X-UA-Compatible" content="IE=edge">
<meta name="viewport" content="width=device-width, initial-scale=1.0">
<title>ajax的fetch</title>
</head>
<body>
<button id="btn1">ajax请求</button>
</body>
<script>
const btn=document.getElementById("btn1")
btn.onclick=function(){
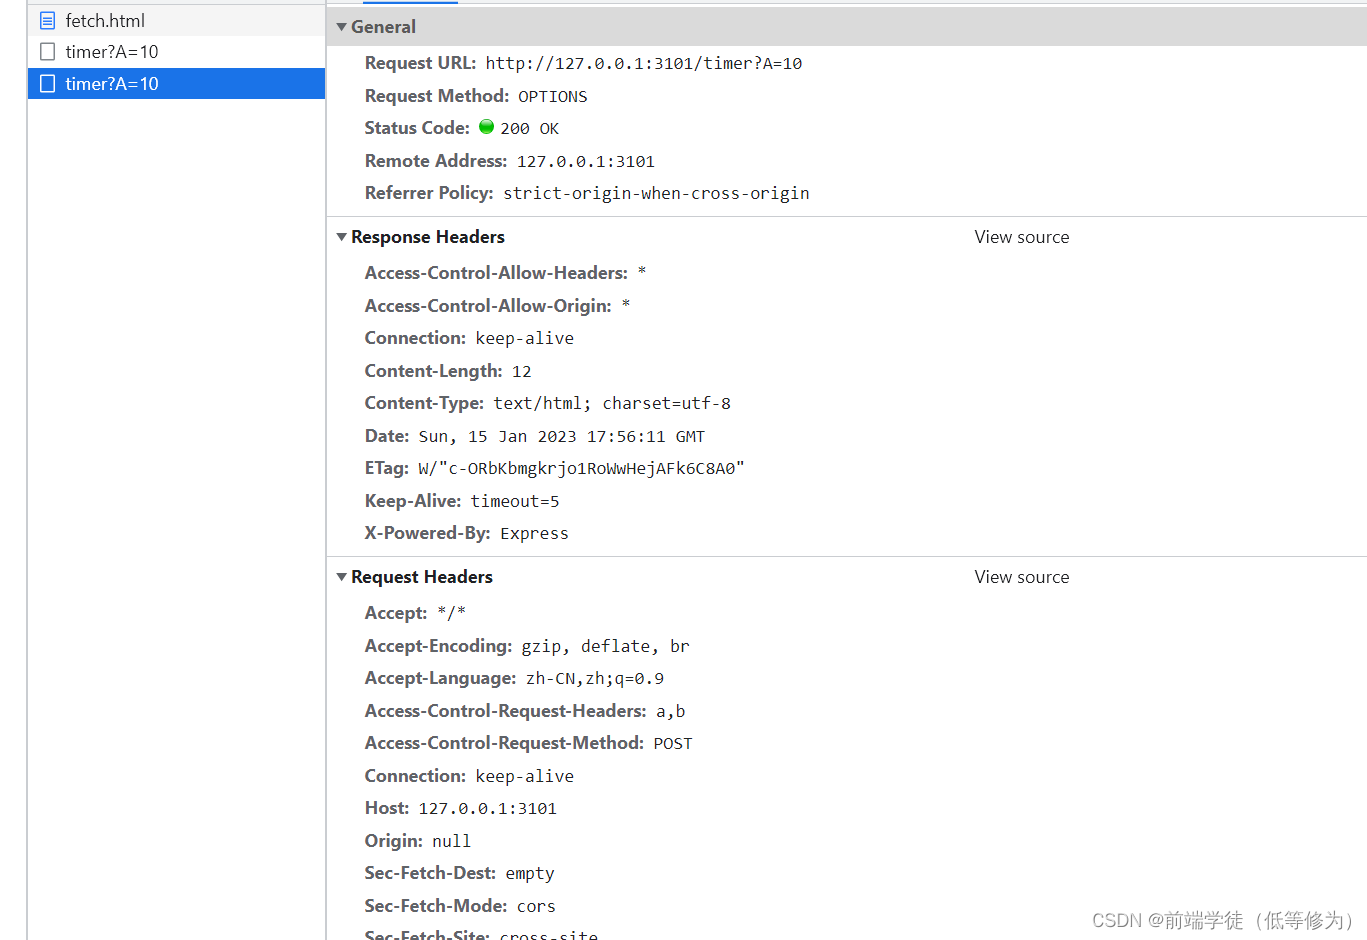
fetch("http://127.0.0.1:3101/timer?A=10",{
method:"POST",
headers:{
a:1,
b:1
},
body:JSON.stringify({
a:1
})
}).then(response=>{
return response.text()
}).then(response=>{
console.log(response)
})
}
</script>
</html>
非常类似于axios接收请求体变成了body,然后不能传对象,然后是params只能在路径后面用query的形式
运行截图:


 254
254


 被折叠的 条评论
为什么被折叠?
被折叠的 条评论
为什么被折叠?
 到【灌水乐园】发言


