


本篇用于记录图像增强的各种方法,手动实现transforms的一些功能
1. 可视化图像
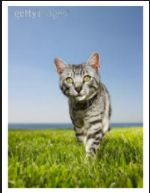
1.1 使用cv2
# 画个图用于测试图像增强效果
test_img_path = './cat_12_train/0ziLohTEqcaRGn1vpCtlg4AUxJ8DB6kX.jpg'
# cv2 图像为BGR
test_img = cv2.imread(test_img_path)
# test_img = cv2.resize(test_img, (224, 224))
# img[:, :, ::-1]是将BGR转化为RGB
plt.axis('off')
plt.imshow(test_img[:, :, ::-1])
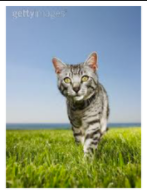
1.2 使用PIL
# 画个图用于测试图像增强效果
test_img_path = './cat_12_train/0ziLohTEqcaRGn1vpCtlg4AUxJ8DB6kX.jpg'
# Img为RGB
test_img = Image.open(test_img_path)
# test_img = test_img.resize((224, 224))
plt.axis('off')
plt.imshow(test_img)
结果是一样的。我更新换使用PIL.Image读取图片,因为格式是RGB的,不用转格式。
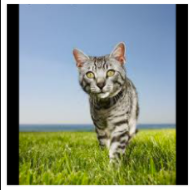
2. 放缩
使用多相位图象插值算法放缩图像
# 简单放缩
def resize_short(img, target_size):
    '''
    根据输入的img和target_size, 返回经过多相位图象插值算法处理过后的放大或缩小的图片
    '''
    percent = float(target_size) / min(img.size[0], img.size[1])
    resized_width = int(round(img.size[0] * percent))
    resized_height = int(round(img.size[1] * percent))
    img = img.resize((resized_width, resized_height), Image.LANCZOS)  # LANCZOS 多相位图象插值算法
    return img
TEST = resize_short(test_img, 224)
show(TEST)
3. 裁剪
def crop_image(img, target_size, center):
    '''
    center表示中心,否则随机裁剪
    target表示裁剪后的尺寸
    '''
    width, height = img.size
    size = target_size
    if center == True:
        w_start = (width - size) / 2
        h_start = (height - size) / 2
    else:
        w_start = np.random.randint(0, width - size + 1)
        h_start = np.random.randint(0, height - size + 1)
    w_end = w_start + size
    h_end = h_start + size
    img = img.crop((w_start, h_start, w_end, h_end))
    return img
TEST = crop_image(test_img, 224, 1)
show(TEST)
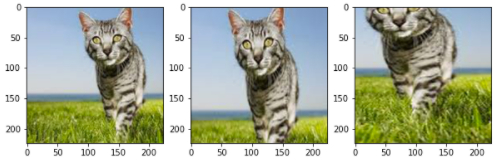
4. 随机裁剪
def random_crop(img, size, scale = [0.08, 1.0], ratio = [3. /4., 4. / 3.]):
    '''
    通过一系列骚操作,确定随即裁剪的起始点和裁剪长和裁剪宽
    返回裁剪区域经过resize的统一尺寸图像
    '''
    aspect_ratio = math.sqrt(
        np.random.uniform(*ratio) # 在ratio = [0.75, 1.333]之间随机生成浮点数。*是解引用、等同于(ratio[0], ratio[1])
    )  # 0.86 -- 1.15
    w = 1.0 * aspect_ratio
    h = 1.0 / aspect_ratio

    bound = min(
        float(img.size[0] / img.size[1]) / (w ** 2),
        float(img.size[1] / img.size[0]) / (h ** 2),
    )
    scale_max = min(scale[1], bound)
    scale_min = min(scale[0], bound)

    # 确定裁剪区域
    target_area = img.size[0] * img.size[1] * np.random.uniform(scale_min, scale_max)

    # 确定裁剪大小
    target_size = math.sqrt(target_area)
    w = int(target_size * w)  # 裁剪的宽
    h = int(target_size * h)  # 裁剪的高

    i = np.random.randint(0, img.size[0] - w + 1)
    j = np.random.randint(0, img.size[1] - h + 1)

    img = img.crop((i, j, i+w, j+h))
    img = img.resize((size, size), Image.LANCZOS)
    return img
TEST1 = random_crop(test_img, 224)
TEST2 = random_crop(test_img, 224)
TEST3 = random_crop(test_img, 224)
plt.figure(figsize=(10, 10))
plt.subplot(131)
plt.imshow(TEST1)
plt.subplot(132)
plt.imshow(TEST2)
plt.subplot(133)
plt.imshow(TEST3)
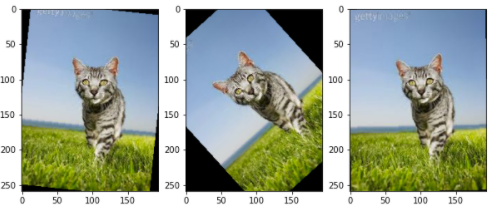
5. 随机旋转
# 旋转角度
def rotate_image(img):
    angle = np.random.randint(-45, 45)
    img = img.rotate(angle)
    return img
TEST1 = rotate_image(test_img)
TEST2 = rotate_image(test_img)
TEST3 = rotate_image(test_img)
plt.figure(figsize=(10, 10))
plt.subplot(131)
plt.imshow(TEST1)
plt.subplot(132)
plt.imshow(TEST2)
plt.subplot(133)
plt.imshow(TEST3)
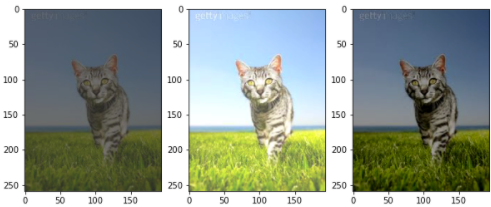
6. 颜色增强
# 颜色增强
def distort_color(img):
    '''
    数据增强

    随机改变图片颜色的参数,如曝光度,对比度,颜色
    '''
    def random_brightness(img, lower = 0.5, upper = 1.5):
        e =np.random.uniform(lower, upper)  # 增强幅度
        return ImageEnhance.Brightness(img).enhance(e)

    def random_contrast(img, lower = 0.5, upper = 1.5):
        e =np.random.uniform(lower, upper)  # 增强幅度
        return ImageEnhance.Contrast(img).enhance(e)

    def random_color(img, lower = 0.5, upper = 1.5):
        e =np.random.uniform(lower, upper)  # 增强幅度
        return ImageEnhance.Color(img).enhance(e)

    # 随机选择一种增强顺序
    ops = [random_brightness, random_contrast, random_color]
    np.random.shuffle(ops)

    img = ops[0](img)
    img = ops[1](img)
    img = ops[2](img)

    return img

TEST1 = distort_color(test_img)
TEST2 = distort_color(test_img)
TEST3 = distort_color(test_img)
plt.figure(figsize=(10, 10))
plt.subplot(131)
plt.imshow(TEST1)
plt.subplot(132)
plt.imshow(TEST2)
plt.subplot(133)
plt.imshow(TEST3)
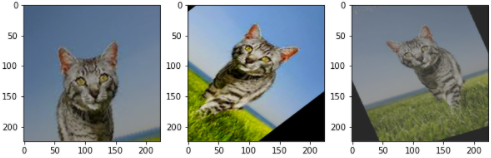
7. 综合处理
def process_added(img):
    # train
    img = rotate_image(img)
    img = random_crop(img, 224)
    img = distort_color(img)
    if np.random.uniform(0, 1) < 0.4:
        # 以百分之五十的概率镜像图片
        img = img.transpose(Image.FLIP_LEFT_RIGHT)
    return img
TEST1 = process_added(test_img)
TEST2 = process_added(test_img)
TEST3 = process_added(test_img)
plt.figure(figsize=(10, 10))
plt.subplot(131)
plt.imshow(TEST1)
plt.subplot(132)
plt.imshow(TEST2)
plt.subplot(133)
plt.imshow(TEST3)


 207
207


 被折叠的 条评论
为什么被折叠?
被折叠的 条评论
为什么被折叠?
 到【灌水乐园】发言


