


1、搭建Lab环境
1.1、安装工具包
使用的是之前跑在 VirtualBox 上的 Ubuntu 虚拟机 版本 20.04.5 TLS
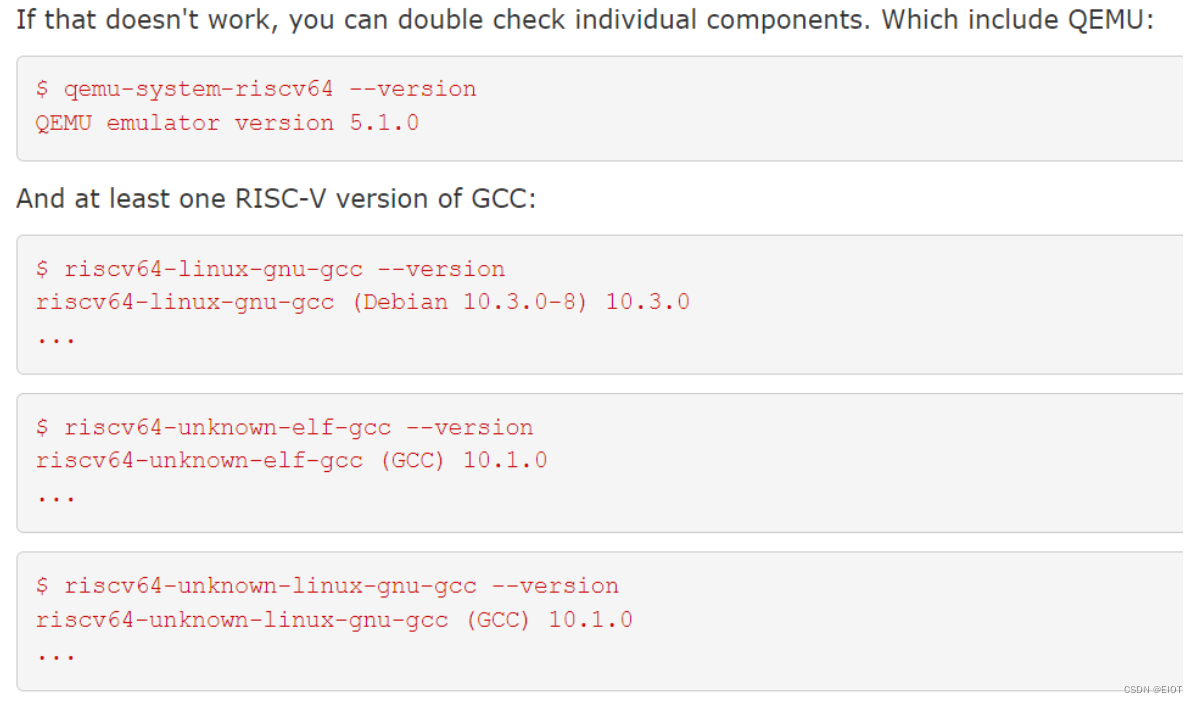
然后按照官网上的指令下载对应的 工具包
$ sudo apt-get update && sudo apt-get upgrade
$ sudo apt-get install git build-essential gdb-multiarch qemu-system-misc gcc-riscv64-linux-gnu binutils-riscv64-linux-gnu
完成之后可以测试一下
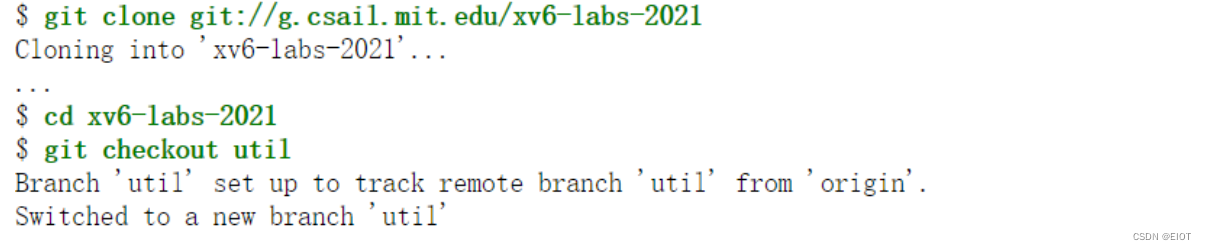
然后到lab页 clone相应的代码
最后执行 make qemu,出现
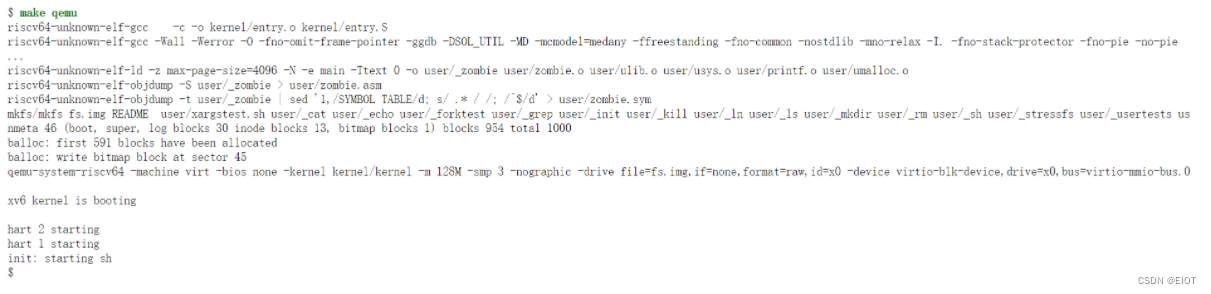
即为搭建成功
1.2、gdb调试过程
1、打开两个cmd窗口
2、其中一个输入:make qemu-gdb
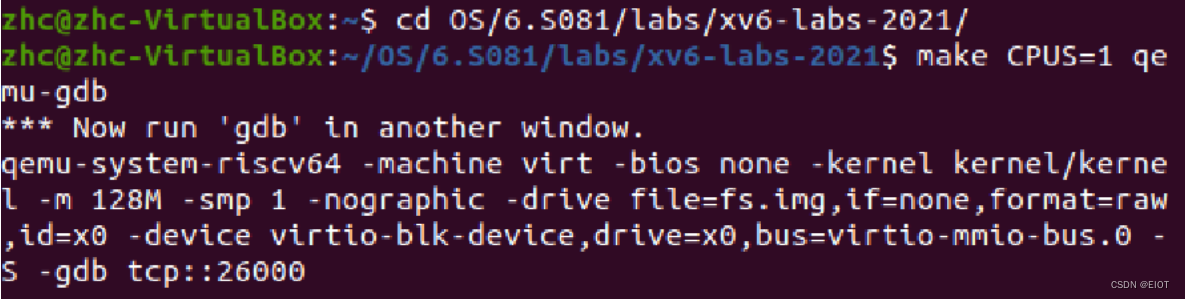
3、另一个输入:gdb-multiarch kernel/kernel
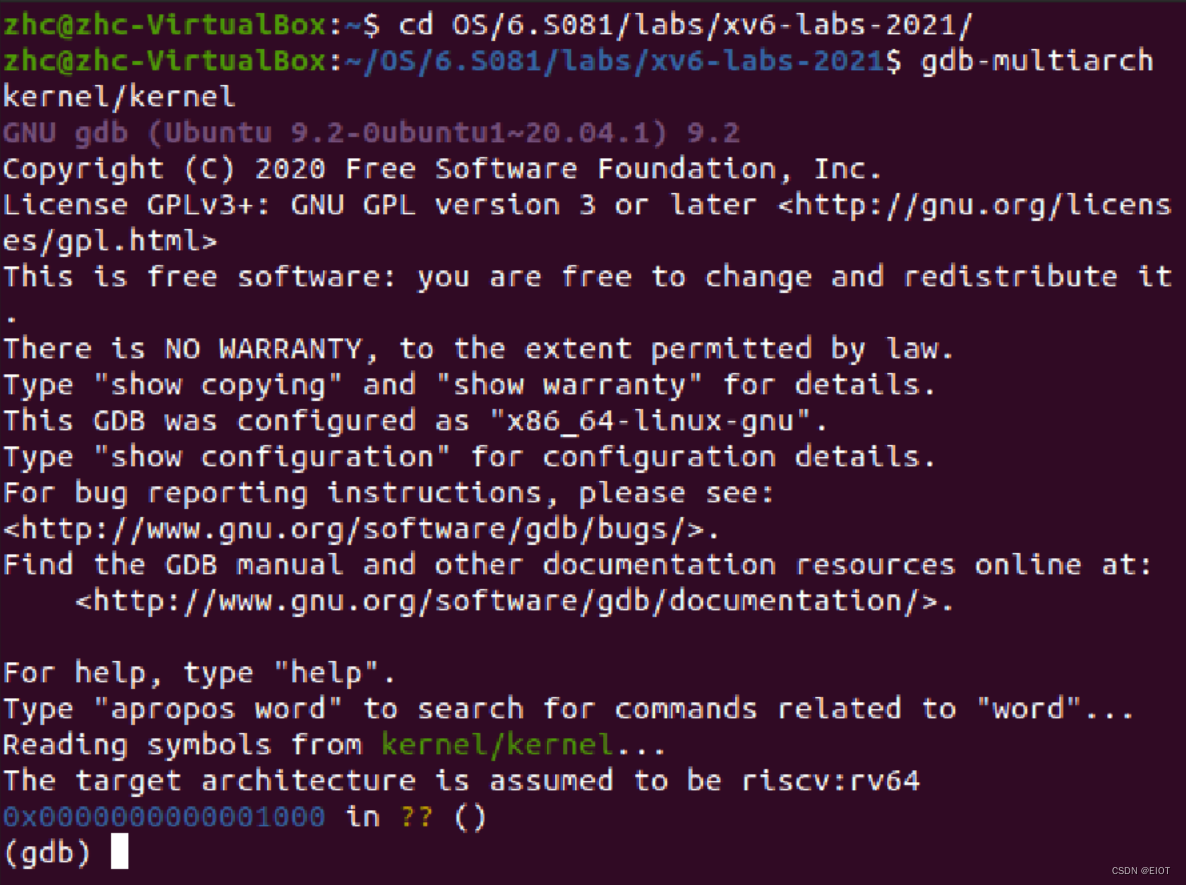
4、可以使用gdb命令进行调试了
2、Utilities实现
2.1、sleep
这个函数比较简单,使用系统调用 sleep
int main(int argc, char *argv[]){
    if(argc < 2){
        fprintf(2, "too few arguments...");
        exit(1);
    }
    sleep(atoi(argv[1]));
    exit(0);
}
2.2、pingpong
这个函数的实现需要重点理解pipe函数(xv6-book的Chapter One)
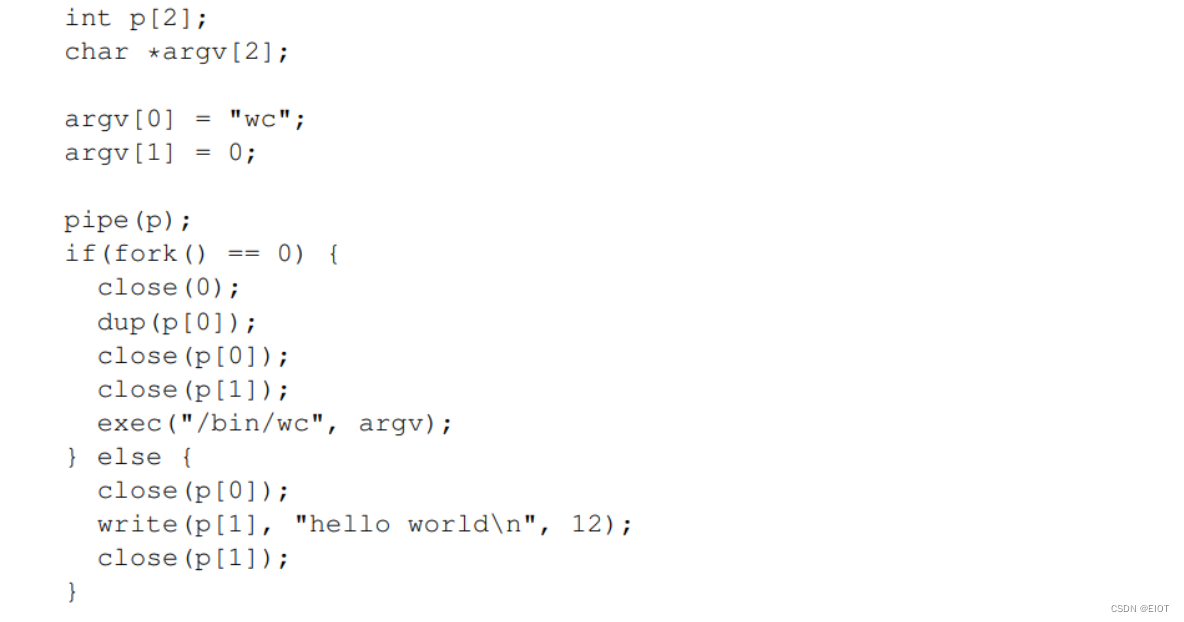
感性的理解,pipe就是创建了一个管道,使得两个进程之间可以通信(互相读取到对方写的数据)
实际上,pipe在传入的数组p里存放一个read file descriptor(p[0])和write file descriptor(p[1])
就像管道的一头一尾,从"头部"写入数据,可以从"尾部"读取数据
而由于fork创建的子进程也会带着这个数组p,从而可以实现父子进程的通信
(具体细节参见xv6-book的相应部分)
int
main(int argc, char *argv[]){
    int p[2];

    char * parent_msg = "p";
    char * child_msg  = "c";
    char buffer[2];

    pipe(p);
    if(fork() == 0){
        printf("%d: received ping\n", getpid());
        close(p[0]);
        write(p[1], child_msg, 1);
        close(p[1]);
        exit(0);
    } else {
        write(p[1], parent_msg, 1);
        close(p[1]);
        wait(0);
        read(p[0], buffer, 1);
        close(p[0]);
        printf("%d: received pong\n", getpid());
        exit(0);
    }
}
2.3、primes
primes函数是借助pipeline实现了一个素数筛。
需要好好理解下面这幅图和上面的pipe

思想:在每个进程中,选取一个素数N(就是通过管道读到的第一个数),然后把所有读到的数中不能被整除N的数继续通过管道写进下一个进程中,而把可以整除的数drop掉。
void func(int * p){
    int p1[2];
    p1[0] = p[0]; p1[1] = p[1];

    pipe(p); // create the new pipeline connect the it and the it's child

    char num[1];
    close(p1[1]); // close the old write
    if( read(p1[0], num, 1) == 1 ){
        int prime = num[0]; // the first number is the prime
        printf("prime %d\n", prime);

        if(fork() == 0){
            func(p); // recursion
        } else {
            close(p[0]); // close the read
            while ( read(p1[0], num, 1) == 1 ){
                int n = num[0];
                if(n % prime != 0){
                    write(p[1], num, 1);
                }
            }
            close(p1[0]);
            close(p[1]);
            wait(0);
        }
    } else { // no data avaliable
        close(p[0]);
        close(p[1]);
        exit(0);
    }
}

int
main(int argc, char *argv[]){

    int p[2];
    pipe(p);

    if(fork() == 0){
      func(p);
    } else {
        close(p[0]);
        char num[1];
        for (int i = 2; i <= 35; i++){
            num[0] = i;
            write(p[1], num, 1);
        }
        close(p[1]);
        wait(0);
    }
    exit(0);
}
2.4、find
find函数的实现需要先去学习一下ls函数的实现,主要是学习如何读取目录的,读懂了之后难度不是很大,需要注意一些细节。
    // Look at user/ls.c to see how to read directories.
    // Use recursion to allow find to descend into sub-directories.
    // Don't recurse into "." and "..".
    // Changes to the file system persist across runs of qemu; to get a clean file system run make clean and then make qemu.
    // You'll need to use C strings. Have a look at K&R (the C book), for example Section 5.5.
    // Note that == does not compare strings like in Python. Use strcmp() instead.
    // Add the program to UPROGS in Makefile.


void
find(char *dir, char *file){
    struct stat st;
    struct dirent de;
    int fd;
    char buf[512], *p;

    // put the dir_name into the buf
    // buf : dir_name/
    strcpy(buf, dir);
    p = buf + strlen(buf);
    *p++ = '/';

    if( (fd = open(dir, 0)) < 0 ){
        fprintf(2, "find: cannot open %s\n", dir);
        return;
    }

    if( fstat(fd, &st) < 0 ){
        fprintf(2, "find: cannot stat %s\n", dir);
        close(fd);
        return;
    }

    if(st.type != T_DIR){
        fprintf(2, "find: %s is not a dir\n", dir);
        close(fd);
        return;
    }

    // read the every file or dir in the `dir` sequentially
    while( read(fd, &de, sizeof(de)) == sizeof(de)){
        if(de.inum == 0) continue;

        char *name = de.name;
        if(strcmp(name, ".") == 0 || strcmp(name, "..") == 0) continue; // not consider the . and ..

        memmove(p, name, DIRSIZ);
        p[DIRSIZ] = 0;

        if(stat(buf, &st) < 0){
            printf("find: cannot stat %s\n", name);
            continue;
        }

        if(st.type == T_DIR){
            find(buf, file);
        } else if(strcmp(name, file) == 0) {
            printf("%s\n", buf);
        }
    }
    close(fd);
}

// find <dir_name> <file_name>
// find all the <file_name> in the <dir_name>
int
main(int argc, char* argv[]){
    if(argc < 3){
        fprintf(1, "the arguments is too few...\n");
        exit(1);
    }

    find(argv[1], argv[2]);
    exit(0);
}
2.5、xargs
首先,需要知道这个命令是干什么的。
Run COMMAND with arguments INITIAL-ARGS and more arguments read from input.
总的来说就是用来跑其他命令的,而参数从输入中读取。
从实验手册上的要求和例子来看,实现的是一个只带-n参数且参数值只为1的xargs命令
这里的-n的意思是执行命令最大能够从输入读取的参数个数,如果-n 1就意味着只能从输入读取一个参数执行命令,所以就意味着会执行多次命令(需要把读取的参数用完)
$ echo hello too | xargs echo bye
bye hello too
$ echo "1\n2" | xargs -n 1 echo line
line 1
line 2 理解了xargs的作用和实现的细节,就可以开始写代码了
#include "kernel/types.h"
#include "kernel/stat.h"
#include "user/user.h"
#include "kernel/param.h"

int seq_num = MAXARG;  // the max_args per cmd


void exec1(char **argv){
    if(fork() == 0){
        exec(argv[0], argv);
    } else {
        wait(0);
    }
}

int main(int argc, char* argv[]) {
    if (argc < 2) {
        fprintf(2, "too few arguments...");
        exit(1);
    }

    char buf[512]; // store the input from the previous cmd
    int read_n = 0;
    int read_total = 0;

    // attention: if exits '\n', just a read can not read all
    while( (read_n = read(0, buf + read_total, 512)) > 0 ){
        read_total += read_n; // stat the number of input
    }
    int len = read_total;

    // switch all the '\n' to ' '
    for(int i = 0; i < len; i ++){
        if(buf[i] == '\n') buf[i] = ' ';
    }

    int cmd_ptr = 1; // the ptr to cmd
    bool is_set_n = false;

    // set the max args
    if(strcmp(argv[1], "-n") == 0){
        is_set_n = true;
        cmd_ptr = 3;
    }

    char* cmd_argv[MAXARG]; // the cmd argv
    // put the arg into the cmd_argv
    int idx = 0;
    for (int i = cmd_ptr; i < argc; i++) {
        char *arg = (char *)malloc(strlen(argv[i])+1); // attention: must use malloc, put the data in heap
        // if use char arg[MAXARG] will cause the error
        strcpy(arg, argv[i]);
        cmd_argv[idx] = arg;
        idx ++;
    }

    if(is_set_n){
        int index = 0;
        char arg[MAXARG];
        memset(arg, 0, MAXARG); // clear the space
        for(int i = 0; i < len; i++){
            if(buf[i] == ' ') { // can spilt out a arg

                arg[index++] = '\0';
                cmd_argv[idx++] = arg;

                // run
                exec1(cmd_argv);

                index = 0;
                memset(arg, 0, MAXARG); // clear the space

                idx --;
                continue;
            }
            arg[index ++] = buf[i];
        }
    } else {
        int prev = 0;
        // should spilt the args with ' '
        // and put them into cmd_argv sequentially
        for(int i = 0; i < len; i ++){
            if(buf[i] == ' '){
                char* add_arg = (char *)malloc(i - prev);
                memcpy(add_arg, buf+prev, i - prev);
                prev = i+1; // attention
                cmd_argv[idx++] = add_arg;
            }
        }
        exec1(cmd_argv);
    }

    exit(0);
}
记录一个小问题
发生在将argv里的参数拷贝到cmd_argv的过程中
for(int i = 0; i < len; i++){
 char agr[32]; // 每次分配到的地址都是一样的!!!
 cmd_argv[idx ++] = strcpy(arg, argv[i]);
}
数组空间是分配在栈中的,而且一次迭代之后空间失效,再次分配时就会分配相同的地址空间,导致cmd_argv中的指针值都是一样的,然后strcpy就是在不断地改变那块地址中的内容。


 1576
1576

 被折叠的 条评论
为什么被折叠?
被折叠的 条评论
为什么被折叠?
 到【灌水乐园】发言


