


首先我们先准备三个纯净虚拟机,包括之前做好的防火墙和selinux都要禁掉,通过之前做好的redhat作为母镜像进行克隆,这里不再赘述
![]()
此时server123分别对应为172.25.0.11 12 13
在此之前我们可以再做一个开机自动挂载
vim /etc/rc.d/rc.local  //这里系统会开机自动执行本地脚本

#!/bin/bash
# THIS FILE IS ADDED FOR COMPATIBILITY PURPOSES
#
# It is highly advisable to create own systemd services or udev rules
# to run scripts during boot instead of using this file.
#
# In contrast to previous versions due to parallel execution during boot
# this script will NOT be run after all other services.
#
# Please note that you must run 'chmod +x /etc/rc.d/rc.local' to ensure
# that this script will be executed during boot.

touch /var/lock/subsys/local
mount /dev/cdrom /media/              //最后一行为自行添加内容
添加可执行权限
chmod +x /etc/rc.d/rc.local此时我们在server2和server3安装httpd并开机自启
yum install -y httpd
systemctl enable --now httpd 在server2和server3的Apache的默认发布目录下写入文件,在感官我们可以感受到的更明显
同时使用curl命令访问页面是否正确


其实会报错。因为server2和3后面少了 > 符号,记得加上
server1下载ipvsadm
![]()
server1查看策略
添加服务
应该注意172.25.0.100是没有人使用的ip,否则需要换虚拟ip
-A 添加服务 -t tcp协议 -s rr 调度算法为rr算法

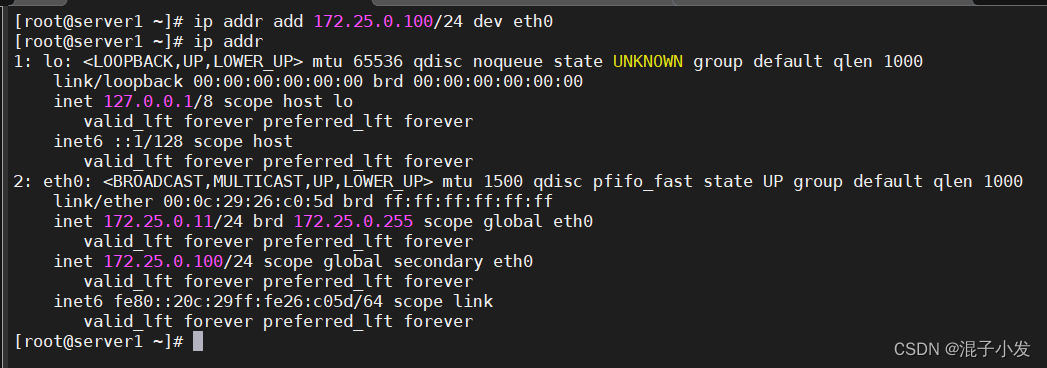
在server添加IP
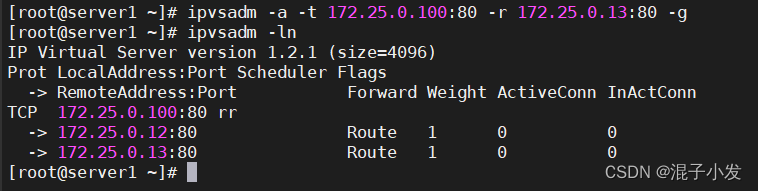
向172.25.0.100中添加真实服务器地址

如果出现“Memory allocation problem”报错则是没有创建虚拟服务器,注意查看虚拟服务器地址是否创建正确!
同样方式我们添加172.25.0.13
-g 直连路由模式
-i 隧道模式
-m NAT模式
生产模式会使用第四种,我们需要重新编译内核
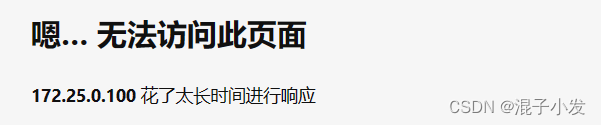
此时我们再次重新开启一台虚拟机(或者使用windows浏览器访问)来访问172.25.0.100(VIP地址)我们会发现访问失败
ipvsadm -ln查看
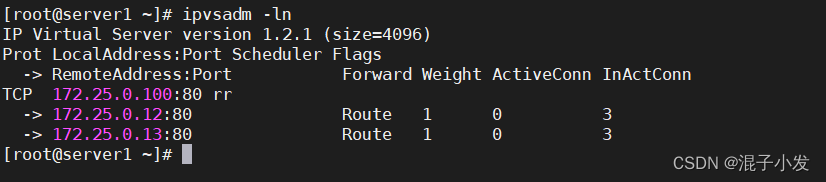
我们应该知道调度器没有问题,流量已被均摊
此时向server2和server3添加VIP地址但不应直接添加,直接添加会导致调度器失去作用
在server2和server3下载arptables(针对arp协议进行管控)
![]()
ip addr add 172.25.0.100/24 dev eth0
            /在server2和server3同时添加172.25.0.100VIP地址,以下步骤在server2和server3同步进行
arptables -A INPUT -d 172.25.0.100 -j DROP
            直接访问VIP地址时拒绝
arptables -A OUTPUT -s 172.25.0.100 -j mangle --mangle-ip-s 172.25.0.12
            地址伪装
arptables-save
            保存策略
arptables-save > /etc/sysconfig/arptables
            永久保存
arptables -F
            刷新arp
arptables -nL
            此时查看策略应已被写入

/*

Chain INPUT (policy ACCEPT)
-j DROP -d 172.25.0.100

Chain OUTPUT (policy ACCEPT)
-j mangle -s 172.25.0.100 --mangle-ip-s 172.25.0.12

Chain FORWARD (policy ACCEPT)

*/

systemctl enable --now arptables.service
            重新启动
此时我们开始新虚拟机server4,使用for do done语句循环十次
for i in {1..10};do curl 172.25.0.100;done效果如下图所示:
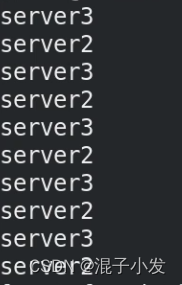
数据包走向:
client-->VS(调度器)-->RS(后端真实服务器)-->client


 2904
2904


 被折叠的 条评论
为什么被折叠?
被折叠的 条评论
为什么被折叠?
 到【灌水乐园】发言


