


之前发过这篇文章,现在添加了支持Grok对话内容的基本无损导出为Markdown,所以后面的文案就不再重复写了,grok网站为:https://grok.com/
- Google插件名称为:ChatGPT to MarkDown plus, 下载地址为ChatGPT to MarkDown plus
- 使用方法:见GitHub主页或插件介绍页面
- https://github.com/thisisbaiy/ChatGPT-To-Markdown-google-plugin/tree/main
我将源代码上传至了GitHub,欢迎star, Issue - 下面是一些简介:支持代码,公式,链接的完整导出在Typora完美显示!
Chatgpt dialog Export to Markdown File
简介:
这个 Chrome 插件旨在帮助用户将 ChatGPT 网站上的聊天记录导出为标准的 Markdown 格式,使其更容易阅读和编辑。
功能:
- 可以实现代码,公式,链接的完整导出,并且以标准的markdown格式显示!
- 标准格式: 以标准的 Markdown 格式显示导出的内容,确保兼容性和易读性。
Typora 兼容性:
特别优化以确保导出的 Markdown 文件可以在 Typora 等 Markdown 编辑器中正确打开和显示。
通过这个插件,用户可以轻松地将 ChatGPT 网站上的聊天记录转换为 Markdown 格式,从而更方便地分享、编辑和存档他们的对话。
Introduction:
This Chrome extension aims to help users export chat records from the ChatGPT website into standard Markdown format, making them easier to read and edit.
Features:
- Complete export of codes, formulas, links, and other content from chat records.
- Standard Format: Display exported content in standard Markdown format, ensuring compatibility and readability.
Typora Compatibility:
- Specially optimized to ensure that exported Markdown files can be correctly opened and displayed in Typora and other Markdown editors.
With this extension, users can effortlessly convert chat records from the ChatGPT website into Markdown format, making it more convenient to share, edit, and archive their conversations.
Step 1:
Download respository
Step2:
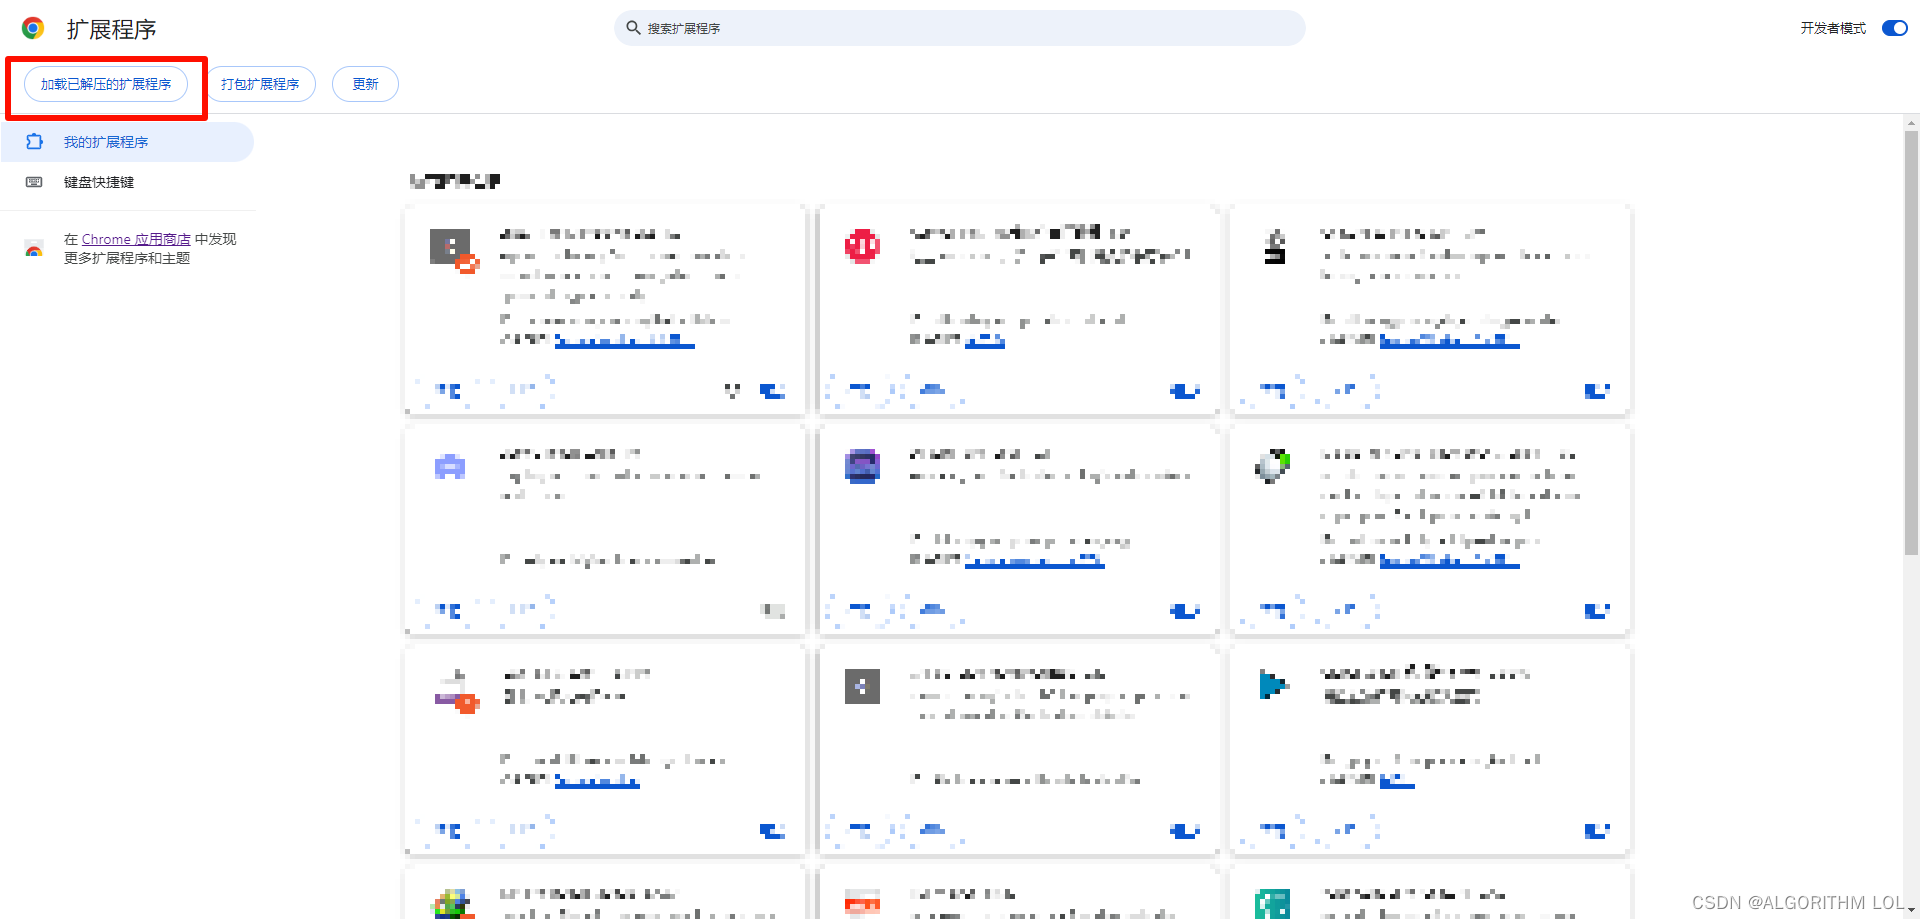
Select the repository folder and click to conform.
Step3:
When you open chatgpt website, you’ll see the Export Chat button
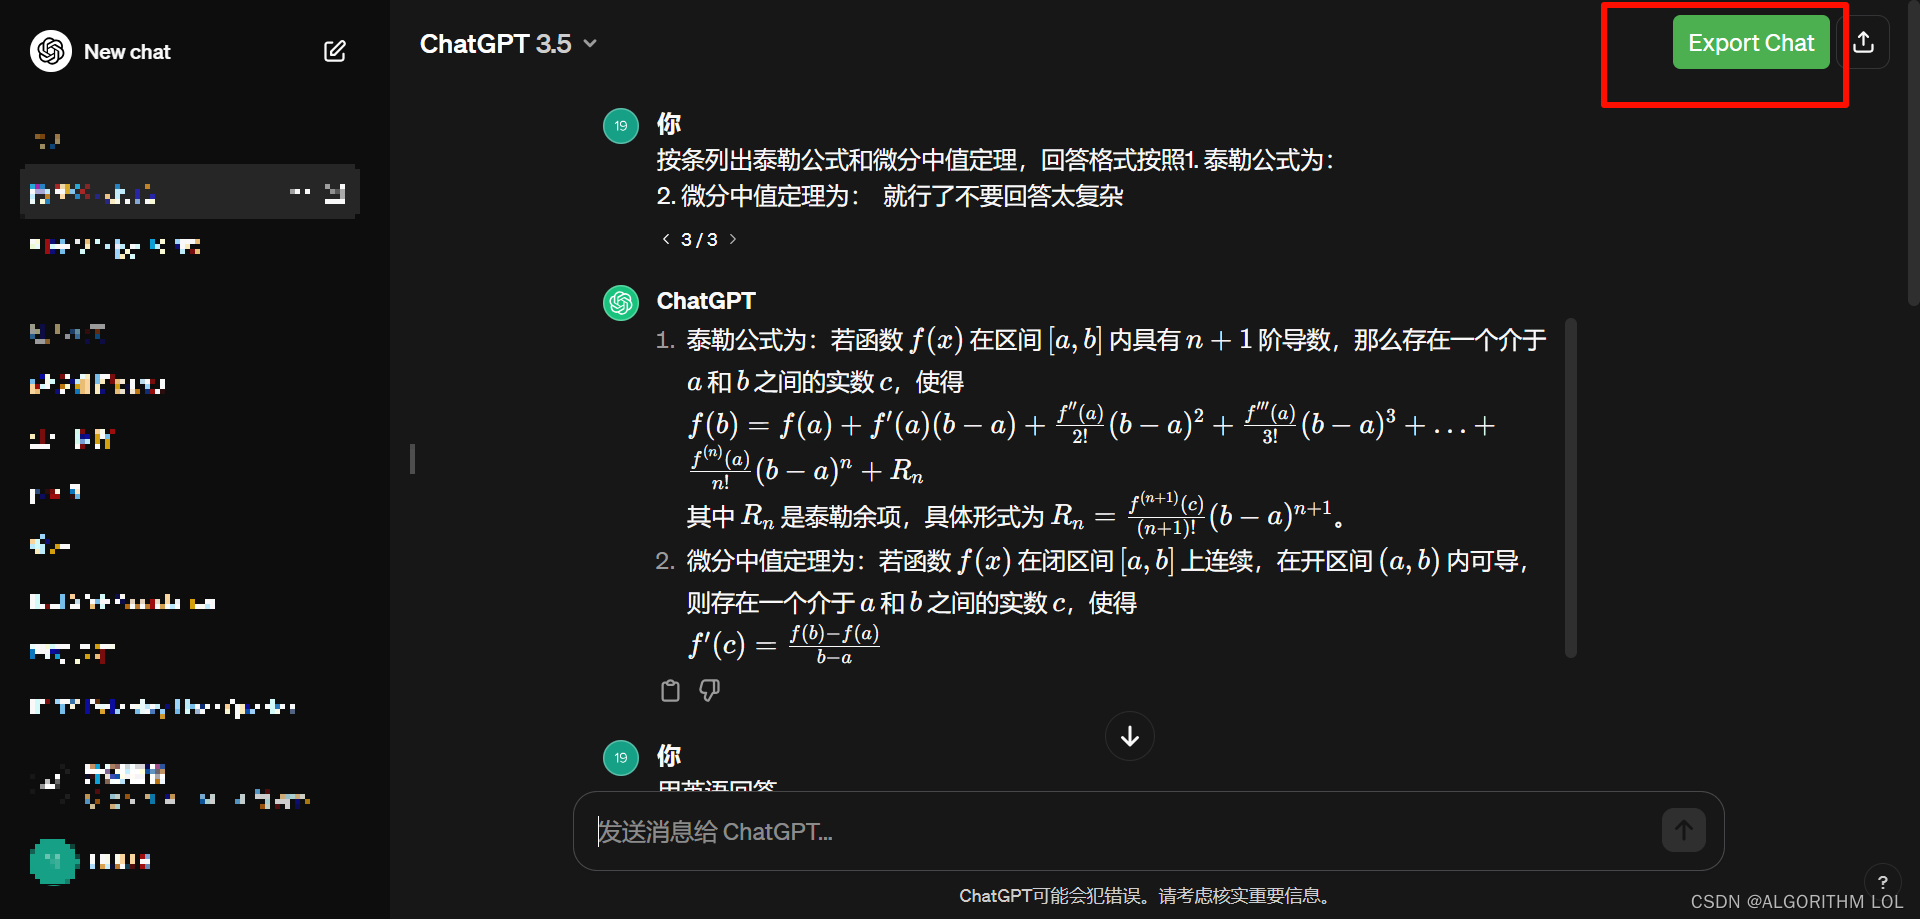
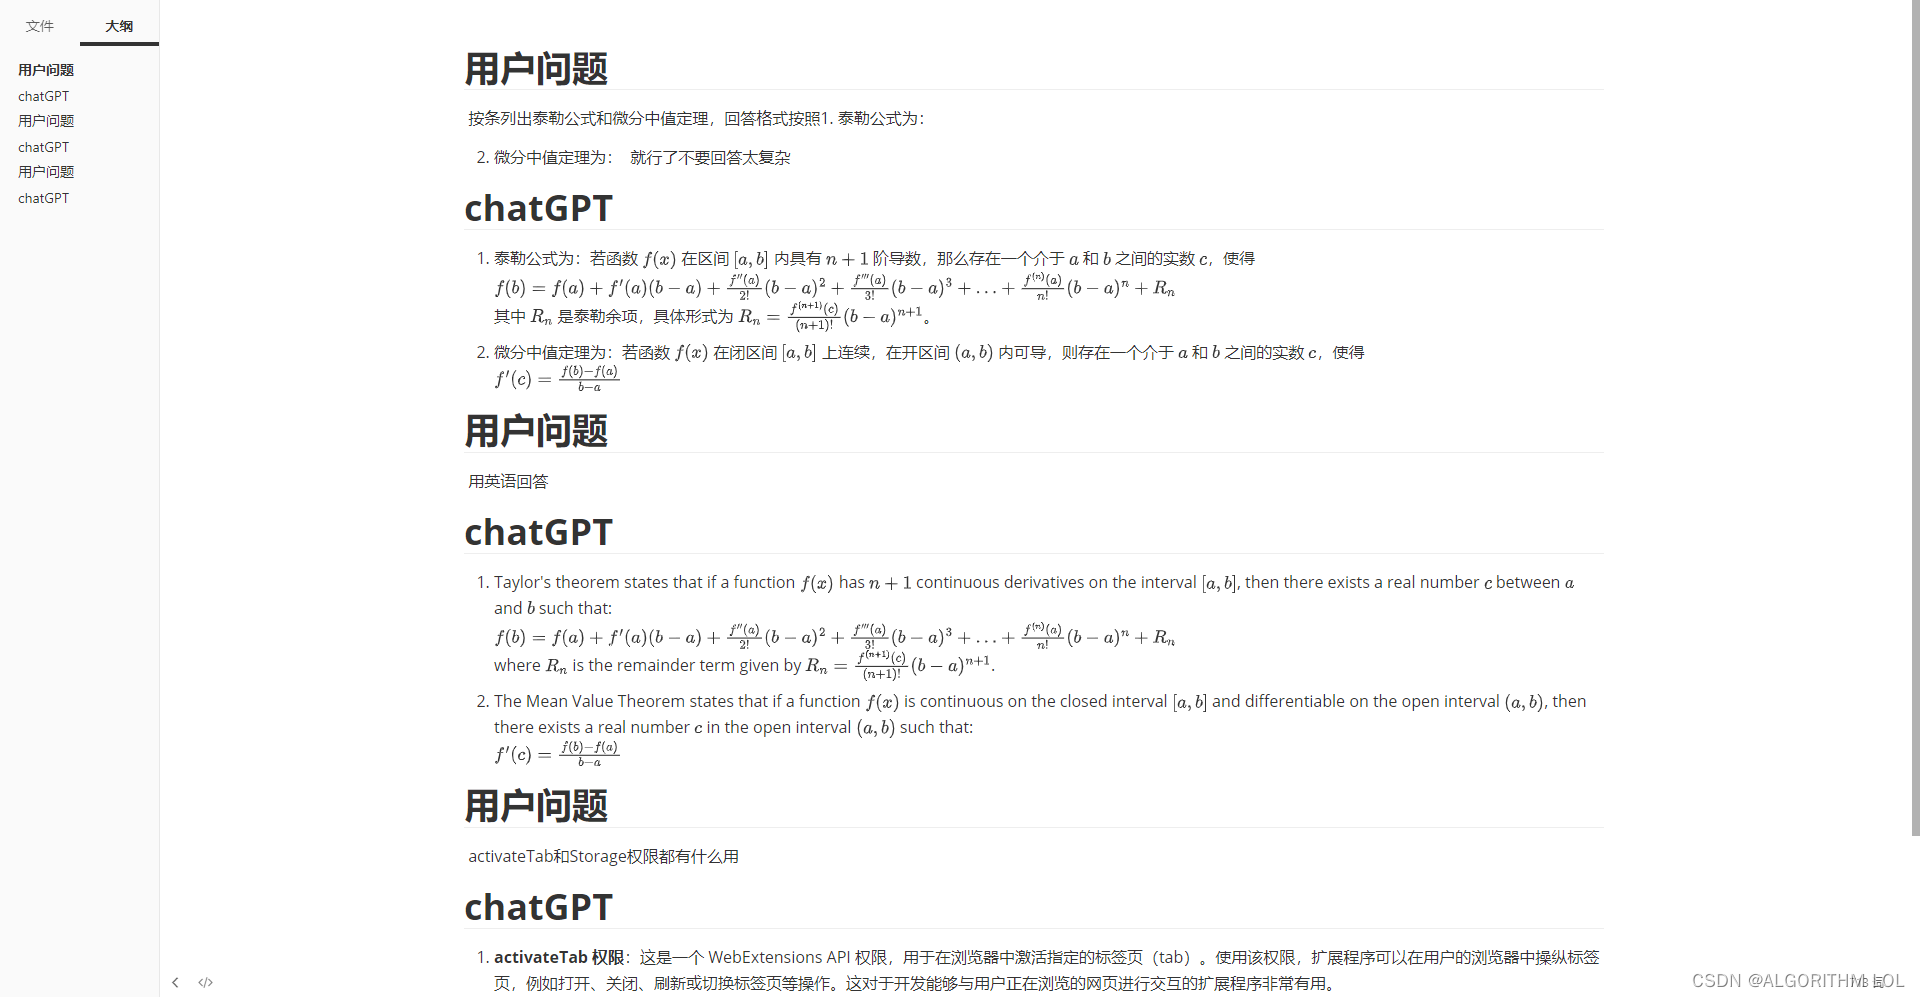
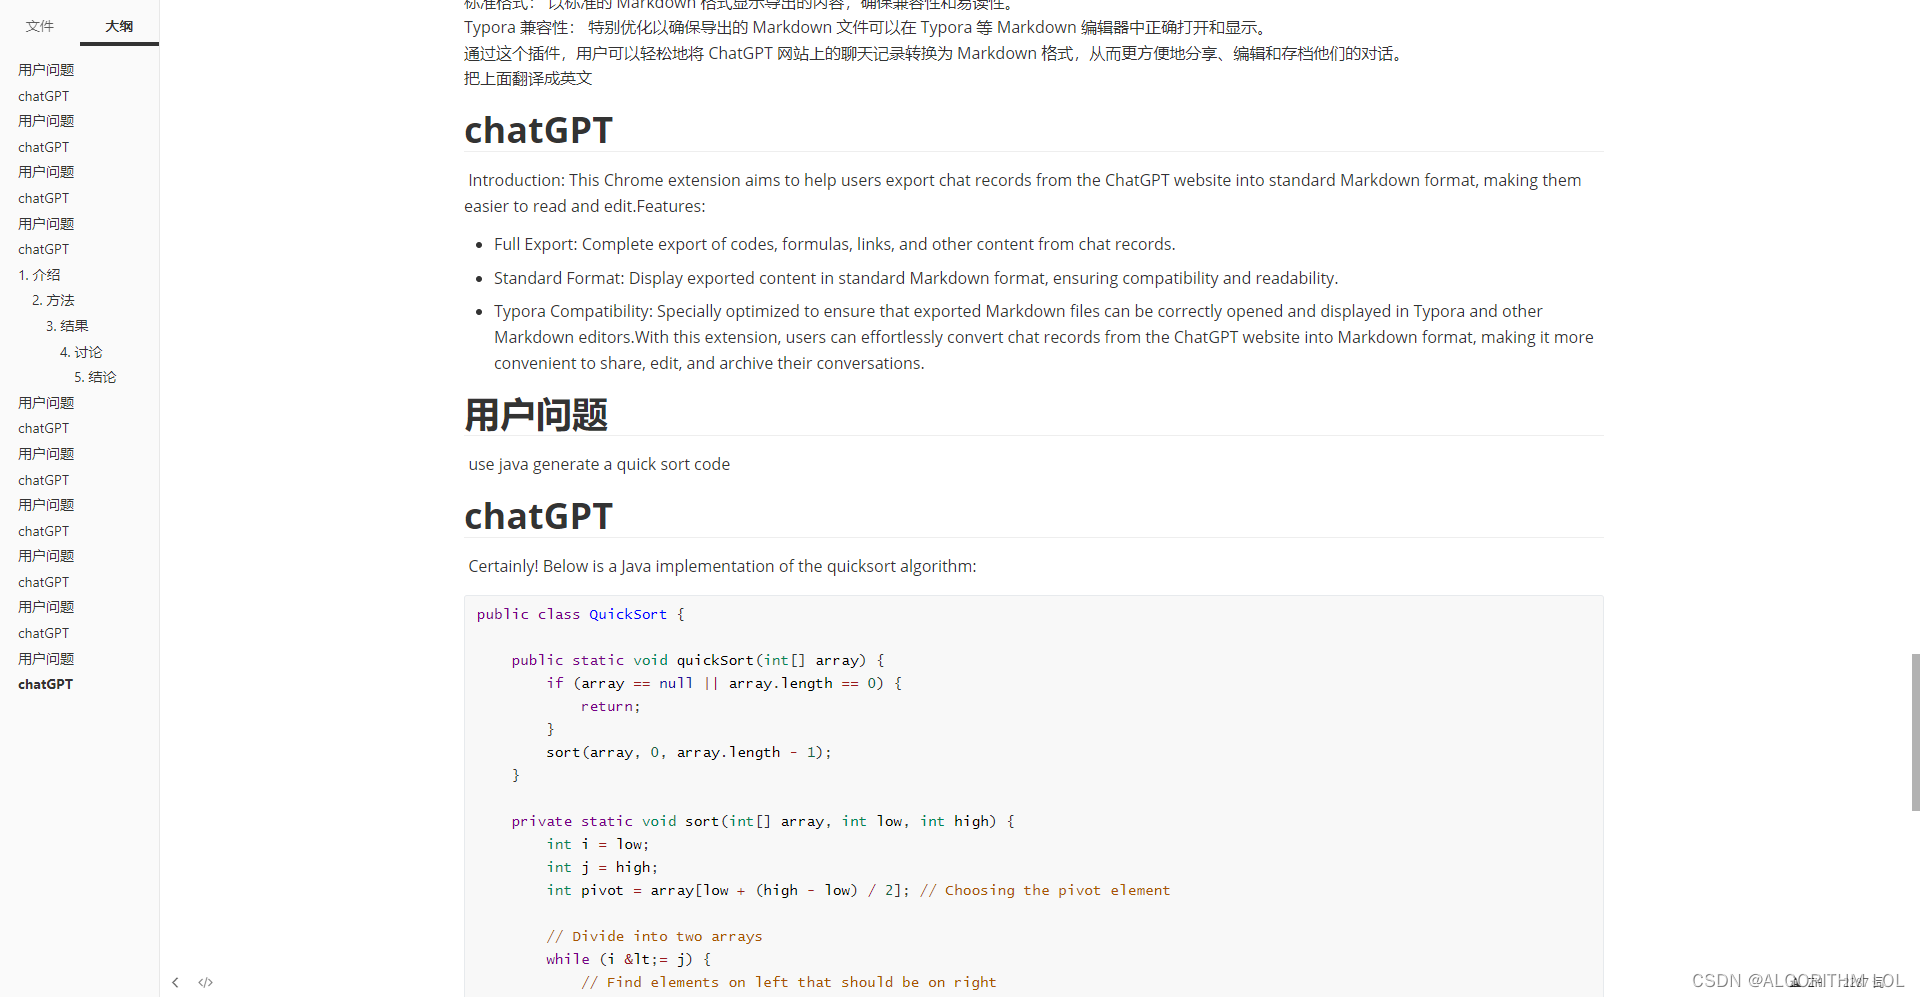
Select the chat you want to export, then click the green botton, you’ll get the .md file, which can be opened by Typora just like the image below:
Result:


 4万+
4万+

 被折叠的 条评论
为什么被折叠?
被折叠的 条评论
为什么被折叠?
 到【灌水乐园】发言


