


MMPretrain功能演示——图像分类、多模态中的图像描述
一、多模态中的图像描述
1、import高阶API,包含get_model, list_models, inference_model,分别用来进行模型获取、列举、模型推理。
from mmpretrain import get_model, list_models, inference_model2、用list_models获取分类任务中,名字包含“resnet18”的所有模型
print(list_models(task='Image Classification', pattern='resnet18'))print(list_models(task='Image Caption', pattern='blip'))运行后结果:['resnet18_8xb16_cifar10', 'resnet18_8xb32_in1k']。
3、列举图像描述任务中,名字包含“blip”的所有模型
print(list_models(task='Image Caption', pattern='blip'))运行后结果:['blip-base_3rdparty_caption', 'blip2-opt2.7b_3rdparty-zeroshot_caption']
4、用resnet18_8xb16_cifar10获得一个resnet18在cifar上训练的模型,查看其类型是:ImageClassifier;同样的,我们可以获得resnet18在ImageNet1k上训练的模型,其类型也是ImageClassifier,另外其backbone的类型是Resnet。
model = get_model('resnet18_8xb32_in1k')
print(type(model))
print(type(model.backbone))
运行后结果:
<class 'mmpretrain.models.classifiers.image.ImageClassifier'>
<class 'mmpretrain.models.backbones.resnet.ResNet'>
【TIPs】该步骤,需要提前安装好版本匹配的torchvision。)
5、使用inference_model进行模型的推理。【TIPs】get_model拿到的模型是没有加载预权重的,若直接使用inference_model进行推理,结果是混乱的。此时,我们需要加载权重,选用“”blip-base_3rdparty_caption”图像描述模型,进行图像推理。使用inference_model,直接传入权重模型的名称,指定需要加载的图片,用show=True展示推理结果。
from mmpretrain import get_model, list_models, inference_model
inference_model('blip-base_3rdparty_caption','demo/01.jpg',show=True)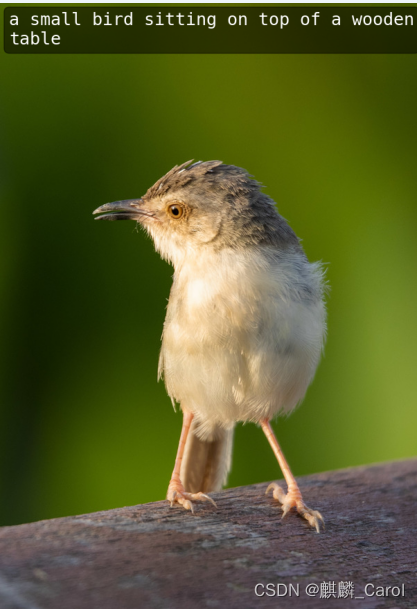
结果对图片进行文字描述。
二、根据图像分类数据集进行resnet18的微调训练
1、相关配置文件学习:
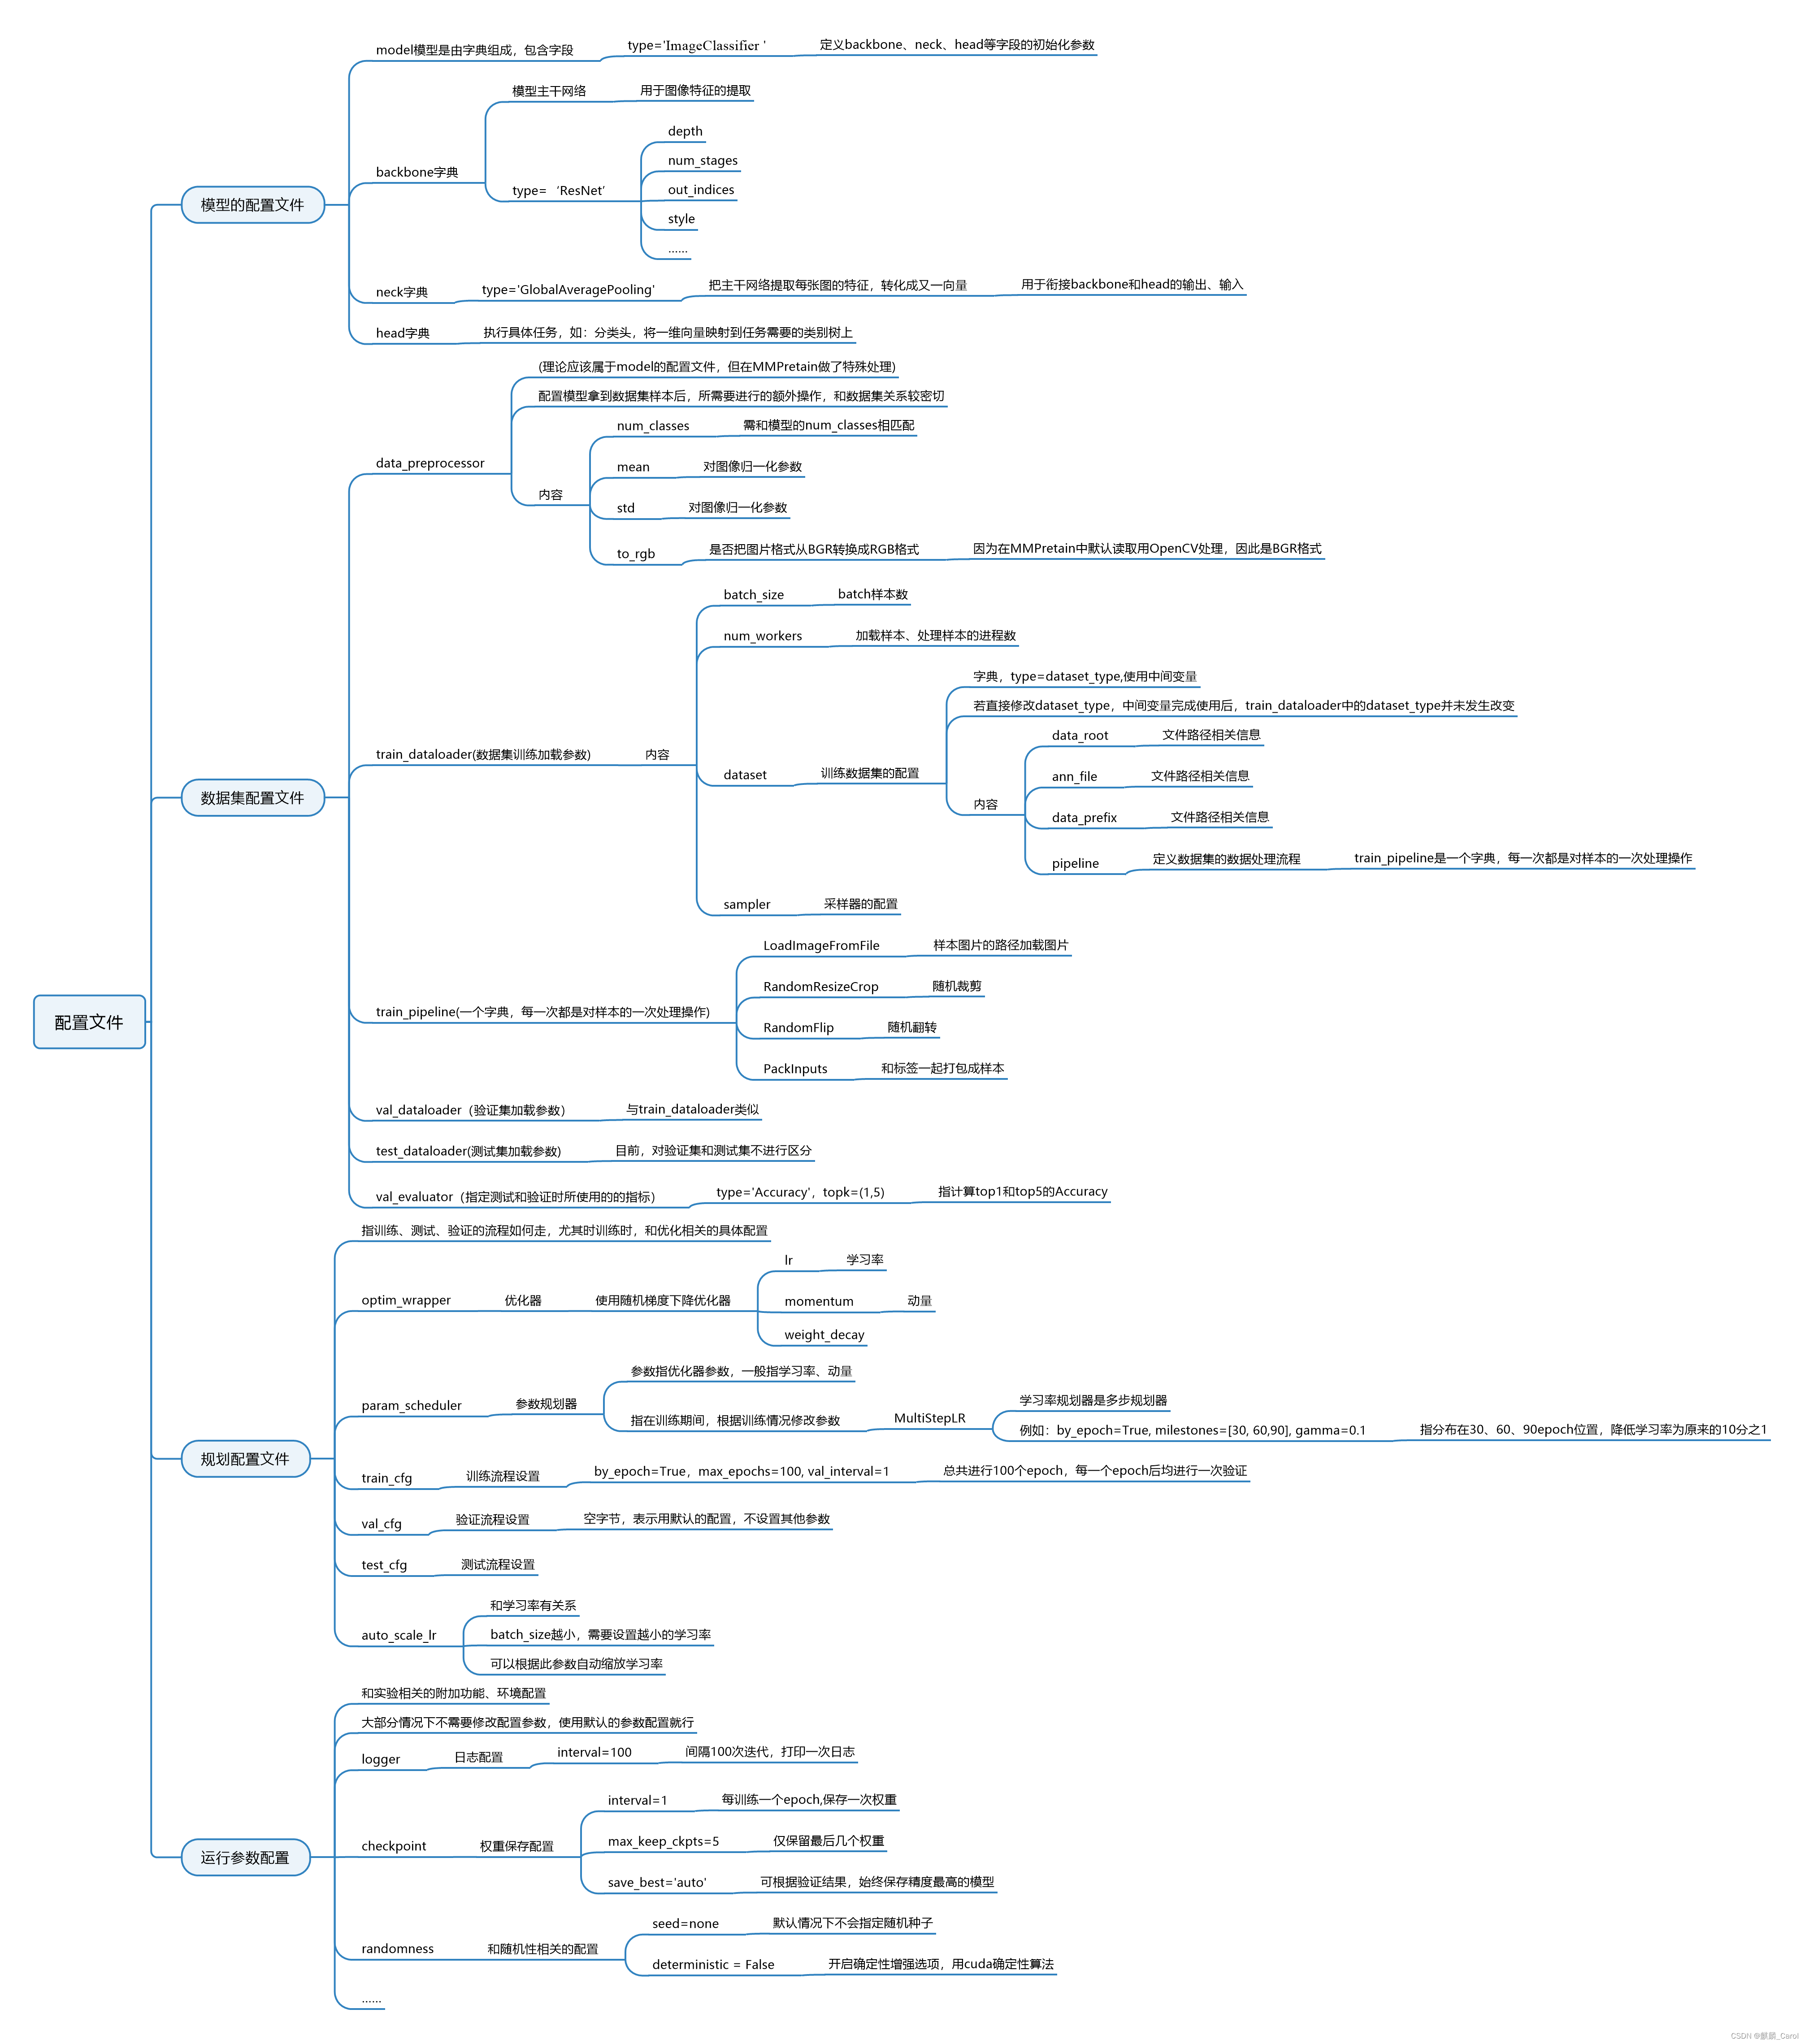
2、用该配置文件的优势:
便于后续修改,没有实例化某个类,而是用字典的形式保存模块,包括class和初始化参数在内的所有信息。在后续操作中,可以在不修改该配置文件的前提下,修改该配置文件的各种属性。
例如,用以下命令,可以完成对num_classes的修改:
cfg.model.head.num_classes = 23、相关练习
【TIPs】
① 在model settings,配置文件中,加入
init_cfg=dict(type='Pretrained', checkpoint='checkpoint/resnet18_8xb32_in1k_20210831-fbbb1da6.pth')需要注意,前面的括号后,有逗号。
② 若视频中的mim指令报错,可以试试python tool的指令
python tools/train.py projects/cats_dogs_dataset/resnet18_finetune.py
python tools/test.py projects/cats_dogs_dataset/resnet18_finetune.py checkpoint/epoch_5.pth
在测试集上跑完发现,accuracy/top1: 93.6290,效果还是可以的。
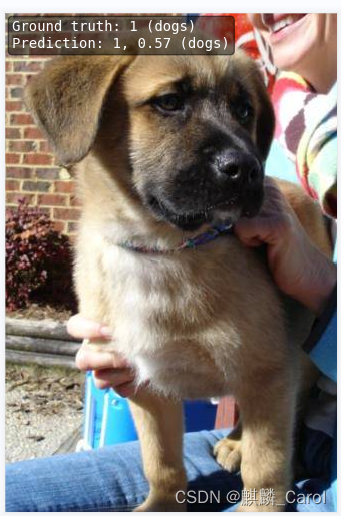
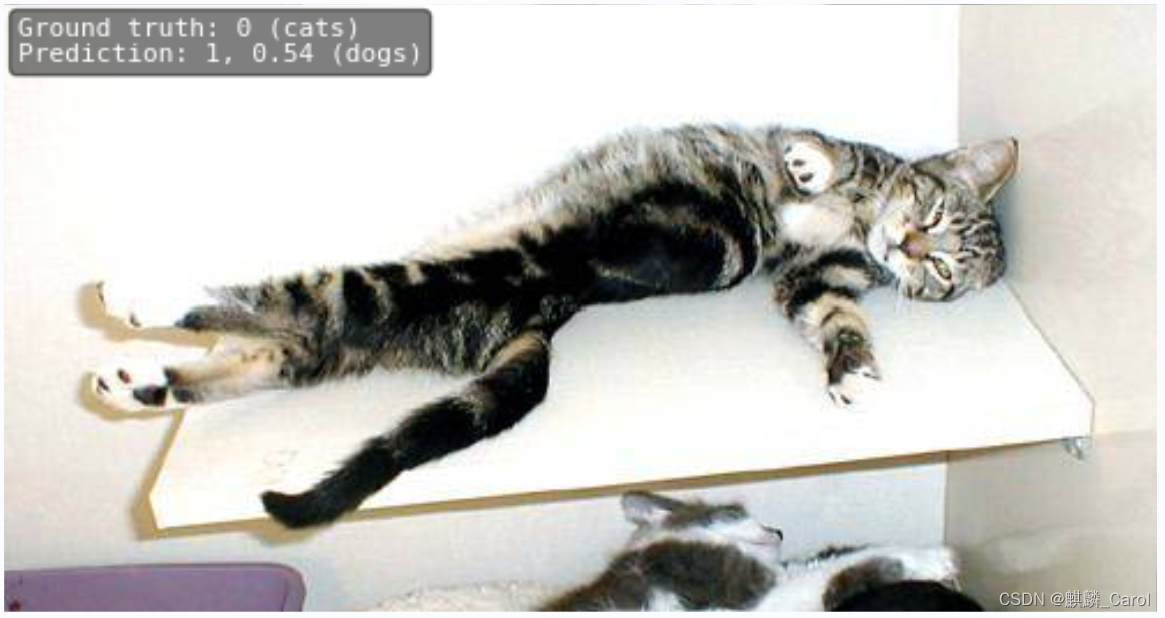
③ 对测试结果做进一步分析:
 python tools/analysis_tools/analyze_results.py projects/cats_dogs_dataset/resnet18
_finetune.py result.pkl --out-dir analyze
我们导出了测试集上预测成功,而且得分最高的一组图片;以及一组得分虽然很高,但是预测错误的图片。每张图上都标有它预测的得分是多少、类别是什么。如下图所示
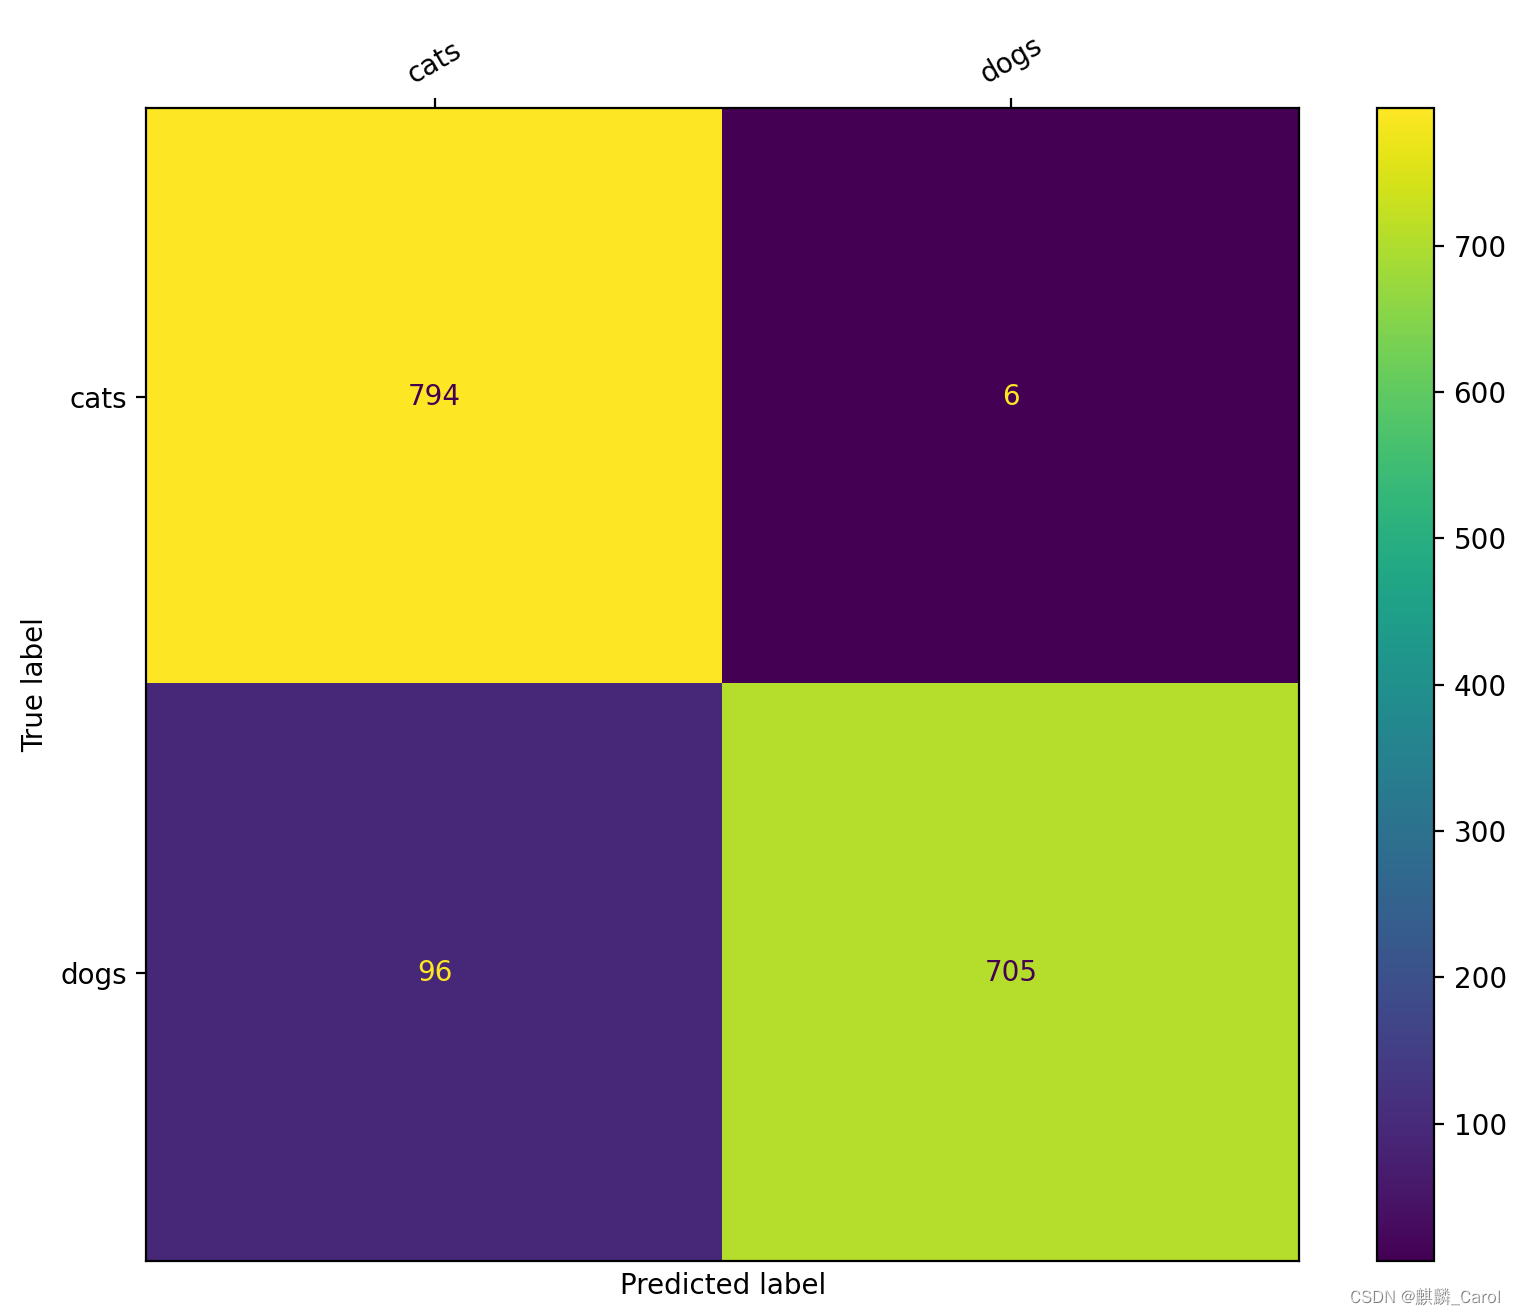
④ 画出分类的混淆矩阵
python tools/analysis_tools/confusion_matrix.py projects/cats_dogs_dataset/resnet1
8_finetune.py result.pkl --show --include-values
出图为:
⑤ 用刚才训练好的模型预测的结果
from mmpretrain import ImageClassificationInferencer
inferencer = ImageClassificationInferencer('./resnet18_finetune.py', pretrained='epoch_5.pth')
inferencer("cat.14.jpg", show=True)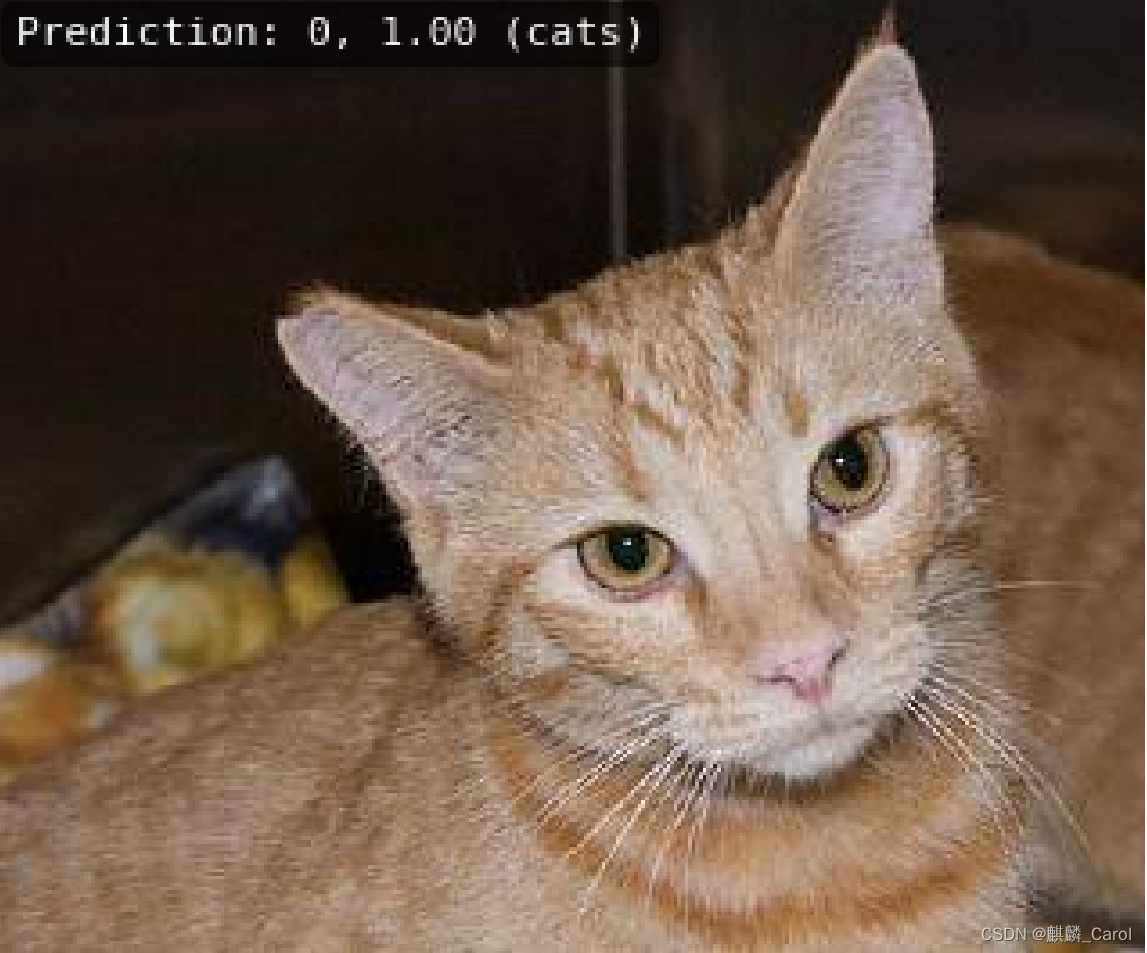
【参考视频】


 149
149


 被折叠的 条评论
为什么被折叠?
被折叠的 条评论
为什么被折叠?
 到【灌水乐园】发言


