在这里我们主要用到是glut
链接:https://pan.baidu.com/s/1O4RcrvgxbSyjTUKq9Jf-2w?pwd=dovp
提取码:dovp
获取以上压缩包,按照如下方法进行配置:
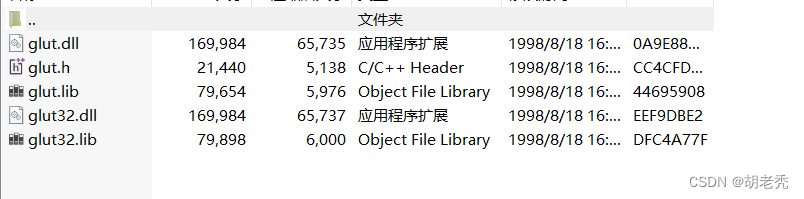
将glut.h文件复制后找到你Visual Studio 2022的安装路径
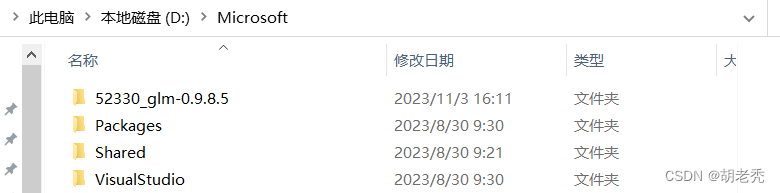
如图,我的VS2022安装到我电脑的D盘
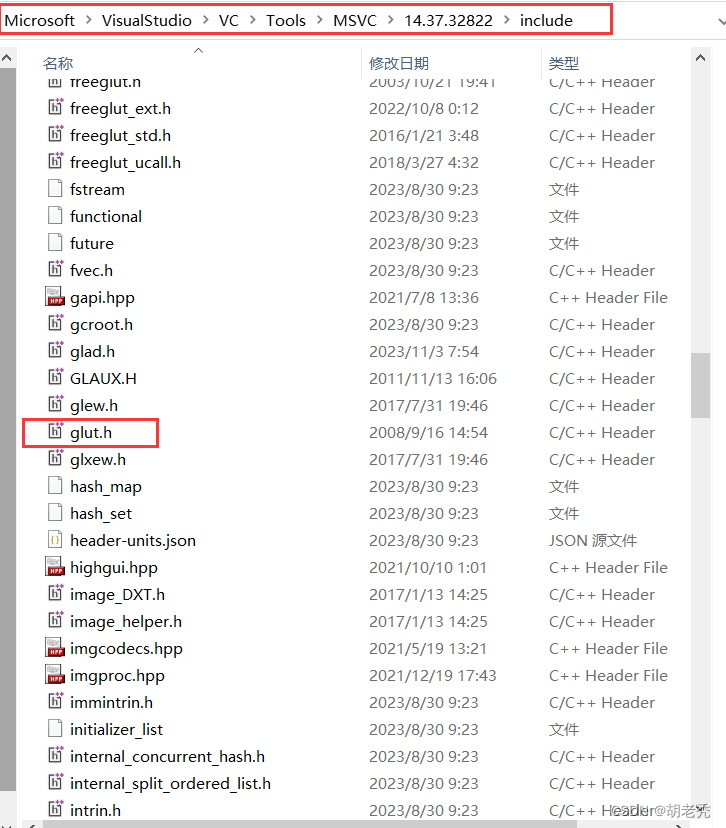
将glut.h文件粘到 \Microsoft Visual Studio\2022\Community\VC\Tools\MSVC\14.37.32822\lncude文件夹中
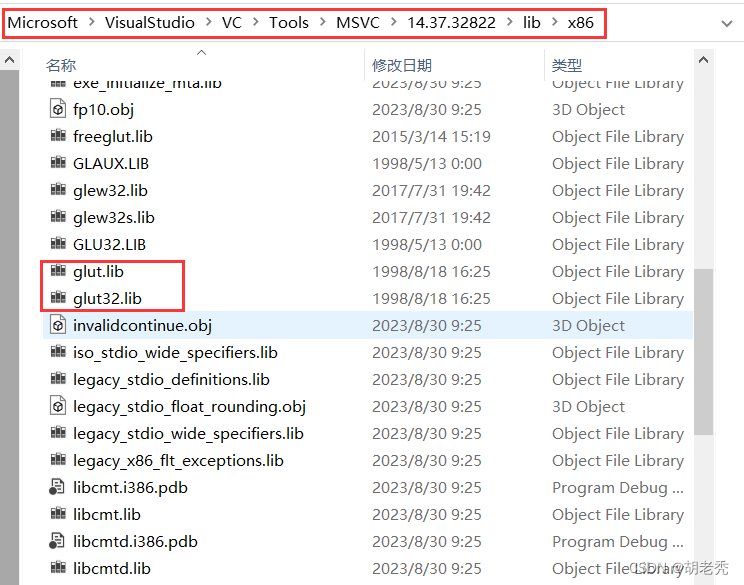
将*.lib的文件复制粘贴到 ..\Microsoft Visual Studio\2022\Community\VC\Tools\MSVC\14.37.32822\lib\x86
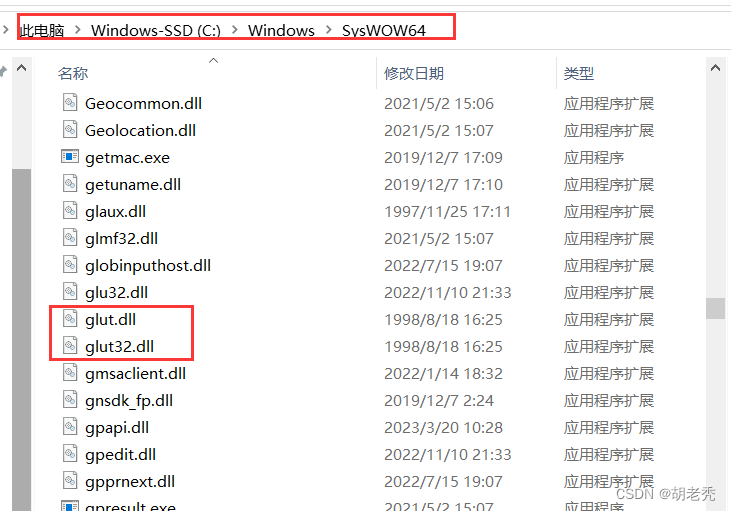
再将*dll的文件复制粘贴到我们电脑的C:\Windows\SysWOW64
以上就完成了glut工具库了
接下来我们就可以开始写OpenGL代码了
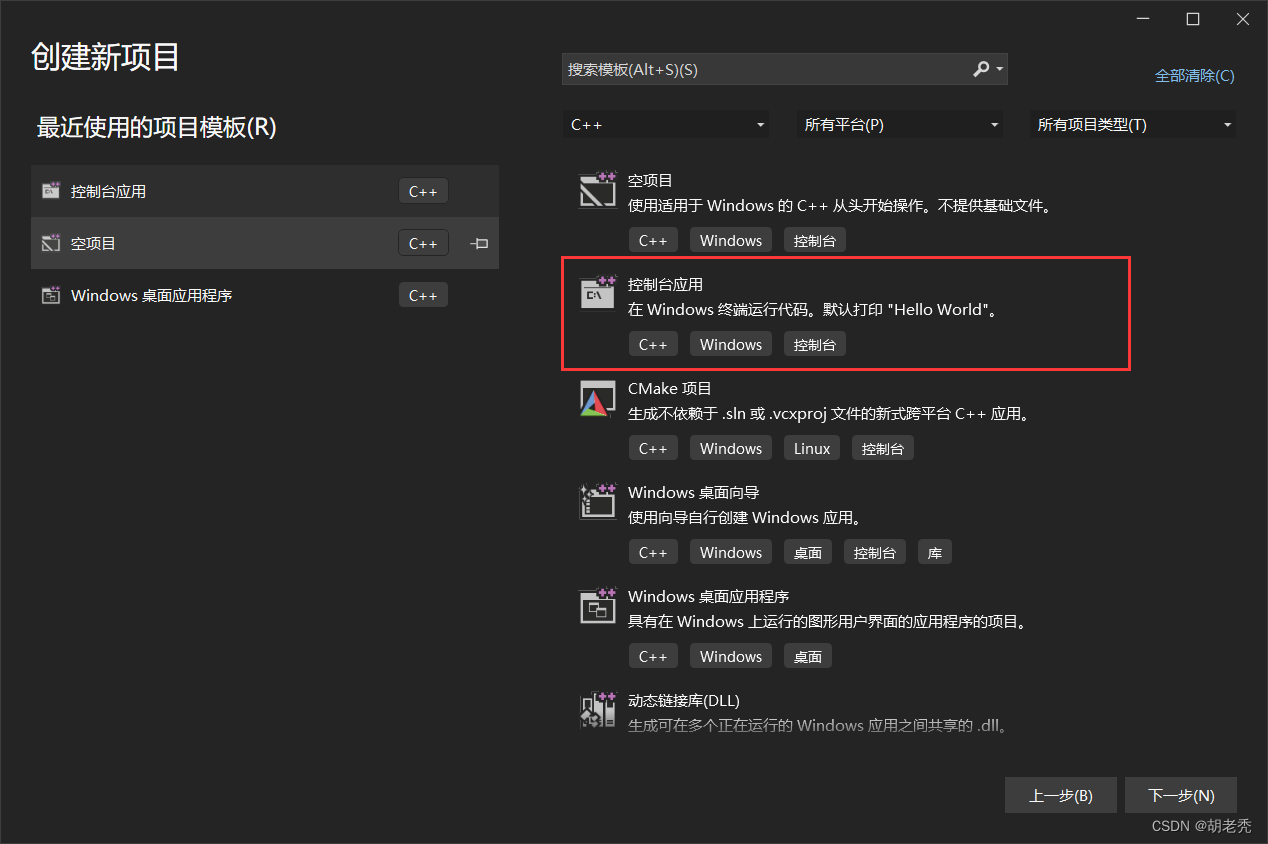
打开Visual Studio,点击创建新项目,选择控制台应用
随便取一个项目名称。
自此,我们便可以开始写代码了。
#include <stdlib.h>
#include <GL/glut.h>
#include<iostream>
using namespace std;
void init(void)
{
glClearColor(1.0, 1.0, 1.0, 1.0); //背景颜色
}
void display(void)
{
glClear(GL_COLOR_BUFFER_BIT);
glLoadIdentity(); //加载单位矩阵
glutSwapBuffers();
}
void reshape(int w, int h)
{
glViewport(0, 0, (GLsizei)w, (GLsizei)h);
glMatrixMode(GL_PROJECTION);
glLoadIdentity();
gluPerspective(60.0, (GLfloat)w / (GLfloat)h, 1.0, 20.0);
glMatrixMode(GL_MODELVIEW);
glLoadIdentity();
gluLookAt(0.0, 0.0, 5.0, 0.0, 0.0, 0.0, 0.0, 1.0, 0.0);
}
int main(int argc, char** argv)
{
glutInit(&argc, argv);
glutInitDisplayMode(GLUT_DOUBLE | GLUT_RGB);
glutInitWindowSize(600, 600);
glutInitWindowPosition(100, 100);
glutCreateWindow("基本图形绘制");
glutMainLoop();
return 0;
}
首先写入头文件以及大体框架
点击运行,会得到如图窗口,名为“基本图形绘制”
下面,我们可以在display中绘制想要的图形了
一下这些是OpenGL中有的图形:
glutWireTeapot(1);//线框茶壶
glutSolidTeapot(1);//实体茶壶
glutWireTetrahedron();//线框四面体
glutSolidTetrahedron();//实体四面体
glutWireCube(2);//线框立方体
glutSolidCube(2);//实体四面体
glutWireDodecahedron();//十二面体
glutWireIcosahedron();//二十面体
glutWireOctahedron();//八面体
glutWireSphere(1, slices, stacks);//线框球
glutSolidSphere(1, slices, stacks);//实体球
glutWireTorus(0.2, 0.8, slices, stacks);//环面,隆起
glutWireCone(1,1,slices,stacks);//线框圆锥
glutSolidCone(1, 1, slices, stacks);//实体圆锥
这里就不一一举例了,Wire意思是线,Solid意思是固体。我们可以看到,上面还有slices,stacks,他们的意思分别是片和栈,通俗一点你可以理解为球上的经纬。可以根据增加slices以z轴上线段为直径分布的圆周线条数,通过增加stacks围绕在z轴周围线的条数
如果想要绘制的图形没有函数直接调用,我们可以根据点坐标来绘制
glBegin(GL_LINES);
glVertex2f(-1.0f, 0.0f);
glVertex2f(1.0f, 0.0f);
glVertex2f(0.0f, -1.0f);
glVertex2f(0.0f, 1.0f);
glEnd();
至此,单个的基本图形绘制就完了。
我们在代码中添加上鼠标交互,方便我们观察图形。
void mouse(int button, int state, int x, int y)
{
if (button == GLUT_LEFT_BUTTON)
{
if (state == GLUT_DOWN)
{
roate = 0;
rote = 0;
oldx = x;//当左键按下时记录鼠标坐标
oldy = y;
cout << "left" << endl;
}
}
if (button == GLUT_RIGHT_BUTTON)
{
if (state == GLUT_DOWN)
{
roate += 1.0f;
cout << "right" << endl;
}
}
}
void motion(int x, int y)
{
GLint deltax = oldx - x;
GLint deltay = oldy - y;
anglex += 360 * (GLfloat)deltax / (GLfloat)WinW;//根据屏幕上鼠标滑动的距离来设置旋转的角度
angley += 360 * (GLfloat)deltay / (GLfloat)WinH;
anglez += 360 * (GLfloat)deltay / (GLfloat)WinH;
oldx = x;//记录此时的鼠标坐标,更新鼠标坐标
oldy = y;//若是没有这两句语句,滑动是旋转会变得不可控
glutPostRedisplay();
}
鼠标交互,键盘交互不同的写法很多,我们如果不需要这种的鼠标交互方式,可以在网上查询另外的交互代码,然后复制到我们代码文件中,记得在main函数中调用。
接下来是完整的代码:
#include <stdlib.h>
#include <GL/glut.h>
#include<iostream>
using namespace std;
GLfloat roate = 0.0;//设置旋转速率
GLfloat rote = 0.0;//设置旋转角度
GLfloat anglex = 0.0;//X 轴旋转
GLfloat angley = 0.0;//Y 轴旋转
GLfloat anglez = 0.0;//Z 轴旋转
GLint WinW = 400;
GLint WinH = 400;
GLfloat oldx;//当左键按下时记录鼠标坐标
GLfloat oldy;
static int slices = 16;
static int stacks = 16;
//可以根据增加slices以z轴上线段为直径分布的圆周线条数
//增加stacks围绕在z轴周围线的条数
void init(void)
{
glClearColor(1.0, 1.0, 1.0, 1.0); //背景黑色
}
void display(void)
{
glClear(GL_COLOR_BUFFER_BIT);
glColor3f(0.2, 0.5, 0.41); //画笔红色
glLoadIdentity(); //加载单位矩阵
gluLookAt(0.0, 0.0, 5.0, 0.0, 0.0, 0.0, 0.0, 1.0, 0.0);
glRotatef(rote, 0.0f, 1.0f, 0.0f);
glRotatef(anglex, 1.0, 0.0, 0.0);
glRotatef(angley, 0.0, 1.0, 0.0);
glRotatef(anglez, 0.0, 0.0, 1.0);
//glutWireTeapot(1);//线框茶壶
//glutSolidTeapot(1);//实体茶壶
//glutWireTetrahedron();//线框四面体
//glutSolidTetrahedron();//实体四面体
//glutWireCube(2);//线框立方体
//glutSolidCube(2);//实体四面体
//glutWireDodecahedron();//十二面体
//glutWireIcosahedron();//二十面体
//glutWireOctahedron();//八面体
//glutWireSphere(1, slices, stacks);//线框球
//glutSolidSphere(1, slices, stacks);//实体球
//glutWireTorus(0.2, 0.8, slices, stacks);//环面,隆起
glutWireCone(1,1,slices,stacks);//圆锥
//glutSolidCone(1, 1, slices, stacks);//圆锥
rote += roate;
//glRotatef(angle, 0.0, 1.0, 0.0);
//angle += 1.0f;
glutSwapBuffers();
}
void reshape(int w, int h)
{
glViewport(0, 0, (GLsizei)w, (GLsizei)h);
glMatrixMode(GL_PROJECTION);
glLoadIdentity();
gluPerspective(60.0, (GLfloat)w / (GLfloat)h, 1.0, 20.0);
glMatrixMode(GL_MODELVIEW);
glLoadIdentity();
gluLookAt(0.0, 0.0, 5.0, 0.0, 0.0, 0.0, 0.0, 1.0, 0.0);
}
void mouse(int button, int state, int x, int y)
{
if (button == GLUT_LEFT_BUTTON)
{
if (state == GLUT_DOWN)
{
roate = 0;
rote = 0;
oldx = x;//当左键按下时记录鼠标坐标
oldy = y;
cout << "left" << endl;
}
}
if (button == GLUT_RIGHT_BUTTON)
{
if (state == GLUT_DOWN)
{
roate += 1.0f;
cout << "right" << endl;
}
}
}
void motion(int x, int y)
{
GLint deltax = oldx - x;
GLint deltay = oldy - y;
anglex += 360 * (GLfloat)deltax / (GLfloat)WinW;//根据屏幕上鼠标滑动的距离来设置旋转的角度
angley += 360 * (GLfloat)deltay / (GLfloat)WinH;
anglez += 360 * (GLfloat)deltay / (GLfloat)WinH;
oldx = x;//记录此时的鼠标坐标,更新鼠标坐标
oldy = y;//若是没有这两句语句,滑动是旋转会变得不可控
glutPostRedisplay();
}
int main(int argc, char** argv)
{
glutInit(&argc, argv);
glutInitDisplayMode(GLUT_DOUBLE | GLUT_RGB);
glutInitWindowSize(600, 600);
glutInitWindowPosition(100, 100);
glutCreateWindow("基本图形绘制");
init();
glutDisplayFunc(display);
glutReshapeFunc(reshape);
glutMouseFunc(mouse);
glutMotionFunc(motion);
glutIdleFunc(display);
glutMainLoop();
return 0;
}
第一次写这种文章,如果有什么问题,欢迎指正。如果觉得对您有帮助的话,可以点个赞再走吗