


准备:首先你需要有一个vue2的项目,然后有一个干净的页面,这些准备好了以后就可以开始了。
第一步,安装插件;
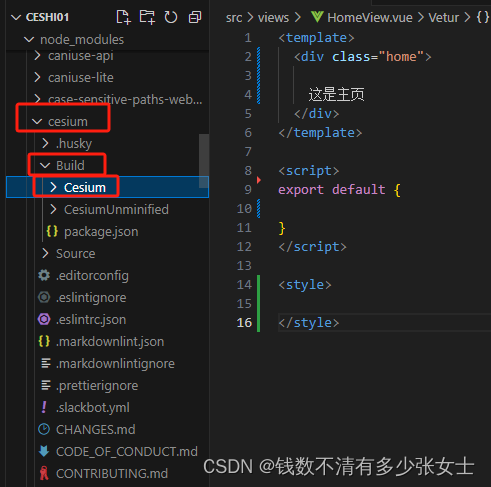
npm install cesium --save第二步,移动文件;
在node-modules中找到刚刚安装的cesium,在文件夹中里面有一个Build文件夹,把Build里面的Cesium复制出来丢到public中
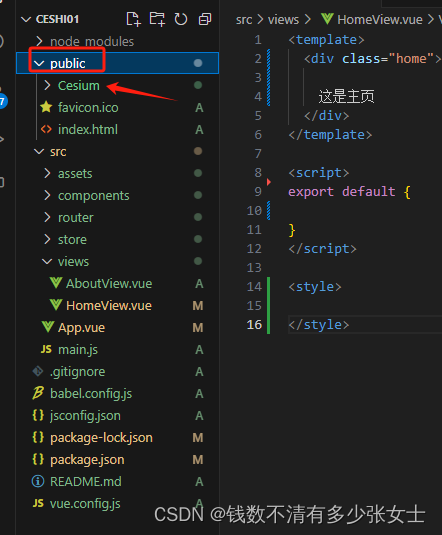
第三步,在public/index.html中,引入cesium全局样式和cesium源码,这样前期工作就已经完成了

第四步,写一个页面,并给一点样式
<template>
   <div id="my-map"></div>
</template>

<script>
export default {
  data(){
    return{

    }
  }
}
</script>

<style >
* {
  padding: 0;
  margin: 0;
}
#my-map {
  position: absolute;
  top: 0;
  left: 0;
  width: 100%;
  height: 100%;
  background-color: black;
}
</style>
第五步:需要在官网申请一个token
Cesium 官网:https://cesium.com/
步骤:
按要求填写信息
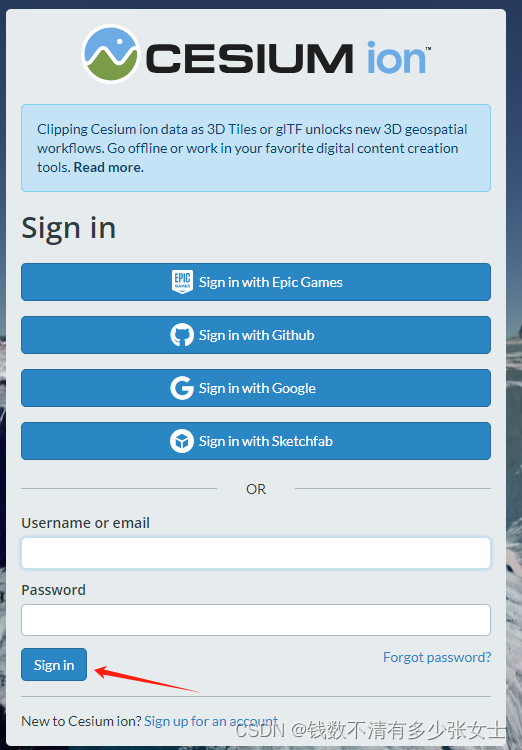
按照步骤来,创建一个token,然后最右边有token可以进行复制了

第六步:开始写代码
在刚刚的页面中写一个方法,并在mounted中使用。
mounted() {
this.init();
},
methods: {
init() {
this.viewer = new Cesium.Viewer("my-map", {
homeButton: false,
sceneModePicker: false,
baseLayerPicker: false, // 影像切换
animation: true, // 是否显示动画控件
infoBox: false, // 是否显示点击要素之后显示的信息
selectionIndicator: false, // 要素选中框
geocoder: false, // 是否显示地名查找控件
timeline: true, // 是否显示时间线控件
fullscreenButton: false,
shouldAnimate: false,
navigationHelpButton: false, // 是否显示帮助信息控件
});
},
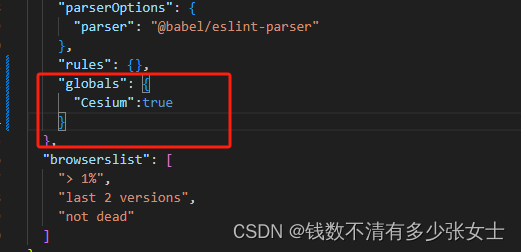
},但是这里会遇到一个问题,会报错

解决:在package.json文件里面的eslintConfig添加这些,然后重启项目就可以了。
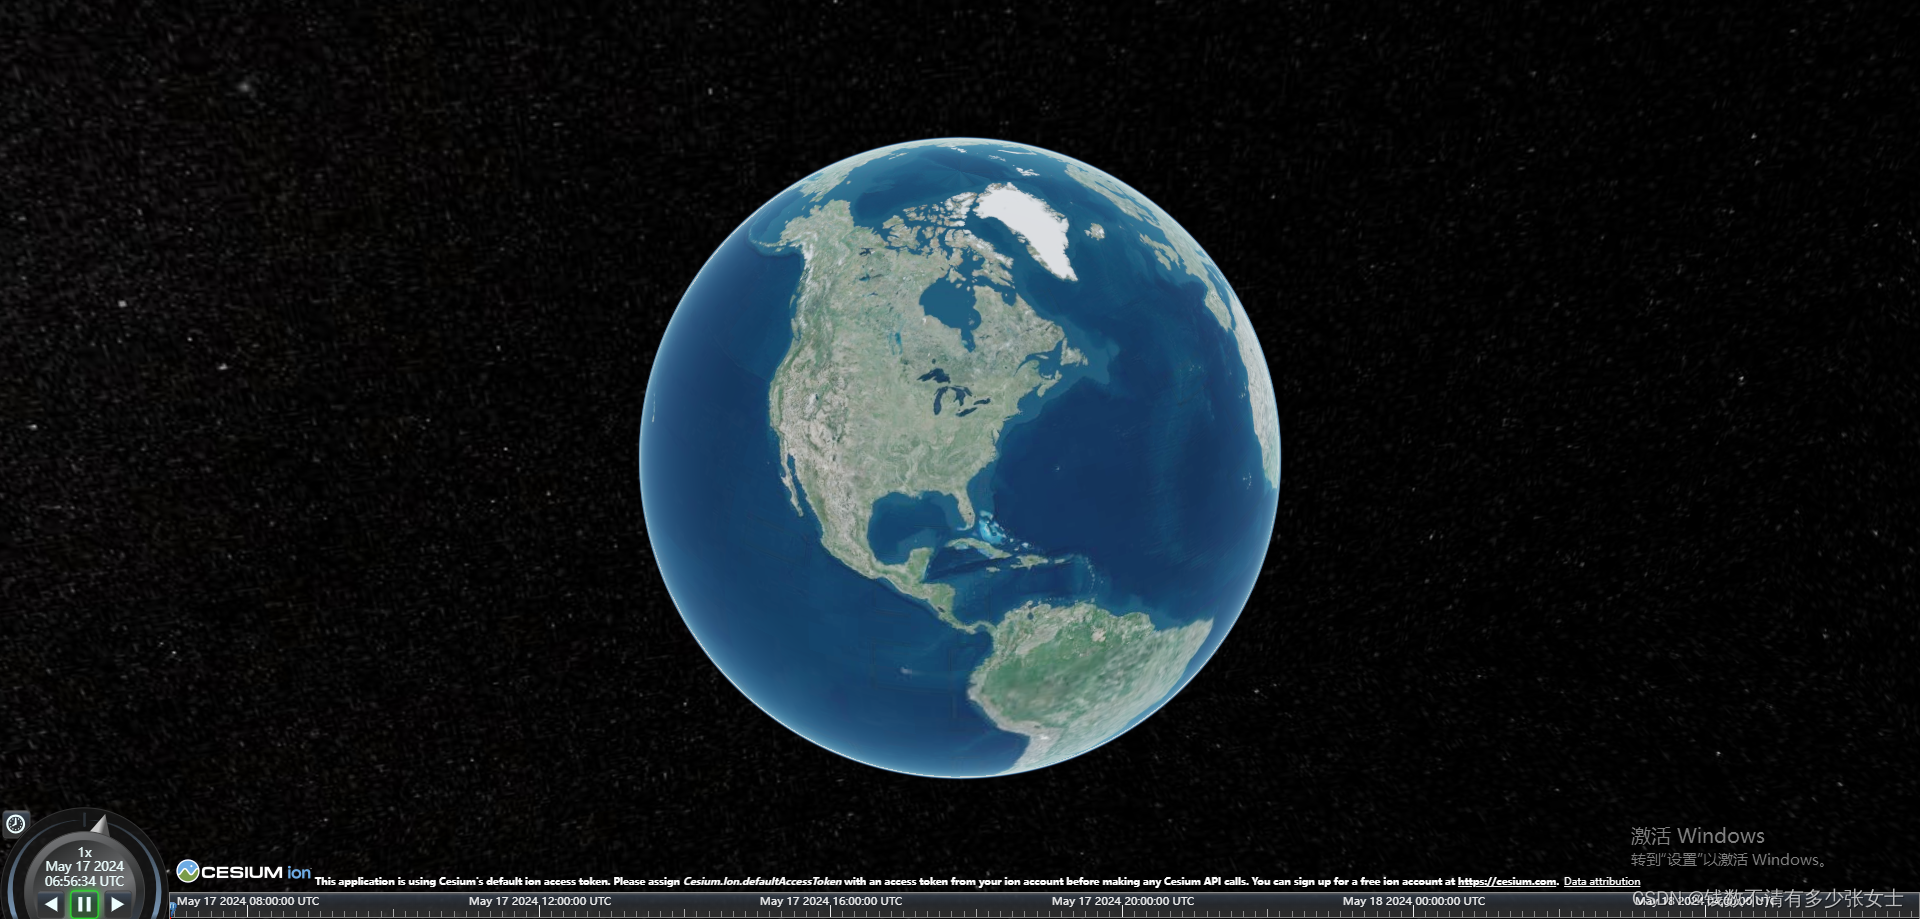
得到的结果就是这样的:
第七步:优化及其他方法
methods: {
init() {
(Cesium.Ion.defaultAccessToken = "你申请的cesium的token");
this.viewer = new Cesium.Viewer("my-map", {
homeButton: false,
sceneModePicker: false,
baseLayerPicker: false, // 影像切换
animation: true, // 是否显示动画控件
infoBox: false, // 是否显示点击要素之后显示的信息
selectionIndicator: false, // 要素选中框
geocoder: false, // 是否显示地名查找控件
timeline: true, // 是否显示时间线控件
fullscreenButton: false,
shouldAnimate: false,
navigationHelpButton: false, // 是否显示帮助信息控件
});
// 优化第一步
//这是让你的画面以一个怎样的形式出现,相当于出场动画
this.viewer.camera.flyTo({
// fromDegrees()方法,将经纬度和高程转换为世界坐标,这里定位到中国
destination: Cesium.Cartesian3.fromDegrees(101.8, 33.74, 5000000),
orientation: {
// 指向
// heading:Cesium.Math.toRadians(90,0),
// 视角
// pitch:Cesium.Math.toRadians(-90),
roll: 0.0,
},
});
// 优化第二步
//显示标注
this.viewer.imageryLayers.addImageryProvider(
new Cesium.WebMapTileServiceImageryProvider({
url:
"http://{s}.tianditu.gov.cn/cva_c/wmts?service=wmts&request=GetTile&version=1.0.0" +
"&LAYER=cva&tileMatrixSet=c&TileMatrix={TileMatrix}&TileRow={TileRow}&TileCol={TileCol}" +
"&style=default&format=tiles&tk=0a30a060a83ae06ba7a9dd5f70a3c203",
layer: "tdtCva",
style: "default",
format: "tiles",
tileMatrixSetID: "c",
subdomains: ["t0", "t1", "t2", "t3", "t4", "t5", "t6", "t7"],
tilingScheme: new Cesium.GeographicTilingScheme(),
tileMatrixLabels: [
"1",
"2",
"3",
"4",
"5",
"6",
"7",
"8",
"9",
"10",
"11",
"12",
"13",
"14",
"15",
"16",
"17",
"18",
"19",
],
maximumLevel: 18,
show: false,
})
);
},
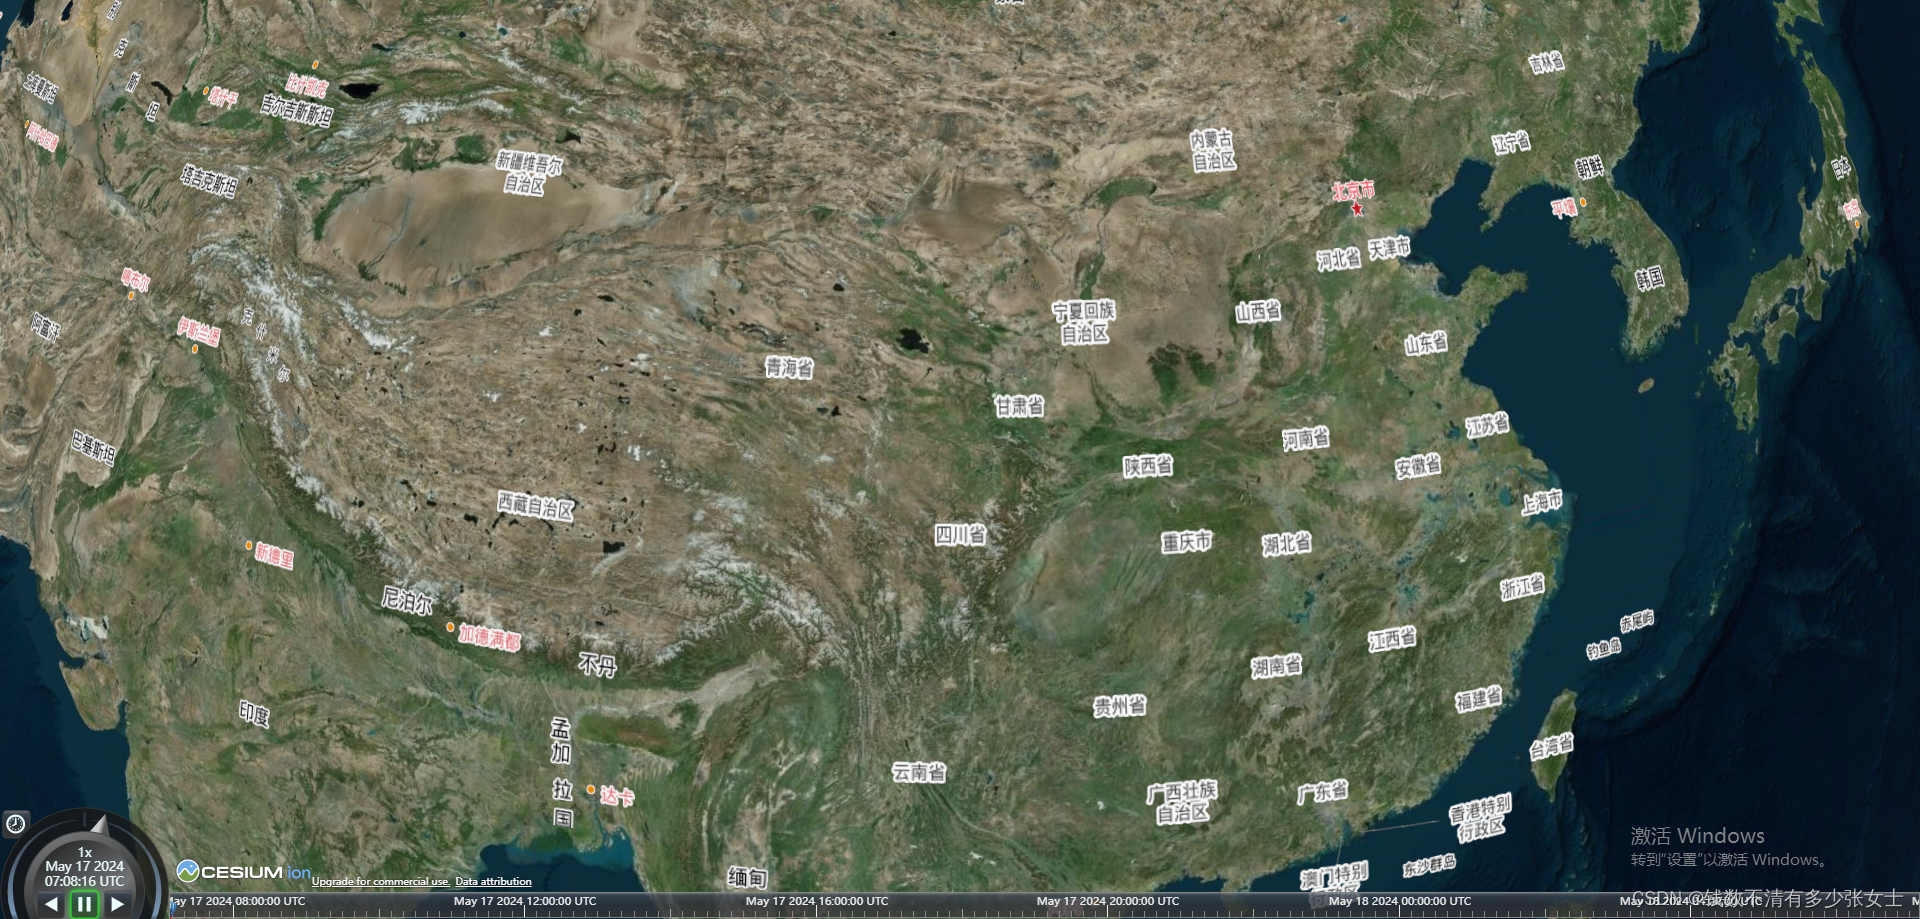
},最后你就得到了一个有标注的地图


 332
332

 被折叠的 条评论
为什么被折叠?
被折叠的 条评论
为什么被折叠?
 到【灌水乐园】发言


