


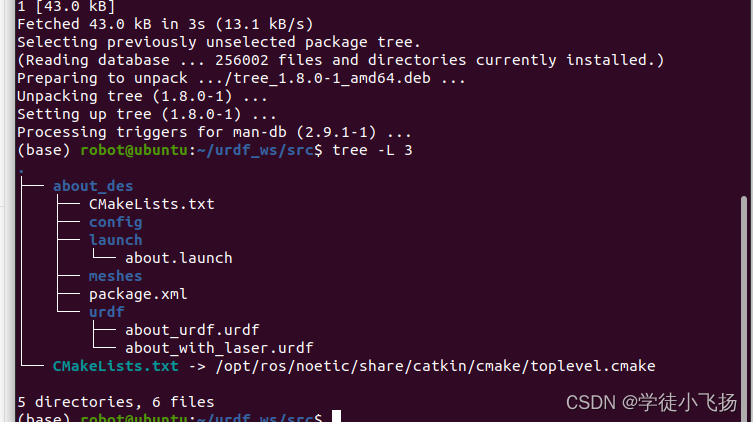
tree -L 3先查看我们要搭建的文件夹的结构,一开始tree没有安装,安装后可以如下图所示,结构搭建。
Command 'tree' not found, but can be installed with:
sudo snap install tree # version 1.8.0+pkg-3fd6, or
sudo apt install tree # version 1.8.0-1See 'snap info tree' for additional versions.
sudo apt install treeReading package lists... Done
Building dependency tree
Reading state information... Done
The following NEW packages will be installed:
tree
0 upgraded, 1 newly installed, 0 to remove and 58 not upgraded.
Need to get 43.0 kB of archives.
After this operation, 115 kB of additional disk space will be used.
Get:1 http://us.archive.ubuntu.com/ubuntu focal/universe amd64 tree amd64 1.8.0-1 [43.0 kB]
Fetched 43.0 kB in 3s (13.1 kB/s)
Selecting previously unselected package tree.
(Reading database ... 256002 files and directories currently installed.)
Preparing to unpack .../tree_1.8.0-1_amd64.deb ...
Unpacking tree (1.8.0-1) ...
Setting up tree (1.8.0-1) ...
Processing triggers for man-db (2.9.1-1) ...
tree -L 3
首先建立ROS工作空间,然后我们进入创建好的ROS工作空间:

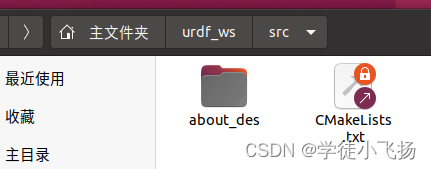
创建一个机器人建模的功能包 如上图所示:
然后我们要创建几个文件夹:config(保存rviz 的配置文件, launch(保存相关启动文件)
meshes(放置URDF的引用的模型渲染文件) ,urdf(存放机器人模型文件:URDF或者xacro)

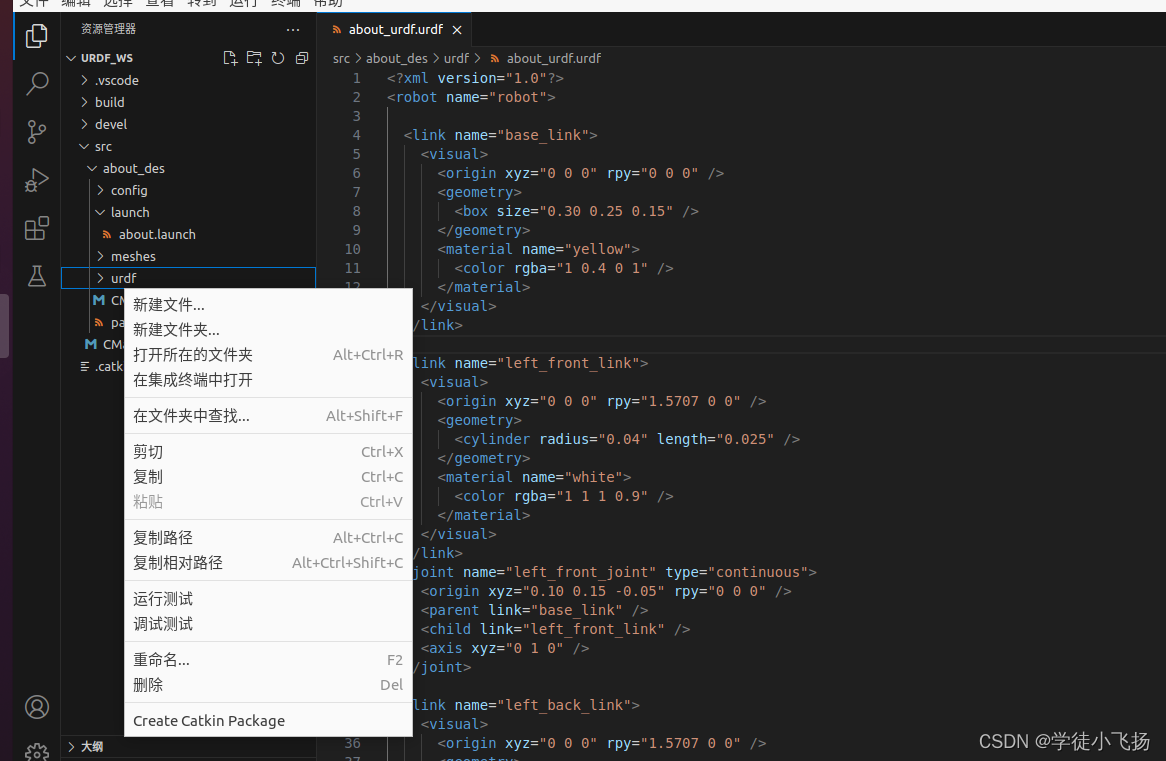
进入urdf文件夹下,编写机器人的URDF,建议从vscode里建立并直接填写,当然也可以利用 终端使用touch about_urdf.urdf (在urdf文件夹下)创建,然后利用指令 gedit about_urdf.urdf打开文本进行编辑
这是直接利用vscode:
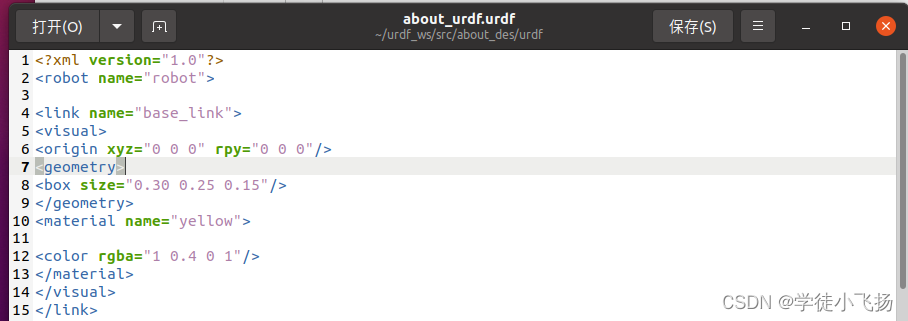
这个是利用gedit about_urdf.urdf:
<?xml version="1.0"?>
<robot name="robot">

  <link name="base_link">
    <visual>
      <origin xyz="0 0 0" rpy="0 0 0" />
      <geometry>
        <box size="0.30 0.25 0.15" />
      </geometry>
      <material name="yellow">
        <color rgba="1 0.4 0 1" />
      </material>
    </visual>
  </link>

  <link name="left_front_link">
    <visual>
      <origin xyz="0 0 0" rpy="1.5707 0 0" />
      <geometry>
        <cylinder radius="0.04" length="0.025" />
      </geometry>
      <material name="white">
        <color rgba="1 1 1 0.9" />
      </material>
    </visual>
  </link>
  <joint name="left_front_joint" type="continuous">
    <origin xyz="0.10 0.15 -0.05" rpy="0 0 0" />
    <parent link="base_link" />
    <child link="left_front_link" />
    <axis xyz="0 1 0" />
  </joint>

  <link name="left_back_link">
    <visual>
      <origin xyz="0 0 0" rpy="1.5707 0 0" />
      <geometry>
        <cylinder radius="0.06" length="0.025" />
      </geometry>
      <material name="white">
        <color rgba="1 1 1 0.9" />
      </material>
    </visual>
  </link>
  <joint name="left_back_joint" type="continuous">
    <origin xyz="-0.10 0.15 -0.05" rpy="0 0 0" />
    <parent link="base_link" />
    <child link="left_back_link" />
    <axis xyz="0 1 0" />
  </joint>

  <link name="right_front_link">
    <visual>
      <origin xyz="0 0 0" rpy="1.5707 0 0" />
      <geometry>
        <cylinder radius="0.04" length="0.025" />
      </geometry>
      <material name="white">
        <color rgba="1 1 1 0.9" />
      </material>
    </visual>
  </link>
  <joint name="right_front_joint" type="continuous">
    <origin xyz="0.10 -0.15 -0.05" rpy="0 0 0" />
    <parent link="base_link" />
    <child link="right_front_link" />
    <axis xyz="0 1 0" />
  </joint>

  <link name="right_back_link">
    <visual>
      <origin xyz="0 0 0" rpy="1.5707 0 0" />
      <geometry>
        <cylinder radius="0.06" length="0.025" />
      </geometry>
      <material name="white">
        <color rgba="1 1 1 0.9" />
      </material>
    </visual>
  </link>
  <joint name="right_back_joint" type="continuous">
    <origin xyz="-0.10 -0.15 -0.05" rpy="0 0 0" />
    <parent link="base_link" />
    <child link="right_back_link" />
    <axis xyz="0 1 0" />
  </joint>

</robot>
除了编写urdf文件,还有launch文件需要编写,个人觉得还是利用vscode 直接创建方便,也可以参考以下代码创建,注意是在文件launch下
about.launch

touch about.launch
在 about.launch 里编写
<launch >
<param  name="robot_description" textfile=" $(find about_des)/urdf/about_urdf.urdf"  / >
<!--设置 GUI 参数,显示关节控制插件 -- >
 <param  name="use_gui" value="true"  / >
<!-- 运动 joint_state_publisher 节点,发布机器人关节状态 -- >
< nodename nodename ="joint_state_publisher"pkg="joint_state_publisher" type="joint_state_publisher"  / >
<!-- 运行 robot_state_publisher 节点,发布 TF -- >
< nodename nodename ="robot_state_publisher"pkg="robot_state_publisher" type="robot_state_publisher"  / >
</launch >
然后进行编译catkin_make,以及source devel/setup.bash(不进行会报错,一劳永逸的是在.bashrc文件里添加,详细操作查阅相关博客)
如果已安装了anaconda,编译可能会报错,
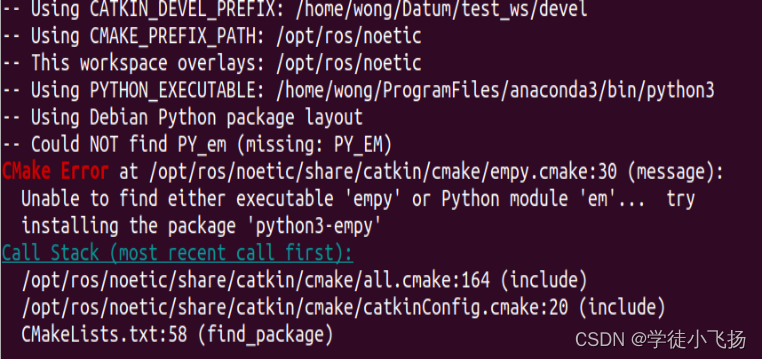
出现这个问题的主要原因是 catkin_make 找到的是 anaconda 下的 python,所以修改成以下指令,即可解决问题:catkin_make -DPYTHON_EXECUTABLE=/usr/bin/python3
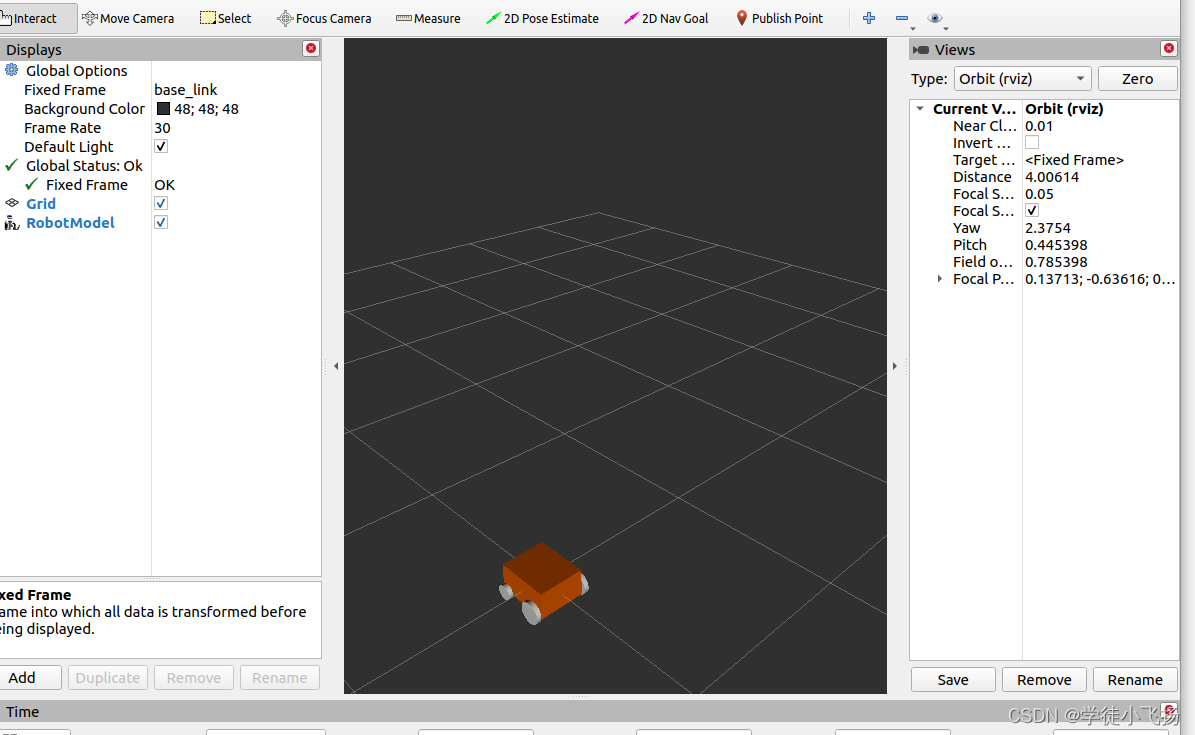
roslaunch about_des about.launch
rosrun rviz rviz
分别在不同的终端运行上述两个指令,并按照下图设置,一开始没有Robotmodel,需要自己添加,设置base_link,会停止报错。
urdf添加雷达部分:
<link name="laser_link">
    <visual>
        <origin xyz="0 0 0" rpy="0 0 0" />
        <geometry>
            <cylinder radius="0.04" length="0.040" />
        </geometry>
        <material name="black">
            <color rgba="0 0 0 0.95" />
        </material>
    </visual>
</link><joint name="laser_joint" type="fixed">
    <origin xyz="0 0 0.09" rpy="0 0 0" />
    <parent link="base_link" />
    <child link="laser_link" />
</joint>
urdf添加摄像头部分:(注意,urdf代码编写需要注意格式,否则会报错)
<link  name="camera_link"  >
<visual >
<origin  xyz="0 0 0" rpy="0 0 0"  / >
<geometry >
<cylinder  radius="0.02" length="0.040"  / >
</geometry >
<material  name="white"  >
<color  rgba="1 1 1 0.95"  / >
</material >
</visual >
</link >
<joint  name="camera_joint" type="fixed"  >
<origin  xyz="0 0 0.13" rpy="0 1.5707 0"  / >
<parent  link="base_link"  / >
<child  link="camera_link"  / >
</joint >
完整版的urdf代码,添加了雷达和摄像头:
<?xml version="1.0"?>
<robot name="robot">

  <link name="base_link">
    <visual>
      <origin xyz="0 0 0" rpy="0 0 0" />
      <geometry>
        <box size="0.30 0.25 0.15" />
      </geometry>
      <material name="yellow">
        <color rgba="1 0.4 0 1" />
      </material>
    </visual>
  </link>

  <link name="left_front_link">
    <visual>
      <origin xyz="0 0 0" rpy="1.5707 0 0" />
      <geometry>
        <cylinder radius="0.04" length="0.025" />
      </geometry>
      <material name="white">
        <color rgba="1 1 1 0.9" />
      </material>
    </visual>
  </link>
  <joint name="left_front_joint" type="continuous">
    <origin xyz="0.10 0.15 -0.05" rpy="0 0 0" />
    <parent link="base_link" />
    <child link="left_front_link" />
    <axis xyz="0 1 0" />
  </joint>

  <link name="left_back_link">
    <visual>
      <origin xyz="0 0 0" rpy="1.5707 0 0" />
      <geometry>
        <cylinder radius="0.06" length="0.025" />
      </geometry>
      <material name="white">
        <color rgba="1 1 1 0.9" />
      </material>
    </visual>
  </link>
  <joint name="left_back_joint" type="continuous">
    <origin xyz="-0.10 0.15 -0.05" rpy="0 0 0" />
    <parent link="base_link" />
    <child link="left_back_link" />
    <axis xyz="0 1 0" />
  </joint>

  <link name="right_front_link">
    <visual>
      <origin xyz="0 0 0" rpy="1.5707 0 0" />
      <geometry>
        <cylinder radius="0.04" length="0.025" />
      </geometry>
      <material name="white">
        <color rgba="1 1 1 0.9" />
      </material>
    </visual>
  </link>
  <joint name="right_front_joint" type="continuous">
    <origin xyz="0.10 -0.15 -0.05" rpy="0 0 0" />
    <parent link="base_link" />
    <child link="right_front_link" />
    <axis xyz="0 1 0" />
  </joint>

  <link name="right_back_link">
    <visual>
      <origin xyz="0 0 0" rpy="1.5707 0 0" />
      <geometry>
        <cylinder radius="0.06" length="0.025" />
      </geometry>
      <material name="white">
        <color rgba="1 1 1 0.9" />
      </material>
    </visual>
  </link>
  <joint name="right_back_joint" type="continuous">
    <origin xyz="-0.10 -0.15 -0.05" rpy="0 0 0" />
    <parent link="base_link" />
    <child link="right_back_link" />
    <axis xyz="0 1 0" />
  </joint>

  <link name="laser_link">
    <visual>
      <origin xyz="0 0 0" rpy="0 0 0" />
      <geometry>
        <cylinder radius="0.04" length="0.040" />
      </geometry>
      <material name="black">
        <color rgba="0 0 0 0.95" />
      </material>
    </visual>
  </link>
  <joint name="laser_joint" type="fixed">
    <origin xyz="0 0 0.09" rpy="0 0 0" />
    <parent link="base_link" />
    <child link="laser_link" />
  </joint>

  <link name="camera_link">
    <visual>
      <origin xyz="0 0 0" rpy="0 0 0" />
      <geometry>
        <cylinder radius="0.02" length="0.040" />
      </geometry>
      <material name="white">
        <color rgba="1 1 1 0.95" />
      </material>
    </visual>
  </link>
  <joint name="camera_joint" type="fixed">
    <origin xyz="0 0 0.13" rpy="0 1.5707 0" />
    <parent link="base_link" />
    <child link="camera_link" />
  </joint>

</robot>
launch文件不需要修改哦,因为自始到终就有一个urdf文件
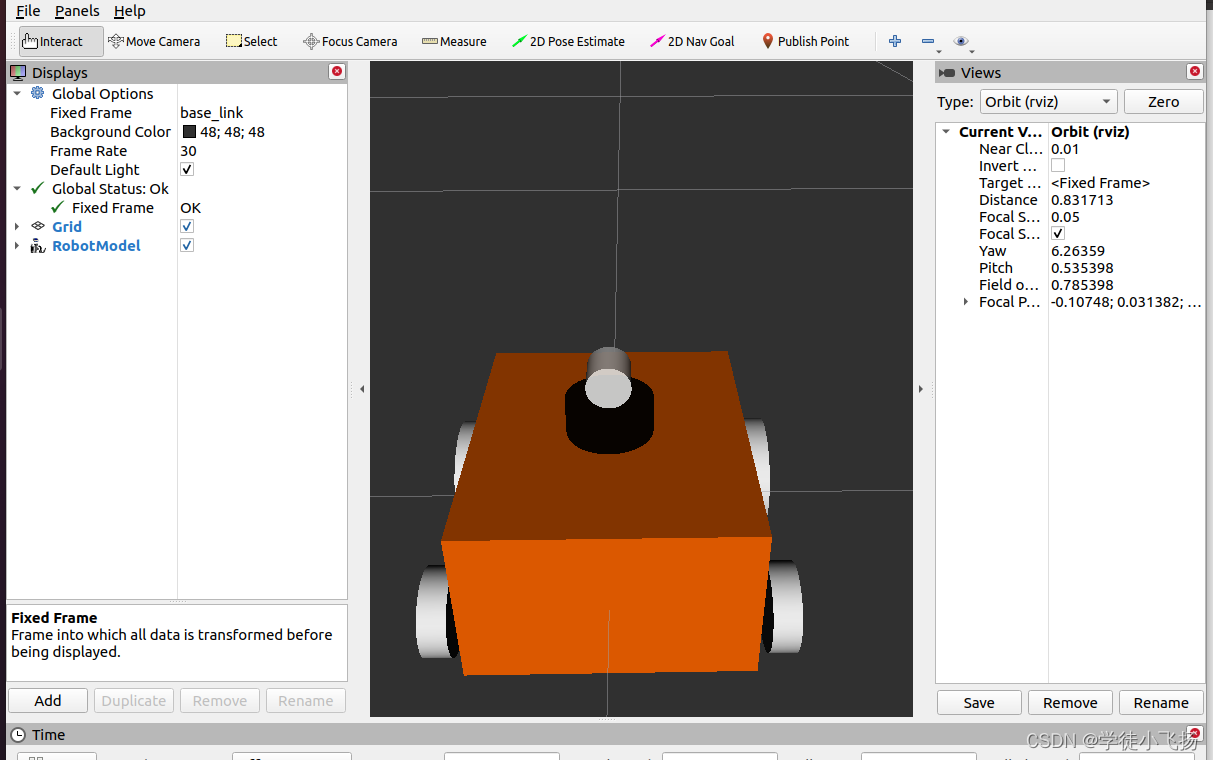
添加完之后重新进行编译,重复上述操作:
roslaunch about_des about.launch
rosrun rviz rviz


 1877
1877

 被折叠的 条评论
为什么被折叠?
被折叠的 条评论
为什么被折叠?
 到【灌水乐园】发言


