


Spring+SpringMVC+MyBatis三个框架的整合就是SSM框架
Spring:提供了容器管理、依赖注入和面向切面编程等功能,实现了应用层和数据访问层的解耦。
SpringMVC:基于MVC模式,提供了一个灵活、可扩展的Web开发框架,可以通过注解、配置和XML等方式实现请求的处理、数据的绑定和页面的渲染等。
MyBatis:是一个持久层框架,提供了对数据库操作的封装,通过XML配置或注解的方式实现了数据库的增删改查等操作。
整合后,通过Spring可以管理MyBatis的SqlSessionFactory和事务管理器,实现了事务的控制和数据库连接的管理;通过SpringMVC可以方便地处理请求和页面跳转,实现了前后端的交互;通过MyBatis可以方便地进行数据库的操作,实现了持久层的功能。
基于前面的spring-mvc以及整合项目,我们现在来学习ssm框架。
框架主要结构:
pojo:包含实体类,对应数据库中的表。——Customer
mapper:包含 MyBatis 的 Mapper 接口,用于数据库操作。——CustomerMapper
service:包含服务层的接口和实现,业务逻辑处理。——CustomerService/CustomerServiceImpl
controller:包含控制层的逻辑,负责请求的转发和响应。——CustomerController
在项目之前还是看一下项目结构:

在了解了项目结构后可以开始建项目了
点击文件——> 新建项目——>Java Enterprise,选择相应的tomcat服务器。在空项目的主目录下新建四个软件包(pojo,mapper,service,controller,每个软件包的作用在上面有)。
1 .数据库的配置
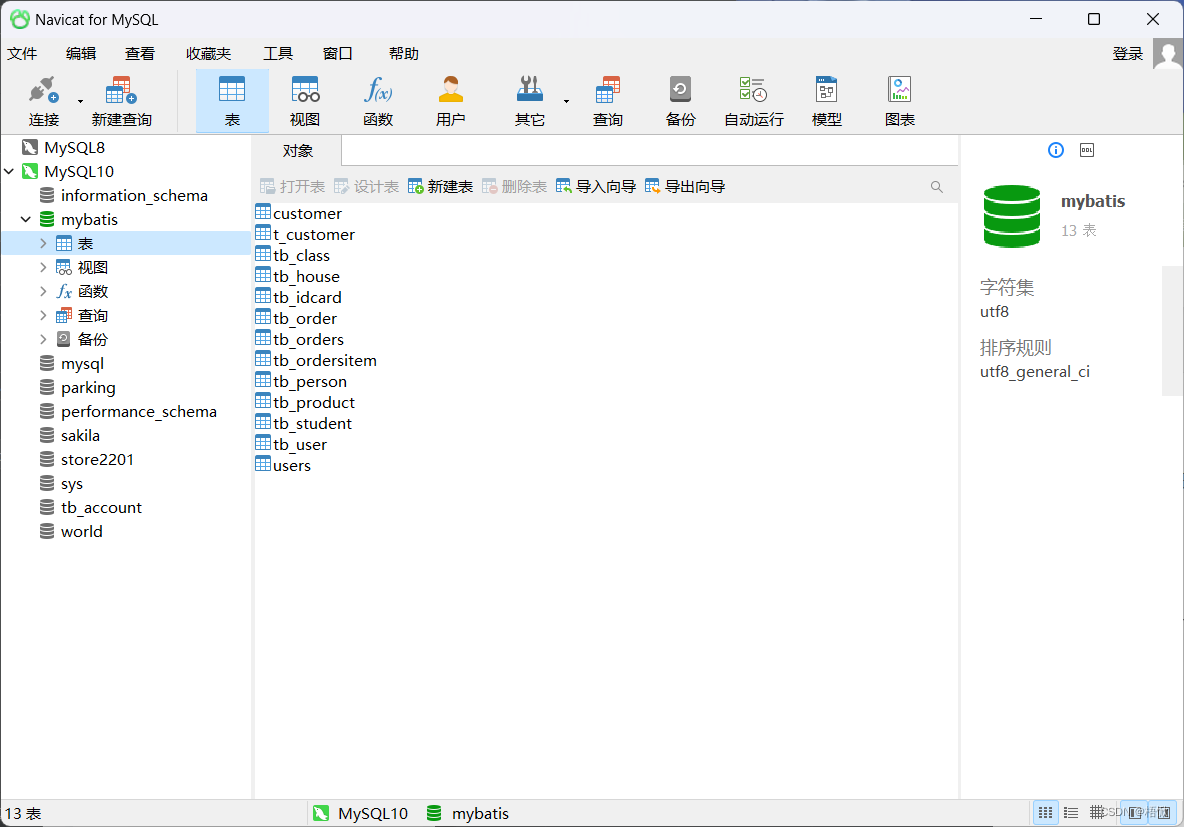
首先,进行数据库的配置,先在navicat中导入数据库(如下图),我建的数据库名称为mybatis,然后再idea中,在右面找到数据库,点击加号——>数据源——>MySQL——>数据库名称为mybatis,这样,我们的数据就导入了,注意:navicat不要关闭
我用的没有的mysql数据:
create table customer
(
    id       int auto_increment
        primary key,
    username varchar(20) not null,
    jobs     varchar(50) null,
    phone    varchar(13) null
)
    charset = utf8;

2 .pom文件的配置
在每个项目中,必不可少的就是pom文件了。ssm框架的pom文件配置和上一篇文章中的pom文件配置大致相同,这里,我就不过多叙述了。
<?xml version="1.0" encoding="UTF-8"?>
<project xmlns="http://maven.apache.org/POM/4.0.0"
         xmlns:xsi="http://www.w3.org/2001/XMLSchema-instance"
         xsi:schemaLocation="http://maven.apache.org/POM/4.0.0 http://maven.apache.org/xsd/maven-4.0.0.xsd">
  <modelVersion>4.0.0</modelVersion>

  <groupId>njitt.software</groupId>
  <artifactId>orm</artifactId>
  <version>1.0-SNAPSHOT</version>
  <name>orm</name>
  <packaging>war</packaging>

  <properties>
    <maven.compiler.target>1.8</maven.compiler.target>
    <maven.compiler.source>1.8</maven.compiler.source>
      <junit.version>5.7.0</junit.version>
      </properties>


    <dependencies>
        <!--mybatis核心包-->
        <dependency>
            <groupId>org.mybatis</groupId>
            <artifactId>mybatis</artifactId>
            <version>3.5.2</version>
        </dependency>
        <!--mysql8.0连接-->
        <dependency>
            <groupId>mysql</groupId>
            <artifactId>mysql-connector-java</artifactId>
            <version>8.0.32</version>
        </dependency>
        <!--alibaba连接池-->
        <dependency>
            <groupId>com.alibaba</groupId>
            <artifactId>druid</artifactId>
            <version>1.1.20</version>
        </dependency>
        <!--MyBatis的分页插件-->
        <dependency>
            <groupId>com.github.pagehelper</groupId>
            <artifactId>pagehelper</artifactId>
            <version>5.1.10</version>
        </dependency>

        <!--mybatis-spring整合-->
        <dependency>
            <groupId>org.mybatis</groupId>
            <artifactId>mybatis-spring</artifactId>
            <version>2.0.1</version>
        </dependency>

        <!--spring核心-->
        <dependency>
            <groupId>org.springframework</groupId>
            <artifactId>spring-context</artifactId>
            <version>5.2.8.RELEASE</version>
        </dependency>
        <!--spring aop切面-->
        <dependency>
            <groupId>org.springframework</groupId>
            <artifactId>spring-aspects</artifactId>
            <version>5.2.8.RELEASE</version>
        </dependency>
        <!--spring-jdbc-->
        <dependency>
            <groupId>org.springframework</groupId>
            <artifactId>spring-jdbc</artifactId>
            <version>5.2.8.RELEASE</version>
        </dependency>

        <!--spring-mvc-->
        <dependency>
            <groupId>org.springframework</groupId>
            <artifactId>spring-webmvc</artifactId>
            <version>5.2.8.RELEASE</version>
        </dependency>

        <!--spring-junit-->
        <dependency>
            <groupId>org.springframework</groupId>
            <artifactId>spring-test</artifactId>
            <version>5.2.8.RELEASE</version>
        </dependency>
        <dependency>
            <groupId>junit</groupId>
            <artifactId>junit</artifactId>
            <version>4.12</version>
        </dependency>

        <!--lombok-->
        <dependency>
            <groupId>org.projectlombok</groupId>
            <artifactId>lombok</artifactId>
            <version>1.18.26</version>
        </dependency>

        <!--通过slf4j设计日志系统,方便扩展-->
        <dependency>
            <groupId>org.slf4j</groupId>
            <artifactId>slf4j-log4j12</artifactId>
            <version>1.6.1</version>
        </dependency>

        <!--servlet-api :引入servlet的功能 -->
        <dependency>
            <groupId>javax.servlet</groupId>
            <artifactId>javax.servlet-api</artifactId>
            <version>4.0.1</version>
            <scope>provided</scope>
        </dependency>
        <!--jsp-api: jsp页面的功能包 -->
        <dependency>
            <groupId>javax.servlet.jsp</groupId>
            <artifactId>jsp-api</artifactId>
            <version>2.2</version>
            <scope>provided</scope>
        </dependency>
        <!-- JSTL标签库 -->
        <dependency>
            <groupId>jstl</groupId>
            <artifactId>jstl</artifactId>
            <version>1.2</version>
        </dependency>
        <dependency>
            <groupId>taglibs</groupId>
            <artifactId>standard</artifactId>
            <version>1.1.2</version>
        </dependency>

        <!--jackson JSON解析-->
        <dependency>
            <groupId>com.fasterxml.jackson.core</groupId>
            <artifactId>jackson-core</artifactId>
            <version>2.9.2</version>
        </dependency>
        <dependency>
            <groupId>com.fasterxml.jackson.core</groupId>
            <artifactId>jackson-databind</artifactId>
            <version>2.9.2</version>
        </dependency>
        <dependency>
            <groupId>com.fasterxml.jackson.core</groupId>
            <artifactId>jackson-annotations</artifactId>
            <version>2.9.0</version>
        </dependency>

    </dependencies>


    <build>
      <plugins>
      <plugin>
        <groupId>org.apache.maven.plugins</groupId>
        <artifactId>maven-war-plugin</artifactId>
        <version>3.3.0</version>
      </plugin>                </plugins>
  </build>
</project>
如果有依赖包报红的话就删了,用自己电脑上有的版本,在配置好后要刷新导入依赖包。
3 .资源包的配置
我们在ssm框架中所用到的资源有:
applicationContext.xml,db.properties,log4j.properties,spring-mvc.xml
applicationContext.xml:用于定义和组织应用程序的各种组件(例如bean、配置、依赖注入等),并通过Spring容器来管理和协调这些组件。
db.properties:用于指定数据库连接的相关参数,包括数据库的IP地址、端口号、数据库名称、用户名、密码等信息。
log4j.properties:用于配置log4j日志框架的参数和属性,以控制日志的生成、格式、输出目标等行为。
spring-mvc.xml:用于配置Spring MVC框架的配置文件,它定义了Spring MVC框架相关的配置信息,包括控制器、视图解析器、拦截器、文件上传配置、异常处理器等等。
1)applicationContext.xml:
<!--applicationContext.xml-->
<?xml version="1.0" encoding="UTF-8"?>
<beans xmlns="http://www.springframework.org/schema/beans"
       xmlns:xsi="http://www.w3.org/2001/XMLSchema-instance"
       xmlns:context="http://www.springframework.org/schema/context"
       xmlns:tx="http://www.springframework.org/schema/tx"
       xmlns:aop="http://www.springframework.org/schema/aop"
       xsi:schemaLocation="http://www.springframework.org/schema/beans
       http://www.springframework.org/schema/beans/spring-beans.xsd
       http://www.springframework.org/schema/context
       https://www.springframework.org/schema/context/spring-context.xsd
       http://www.springframework.org/schema/tx
       http://www.springframework.org/schema/tx/spring-tx.xsd
       http://www.springframework.org/schema/aop
       https://www.springframework.org/schema/aop/spring-aop.xsd">

    <!--包扫描,找到组件-->
    <context:component-scan base-package="njitt.software.orm"/>

    <!--导入db.properties-->
    <context:property-placeholder location="classpath:db.properties"/>

    <!--使用阿里巴巴德鲁伊连接池-->
    <bean id="dataSource" class="com.alibaba.druid.pool.DruidDataSource">
        <property name="driverClassName" value="${jdbc.driver}"/>
        <property name="url" value="${jdbc.url}"/>
        <property name="username" value="${jdbc.username}"/>
        <property name="password" value="${jdbc.password}"/>
    </bean>

    <!--数据源和pojo别名-->
    <bean id="sqlSessionFactory" class="org.mybatis.spring.SqlSessionFactoryBean">
        <property name="dataSource" ref="dataSource"/>
        <property name="typeAliasesPackage" value="njitt.software.orm.pojo"/>
    </bean>

    <!--自动扫描mapper映射文件-->
    <bean class="org.mybatis.spring.mapper.MapperScannerConfigurer">
        <property name="sqlSessionFactoryBeanName" value="sqlSessionFactory"/>
        <property name="basePackage" value="njitt.software.orm.mapper"/>
    </bean>

    <!--基于XML的声明式事务处理,id=transactionManager-->
    <bean id="transactionManager" class="org.springframework.jdbc.datasource.DataSourceTransactionManager">
        <property name="dataSource" ref="dataSource"/>
    </bean>

    <!-- 5.编写通知,需要编写对切入点和具体执行事务细节-->
    <tx:advice id="txAdvice" transaction-manager="transactionManager">
        <tx:attributes>
            <!--传播行为如果当前存在一个事务,则加入该事务;如果当前没有事务,则创建一个新的事务。-->
            <!--增加、删除、修改数据库read-only="false" ,查询true只读-->
            <tx:method name="insert*" propagation="REQUIRED" read-only="false" isolation="DEFAULT"/>
            <tx:method name="update*" propagation="REQUIRED" read-only="false" isolation="DEFAULT"/>
            <tx:method name="delete*" propagation="REQUIRED" read-only="false" isolation="DEFAULT"/>
            <tx:method name="do*" propagation="REQUIRED" read-only="false" isolation="DEFAULT"/>
            <tx:method name="select*" propagation="REQUIRED" read-only="true" isolation="DEFAULT"/>
            <tx:method name="query*" propagation="REQUIRED" read-only="true" isolation="DEFAULT"/>
            <tx:method name="find*" propagation="REQUIRED" read-only="true" isolation="DEFAULT"/>
            <tx:method name="*" propagation="REQUIRED" read-only="true" isolation="DEFAULT"/>
        </tx:attributes>
    </tx:advice>

    <!-- 6.编写aop,使用AspectJ的表达式,让spring自动对目标生成代理-->
    <aop:config>
        <aop:pointcut id="txPointCut" expression="execution(* njitt.software.orm.service.*.*(..))"/>
        <aop:advisor advice-ref="txAdvice" pointcut-ref="txPointCut"/>
    </aop:config>
</beans>
2)db.properties:
jdbc.driver=com.mysql.cj.jdbc.Driver
jdbc.url=jdbc:mysql://localhost:3306/mybatis?serverTimezone=UTC&characterEncoding=utf8&useUnicode=true&useSSL=false
jdbc.username=root
jdbc.password=123456
3)log4j.properties:
log4j.rootLogger=info,console
log4j.appender.console=org.apache.log4j.ConsoleAppender
log4j.appender.console.layout=org.apache.log4j.PatternLayout
log4j.appender.console.layout.ConversionPattern=%p [%t] - %m%n
log4j.logger.njitt.software.orm=DEBUG
4)spring-mvc.xml:
<?xml version="1.0" encoding="UTF-8"?>
<beans xmlns="http://www.springframework.org/schema/beans"
       xmlns:xsi="http://www.w3.org/2001/XMLSchema-instance"
       xmlns:context="http://www.springframework.org/schema/context"
       xmlns:mvc="http://www.springframework.org/schema/mvc"
       xsi:schemaLocation="http://www.springframework.org/schema/beans
       http://www.springframework.org/schema/beans/spring-beans.xsd
       http://www.springframework.org/schema/context
       https://www.springframework.org/schema/context/spring-context.xsd
       http://www.springframework.org/schema/mvc
       https://www.springframework.org/schema/mvc/spring-mvc.xsd">

    <!--1.扫描Controller包中的@Controller注解-->
    <context:component-scan base-package="njitt.software.orm.controller">
        <context:include-filter type="annotation" expression="org.springframework.stereotype.Controller"/>
    </context:component-scan>

    <!--2.视图解析器进行解析,添加前缀/WEB-INF/pages/和后缀.jsp-->
    <bean class="org.springframework.web.servlet.view.InternalResourceViewResolver">
        <property name="prefix" value="/WEB-INF/"/>
        <property name="suffix" value=".jsp"/>
    </bean>

    <!--3.静态资源处理css,js,images,html-->
    <mvc:default-servlet-handler/>

    <!--4.注解驱动,json中文乱码-->
    <mvc:annotation-driven>
        <mvc:message-converters>
            <bean class="org.springframework.http.converter.StringHttpMessageConverter">
                <property name="supportedMediaTypes">
                    <list>
                        <value>text/plain;charset=UTF-8</value>
                        <value>text/html;charset=UTF-8</value>
                        <value>application/json;charset=UTF-8</value>
                    </list>
                </property>
            </bean>
        </mvc:message-converters>
    </mvc:annotation-driven>
</beans>
注意:本文中的代码均为作者的项目,如果复制的话需要修改包名(applicationContext.xml和spring-mvc.xml),而db.properties中需要注意你的数据库名称
log4j.properties中需要修改包名

至此,我们的基础配置已经完成了。
4 .主文件的配置
1)pojo(实体类)
可以通过mysql生成,也可以自己写
package njitt.software.orm.pojo;

import lombok.AllArgsConstructor;
import lombok.Data;
import lombok.NoArgsConstructor;

import java.io.Serializable;

@NoArgsConstructor
@AllArgsConstructor
@Data
public class Customer implements Serializable {

    private static final long serialVersionUID = 1L;

    private Integer id;

    private String username;

    private String jobs;

    private String phone;

}
注意:要加上
@NoArgsConstructor
@AllArgsConstructor
在后面新增等操作时要用到。
2) mapper映射文件配置
2.1)mapper (映射文件,java目录下的mapper软件包)
mapper映射文件为接口,与service中的接口基本一致
package njitt.software.orm.mapper;
import njitt.software.orm.pojo.Customer;

import java.util.List;

public interface CustomerMapper {
//查询
   List<Customer> findAllCustomers();
//删除
   int deleteById(int id);
//新增
   int insertCustomer(Customer customer);
   Customer findAllByPhone(String phone);
   Customer findAllById(int id);
//更新
   int updateCustomer(Customer customer);
}
在mapper文件中写的方法需要映射到resourses目录下的mapper软件包,(具体看开头的项目结构)
2.2)mapper (映射文件,resources目录下的mapper软件包)
<?xml version="1.0" encoding="UTF-8"?>
<!DOCTYPE mapper PUBLIC "-//mybatis.org//DTD Mapper 3.0//EN"
        "http://mybatis.org/dtd/mybatis-3-mapper.dtd">
<mapper namespace="njitt.software.orm.mapper.CustomerMapper">
    <resultMap id="BaseResultMap" type="njitt.software.orm.pojo.Customer">
        <!--@JPA.Support generated on 2024-05-27 08:48:59.-->
        <!--@Table customer-->
        <id column="id" jdbcType="INTEGER" property="id"/>
        <result column="username" jdbcType="VARCHAR" property="username"/>
        <result column="jobs" jdbcType="VARCHAR" property="jobs"/>
        <result column="phone" jdbcType="VARCHAR" property="phone"/>
    </resultMap>
    <sql id="Base_Column_List">
        <!--@JPA.Support generated on 2024-05-27 08:48:59.-->
        id, username, jobs, phone
    </sql>
    <insert id="insertCustomer" parameterType="njitt.software.orm.pojo.Customer">
        insert into customer (username,jobs,phone)
        values (#{username},#{jobs},#{phone})
    </insert>
    <update id="updateCustomer" parameterType="customer">
        update customer
        <set>
            <if test="username !=null and username!=''">username=#{username},</if>
            <if test="jobs !=null and jobs!=''">jobs=#{jobs},</if>
            <if test="phone !=null and phone!=''">phone=#{phone},</if>
        </set>
        where id=#{id};
    </update>
    <delete id="deleteById" parameterType="integer">
        delete from customer where  id=#{id}
    </delete>
    <select id="findAllCustomers" resultMap="BaseResultMap">
        select *
        from customer
    </select>
    <select id="findAllByPhone" resultMap="BaseResultMap" parameterType="java.lang.String">
        select *
        from customer
        where phone =#{phone}
    </select>
    <select id="findAllById" resultMap="BaseResultMap" parameterType="int">
        select *
        from customer
        where id =#{id}
    </select>
</mapper>
编写mapper时,需要在开头的<mapper>映射到java目录下的mapper文件
<mapper namespace="njitt.software.orm.mapper.CustomerMapper">
而且在下面编写查询语句时,最好把resultType替换为resultMap
3)service (服务层)
3.1)服务层接口
服务层的接口与mapper映射文件中的接口数据基本一致
package njitt.software.orm.service;

import njitt.software.orm.pojo.Customer;

import java.util.List;

public interface CustomerService {
    List<Customer> findAllCustomers();
    int deleteById(int id);
    String insertCustomer(Customer customer);
    Customer findAllByPhone(String phone);
    Customer findAllById(int id);
    int updateCustomer(Customer customer);
}
3.2)服务层接口的实现类
1.在实现类中要实现CustomerService的接口方法,即: implements CustomerService
2.在实现类中要写类注解 @Service
3.注入mapper映射
@Autowired
private CustomerMapper customerMapper;
4.实现方法
package njitt.software.orm.service.impl;

import njitt.software.orm.mapper.CustomerMapper;
import njitt.software.orm.pojo.Customer;
import njitt.software.orm.service.CustomerService;
import org.springframework.beans.factory.annotation.Autowired;
import org.springframework.stereotype.Service;

import java.util.List;
@Service
public class CustomerServiceImpl implements CustomerService {

    @Autowired
    private CustomerMapper customerMapper;

    @Override
    public List<Customer> findAllCustomers() {
        return customerMapper.findAllCustomers();
    }

    @Override
    public int deleteById(int id) {
        return customerMapper.deleteById(id);
    }

    /**
     * 新增顾客判断手机号是否存在
     * @param customer
     * @return
     */
    @Override
    public String insertCustomer(Customer customer) {
        String msg = "手机号已存在!";
        Customer existCustomer = customerMapper.findAllByPhone(customer.getPhone());
        if (existCustomer == null) {
            customerMapper.insertCustomer(customer);
            msg = "新增成功";
        }
        return msg;
    }

    @Override
    public Customer findAllByPhone(String phone) {
        return customerMapper.findAllByPhone(phone);
    }

    @Override
    public Customer findAllById(int id) {
        return customerMapper.findAllById(id);
    }

    @Override
    public int updateCustomer(Customer customer) {
        return customerMapper.updateCustomer(customer);
    }
}
5 .开始测试
在写完服务层的接口实现类后就可以开始进行测试了。
生成junit4测试。
在测试方法前先进行注解
@RunWith(SpringJUnit4ClassRunner.class)
@ContextConfiguration(locations = "classpath:applicationContext.xml")
然后进行注入服务层接口实现类
@Autowired
private CustomerService customerService;
然后,测试程序正常写就可以了
package njitt.software.orm.service.impl;

import njitt.software.orm.pojo.Customer;
import njitt.software.orm.service.CustomerService;
import org.junit.Test;
import org.junit.runner.RunWith;
import org.springframework.beans.factory.annotation.Autowired;
import org.springframework.test.context.ContextConfiguration;
import org.springframework.test.context.junit4.SpringJUnit4ClassRunner;

import java.util.List;

import static org.junit.Assert.*;
@RunWith(SpringJUnit4ClassRunner.class)
@ContextConfiguration(locations = "classpath:applicationContext.xml")
public class CustomerServiceImplTest {
    @Autowired
    private CustomerService customerService;
    @Test
    public void findAllCustomers() {
        List<Customer> list = customerService.findAllCustomers();
        for (Customer customer : list) {
            System.out.println(customer);
        }
    }

    @Test
    public void deleteById() {
        int rows = customerService.deleteById(11);
        System.out.println(rows);
    }

    @Test
    public void insertCustomer() {
        Customer customer = new Customer(7,"jack","教师","16562366666");
        String msg = customerService.insertCustomer(customer);
        System.out.println(msg);
    }

    @Test
    public void updateCustomer() {
        Customer customer = new Customer(6,"jack","教师","16562366666");
        int i = customerService.updateCustomer(customer);
        System.out.println(i);
    }
}
6 .controller 控制层
在确保测试不会出问题的情况下,可以进行控制层的编写
本文中我们先完成查询的编写,其他方法的编写可以参考查询。
1.控制层,不可缺少的就是注解 @Controller
2.依然是注入service
@Autowired
private CustomerService customerService;
import njitt.software.orm.service.CustomerService;
import org.springframework.beans.factory.annotation.Autowired;
import org.springframework.stereotype.Controller;
import org.springframework.web.bind.annotation.PathVariable;
import org.springframework.web.bind.annotation.RequestMapping;
import org.springframework.web.servlet.ModelAndView;

import java.util.List;

@Controller
public class CustomerController {
    @Autowired
    private CustomerService customerService;

    @RequestMapping("/customer/list")
    public ModelAndView findAllCustomers(){
        ModelAndView modelAndView = new ModelAndView();
        List<Customer> list = customerService.findAllCustomers();
        modelAndView.addObject("list",list);
        modelAndView.setViewName("list_customer");
        return modelAndView;
    }
ModelAndView是Spring MVC框架中的一个类,它的作用是将模型数据和视图引擎解析出来的视图进行封装,用于返回给客户端。
7 .jsp文件
我们现在index.jsp中给一个路径,能进入list_customer.jsp页面
index.jsp:
<%@ page contentType="text/html; charset=UTF-8" pageEncoding="UTF-8" %>
<!DOCTYPE html>
<html>
<head>
  <title>顾客管理</title>
</head>
<body>
<h1><%= "顾客管理" %></h1>
<br/>
<a href="/customer/list">顾客列表</a>
</body>
</html>
我们在WEB-INF目录下新建list-customer.jsp页面
查询所有顾客需要for循环来实现,因此,需要导入
<%@taglib prefix="c" uri="http://java.sun.com/jsp/jstl/core" %>
这样,我们在下面就可以使用for循环
<c:forEach items="${list}" var="customer" varStatus="status">
<%@ page language="java" contentType="text/html; charset=UTF-8" pageEncoding="UTF-8" %>
<%@taglib prefix="c" uri="http://java.sun.com/jsp/jstl/core" %>
<%
    String path = request.getContextPath();
    String basePath = request.getScheme() + "://" + request.getServerName() + ":"
            + request.getServerPort() + path + "/";
%>

<!DOCTYPE html>
<html>
<head>
    <base href="<%=basePath%>"/>
    <meta charset="UTF-8">
    <meta name="viewport" content="width=device-width, initial-scale=1.0, maximum-scale=1.0">

    <title>Title</title>
    <link rel="stylesheet" href="bootstrap3.3.7/css/bootstrap.css">
    <script src="js/jquery-3.4.1.js" charset="UTF-8"></script>
</head>
<body>
<div>
    <h1>顾客管理</h1>
    <table class="table table-striped table-hover table-bordered">
        <tr>
            <th>编号</th>
            <th>姓名</th>
            <th>职业</th>
            <th>手机号码</th>
            <th>操作</th>
        </tr>
        <c:forEach items="${list}" var="customer" varStatus="status">
            <tr>
                <td>${customer.id}</td>
                <td>${customer.username}</td>
                <td>${customer.jobs}</td>
                <td>${customer.phone}</td>
                <td>
                    <a class="btn btn-danger" href="" >删除</a>
                    <a class="btn btn-primary" href="">编辑</a>
                </td>
            </tr>
        </c:forEach>
    </table>
</div>
</body>
</html>完成后就可以通过tomcat服务器来在网页上实现查询,为了更方便,我们可以将网页的网址修改一下,具体看上篇内容,编辑配置


这样,我们的ssm框架就基本写好了。我们开始运行(注意:不要关闭mysql)

点击顾客列表进入到顾客列表页面

我们可以看到页面已经显示了数据库的内容。这就代表我们的项目成功运行了。
庆祝一下吧✌✌🎉🎉,再接再厉。


 63万+
63万+

 被折叠的 条评论
为什么被折叠?
被折叠的 条评论
为什么被折叠?
 到【灌水乐园】发言


