


前言:
前面已经讲过uniapp通过tomcat获取本地服务器数据,那么像登录,注册等接口如何编写呢,这就要用到SpringMVC来操作。
现在先来了解一下SpringMVC框架,SpringMVC是基于Servlet AP构建的原始Web框架,属于Spring中的一个模块。它提供了一种开发Web应用的模型-视图-控制器(MVC)的架构,并集成了Spring的IoC容器和AOP特性,使得开发Web应用更加简单和灵活。通过使用Spring MVC框架,程序可以更加方便地实现业务逻辑、处理用户请求、渲染视图等功能。
现在,我们来创建一个最简单的SpringMVC项目
新建项目 ——> Java Enterprise,服务器选电脑上有的tomcat版本。
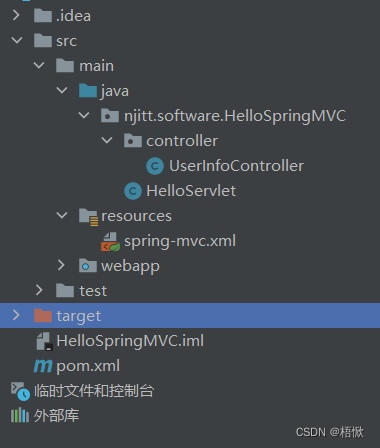
具体项目结构:
建好项目后开始配置pom文件
pom文件的配置基本包括
mybatis核心包,mysql8.0连接,libaba连接池,MyBatis的分页插件,mybatis-spring整,spring核心,spring aop切面,spring-jdbc,spring-mvc,spring-junit,lombok,slf4j日志系统,servlet-api(引入servlet的功能),jsp-api(jsp页面的功能包) ,STL标签,jackson JSON解析等等
具体的pom.xml文件如下
<?xml version="1.0" encoding="UTF-8"?>
<project xmlns="http://maven.apache.org/POM/4.0.0"
         xmlns:xsi="http://www.w3.org/2001/XMLSchema-instance"
         xsi:schemaLocation="http://maven.apache.org/POM/4.0.0 http://maven.apache.org/xsd/maven-4.0.0.xsd">
  <modelVersion>4.0.0</modelVersion>

  <groupId>njitt.software</groupId>
  <artifactId>orm</artifactId>
  <version>1.0-SNAPSHOT</version>
  <name>orm</name>
  <packaging>war</packaging>

  <properties>
    <maven.compiler.target>1.8</maven.compiler.target>
    <maven.compiler.source>1.8</maven.compiler.source>
      <junit.version>5.7.0</junit.version>
      </properties>


    <dependencies>
        <!--mybatis核心包-->
        <dependency>
            <groupId>org.mybatis</groupId>
            <artifactId>mybatis</artifactId>
            <version>3.5.2</version>
        </dependency>
        <!--mysql8.0连接-->
        <dependency>
            <groupId>mysql</groupId>
            <artifactId>mysql-connector-java</artifactId>
            <version>8.0.32</version>
        </dependency>
        <!--alibaba连接池-->
        <dependency>
            <groupId>com.alibaba</groupId>
            <artifactId>druid</artifactId>
            <version>1.1.20</version>
        </dependency>
        <!--MyBatis的分页插件-->
        <dependency>
            <groupId>com.github.pagehelper</groupId>
            <artifactId>pagehelper</artifactId>
            <version>5.1.10</version>
        </dependency>

        <!--mybatis-spring整合-->
        <dependency>
            <groupId>org.mybatis</groupId>
            <artifactId>mybatis-spring</artifactId>
            <version>2.0.1</version>
        </dependency>

        <!--spring核心-->
        <dependency>
            <groupId>org.springframework</groupId>
            <artifactId>spring-context</artifactId>
            <version>5.2.8.RELEASE</version>
        </dependency>
        <!--spring aop切面-->
        <dependency>
            <groupId>org.springframework</groupId>
            <artifactId>spring-aspects</artifactId>
            <version>5.2.8.RELEASE</version>
        </dependency>
        <!--spring-jdbc-->
        <dependency>
            <groupId>org.springframework</groupId>
            <artifactId>spring-jdbc</artifactId>
            <version>5.2.8.RELEASE</version>
        </dependency>

        <!--spring-mvc-->
        <dependency>
            <groupId>org.springframework</groupId>
            <artifactId>spring-webmvc</artifactId>
            <version>5.2.8.RELEASE</version>
        </dependency>

        <!--spring-junit-->
        <dependency>
            <groupId>org.springframework</groupId>
            <artifactId>spring-test</artifactId>
            <version>5.2.8.RELEASE</version>
        </dependency>
        <dependency>
            <groupId>junit</groupId>
            <artifactId>junit</artifactId>
            <version>4.12</version>
        </dependency>

        <!--lombok-->
        <dependency>
            <groupId>org.projectlombok</groupId>
            <artifactId>lombok</artifactId>
            <version>1.18.26</version>
        </dependency>

        <!--通过slf4j设计日志系统,方便扩展-->
        <dependency>
            <groupId>org.slf4j</groupId>
            <artifactId>slf4j-log4j12</artifactId>
            <version>1.6.1</version>
        </dependency>

        <!--servlet-api :引入servlet的功能 -->
        <dependency>
            <groupId>javax.servlet</groupId>
            <artifactId>javax.servlet-api</artifactId>
            <version>4.0.1</version>
            <scope>provided</scope>
        </dependency>
        <!--jsp-api: jsp页面的功能包 -->
        <dependency>
            <groupId>javax.servlet.jsp</groupId>
            <artifactId>jsp-api</artifactId>
            <version>2.2</version>
            <scope>provided</scope>
        </dependency>
        <!-- JSTL标签库 -->
        <dependency>
            <groupId>jstl</groupId>
            <artifactId>jstl</artifactId>
            <version>1.2</version>
        </dependency>
        <dependency>
            <groupId>taglibs</groupId>
            <artifactId>standard</artifactId>
            <version>1.1.2</version>
        </dependency>

        <!--jackson JSON解析-->
        <dependency>
            <groupId>com.fasterxml.jackson.core</groupId>
            <artifactId>jackson-core</artifactId>
            <version>2.9.2</version>
        </dependency>
        <dependency>
            <groupId>com.fasterxml.jackson.core</groupId>
            <artifactId>jackson-databind</artifactId>
            <version>2.9.2</version>
        </dependency>
        <dependency>
            <groupId>com.fasterxml.jackson.core</groupId>
            <artifactId>jackson-annotations</artifactId>
            <version>2.9.0</version>
        </dependency>

    </dependencies>


    <build>
      <plugins>
      <plugin>
        <groupId>org.apache.maven.plugins</groupId>
        <artifactId>maven-war-plugin</artifactId>
        <version>3.3.0</version>
      </plugin>                </plugins>
  </build>
</project>
我们先来写一个登录的jsp页面
<%@ page language="java" contentType="text/html; charset=UTF-8"
pageEncoding="UTF-8"%>
<%
String path = request.getContextPath();
String basePath = request.getScheme() + "://" + request.getServerName() + ":" + request.getServerPort()
+ path + "/";
%>
<!DOCTYPE html>
<html>
<head>
<base href="<%=basePath%>" />
<meta charset="utf-8">
<meta name="viewport"
content="width=device-width, initial-scale=1.0, maximum-scale=1.0">
<meta name="description" content="">
<meta name="author" content="ThemeBucket">
<link rel="shortcut icon" href="#" type="image/png">
<title>Login</title>
<%--你想要实现的页面样式或你自己写的样式--%>
<link href="bootstrap3.3.7/css/bootstrap.css" rel="stylesheet">
<link href="css/common.css" rel="stylesheet">
<link href="fonts/css/font-awesome.min.css" rel="stylesheet">
<!-- HTML5 shim and Respond.js IE8 support of HTML5 elements and media queries -->
<!--[if lt IE 9]>
<script src="js/html5shiv.js"></script>
<script src="js/respond.min.js"></script>
<![endif]-->
</head>
<body class="login-body">
<div class="container">
<form class="form-signin" action="login" method="post">
<div class="form-signin-heading text-center">
<h1 class="sign-title">登录</h1>
<img src="images/login-logo.png" alt="" />
</div>
<div class="login-wrap">
<label>${message}</label>
<input type="text" name="code" value="admin"
class="form-control" placeholder="登录账号" autofocus>
<input type="password" name="password" value="admin"
class="form-control" placeholder="密码">
<button class="btn btn-lg btn-login btn-block" type="submit">
<i class="fa fa-check"></i>
</button>
<div class="registration">
<a class="" href="registration.jsp">注册 </a>
</div>
<label class="checkbox"> <input type="checkbox"
value="remember-me">记住密码<span class="pull-right"> <a
data-toggle="modal" href="#myModal">忘记密码?</a>
</span>
</label>
</div>
<!-- 忘记密码Modal -->
<div aria-hidden="true" aria-labelledby="myModalLabel" role="dialog"
tabindex="-1" id="myModal" class="modal fade">
<div class="modal-dialog">
<div class="modal-content">
<div class="modal-header">
<button type="button" class="close" data-dismiss="modal"
aria-hidden="true">×</button>
<h4 class="modal-title">忘记密码?</h4>
</div>
<div class="modal-body">
<p>请输入Email地址,重置密码</p>
<input type="text" name="email" placeholder="Email"
autocomplete="off" class="form-control placeholder-no-fix">
</div>
<div class="modal-footer">
<button data-dismiss="modal" class="btn btn-default"
type="button">取消</button>
<button class="btn btn-primary" type="button">提交</button>
</div>
</div>
</div>
</div>
<!-- modal -->
</form>
</div>
<!-- Placed js at the end of the document so the pages load faster -->
<script type="text/javascript" src="js/jquery-3.4.1.js"></script>
<script type="text/javascript" src="bootstrap3.3.7/js/bootstrap.js"></script>
</body>
</html>
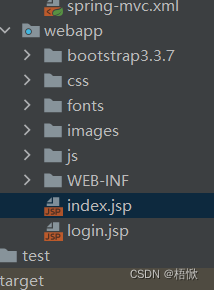
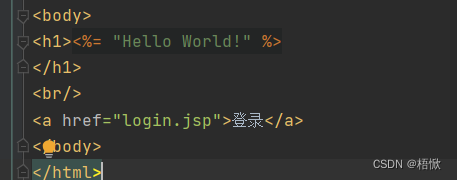
在写完login页面后直接在index.jsp页面引用一下
在pom文件后必不可少的就是spring-mvc.xml了
<?xml version="1.0" encoding="UTF-8"?>
<beans xmlns="http://www.springframework.org/schema/beans"
       xmlns:xsi="http://www.w3.org/2001/XMLSchema-instance" xmlns:mvc="http://www.springframework.org/schema/mvc"
       xmlns:context="http://www.springframework.org/schema/context"
       xsi:schemaLocation="http://www.springframework.org/schema/beans http://www.springframework.org/schema/beans/spring-beans.xsd http://www.springframework.org/schema/mvc https://www.springframework.org/schema/mvc/spring-mvc.xsd http://www.springframework.org/schema/context https://www.springframework.org/schema/context/spring-context.xsd">

    <!--springmvc的注解驱动-->
    <mvc:annotation-driven/>

    <context:component-scan base-package="njitt.software.HelloSpringMVC.controller">
        <context:include-filter type="annotation" expression="org.springframework.stereotype.Controller"/>
    </context:component-scan>


    <!--InternalResourceViewResolver视图解析器增加前缀和后缀-->
    <bean class="org.springframework.web.servlet.view.InternalResourceViewResolver">
        <property name="prefix" value="/WEB-INF/pages/"/>
        <property name="suffix" value=".jsp"/>
    </bean>


    <!--静态资源处理-->
    <mvc:default-servlet-handler/>
</beans>
入门程序只需要写controller就行
package njitt.software.HelloSpringMVC.controller;


import org.springframework.stereotype.Controller;
import org.springframework.web.bind.annotation.RequestMapping;
import org.springframework.web.servlet.ModelAndView;

import javax.servlet.http.HttpSession;

@Controller
public class UserInfoController {
    @RequestMapping("/login")
    public ModelAndView login(String code, String password, HttpSession session){
        ModelAndView modelAndView = new ModelAndView();
        if ("admin".equals(code) && "admin".equals(password)) {
            System.out.println("登录成功,登录名:" + code + ",密码:" + password);
            String msg = "登录成功,登录名:" + code + ",密码:" + password;
            modelAndView.addObject("message", msg);
            modelAndView.setViewName("success");
            return modelAndView;
        }else{
            session.setAttribute("message","用户名或密码错误");
            modelAndView.setViewName("redirect:login.jsp");
        }
        return modelAndView;
    }
    @RequestMapping("/logout")
    public String logout(){
        System.out.println("用户注销");
        return "redirect:index.jsp";
    }
}
注意: modelAndView.setViewName("redirect:login.jsp");
redirect表示重定向,因为在spring-mvc中我们定义了:InternalResourceViewResolver视图解析器增加前缀和后缀
所以我们写在WEB-INF目录下的jsp文件时不需要重定向,而不在WEB-INF目录下的jsp文件则需要用到redirect重定向

在完成上述文件后就可以测试了,首先,我们为了方便需要修改tomcat配置

点击tomcat编辑配置

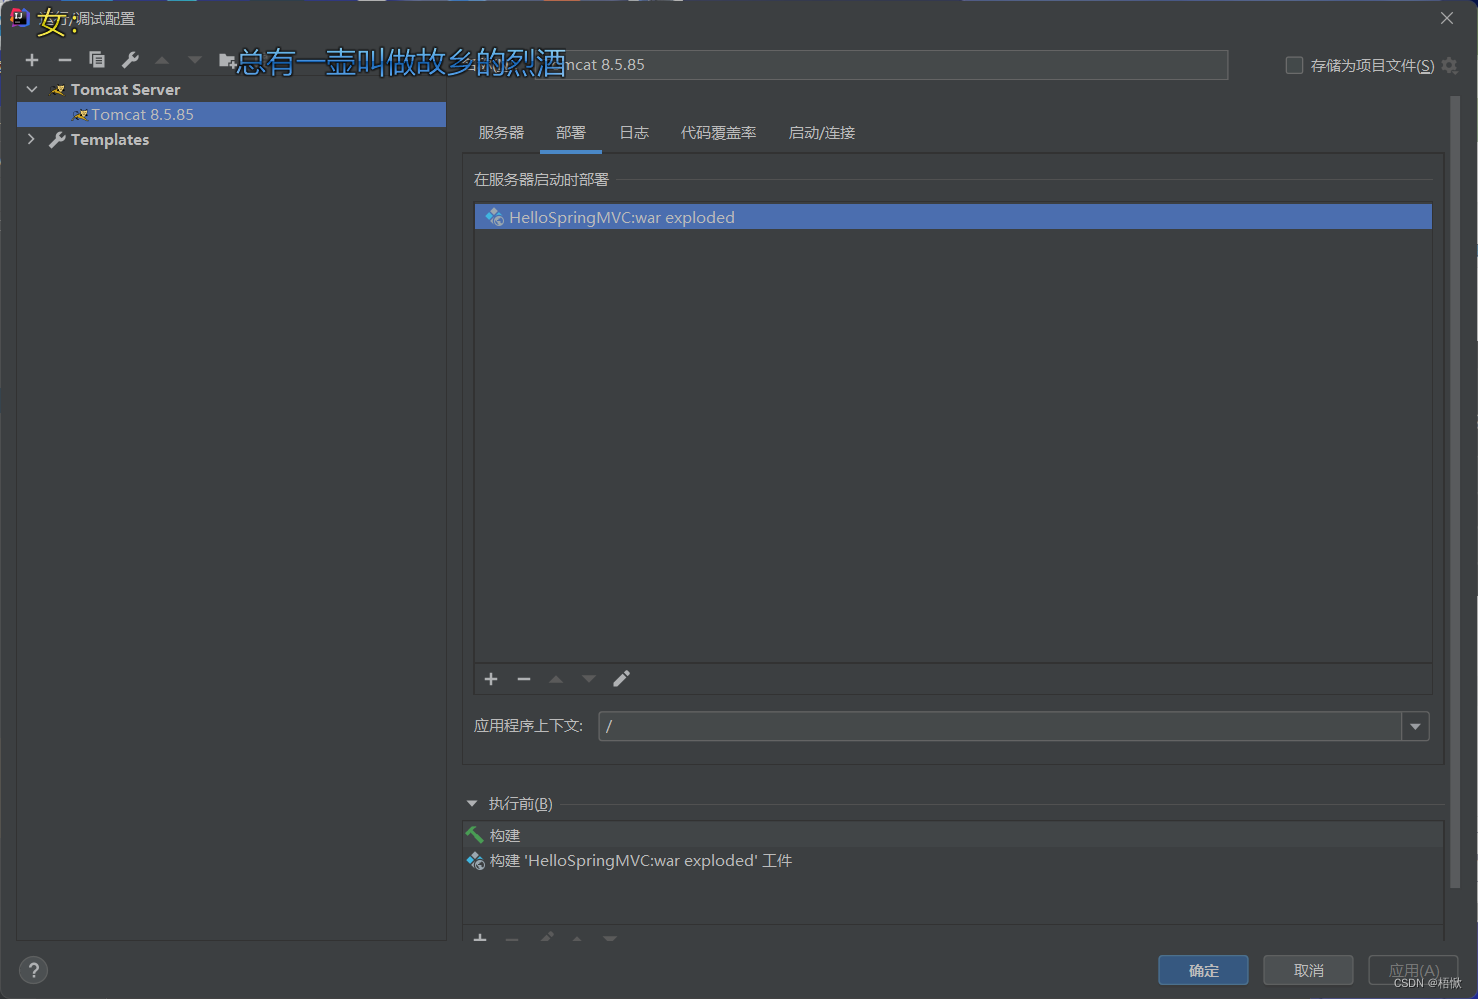
这样,我们直接点击运行,出现页面,点击登录就可以进入登录页面了


这样,我们的springmvc入门程序就完成了。


 192
192


 被折叠的 条评论
为什么被折叠?
被折叠的 条评论
为什么被折叠?
 到【灌水乐园】发言


