


微信小程序中使用canvas组件来实现奥运五环
在微信小程序中使用canvas组件来实现奥运五环,你需要先创建一个canvas组件,并在其上进行绘图。下面是一个简单的步骤说明:
- 设置canvas组件
在你的.wxml文件中,添加一个canvas组件,并为其指定一个canvas-id,以便在JS中引用它。
<canvas canvas-id="olympicRingsCanvas" style="width: 300px; height: 200px;"></canvas>- 绘制五环
在你的.js文件中,使用微信小程序的CanvasContext API 来绘制五环。
Page({
  onReady: function() {
    this.drawOlympicRings();
  },

  drawOlympicRings: function() {
    const ctx = wx.createCanvasContext('olympicRingsCanvas', this);
    const centerX = 150; // 画布中心X坐标
    const centerY = 100; // 画布中心Y坐标
    const radius = 40; // 环的半径
    const distance = 10; // 环之间的距离
    const colors = ['blue', 'black', 'red', 'yellow', 'green']; // 五环的颜色

    // 绘制每一个环
    for (let i = 0; i < 5; i++) {
      const angle = Math.PI * (2 / 5) * i; // 计算每个环的旋转角度
      const x = centerX + Math.cos(angle) * (radius + distance * i); // 计算环的中心X坐标
      const y = centerY + Math.sin(angle) * (radius + distance * i); // 计算环的中心Y坐标
      ctx.beginPath();
      ctx.arc(x, y, radius, 0, 2 * Math.PI); // 绘制环
      ctx.setFillStyle(colors[i]); // 设置环的颜色
      ctx.fill(); // 填充环
    }

    ctx.draw(); // 将之前在context上绘制的内容渲染到canvas上
  }
});
注意:这个示例代码简化了五环的排列,使得它们以等间距排列在一个圆形路径上。实际的奥运五环可能有一些细微的差异,你可以根据需要调整坐标、半径和距离来达到更精确的效果。
3. 设置样式
你还可以在.wxss文件中为canvas组件设置样式,比如边框、背景色等。
canvas {
  border: 1px solid #000; /* 添加边框 */
  background-color: #fff; /* 设置背景色 */
}现在,当你打开微信小程序时,你应该能看到一个包含奥运五环的canvas组件。

书单页面案例:
1. 设计页面结构(WXML)
首先,你需要设计页面的结构。以下是一个简单的示例,描述了书单界面的基本布局:
<view class="container">
  <view class="back-arrow">
    <image src="/images/back-arrow.png" mode="aspectFit" bindtap="goBack"></image>
  </view>
  <view class="book-cover-row">
    <image src="{{coverImage}}" class="book-cover" mode="aspectFill"></image>
  </view>
  <view class="book-list">
    <block wx:for="{{books}}" wx:key="index">
      <view class="book-item">
        <image src="{{item.cover}}" class="book-cover"></image>
        <view class="book-info">
          <text class="book-title">{{item.title}}</text>
          <text class="book-author">{{item.author}}</text>
          <text class="book-description">{{item.description}}</text>
        </view>
      </view>
    </block>
  </view>
</view>
2. 添加样式(WXSS)
接下来,为上述结构添加样式:
.container {
  display: flex;
  flex-direction: column;
  padding: 20rpx;
}

.back-arrow {
  display: flex;
  align-items: center;
  justify-content: flex-start;
  margin-bottom: 20rpx;
}

.book-cover-row {
  display: flex;
  justify-content: center;
  align-items: center;
}

.book-cover {
  width: 100%;
  height: 200rpx; /* 根据需要调整 */
}

.book-list {
  display: flex;
  flex-direction: column;
}

.book-item {
  display: flex;
  align-items: center;
  margin-bottom: 20rpx;
}

.book-info {
  display: flex;
  flex-direction: column;
  margin-left: 20rpx;
}

.book-title {
  font-weight: bold;
  font-size: 18rpx;
}

.book-author {
  font-size: 16rpx;
  color: #888;
}

.book-description {
  font-size: 14rpx;
  color: #666;
  margin-top: 10rpx;
}
3. 处理交互逻辑(JS)
在页面的 JS 文件中,你需要处理返回按钮的点击事件,并准备书籍数据:
Page({
  data: {
    coverImage: 'yes.jpg', // 整行平铺的照片
    books: [
      {
        cover: 'ni.jpg',
        title: '人性的弱点',
        author: '卡耐基',
        description: '书实用人际关系名著帮你轻松获得成功 本书作为一本实用的人际关系著作...'
      },
      {
        cover: 'wu.jpg',
        title: '噪声',
        author: '丹尼尔',
        description: '想象一下,两名医生对相同的病人给出了不同的诊断;两名法官对犯了同罪的嫌疑人给出了不同的判决。...'
      },
      // ... 更多书籍数据
    ]
  },

  goBack: function() {
    wx.navigateBack({
      delta: 1
    });
  }
});
4. 准备图片资源
确保你已经在小程序的项目目录中放置了所有必要的图片资源,并且路径是正确的。
5. 调试和预览
使用微信开发者工具进行调试和预览,确保你的书单界面按照预期工作。

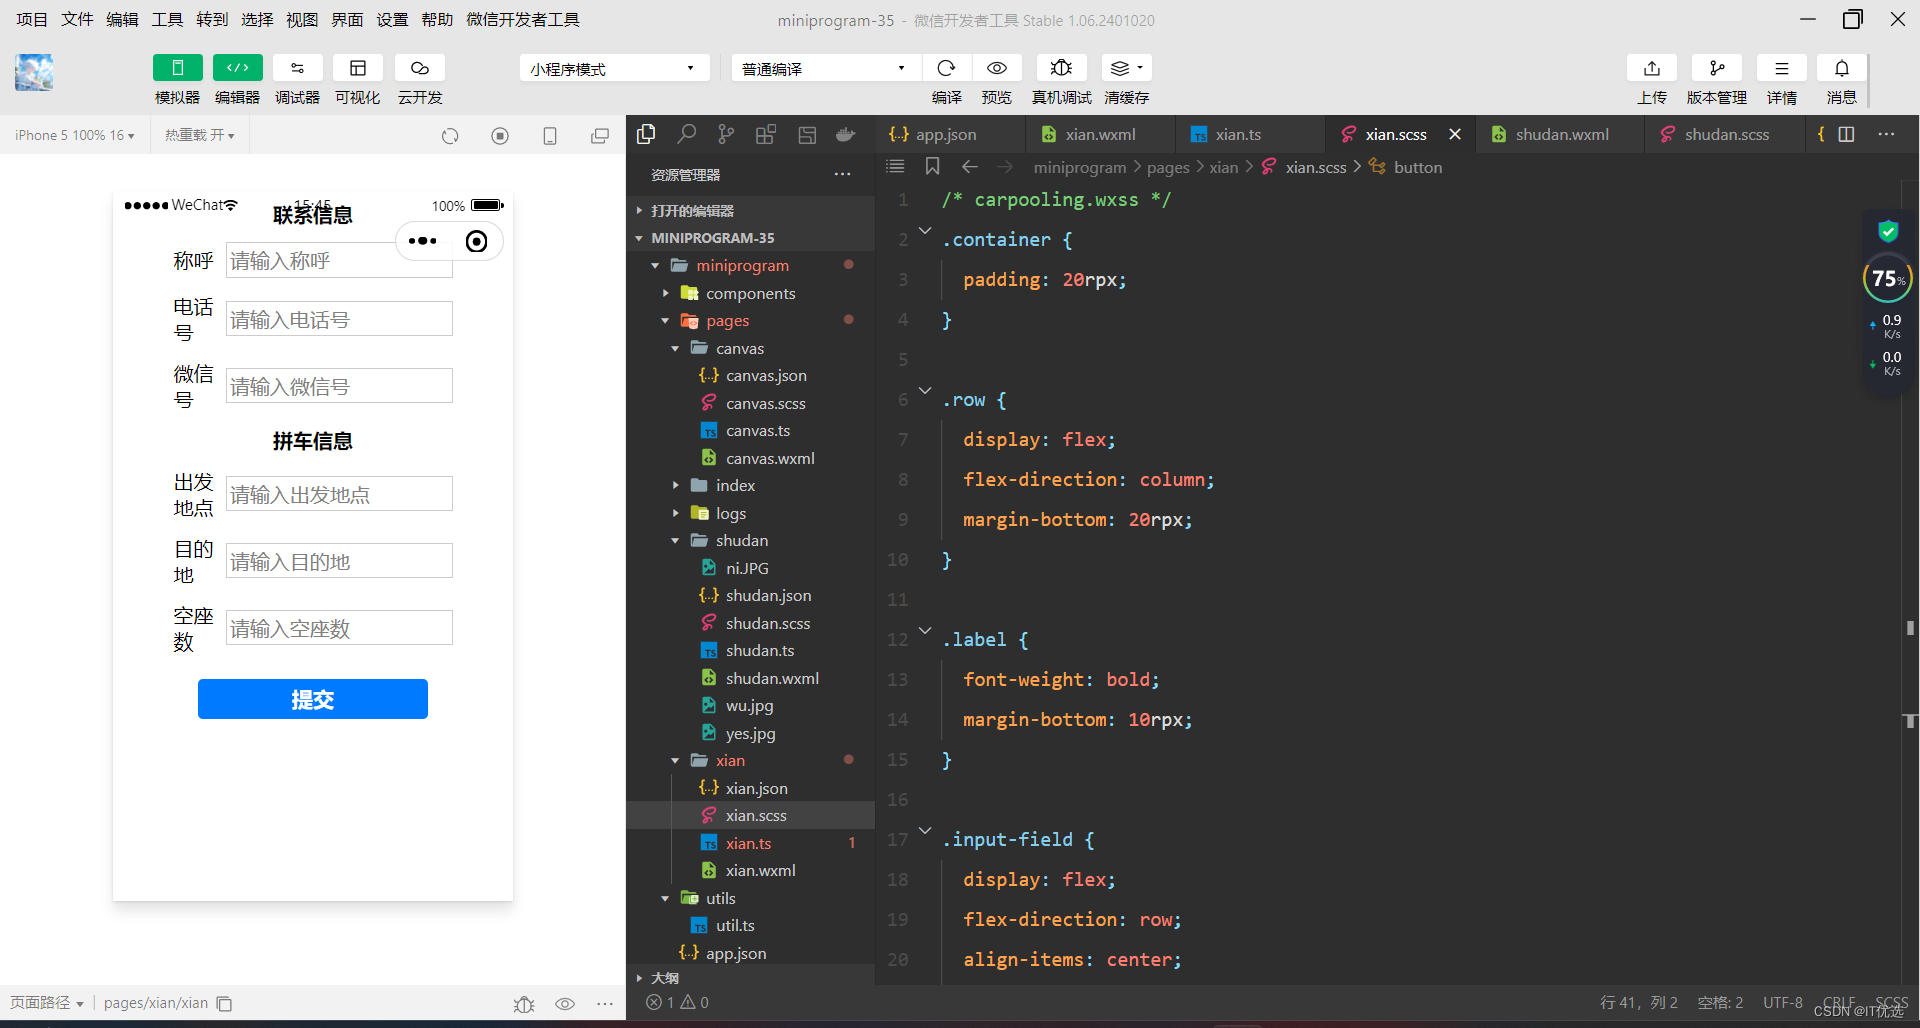
西安找拼车案例:
3. 编写 WXML 文件
在 carpooling.wxml 文件中,您可以设计如下的布局:
<!-- carpooling.wxml -->
<view class="container">
  <view class="row">
    <view class="label">联系信息</view>
  </view>
  <view class="row">
    <view class="input-field">
      <label>称呼</label>
      <input type="text" placeholder="请输入称呼" />
    </view>
  </view>
  <view class="row">
    <view class="input-field">
      <label>电话号</label>
      <input type="number" placeholder="请输入电话号" />
    </view>
  </view>
  <view class="row">
    <view class="input-field">
      <label>微信号</label>
      <input type="text" placeholder="请输入微信号" />
    </view>
  </view>

  <view class="row">
    <view class="label">拼车信息</view>
  </view>
  <view class="row">
    <view class="input-field">
      <label>出发地点</label>
      <input type="text" placeholder="请输入出发地点" />
    </view>
  </view>
  <view class="row">
    <view class="input-field">
      <label>目的地</label>
      <input type="text" placeholder="请输入目的地" />
    </view>
  </view>
  <view class="row">
    <view class="input-field">
      <label>空座数</label>
      <input type="number" placeholder="请输入空座数" />
    </view>
  </view>

  <button bindtap="submitForm">提交</button>
</view>
4. 编写 WXSS 文件
在 carpooling.wxss 文件中,您可以编写相应的样式来美化布局:
/* carpooling.wxss */
.container {
  padding: 20rpx;
}

.row {
  display: flex;
  flex-direction: column;
  margin-bottom: 20rpx;
}

.label {
  font-weight: bold;
  margin-bottom: 10rpx;
}

.input-field {
  display: flex;
  flex-direction: row;
  align-items: center;
  margin-bottom: 10rpx;
}

.input-field label {
  width: 100rpx;
}

input {
  border: 1px solid #ccc;
  padding: 5rpx;
  flex: 1; /* 占据剩余空间 */
}

button {
  width: 100%;
  background-color: #007AFF;
  color: white;
  border: none;
  padding: 10rpx;
  margin-top: 20rpx;
}
5. 编写 JavaScript 文件
在 carpooling.js 文件中,您可以编写处理表单提交的逻辑:
// carpooling.js
Page({
  data: {},

  submitForm: function(e) {
    const formData = e.detail.value;
    console.log(formData); // 在控制台输出表单数据

    // 你可以在这里处理表单数据,比如发送到服务器或保存到本地存储
    // 如果需要发送到服务器,可以使用 wx.request 发起网络请求
  }
});
运行:
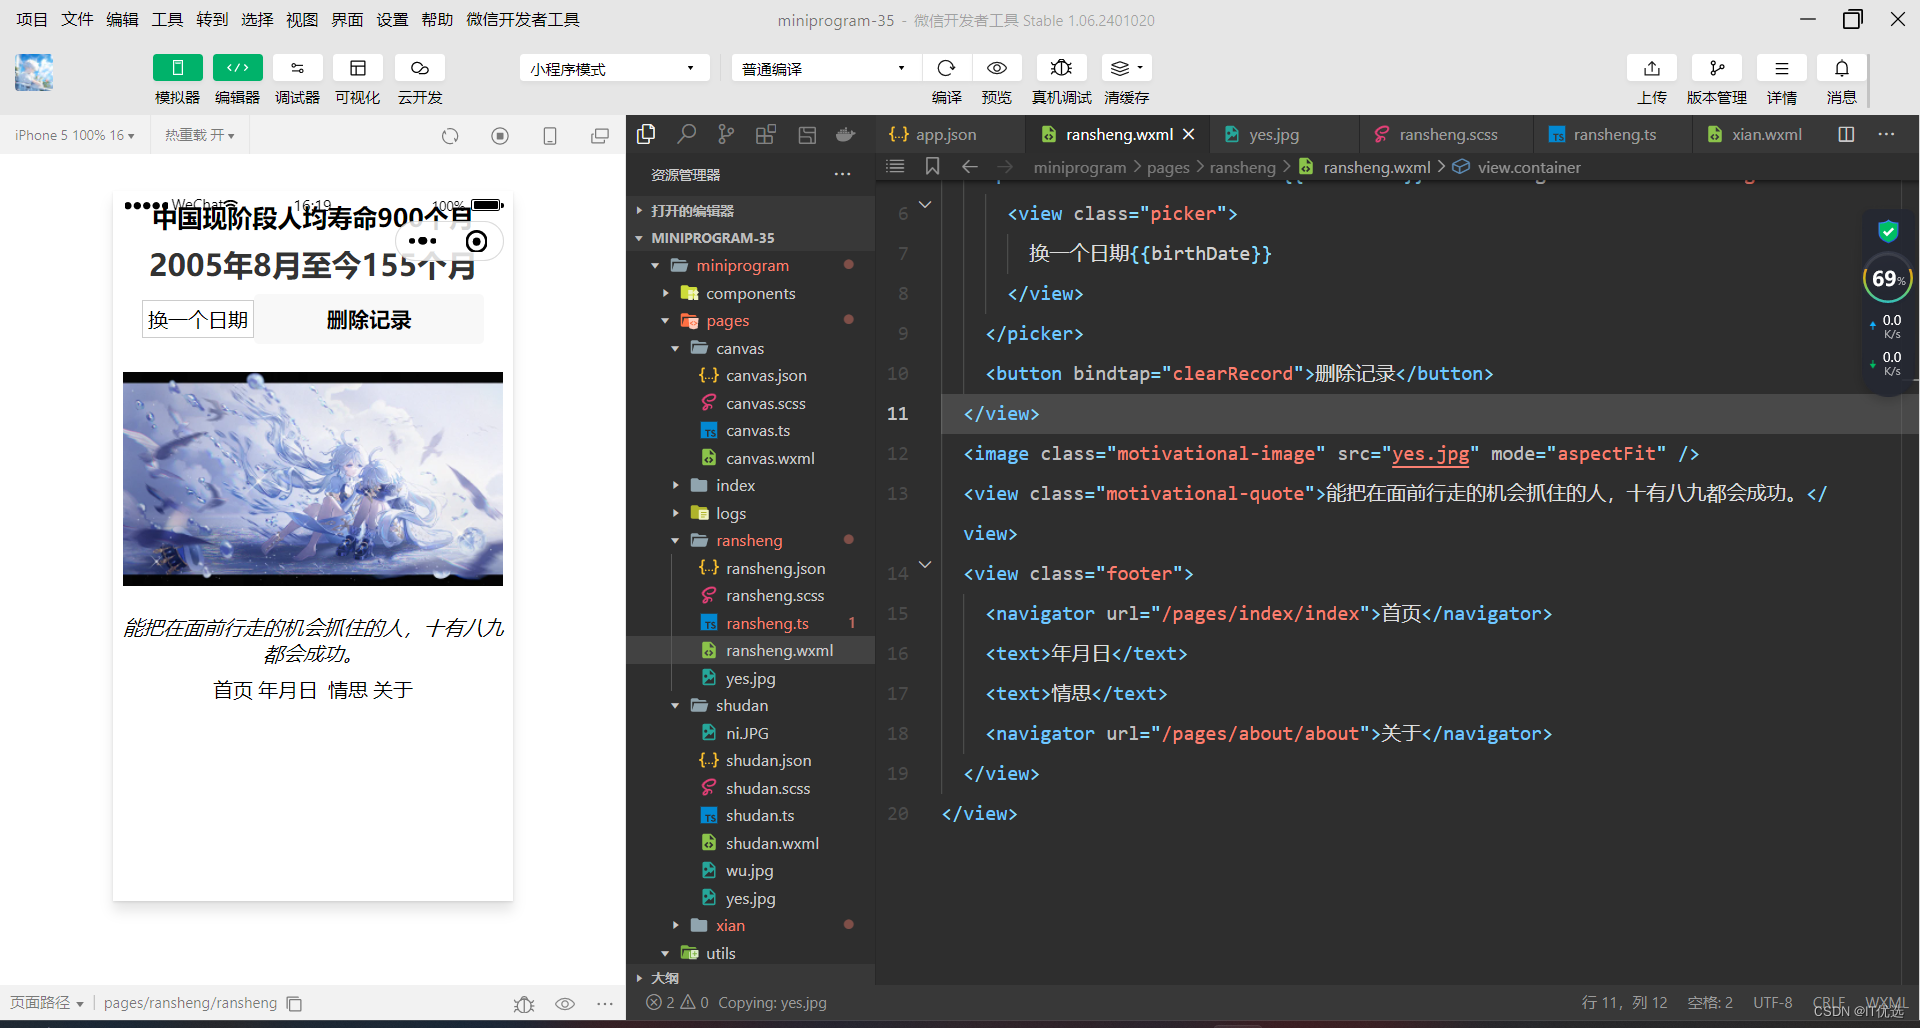
 人生进程案例:
1. 创建小程序页面
首先,在微信开发者工具中创建一个新页面,比如命名为 lifeProgress。
2. 设计页面结构 (lifeProgress.wxml)
<view class="container">
  <view class="title">中国现阶段人均寿命900个月</view>
  <view class="highlight">2005年8月至今155个月</view>
  <view class="date-picker-container">
    <picker mode="date" value="{{birthDate}}" bindchange="onBirthDateChange">
      <view class="picker">
        当前选择:{{birthDate}}
      </view>
    </picker>
    <button bindtap="clearRecord">删除记录</button>
  </view>
  <image class="motivational-image" src="motivational-quote-image.jpg" mode="aspectFit" />
  <view class="motivational-quote">能把在面前行走的机会抓住的人,十有八九都会成功。</view>
  <view class="footer">
    <navigator url="/pages/index/index">首页</navigator>
    <text>年月日</text>
    <text>情思</text>
    <navigator url="/pages/about/about">关于</navigator>
  </view>
</view>
3. 编写样式 (lifeProgress.wxss)
.container {
  display: flex;
  flex-direction: column;
  align-items: center;
  padding: 20rpx;
}

.title {
  font-size: 20px;
  font-weight: bold;
  margin-bottom: 20rpx;
}

.highlight {
  font-size: 24px;
  font-weight: bold;
  color: #333;
  margin-bottom: 20rpx;
}

.date-picker-container {
  display: flex;
  justify-content: space-between;
  align-items: center;
  margin-bottom: 20rpx;
}

.picker {
  border: 1px solid #ccc;
  padding: 10rpx;
  background-color: #fff;
}

.motivational-image {
  width: 100%;
  height: 200px; /* 根据实际图片大小调整 */
  margin-bottom: 20rpx;
}

.motivational-quote {
  font-style: italic;
  text-align: center;
  margin-bottom: 20rpx;
}

.footer {
  display: flex;
  justify-content: space-between;
  align-items: center;
}

.footer text {
  margin: 0 10rpx;
}
4. 编写逻辑处理 (lifeProgress.js)
Page({
  data: {
    birthDate: '', // 初始为空,用户选择后会更新
  },

  // 日期选择改变时更新数据
  onBirthDateChange: function(e) {
    this.setData({
      birthDate: e.detail.value
    });
  },

  // 删除记录
  clearRecord: function() {
    this.setData({
      birthDate: ''
    });
  }
});
运行:


 1万+
1万+


 被折叠的 条评论
为什么被折叠?
被折叠的 条评论
为什么被折叠?
 到【灌水乐园】发言


