


参照所给的代码,完成诗人信息列表展示的页面,需要完成前端html页面和后端程序的编写。
整体编写步骤:pojo->mapper->service->cotroller
(1)连接数据库:(applicatiom.properties)
#配置数据库的连接信息
#驱动类名称
spring.datasource.driver-class-name=com.mysql.cj.jdbc.Driver
#数据库连接的url
spring.datasource.url=jdbc:mysql://localhost:3306/mybatis
#连接数据库的用户名
spring.datasource.username=不给看
#连接数据库的密码
spring.datasource.password=不给看
(2)展示页面 即查询所有数据,因为在mapper中处理数据,于是编写sql语句:(WriterMapper)
package com.example.writershow.Mapper;

import com.example.writershow.Pojo.Writer;
import org.apache.ibatis.annotations.Mapper;
import org.apache.ibatis.annotations.Select;

import java.util.List;

@Mapper
public interface WriterMapper {
    //查询所有数据
    @Select("SELECT * FROM writer")
    public List<Writer> list();
}
(3)mapper处理完后的数据交给service进行业务逻辑处理(这里只用展示不用处理),因此先编写WriterService接口,再编写其实现类WriterServiceImpl:
WriterService接口:
package com.example.writershow.Service;

import com.example.writershow.Pojo.Writer;
import org.springframework.stereotype.Service;

import java.util.List;

@Service
public interface WriterService {
    public List<Writer> list();
}
实现类WriterServiceImpl,实现类中依赖注入mapper对象,因为要调用方法实现数据的传递:
package com.example.writershow.Service.impl;

import com.example.writershow.Mapper.WriterMapper;
import com.example.writershow.Service.WriterService;
import org.springframework.beans.factory.annotation.Autowired;
import org.springframework.stereotype.Service;
import com.example.writershow.Pojo.Writer;
import java.util.List;

@Service
public class WriterServiceImpl implements WriterService {
    @Autowired
    private WriterMapper writerMapper;

    @Override
    public List<Writer> list(){
        return writerMapper.list();
    }
}
(4)此时service要将接收到的数据返回给controller,于是编写controller层:
package com.example.writershow.Controller;

import com.example.writershow.Pojo.Result;
import com.example.writershow.Service.WriterService;
import org.springframework.beans.factory.annotation.Autowired;
import org.springframework.web.bind.annotation.RequestMapping;
import org.springframework.web.bind.annotation.RestController;

@RestController
public class WriterController {

    @Autowired
    private WriterService writerService;

    @RequestMapping("/showAll")
    public Result list(){
        return Result.success(writerService.list());
    }
}
使用result接收来统一响应结果
controller将返回响应给前端,编写前端页面,让数据渲染到表格中:
<!DOCTYPE html>
<html lang="en">
<head>
  <meta charset="UTF-8">
  <meta http-equiv="X-UA-Compatible" content="IE=edge">
  <meta name="viewport" content="width=device-width, initial-scale=1.0">
  <title>诗人信息</title>
</head>

<link rel="stylesheet" href="element-ui/index.css">
<script src="./js/vue.js"></script>
<script src="./element-ui/index.js"></script>
<script src="./js/axios-0.18.0.js"></script>

<body>
<h1 align="center">诗人信息列表展示</h1>
<div id="app">
  <table border="1" cellspacing="0" width="100%">
    <tr align="center" >
      <td>编号</td>
      <td>姓名</td>
      <td>性别</td>
      <td>朝代</td>
      <td>头衔</td>
      <td>风格</td>
    </tr>
    <tr v-for="(writer,index) in tableData" align="center">
      <td>{{index+1}}</td>
      <td>{{writer.author}}</td>
      <td>{{writer.gender}}</td>
      <td>{{writer.dynasty}}</td>
      <td>{{writer.title}}</td>
      <td>{{writer.style}}</td>
    </tr>
  </table>
</div>
</body>
<style>
  .el-table .warning-row {
    background: oldlace;
  }
  .el-table .success-row {
    background: #f0f9eb;
  }
</style>

<script>
  new Vue({
    el: "#app",
    data() {
      return {
        tableData: []
      }
    },
    mounted(){//vue的钩子方法发起异步请求请求数据
      axios.get('/showAll').then(result =>{
        if(result.data.code){//回调函数中判断返回code的值
          this.tableData = result.data.data;
        }
      });
    },
    methods: {
    }
  });
</script>
</html>
在浏览器输入“/WriterShoe.html”后,前端页面中axios中发起get异步请求(‘/showAll’),controller接收请求根据地址‘/showAll’确定位置后执行,到service在到mapper得到数据后到service再到controller返回响应给前端。
结果展示: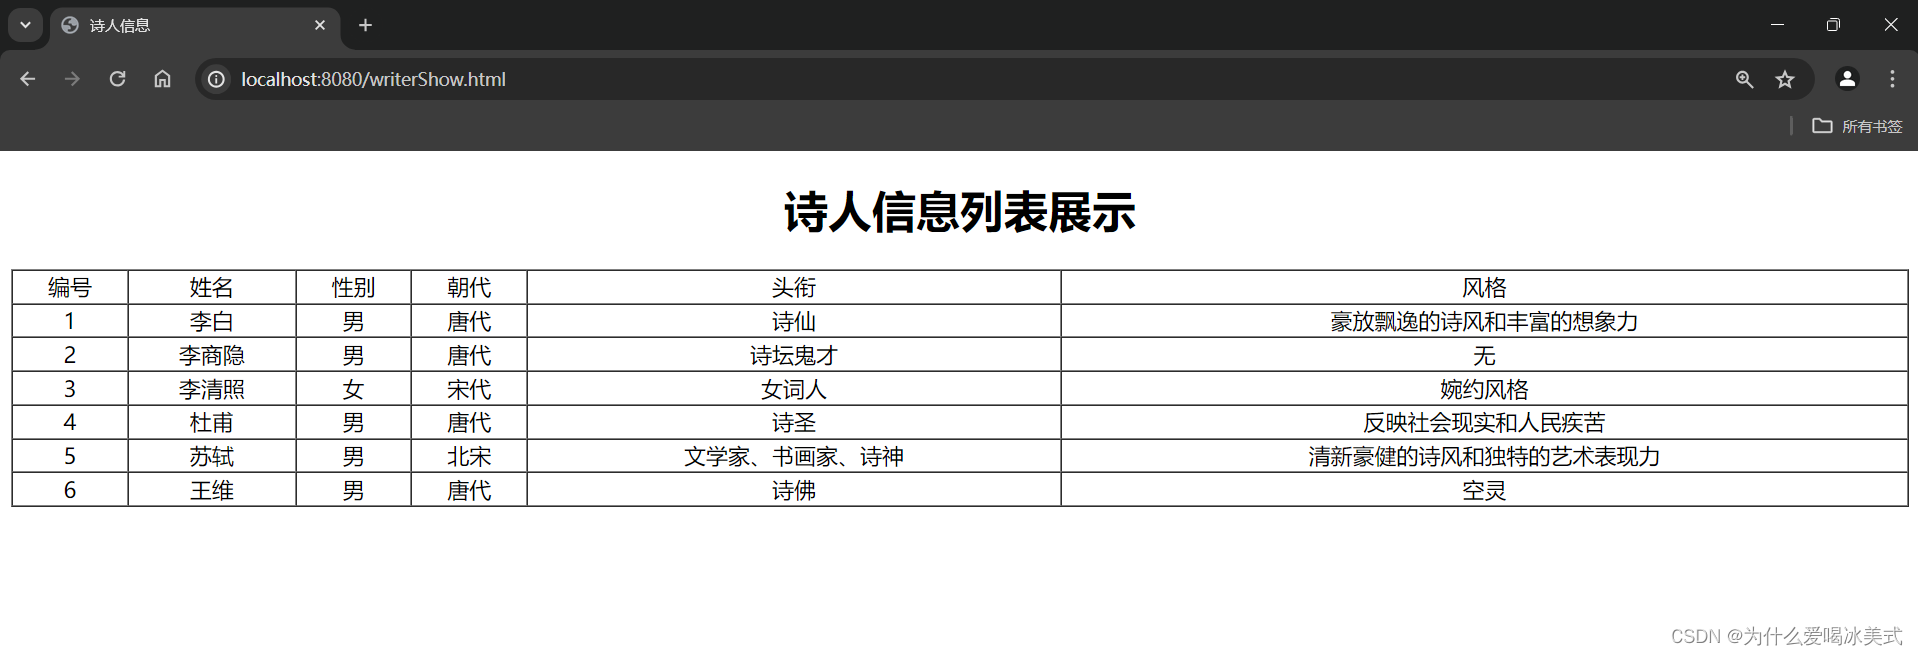


 428
428


 被折叠的 条评论
为什么被折叠?
被折叠的 条评论
为什么被折叠?
 到【灌水乐园】发言


