


简单使用vllm
1 介绍
vLLM是一个快速且易于使用的LLM推理和服务库。它支持分布式部署、容器化部署和OpenAI的数据格式等,并且内置了大模型服务,可以直接用命令启动。vllm与Ollama有一定的区别,Ollama适合个人和小服务,vllm适合企业和提供服务,vllm的性能较高,并且并发性也较好。
vLLM是一个Python库,它包含预编译的C++和CUDA(12.1)二进制文件,因此需要有GPU支持。
参考网站:
# 开发文档
https://docs.vllm.ai

# Github地址
https://github.com/vllm-project/vllm

# OpenAI兼容性服务
https://docs.vllm.ai/en/latest/serving/openai_compatible_server.html
2 简单使用vllm
2.1 使用Python启动
# 创建Python环境,安装依赖
pip install vllm -i https://pypi.tuna.tsinghua.edu.cn/simple

# 用命令执行
# 命令参数参考地址
https://docs.vllm.ai/en/latest/serving/openai_compatible_server.html#command-line-arguments-for-the-server

# 部分参数解释
--host
  主机地址,默认 0.0.0.0
--port
  端口,默认端口8000
--model
  加载模型的路径
--served-model-name
  远程API调用时指定的模型名称
--tensor-parallel-size
  设置的卡的数量,默认1
--dtype
  模型权重和激活的数据类型,默认auto
--api-key
  设置OpenAI格式的密钥,如果设置此值,要求在服务的请求头中加此密钥,注意密钥有要求。
--trust-remote-code
  允许模型加载来自huggingface的远程代码,默认False

# 执行命令
python -m vllm.entrypoints.openai.api_server \
--model "/home/models/Qwen2-1.5B-Instruct" \
--served-model-name "openchat"
2.2 使用Docker启动
# 注意:vllm/vllm-openai:v0.6.3内置的torch:2.4.0,vllm:0.6.3,CUDA版本:需要12.4、12.1、11.8.
# 可从PyTorch官网上查询PyTorch版本对应关系。
# 最新版本: https://pytorch.org/get-started/locally/
# 以前版本: https://pytorch.org/get-started/previous-versions/

# 下载docker镜像
docker pull vllm/vllm-openai:v0.6.3


# 参数说明
# --gpus all:使用全部的GPU;
# --ipc=host:共享宿主机的内存;
# --runtime nvidia:使用nvidia运行时启动docker,来使用GPU;
docker run -itd \
--restart always \
--name my-vllm \
--runtime nvidia \
--gpus all \
--ipc=host \
-v /home/models:/root/models \
-p 8000:8000 \
vllm/vllm-openai:v0.6.3 --model /root/models/Qwen2-1.5B-Instruct --served-model-name openchat
启动日志
WARNING 10-21 22:42:50 serving_embedding.py:199] embedding_mode is False. Embedding API will not work.
INFO 10-21 22:42:50 launcher.py:19] Available routes are:
INFO 10-21 22:42:50 launcher.py:27] Route: /openapi.json, Methods: HEAD, GET
INFO 10-21 22:42:50 launcher.py:27] Route: /docs, Methods: HEAD, GET
INFO 10-21 22:42:50 launcher.py:27] Route: /docs/oauth2-redirect, Methods: HEAD, GET
INFO 10-21 22:42:50 launcher.py:27] Route: /redoc, Methods: HEAD, GET
INFO 10-21 22:42:50 launcher.py:27] Route: /health, Methods: GET
INFO 10-21 22:42:50 launcher.py:27] Route: /tokenize, Methods: POST
INFO 10-21 22:42:50 launcher.py:27] Route: /detokenize, Methods: POST
INFO 10-21 22:42:50 launcher.py:27] Route: /v1/models, Methods: GET
INFO 10-21 22:42:50 launcher.py:27] Route: /version, Methods: GET
INFO 10-21 22:42:50 launcher.py:27] Route: /v1/chat/completions, Methods: POST
INFO 10-21 22:42:50 launcher.py:27] Route: /v1/completions, Methods: POST
INFO 10-21 22:42:50 launcher.py:27] Route: /v1/embeddings, Methods: POST
请求数据
curl http://localhost:8000/v1/chat/completions \
-X POST \
-H "Content-Type: application/json" \
-d '{
    "model": "openchat",
    "messages": [
        {"role": "system", "content": "You are a helpful assistant."},
        {"role": "user", "content": "介绍一下中国,不少于10000字"}
    ],
    "stream": true
}'
⚠️(1)CUDA的版本不兼容报错:RuntimeError: Unexpected error from cudaGetDeviceCount(). Did you run some cuda functions before cal.
解决方法:更新宿主机的CUDA版本,更换vllm版本。
⚠️(2)运行时报错:docker: Error response from daemon: Unknown runtime specified nvidia.
解决方案如下:
创建docker服务文件夹
mkdir -p /etc/systemd/system/docker.service.d
构建override.conf文件
sudo tee /etc/systemd/system/docker.service.d/override.conf <<EOF
[Service]
ExecStart=
ExecStart=/usr/bin/dockerd --host=fd:// --add-runtime=nvidia=/usr/bin/nvidia-container-runtime
EOF
修改daemon.json文件
sudo tee /etc/docker/daemon.json <<EOF
{
    "runtimes": {
        "nvidia": {
            "path": "/usr/bin/nvidia-container-runtime",
            "runtimeArgs": []
        }
    }
}
EOF
重启服务
# 重载daemon文件
systemctl daemon-reload

# 重启docker
systemctl restart docker
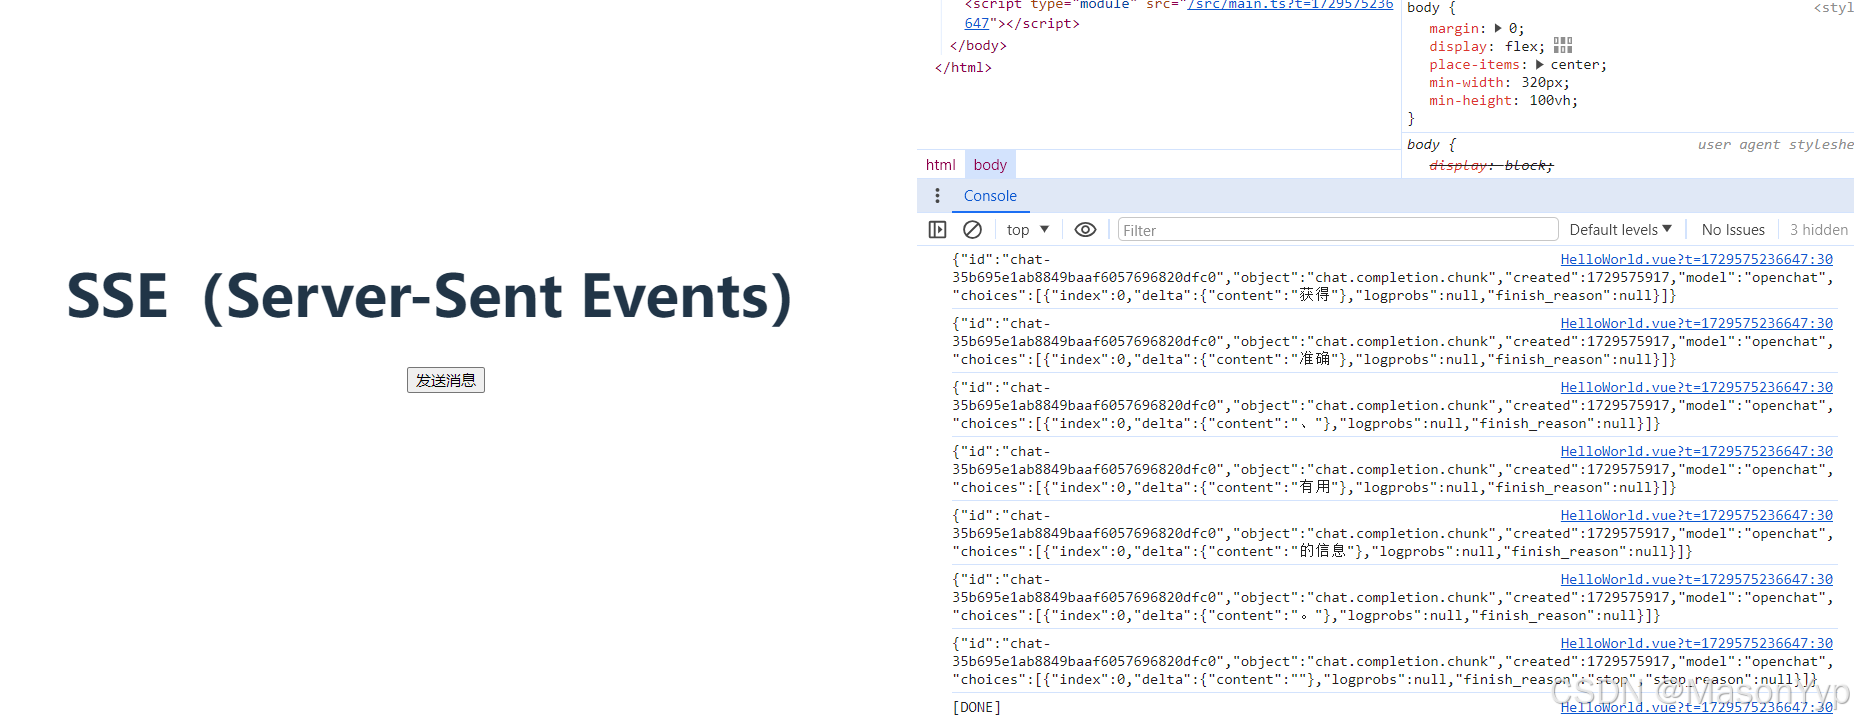
3 vue3前端访问
<script setup lang="ts">

/*
# 安装
npm install @microsoft/fetch-event-source

*/

import { fetchEventSource } from "@microsoft/fetch-event-source";


defineProps<{ msg: string }>()


// 建立连接
function createSseConnect() {

  const controller = new AbortController()
  const signal = controller.signal

  fetchEventSource('http://192.168.137.64:8000/v1/chat/completions', {
    method: 'POST',
    signal: signal,
    headers: {
          /* 请求头配置 */
          "Content-Type": "application/json"
      },
    body: JSON.stringify({
      /* 发送的内容 */
      "model": "openchat",
      "messages": [
          {"role": "system", "content": "You are a helpful assistant."},
          {"role": "user", "content": "介绍一下中国,不少于10000字"}
      ],
      "stream": true
    }),
    onmessage(msg) {
          // let result= JSON.parse(msg.data);  // 得到的数据
          console.log(msg.data)
      },
    onerror(err){
          // 必须抛出错误才会停止
          throw err
      }
  })

}


</script>

<template>
  <h1>{{ msg }}</h1>

  <input type="button" value="发送消息" v-on:click="createSseConnect('1234')" />

</template>

<style scoped>
.read-the-docs {
  color: #888;
}
</style>
截图


 867
867

 被折叠的 条评论
为什么被折叠?
被折叠的 条评论
为什么被折叠?
 到【灌水乐园】发言


