


前言:
非常感谢https://blog.csdn.net/flztiii/article/details/73881954,这篇博客,本文主要参考这篇文章
kitti数据集是一个车辆检测的数据集
数据集的准备
- <?xml version="1.0" ?>
- <annotation>
- <folder>VOC2007</folder> //文件夹
- <filename>000012.jpg</filename> //xml文件对应的图片的名称
- <source>
- <database>The VOC2007 Database</database>
- <annotation>PASCAL VOC2007</annotation>
- </source>
- <size> //图片大小信息1242x375
- <width>1242</width>
- <height>375</height>
- <depth>3</depth>
- </size>
- <object> //图片中标注的物体
- <name>car</name> //标注的物体类别
- <difficult>0</difficult>
- <bndbox> //标注物体的bounding box
- <xmin>662</xmin>
- <ymin>185</ymin>
- <xmax>690</xmax>
- <ymax>205</ymax>
- </bndbox>
- </object>
- <object>
- <name>car</name>
- <difficult>0</difficult>
- <bndbox>
- <xmin>448</xmin>
- <ymin>177</ymin>
- <xmax>481</xmax>
- <ymax>206</ymax>
- </bndbox>
- </object>
- </annotation>
- car 0.00 0 -1.57 599.41 156.40 629.75 189.25 2.85 2.63 12.34 0.47 1.49 69.44 -1.56
- car 0.00 0 1.85 387.63 181.54 423.81 203.12 1.67 1.87 3.69 -16.53 2.39 58.49 1.57
- pedestrian 0.00 3 -1.65 676.60 163.95 688.98 193.93 1.86 0.60 2.02 4.59 1.32 45.84 -1.55
了解了两类数据集的格式之后,让我们来看看如何将kitti数据集转化为VOC数据集吧:
#!/usr/bin/env python
# -*- coding: UTF-8 -*-

# modify_annotations_txt.py
import glob
import string
"""
将本程序和kitti的Labels放在同一目录下执行,可以将Labels中的类别合并为只剩下car类和pedestrian类(这里我使用小写是防止faster-rcnn训练报错)。之后要把txt文件转化为xml文件,在相同目录下创建文件夹Annotations
"""

txt_list = glob.glob('./label_2/*.txt') # 存储Labels文件夹所有txt文件路径
def show_category(txt_list):
	category_list= []
	for item in txt_list:
	    try:
		with open(item) as tdf:
		    for each_line in tdf:
		        labeldata = each_line.strip().split(' ') # 去掉前后多余的字符并把其分开
		        category_list.append(labeldata[0]) # 只要第一个字段,即类别
	    except IOError as ioerr:
		print('File error:'+str(ioerr))
	print(set(category_list)) # 输出集合

def merge(line):
	each_line=''
	for i in range(len(line)):
	    if i!= (len(line)-1):
		each_line=each_line+line[i]+' '
	    else:
		each_line=each_line+line[i] # 最后一条字段后面不加空格
	each_line=each_line+'\n'
	return (each_line)

print('before modify categories are:\n')
show_category(txt_list)

for item in txt_list:
	new_txt=[]
	try:
	    with open(item, 'r') as r_tdf:
		for each_line in r_tdf:
		    labeldata = each_line.strip().split(' ')
		    if labeldata[0] in ['Truck','Van','Tram','Car']: # 合并汽车类
		        labeldata[0] = labeldata[0].replace(labeldata[0],'car')
		    if labeldata[0] in ['Person_sitting','Cyclist','Pedestrian']: # 合并行人类
		        labeldata[0] = labeldata[0].replace(labeldata[0],'pedestrian')
		    if labeldata[0] == 'DontCare': # 忽略Dontcare类
		        continue
		    if labeldata[0] == 'Misc': # 忽略Misc类
		        continue
		    new_txt.append(merge(labeldata)) # 重新写入新的txt文件
	    with open(item,'w+') as w_tdf: # w+是打开原文件将内容删除,另写新内容进去
		for temp in new_txt:
		    w_tdf.write(temp)
	except IOError as ioerr:
	    print('File error:'+str(ioerr))

print('\nafter modify categories are:\n')
show_category(txt_list)
将本程序和kitti的Labels放在同一目录下执行,可以将Labels中的类别合并为只剩下car类和pedestrian类(这里我使用小写是防止faster-rcnn训练报错)。
===================================================================
之后要把txt文件转化为xml文件,在相同目录下创建文件夹Annotations。执行文件代码如下:
txt_to_xml.py
#!/usr/bin/env python
# -*- coding: UTF-8 -*-
# txt_to_xml.py
# 根据一个给定的XML Schema,使用DOM树的形式从空白文件生成一个XML
from xml.dom.minidom import Document
import cv2
import os


def generate_xml(name, split_lines, img_size, class_ind):
    doc = Document()  # 创建DOM文档对象

    annotation = doc.createElement('annotation')
    doc.appendChild(annotation)

    title = doc.createElement('folder')
    title_text = doc.createTextNode('VOC2007')  # 这里修改了文件夹名
    title.appendChild(title_text)
    annotation.appendChild(title)

    img_name = name + '.jpg'  # 要用jpg格式

    title = doc.createElement('filename')
    title_text = doc.createTextNode(img_name)
    title.appendChild(title_text)
    annotation.appendChild(title)

    source = doc.createElement('source')
    annotation.appendChild(source)

    title = doc.createElement('database')
    title_text = doc.createTextNode('The VOC2007 Database')  # 修改为VOC
    title.appendChild(title_text)
    source.appendChild(title)

    title = doc.createElement('annotation')
    title_text = doc.createTextNode('PASCAL VOC2007')  # 修改为VOC
    title.appendChild(title_text)
    source.appendChild(title)

    size = doc.createElement('size')
    annotation.appendChild(size)

    title = doc.createElement('width')
    title_text = doc.createTextNode(str(img_size[1]))
    title.appendChild(title_text)
    size.appendChild(title)

    title = doc.createElement('height')
    title_text = doc.createTextNode(str(img_size[0]))
    title.appendChild(title_text)
    size.appendChild(title)

    title = doc.createElement('depth')
    title_text = doc.createTextNode(str(img_size[2]))
    title.appendChild(title_text)
    size.appendChild(title)

    for split_line in split_lines:
        line = split_line.strip().split()
        if line[0] in class_ind:
            object = doc.createElement('object')
            annotation.appendChild(object)

            title = doc.createElement('name')
            title_text = doc.createTextNode(line[0])
            title.appendChild(title_text)
            object.appendChild(title)

        title = doc.createElement('difficult')
        title_text = doc.createTextNode('0')
        title.appendChild(title_text)
        object.appendChild(title)

        bndbox = doc.createElement('bndbox')
        object.appendChild(bndbox)
        title = doc.createElement('xmin')
        title_text = doc.createTextNode(str(int(float(line[4]))))
        title.appendChild(title_text)
        bndbox.appendChild(title)
        title = doc.createElement('ymin')
        title_text = doc.createTextNode(str(int(float(line[5]))))
        title.appendChild(title_text)
        bndbox.appendChild(title)
        title = doc.createElement('xmax')
        title_text = doc.createTextNode(str(int(float(line[6]))))
        title.appendChild(title_text)
        bndbox.appendChild(title)
        title = doc.createElement('ymax')
        title_text = doc.createTextNode(str(int(float(line[7]))))
        title.appendChild(title_text)
        bndbox.appendChild(title)

        # 将DOM对象doc写入文件


        f = open('Annotations/' + name + '.xml', 'w')
        f.write(doc.toprettyxml(indent=''))
        f.close()

if __name__ == '__main__':
    class_ind = ('pedestrian', 'car')  # 修改为了两类
    cur_dir = os.getcwd()
    labels_dir = os.path.join(cur_dir, 'label_2')
    for parent, dirnames, filenames in os.walk(labels_dir):  # 分别得到根目录,子目录和根目录下文件
        for file_name in filenames:
            full_path = os.path.join(parent, file_name)  # 获取文件全路径
            # print full_path
            f = open(full_path)
            split_lines = f.readlines()
            name = file_name[:-4]  # 后四位是扩展名.txt,只取前面的文件名
            # print name
            img_name = name + '.jpg'
            img_path = os.path.join('/home/xuy/桌面/training/JPEGImages',
                                    img_name)  # 路径需要自行修改
            # print img_path
            img_size = cv2.imread(img_path).shape
            generate_xml(name, split_lines, img_size, class_ind)
print('all txts has converted into xmls')
print('all txts has converted into xmls')
将程序放在Labels同一级目录下执行,则可以在Annotations文件夹下生成xml文件
=================================================================
之后在同级目录下创建Imagesets文件夹,在文件夹中创建Main,Layout,Segmentation子文件夹。执行文件代码如下(用python3运行。t执行程序过程中,如遇到pdb提示,可按c键,再按enter键)
from __future__ import print_function
# -*- coding:utf-8 -*-
__author__ = 'xuy'
"""
在python3的环境下运行
"""

import pdb
import glob
import os
import random
import math


def get_sample_value(txt_name, category_name):
    label_path = './label_2/'
    txt_path = label_path + txt_name+'.txt'
    try:
        with open(txt_path) as r_tdf:
            if category_name in r_tdf.read():
                return ' 1'
            else:
                return '-1'
    except IOError as ioerr:
        print('File error:'+str(ioerr))

txt_list_path = glob.glob('./label_2/*.txt')
txt_list = []

for item in txt_list_path:
	#temp1返回文件名,temp2返回后缀名
    temp1,temp2 = os.path.splitext(os.path.basename(item))
    txt_list.append(temp1)
txt_list.sort()
print(txt_list, end = '\n\n')

# 有博客建议train:val:test=8:1:1,先尝试用一下
num_trainval = random.sample(txt_list, math.floor(len(txt_list)*9/10.0)) # 可修改百分比
num_trainval.sort()
print(num_trainval, end = '\n\n')

num_train = random.sample(num_trainval,math.floor(len(num_trainval)*8/9.0)) # 可修改百分比
num_train.sort()
print(num_train, end = '\n\n')

num_val = list(set(num_trainval).difference(set(num_train)))
num_val.sort()
print(num_val, end = '\n\n')

num_test = list(set(txt_list).difference(set(num_trainval)))
num_test.sort()
print(num_test, end = '\n\n')

pdb.set_trace()

Main_path = './ImageSets/Main/'
train_test_name = ['trainval','train','val','test']
category_name = ['Car','Pedestrian']#修改类别

# 循环写trainvl train val test
for item_train_test_name in train_test_name:
    list_name = 'num_'
    list_name += item_train_test_name
    train_test_txt_name = Main_path + item_train_test_name + '.txt'
    try:
        # 写单个文件,train.txt,trainval.txt,val.txt,test.txt这四个文件
        with open(train_test_txt_name, 'w') as w_tdf:
            # 一行一行写
            for item in eval(list_name):
                w_tdf.write(item+'\n')
        # 循环写Car Pedestrian Cyclist
        for item_category_name in category_name:
            category_txt_name = Main_path + item_category_name + '_' + item_train_test_name + '.txt'
            with open(category_txt_name, 'w') as w_tdf:
                # 一行一行写
                for item in eval(list_name):
                    w_tdf.write(item+' '+ get_sample_value(item, item_category_name)+'\n')
    except IOError as ioerr:
        print('File error:'+str(ioerr))
产生文件如下图所示:

在Labels同级目录下执行文件,生成Main中的txt文件。至此,数据集的准备结束,我们将准备好的Annotations,JPEGImages,ImageSets文件夹放到如下目录下
python-faster-rcnn/data/VOCdevkit2007/VOC2007
文件结构如下图所示:

Faster-rcnn训练
data —> 存放数据,以及读取文件的cache
experiments —>存放配置文件以及运行的log文件,配置文件
lib —> python接口
models —> 三种模型, ZF(S)/VGG1024(M)/VGG16(L)
output —> 输出的model存放的位置,不训练此文件夹没有
tools —> 训练和测试的python文件
- name: "VGG_ILSVRC_16_layers"
- layer {
- name: 'data'
- type: 'Python'
- top: 'data'
- top: 'rois'
- top: 'labels'
- top: 'bbox_targets'
- top: 'bbox_inside_weights'
- top: 'bbox_outside_weights'
- python_param {
- module: 'roi_data_layer.layer'
- layer: 'RoIDataLayer'
- param_str: "'num_classes': 3" #此处修改类别
- }
- }
- layer {
- name: "cls_score"
- type: "InnerProduct"
- bottom: "fc7"
- top: "cls_score"
- param {
- lr_mult: 1
- }
- param {
- lr_mult: 2
- }
- inner_product_param {
- num_output: 3 #此处修改类别
- weight_filler {
- type: "gaussian"
- std: 0.01
- }
- bias_filler {
- type: "constant"
- value: 0
- }
- }
- }
- layer {
- name: "bbox_pred"
- type: "InnerProduct"
- bottom: "fc7"
- top: "bbox_pred"
- param {
- lr_mult: 1
- }
- param {
- lr_mult: 2
- }
- inner_product_param {
- num_output: 12 #此处修改类别
- weight_filler {
- type: "gaussian"
- std: 0.001
- }
- bias_filler {
- type: "constant"
- value: 0
- }
- }
- }
2./py-faster-rcnn/models/pascal_voc/VGG16/faster_rcnn_alt_opt/stage1_rpn_train.pt文件
第11行
- name: "VGG_ILSVRC_16_layers"
- layer {
- name: 'input-data'
- type: 'Python'
- top: 'data'
- top: 'im_info'
- top: 'gt_boxes'
- python_param {
- module: 'roi_data_layer.layer'
- layer: 'RoIDataLayer'
- param_str: "'num_classes': 3" #此处修改类别
- }
- }
第14行
- name: "VGG_ILSVRC_16_layers"
- layer {
- name: 'data'
- type: 'Python'
- top: 'data'
- top: 'rois'
- top: 'labels'
- top: 'bbox_targets'
- top: 'bbox_inside_weights'
- top: 'bbox_outside_weights'
- python_param {
- module: 'roi_data_layer.layer'
- layer: 'RoIDataLayer'
- param_str: "'num_classes': 3" #此处修改类别
- }
- }
- layer {
- name: "cls_score"
- type: "InnerProduct"
- bottom: "fc7"
- top: "cls_score"
- param { lr_mult: 1 }
- param { lr_mult: 2 }
- inner_product_param {
- num_output: 3 #此处修改类别
- weight_filler {
- type: "gaussian"
- std: 0.01
- }
- bias_filler {
- type: "constant"
- value: 0
- }
- }
- }
- layer {
- name: "bbox_pred"
- type: "InnerProduct"
- bottom: "fc7"
- top: "bbox_pred"
- param { lr_mult: 1 }
- param { lr_mult: 2 }
- inner_product_param {
- num_output: 12 #此处修改类别
- weight_filler {
- type: "gaussian"
- std: 0.001
- }
- bias_filler {
- type: "constant"
- value: 0
- }
- }
- }
第11行
- name: "VGG_ILSVRC_16_layers"
- layer {
- name: 'input-data'
- type: 'Python'
- top: 'data'
- top: 'im_info'
- top: 'gt_boxes'
- python_param {
- module: 'roi_data_layer.layer'
- layer: 'RoIDataLayer'
- param_str: "'num_classes': 3"
- }
- }
- base_lr: 0.0001
之后执行/py-fater-rcnn/data/scripts/fetch_imagenet_model.sh,得到imagenet的caffemodel文件,因为rpn网络的训练是以imagenet为初始值进行训练的。再之后修改py-faster-rcnn/lib/datasets/pascal_voc.py文件的31行,修改为自己的类别,如下:
- self._classes = ('__background__', # always index 0
- 'car', 'pedestrian')
修改py-faster-rcnn/lib/dataset/imdb.py文件,修改102行的append_flipped_images函数为:
- def append_flipped_images(self):
- num_images = self.num_images
- widths = [PIL.Image.open(self.image_path_at(i)).size[0]
- for i in xrange(num_images)]
- for i in xrange(num_images):
- boxes = self.roidb[i]['boxes'].copy()
- oldx1 = boxes[:, 0].copy()
- oldx2 = boxes[:, 2].copy()
- boxes[:, 0] = widths[i] - oldx2 - 1
- boxes[:, 2] = widths[i] - oldx1 - 1
- assert (boxes[:, 2] >= boxes[:, 0]).all()
- entry = {'boxes' : boxes,
- 'gt_overlaps' : self.roidb[i]['gt_overlaps'],
- 'gt_classes' : self.roidb[i]['gt_classes'],
- 'flipped' : True}
- self.roidb.append(entry)
- self._image_index = self._image_index * 2
接来下先介绍一下如何修改训练超参数(学习率已经在前面改过了,就不再说了),大多数超参数都是在/py-faster-rcnn/models/pascal_voc/VGG16/faster_rcnn_alt_opt目录下的所有的solver文件中进行改动的。只有训练次数不同,训练次数是在/py-faster-rcnn/tools/train_faster_rcnn_alt_opt.py中进行修改的:
- max_iters = [120000, 80000, 120000, 80000]
接下来就是在py-faster-rcnn目录下打开终端,执行下列命令:
- ./experiments/scripts/faster_rcnn_alt_opt.sh 0 VGG16 pascal_voc
训练中遇到了错误及问题
File "/py-faster-rcnn/tools/../lib/datasets/imdb.py", line 108, in append_flipped_images
assert (boxes[:, 2] >= boxes[:, 0]).all()
AssertionError
这个问题是由于faster rcnn会对Xmin,Ymin,Xmax,Ymax进行减一操作如果Xmin为0,减一后变为65535
解决方法如下
改/py-faster-rcnn/lib/fast_rcnn/config.py的61行,不使图片实现翻转,如下改为:
# Use horizontally-flipped images during training?
__C.TRAIN.USE_FLIPPED = False
问题四:
TypeError: ‘numpy.float64’ object cannot be interpreted as an index
这个错误是/py-faster-rcnn/lib/roi_data_layer下的minibatch.py中的npr.choice引起的(98行到116行),所以需要改成如下所示
- if fg_inds.size > 0:
- for i in range(0,len(fg_inds)):
- fg_inds[i] = int(fg_inds[i])
- fg_inds = npr.choice(fg_inds, size=int(fg_rois_per_this_image), replace=False)
- # Select background RoIs as those within [BG_THRESH_LO, BG_THRESH_HI)
- bg_inds = np.where((overlaps < cfg.TRAIN.BG_THRESH_HI) &
- (overlaps >= cfg.TRAIN.BG_THRESH_LO))[0]
- # Compute number of background RoIs to take from this image (guarding
- # against there being fewer than desired)
- bg_rois_per_this_image = rois_per_image - fg_rois_per_this_image
- bg_rois_per_this_image = np.minimum(bg_rois_per_this_image,
- bg_inds.size)
- # Sample foreground regions without replacement
- if bg_inds.size > 0:
- for i in range(0,len(bg_inds)):
- bg_inds[i] = int(bg_inds[i])
- bg_inds = npr.choice(bg_inds, size=int(bg_rois_per_this_image), replace=False)
问题五:
labels[fg_rois_per_this_image:] = 0
TypeError: slice indices must be integers or None or have an index method
这个错误是由numpy的版本引起的,只要将fg_rois_per_this_image强制转换为int型就可以了
labels[int(fg_rois_per_this_image):] = 0
问题六:bbox_targets[ind, start:end] = bbox_target_data[ind, 1:]
TypeError: slice indices must be integers or None or have an __index__ method
解决方法:修改/py-faster-rcnn/lib/rpn/proposal_target_layer.py,转到123行
for ind in inds:
cls = clss[ind]
start = 4 * cls
end = start + 4
bbox_targets[ind, start:end] = bbox_target_data[ind, 1:]
bbox_inside_weights[ind, start:end] = cfg.TRAIN.BBOX_INSIDE_WEIGHTS
return bbox_targets, bbox_inside_weights
这里的ind,start,end都是 numpy.int 类型,这种类型的数据不能作为索引,所以必须对其进行强制类型转换,转化结果如下:
- for ind in inds:
- ind = int(ind)
- cls = clss[ind]
- start = int(4 * cls)
- end = int(start + 4)
- bbox_targets[ind, start:end] = bbox_target_data[ind, 1:]
- bbox_inside_weights[ind, start:end] = cfg.TRAIN.BBOX_INSIDE_WEIGHTS
- return bbox_targets, bbox_inside_weights
问题七:
/home/iair339-04/py-faster-rcnn/tools/../lib/rpn/proposal_layer.py:175: RuntimeWarning: invalid value encountered in greater_equal
keep = np.where((ws >= min_size) & (hs >= min_size))[0]
解决方法
修改/py-faster-rcnn/lib/datasets/pascal_voc.py第204-207行,修改结果如下:
- x1 = float(bbox.find('xmin').text)
- y1 = float(bbox.find('ymin').text)
- x2 = float(bbox.find('xmax').text)
- y2 = float(bbox.find('ymax').text)
问题八:
mini_batch.py文件当中
仍然是numpy的版本问题,1.11.0以上的版本不支持非整数索引,需要修改为如下代码:
    for ind in inds:
        ind=int(ind)
        cls = clss[ind]
        start = int(4 * cls)
        end = int(start + 4)
        bbox_targets[ind, start:end] = bbox_target_data[ind, 1:]
        bbox_inside_weights[ind, start:end] = cfg.TRAIN.BBOX_INSIDE_WEIGHTS
问题九:
由于制作的xml文件没有pose,以及truncated属性,因此在测试阶段会报错,显示pose和truncated为空置
因此,在voc_eval.py文件当中注释掉这两个属性
def parse_rec(filename):
    """ Parse a PASCAL VOC xml file """
    tree = ET.parse(filename)
    objects = []
    for obj in tree.findall('object'):
        obj_struct = {}
        obj_struct['name'] = obj.find('name').text
        # obj_struct['pose'] = obj.find('pose').text
        # obj_struct['truncated'] = int(obj.find('truncated').text)
        obj_struct['difficult'] = int(obj.find('difficult').text)
        bbox = obj.find('bndbox')
        obj_struct['bbox'] = [int(bbox.find('xmin').text),
                              int(bbox.find('ymin').text),
                              int(bbox.find('xmax').text),
                              int(bbox.find('ymax').text)]
        objects.append(obj_struct)

    return objects
Faster rcnn测试
接下来是测试部分的代码修改,我使用的tools里的demo.py进行修改来实现模型的测试。首先我们要修改测试的模型文件
/py-faster-rcnn/models/pascal_voc/VGG16/faster_rcnn_alt_opt/faster_rcnn_test.pt文件
第392和第401行
- layer {
- name: "cls_score"
- type: "InnerProduct"
- bottom: "fc7"
- top: "cls_score"
- inner_product_param {
- num_output: 3 #修改类别数
- }
- }
- layer {
- name: "bbox_pred"
- type: "InnerProduct"
- bottom: "fc7"
- top: "bbox_pred"
- inner_product_param {
- num_output: 12 #修改类别数
- }
- }
第27行修改类别
- CLASSES = ('__background__',
- 'car', 'pedestrian') #此处修改类别
第31行修改模型名称为final caffemodel名称
- NETS = {'vgg16': ('VGG16',
- 'kitti4.caffemodel'),#修改model名字
- 'zf': ('ZF',
- 'ZF_faster_rcnn_final.caffemodel')}
第141行修改测试图片名称
- im_names = ['1348.png','1562.png','4714.png','5509.png','5512.png','5861.png','12576.png','12924.png',
- '22622.png','23873.png','2726.png','3173.png','8125.png','8853.png','9283.png','11714.png','24424.png',
- '25201.png','25853.png','27651.png']
之后运行demo.py便可以进行测试,在此我并没有把行人检测和车辆检测合并到同一个图片上,感兴趣的可以自己去网上搜索相关资料。
后记:
1.利用中间阶段生成的pkl输出多个框
参考https://blog.csdn.net/majinlei121/article/details/78903537
在训练和测试模型的时候,会产生pkl文件,用来记录训练的中间过程
pkl文件包含了多个框,也就是在nms之前的结果,nms将这些框进行非极大值抑制,最终获取了一个框
以车辆检测的pkl为例,py-faster-rcnn/output/faster_rcnn_alt_opt/voc_2007_test/VGG16_faster_rcnn_final/car_pr.pkl
在该路径下新建一个pkl文件夹/results文件夹
# -*- coding:utf-8 -*-

import os
import os.path
import numpy as np
import xml.etree.ElementTree as xmlET
from PIL import Image, ImageDraw
import cPickle as pickle

f = open('car_pr.pkl')
ship_pr = pickle.load(f)

test_file='/home/xuy/py-faster-rcnn/data/VOCdevkit2007/VOC2007/ImageSets/Main/test.txt'
file_path_img = '/home/xuy/py-faster-rcnn/data/VOCdevkit2007/VOC2007/JPEGImages'
save_file_path = 'pkl/results'

with open(test_file) as f:
    image_index = [x.strip() for x in f.readlines()]


f = open('detections.pkl')
info = pickle.load(f)
dets = info[1]


num = 0
for idx in xrange(len(dets)):
    if len(dets[idx]) == 0:
        continue
    img = Image.open(os.path.join(file_path_img, image_index[idx] + '.jpg'))
    draw = ImageDraw.Draw(img)
    for i in xrange(len(dets[idx])):
        box = dets[idx][i]
        draw.rectangle([int(np.round(float(box[0]))), int(np.round(float(box[1]))),
                    int(np.round(float(box[2]))), int(np.round(float(box[3])))], outline=(255, 0, 0))
    img.save(os.path.join(save_file_path, image_index[idx] + '.jpg'))
结果生成了所有测试集的候选框矩形框
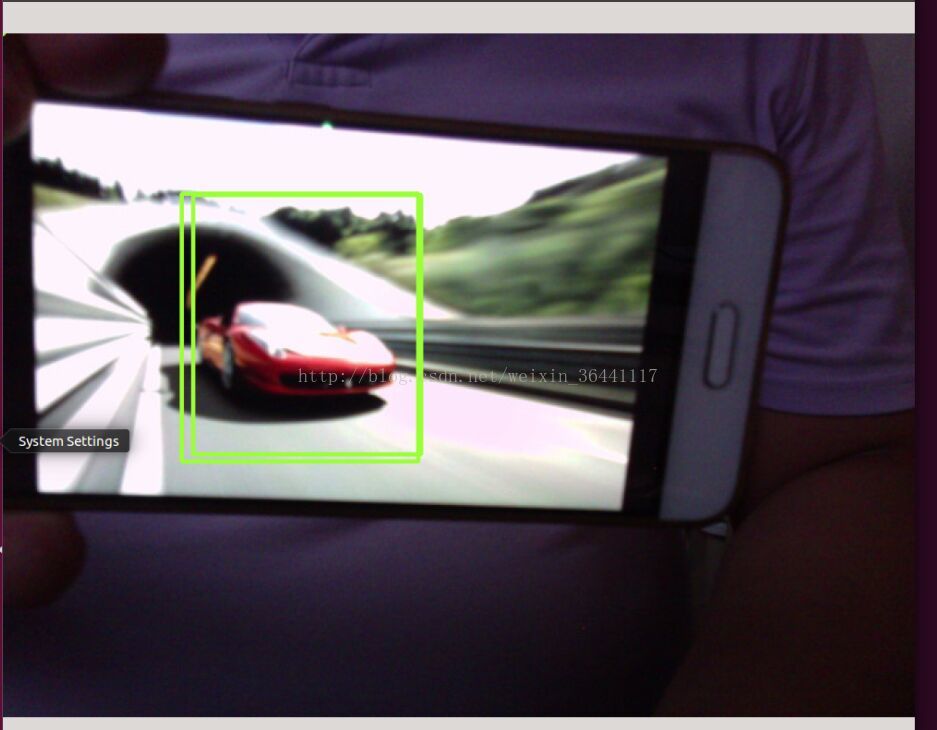
2.基于摄像头的实时监测
参考链接:https://blog.csdn.net/weixin_36441117/article/details/77127014?locationNum=5&fps=1
- # -*- coding:utf-8 -*-
- # 用于模型的单张图像分类操作
- import os
- os.environ['GLOG_minloglevel'] = '2' # 将caffe的输出log信息不显示,必须放到import caffe前
- import caffe # caffe 模块
- from caffe.proto import caffe_pb2
- from google.protobuf import text_format
- import numpy as np
- import cv2
- import matplotlib.pyplot as plt
- import time
- import skimage.io
- global num
- num = 0
- def detect(image1,net):
- # 传进来的image1的dtype为uint8
- # print image1.shape
- # print image1.dtype
- # print image1.size
- # image = np.array(image1, dtype=np.float32)
- # image = caffe.io.resize_image(image1, (480, 640))
- image = skimage.img_as_float(image1).astype(np.float32)
- # image = caffe.io.resize_image(image2, (300, 300))
- # skimage.io.imsave("photo.png", image)
- # cv2.imwrite("photo.png", image)
- # image = caffe.io.load_image(caffe_root + 'examples/images/bird.jpg')
- # 以下方式读取的imaged的dtype为float32
- # image = caffe.io.load_image(caffe_root + 'photo.png')
- # image = caffe.io.load_image(image1)
- # 改变dtype
- # image.dtype = 'float32'
- # print 'mode:'+image.mode
- # print image.shape
- # print image.dtype
- # print image.size
- # plt.imshow(image)
- # * Run the net and examine the top_k results
- # In[5]:
- global num
- num += 1
- print 'image num:' + str(num)
- transformed_image = transformer.preprocess('data', image)
- net.blobs['data'].data[...] = transformed_image
- time_start=time.time()
- # Forward pass.
- net.forward()
- time_end=time.time()
- print 'time:' + str(time_end-time_start) + ' s'
- loc = net.blobs['bbox-list'].data[0]
- print(loc)
- #查看了结构文件发现在CAFFE一开始图像输入的时候就已经将图片缩小了,宽度1248高度384
- #然后我们在net.blobs['bbox-list'].data得到的是侦测到的目标座标,但是是相对于1248*384的
- #所以我们要把座标转换回相对原大小的位置,下面im.shape是保存在原尺寸的宽高,
- for l in range(len(loc)):
- xmin = int(loc[l][0] * image.shape[1] / 1248)
- ymin = int(loc[l][1] * image.shape[0] / 384)
- xmax = int(loc[l][2] * image.shape[1] /1248)
- ymax = int(loc[l][3] * image.shape[0] / 384)
- #在该座标位置画一个方框
- cv2.rectangle(image, (xmin, ymin), (xmax, ymax), (55 / 255.0, 255 / 255.0, 155 / 255.0), 2)
- # 显示结果
- #plt.imshow(image, 'brg')
- #plt.show()
- cv2.imshow('img', image)
- def show_info(cam):
- print 'POS_FRAMES:'+str(cam.get(1))
- print 'FRAME_COUNT:'+str(cam.get(7))
- print 'FORMAT:'+str(cam.get(8))
- print 'MODE:'+str(cam.get(9))
- print 'SATURATION:'+str(cam.get(12))
- print 'FPS:'+str(cam.get(5))
- #CPU或GPU模型转换
- caffe.set_mode_gpu()
- #caffe.set_mode_cpu()
- #caffe.set_device(0)
- caffe_root = '/var/smb/work/mycode/'
- # 网络参数(权重)文件
- caffemodel = caffe_root + 'module/detectnet/snapshot_iter_2391.caffemodel'
- # 网络实施结构配置文件
- deploy = caffe_root + 'module/detectnet/deploy.prototxt'
- img_root = caffe_root + 'data/'
- # 网络实施分类
- net = caffe.Net(deploy, # 定义模型结构
- caffemodel, # 包含了模型的训练权值
- caffe.TEST) # 使用测试模式(不执行dropout)
- # 加载ImageNet图像均值 (随着Caffe一起发布的)
- print(os.environ['PYTHONPATH'])
- #mu = np.load(os.environ['PYTHONPATH'] + '/caffe/imagenet/ilsvrc_2012_mean.npy')
- #mu = mu.mean(1).mean(1) # 对所有像素值取平均以此获取BGR的均值像素值
- # 图像预处理
- transformer = caffe.io.Transformer({'data': net.blobs['data'].data.shape})
- transformer.set_transpose('data', (2,0,1))
- #transformer.set_mean('data', mu)
- transformer.set_raw_scale('data', 255)
- transformer.set_channel_swap('data', (2,1,0))
- # 处理图像
- cam = cv2.VideoCapture(0)
- if cam.isOpened():
- cam.set(3, 400)
- cam.set(4, 300)
- cam.set(5, 3)
- time.sleep(6)
- cam.set(15, -8.0)
- size = (int(cam.get(3)), int(cam.get(4)))
- print 'size:'
- print size
- cv2.namedWindow('img', cv2.WINDOW_NORMAL)
- # cnt=2
- # while cnt:
- # cnt -= 1
- while cam.isOpened():
- ret, img = cam.read()
- if ret:
- #show_info(cam)
- detect(img,net)
- if 0xFF == ord('q') & cv2.waitKey(5) == 27:
- break
- # time.sleep(0.033)
- cam.release()
- cv2.destroyAllWindows()


 3252
3252


 被折叠的 条评论
为什么被折叠?
被折叠的 条评论
为什么被折叠?
 到【灌水乐园】发言


