


python+OpenCV实现image stitching
在最新的OpenCV官方文档中可以找到C++版本的Stitcher类的说明, 但是python版本的还没有及时更新, 本篇对python版本的实现做一个简单的介绍.
由于官方文档中还没有python版本的Stitcher类的说明, 因此只能自己去GitHub源码上找, 以下是stitching的样例:
from __future__ import print_function
import cv2 as cv
import numpy as np
import argparse
import sys

modes = (cv.Stitcher_PANORAMA, cv.Stitcher_SCANS)

parser = argparse.ArgumentParser(description='Stitching sample.')
parser.add_argument('--mode',
    type = int, choices = modes, default = cv.Stitcher_PANORAMA,
    help = 'Determines configuration of stitcher. The default is `PANORAMA` (%d), '
         'mode suitable for creating photo panoramas. Option `SCANS` (%d) is suitable '
         'for stitching materials under affine transformation, such as scans.' % modes)
parser.add_argument('--output', default = 'result.jpg',
    help = 'Resulting image. The default is `result.jpg`.')
parser.add_argument('img', nargs='+', help = 'input images')
args = parser.parse_args()

# read input images
imgs = []
for img_name in args.img:
    img = cv.imread(img_name)
    if img is None:
        print("can't read image " + img_name)
        sys.exit(-1)
    imgs.append(img)

stitcher = cv.Stitcher.create(args.mode)
status, pano = stitcher.stitch(imgs)

if status != cv.Stitcher_OK:
    print("Can't stitch images, error code = %d" % status)
    sys.exit(-1)

cv.imwrite(args.output, pano);
print("stitching completed successfully. %s saved!" % args.output)
上面写了一大堆, 然鹅, 直接拿来用的话, 用下面的代码可以了, 简单粗暴
import numpy as np
import cv2
from cv2 import Stitcher

if __name__ == "__main__":
    img1 = cv2.imread('1.jpg')
    img2 = cv2.imread('2.jpg')
    stitcher = cv2.createStitcher(False)
    #stitcher = cv2.Stitcher.create(cv2.Stitcher_PANORAMA), 根据不同的OpenCV版本来调用
    (_result, pano) = stitcher.stitch((img1, img2))
    cv2.imshow('pano',pano)
    cv2.waitKey(0)
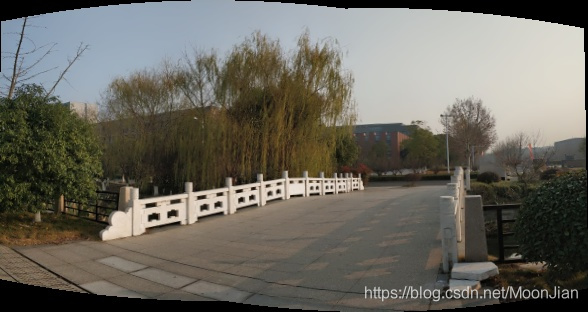
效果如下:
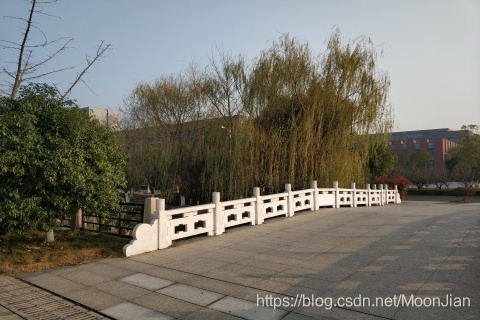
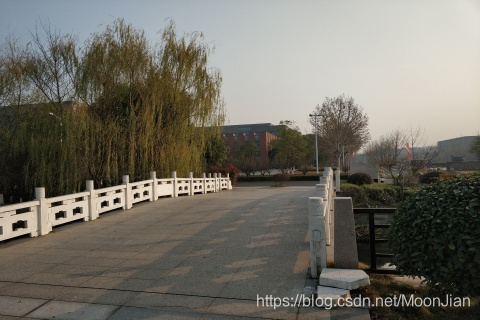
原图:
拼接后的图像:


 994
994


 被折叠的 条评论
为什么被折叠?
被折叠的 条评论
为什么被折叠?
 到【灌水乐园】发言


