


Win10 环境下VScode C++配置
VScode安装
中途:这些可以勾选,便不需要手动配置环境变量path

VScode安装完成后,打开软件,安装C++插件:

安装MinGW
官方下载链接
安装时根据自己电脑32还是64位对应选择与安装。
记住安装的位置,后面要指定bin的路径,配置环境变量。

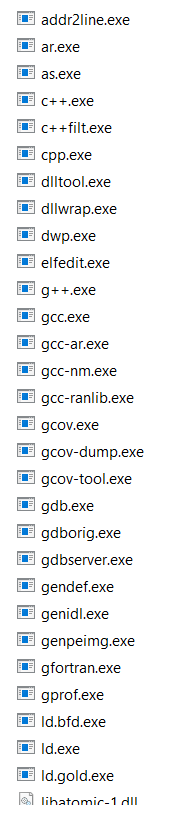
bin目录下有很多这种文件:
开始配置环境变量:
右击我的电脑—属性—高级系统设置—环境变量----系统变量中找到PATH, 点击右上方NEW,将bin的路径加进去:

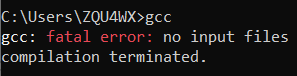
完成后,打开运行—输入cmd----输入gcc–回车,得到如下界面即表示成功。
VScode中运行c++
创建一个文件夹和示例文件test.cpp,vscode打开
加入测试代码:
#include <iostream>
using namespace std;
int main() {
    cout << "hello\n";
    cout << "hello\n";
    cout << "hello\n";
    return 0;
}
显示如图(先不看json文件,后面配置)

task.json文件
工具栏:Terminal > Configure Default Build Task
选择C/C++: g++.exe build active file
自动生成代码文件: 不需要改动,默认即可
{
	"version": "2.0.0",
	"tasks": [
		{
			"type": "cppbuild",
			"label": "C/C++: g++.exe build active file",
			"command": "C:\\mingw64\\bin\\g++.exe",
			"args": [
				"-g",
				"${file}",
				"-o",
				"${fileDirname}\\${fileBasenameNoExtension}.exe"
			],
			"options": {
				"cwd": "${fileDirname}"
			},
			"problemMatcher": [
				"$gcc"
			],
			"group": {
				"kind": "build",
				"isDefault": true
			},
			"detail": "compiler: C:\\mingw64\\bin\\g++.exe"
		}
	]
}
launch.json文件
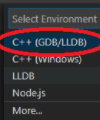
点击工具栏中Run > Add Configuration
生成json文件,这是已经修改完后的:
{
    // Use IntelliSense to learn about possible attributes.
    // Hover to view descriptions of existing attributes.
    // For more information, visit: https://go.microsoft.com/fwlink/?linkid=830387
    "version": "0.2.0",
    "configurations": [
        {
            "name": "(gdb) Launch",
            "type": "cppdbg",
            "request": "launch",
            "program": "${fileDirname}\\${fileBasenameNoExtension}.exe",
            "args": [],
            "stopAtEntry": false,
            "cwd": "${fileDirname}",
            "environment": [],
            "externalConsole": false,  //false 是否输出到外部窗口
            "MIMode": "gdb",
            "miDebuggerPath": "C:/mingw64/bin/gdb.exe", //根据自身MinGW路径:
            "setupCommands": [
                {
                    "description": "Enable pretty-printing for gdb",
                    "text": "-enable-pretty-printing",
                    "ignoreFailures": true
                }
            ],
            "preLaunchTask": "C/C++: g++.exe build active file"  //新增
        }
    ]
}
** 修改的地方 **
- 增加可执行文件的名字:(修改一下)
“program”: “${fileDirname}\${fileBasenameNoExtension}.exe”, - “externalConsole”: false, //false 是否输出到外部窗口
- “miDebuggerPath”: “C:/mingw64/bin/gdb.exe”, //根据自身MinGW路径
- 增加一条语句: “preLaunchTask”: “C/C++: g++.exe build active file” //新增
至此VScode的c++运行环境配置完成,可以点击运行啦,撒花花~
点击右边的三角箭头就可以啦:


 22万+
22万+


 被折叠的 条评论
为什么被折叠?
被折叠的 条评论
为什么被折叠?
 到【灌水乐园】发言


