


windows 下安装并配置c++版本的opencv 4.8.0
官方文档:OpenCV: Installation in Windows
其实主要就5步(前4步太简单了):
- Launch a web browser of choice and go to our page on Sourceforge.
- Choose a build you want to use and download it.
- Make sure you have admin rights. Unpack the self-extracting archive.
- You can check the installation at the chosen path as you can see below.
- To finalize the installation go to the Set the OpenCV environment variable and add it to the systems path section.
翻译:
- 到官网去
- 选择需要的版本下载(windows就选exe)
- 以管理员权限解压下载的文件
- 在选择解压的路径下,检查解压的文件是否完整
- 设置opencv的环境变量并添加到系统路径中
有关第5步的说明,具体还是看文档吧:
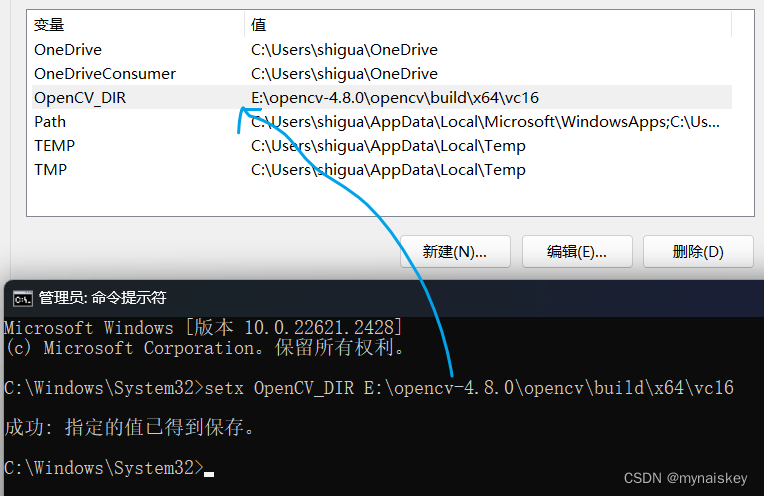
现在visual studio 2019以上的版本一般都使用vc16,不过这还是得看你自己下的opencv的文件夹到底是什么名字

输入setx OpenCV_DIR xxx 就会自动设置用户的环境变量
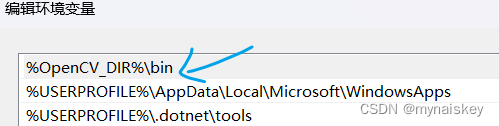
然后再把bin目录添加到环境变量的路径中


 2094
2094


 被折叠的 条评论
为什么被折叠?
被折叠的 条评论
为什么被折叠?
 到【灌水乐园】发言


