


先看效果
上传一张图片和一段音频,照片如下:

合成后效果如下:
照片对口型-音频驱动
支持音频驱动和视频驱动,视频可以使照片有参照视频中的口型和和动作。
项目地址
https://github.com/yerfor/Real3DPortrait
我的环境
win10,python3.10.8,cuda11.7
环境部署
安装步骤:https://github.com/yerfor/Real3DPortrait/blob/main/docs/prepare_env/install_guide.md
windows下torch torchvision torchaudio的安装参照https://pytorch.org/get-started/locally/,选择对应的平台、cuda版本后复制安装命令:pip3 install torch torchvision torchaudio --index-url https://download.pytorch.org/whl/cu…
visualstudio安装:https://visualstudio.microsoft.com/zh-hans/downloads/
cuda安装:https://developer.nvidia.com/cuda-toolkit-archive,之前安装其他版本CUDA的不用卸载,可以同时安装两个,在环境变量中设置CUDA_HOME就行。

安装中遇到的问题
- 安装Pytorch3D报错:
3 errors detected in the compilation of “C:/Users/Administrator/AppData/Local/Temp/pip-reg-bui1d-0hwl1r79/pytorch3d/csrc/pulsar
cuda/renderer.backward. gpu. cu”.

解决方案:参考链接 https://github.com/facebookresearch/pytorch3d/issues/1227
省流:据说是CUDA中的CUB版本不行(1.15),要手动重新下载1.17版本,在https://github.com/NVIDIA/cub/releases下载cub1.17版本,替换cuda下的cub(C:\Program Files\NVIDIA GPU Computing Toolkit\CUDA\v11.7\include\cub)
然而替换以后我这里换了一个错(C:/Program Files/NVIDIA GPU Computing Toolkit/CUDA/v11.7/include\thrust/system/cuda/config.h(79): fatal error C1189: #error: Tle version of CUB in your include path is not compatible with this release of Thrust. CUB is now included in the CuA Toolkit, so you no longer need to use your own checkout of CUB. Define THRUST IGNORE CUB VERSION CHECK to ignore this. error:command ’C:\Program Files!\NVIDIA GPU Computing Toolkit\CUDAl\v11. 7\bin\nvcc.exe’ failed with exit code 2):
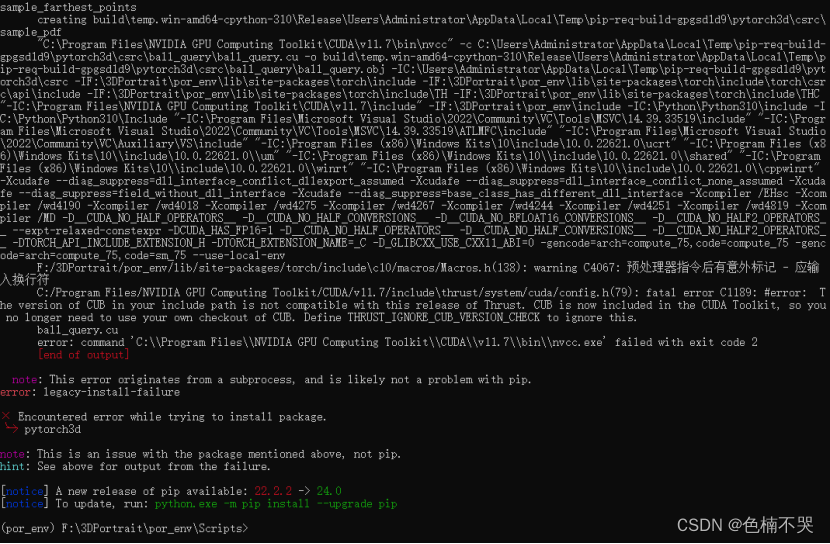
是说CUB版本和CUDA版本不匹配,在CUDA11.7/include/cub文件夹下,打开 version.cuh, 在“#pragma once”下面一行添加:#define THRUST_IGNORE_CUB_VERSION_CHECK,取消版本号检查。 - 安装python依赖包报错(cmake问题):
ERROR: CMake must be installed to build dlib

解决方案:安装cmake:https://cmake.org/files/,我装了3.27版本(下载x86_64.msi)。 - 运行报错(pyplot问题)
AttributeError: module ‘backend_interagg’ has no attribute ‘FigureCanvas’. Did you mean: ‘FigureCanvasAgg’?
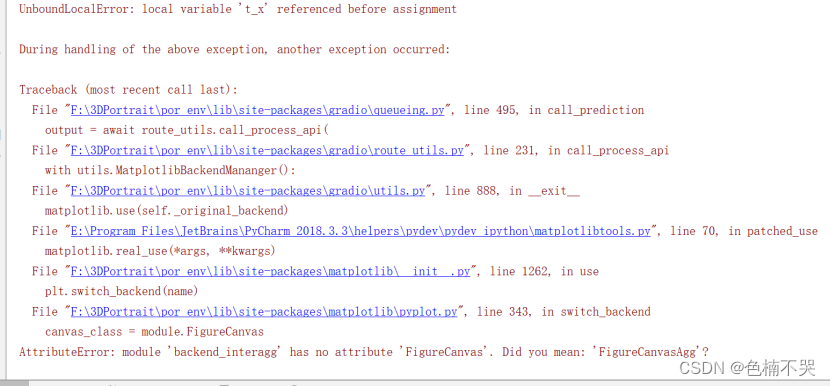
解决方案:参考https://blog.csdn.net/lsb2002/article/details/135149302
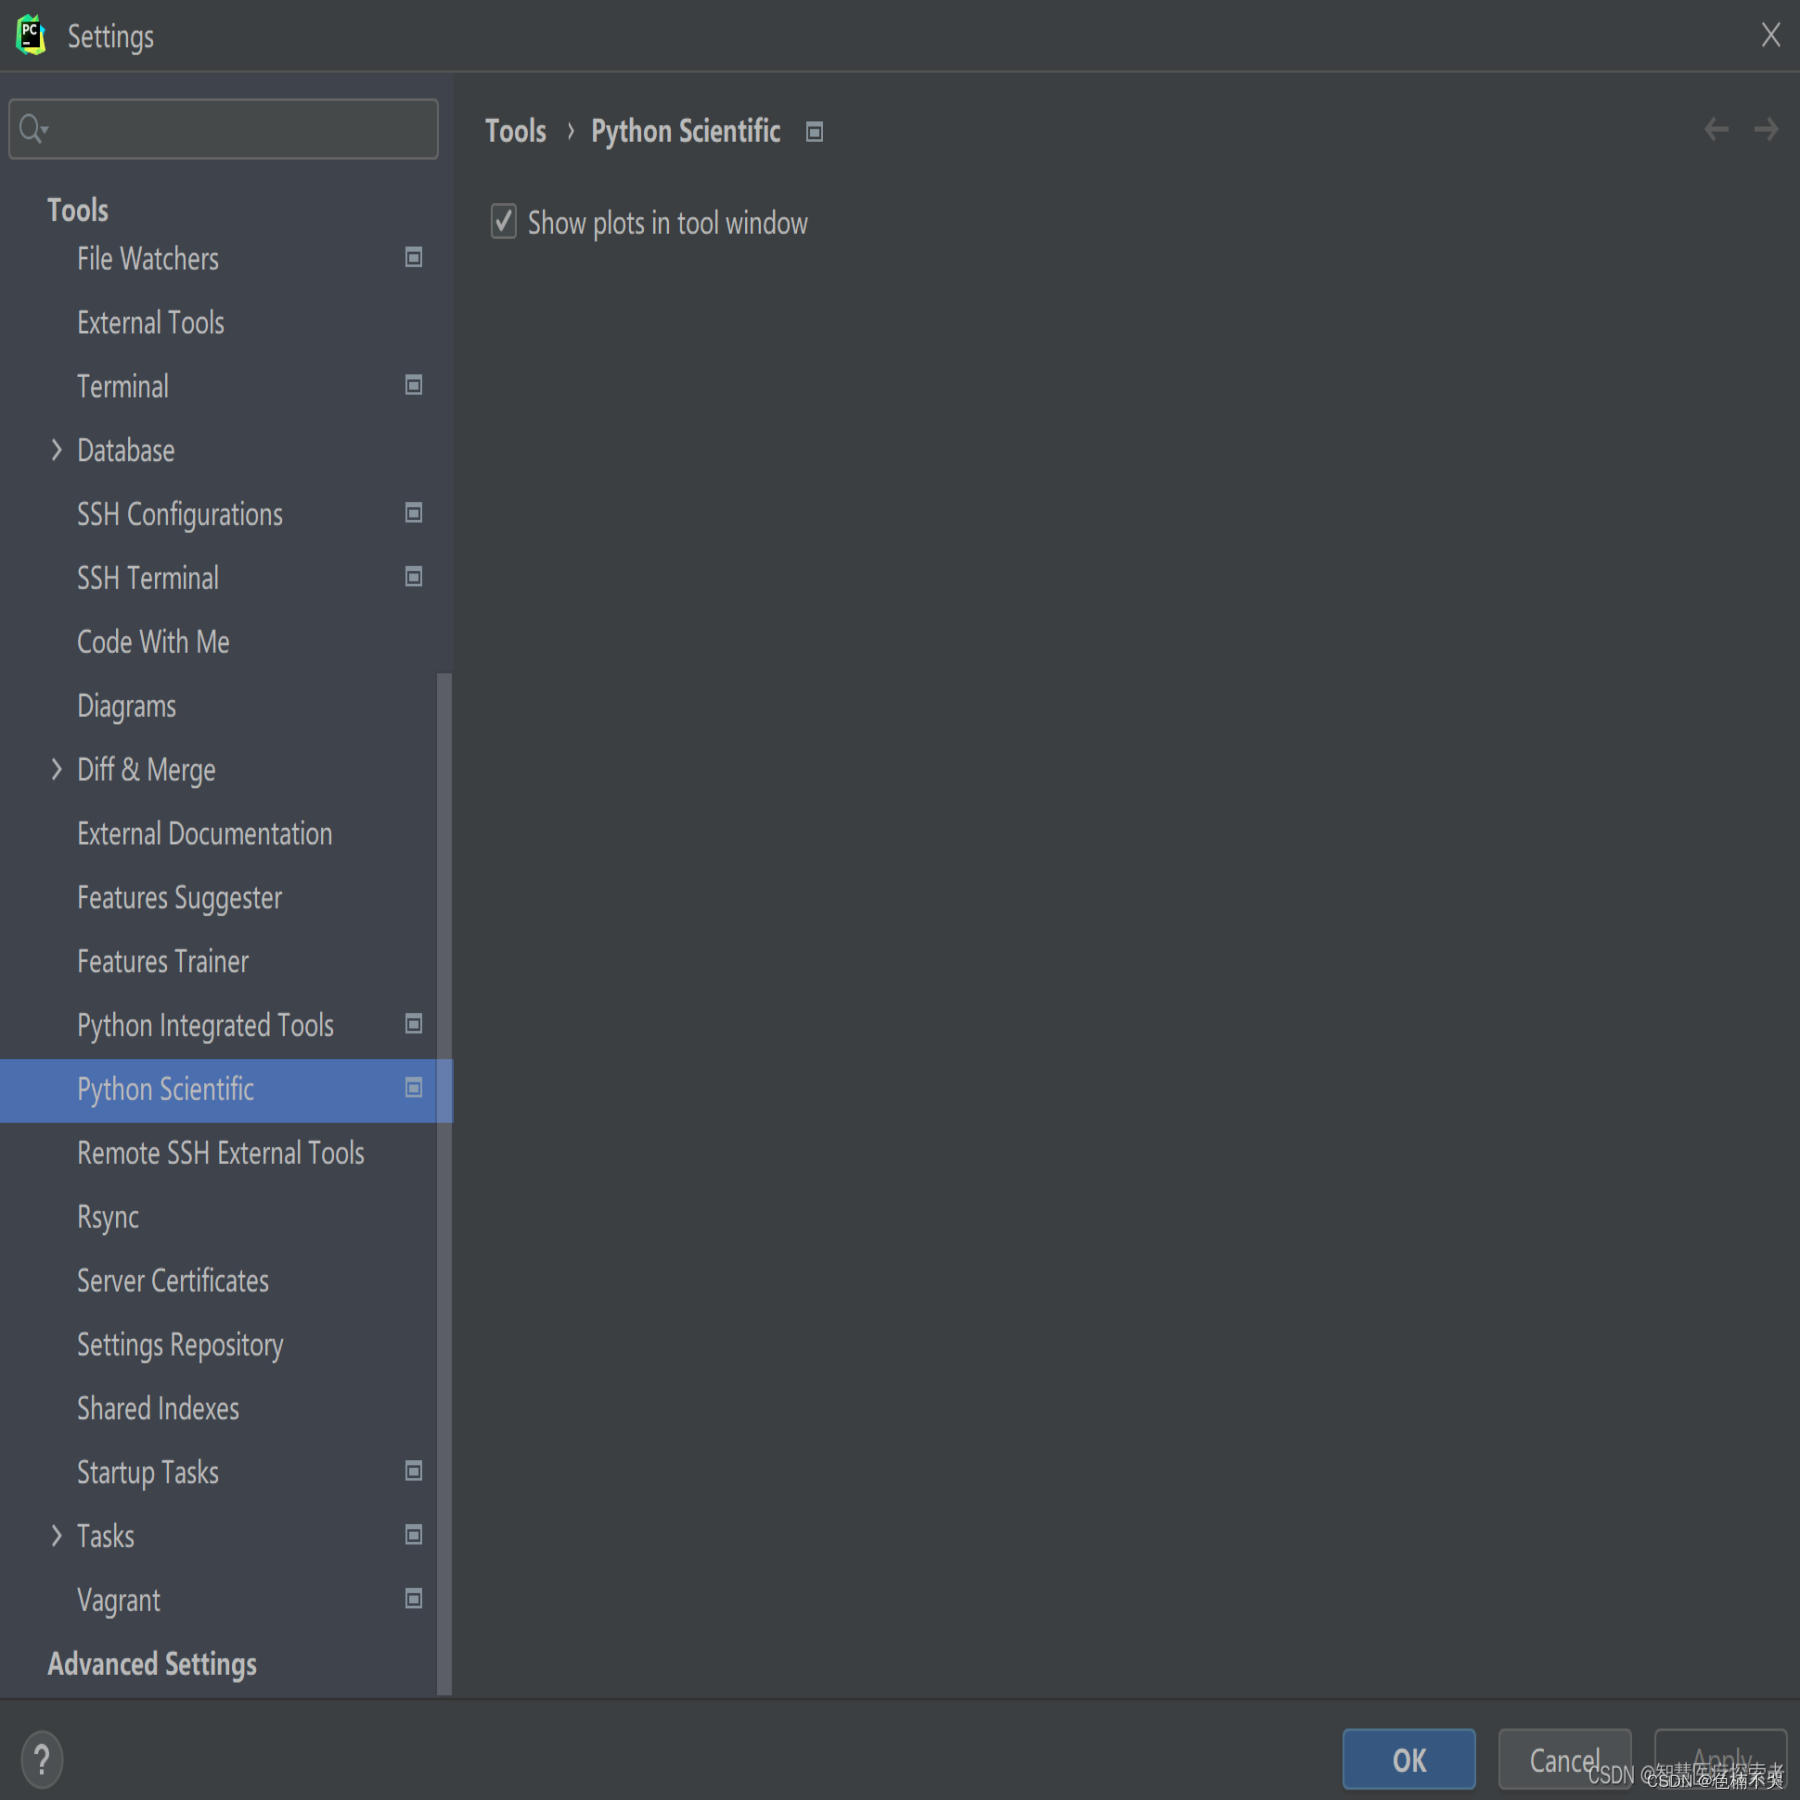
省流:方案1:在pycharm的setting–>Tools–>Python Scientific中去掉“show plots in tool window”的勾选。(或者直接cmd运行就没问题)
方案2:matplotlib切换图形界面显示终端TkAgg,在使用matplotlib的python文件中增加两行代码,如下所示:
import matplotlib
matplotlib.use('TkAgg')
方案3:降低matplotlib版本,pip install matplotlib==3.5.0
- 运行报错 无法打开文件“python310.lib”
LINK:fatal error LNK1104:无法打开文件“python310.lib”
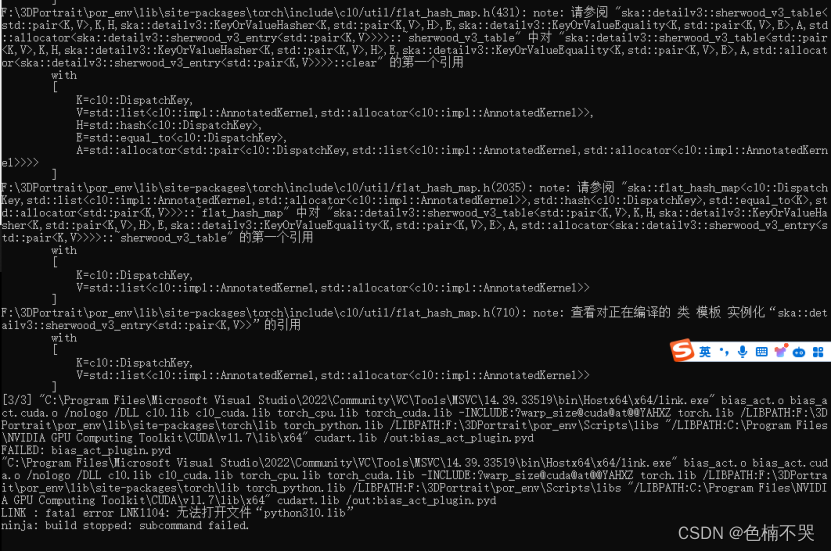
解决方案:参照https://blog.csdn.net/dalaomanzou/article/details/133851299
省流:python安装目录下的Python310\libs\python310.lib文件复制到虚拟环境的/venv/Scripts/libs下,没有libs文件夹就手动创建 - 运行报错:
ImportError: DLL load failed while importing bias_act_plugin: 找不到指定的模块
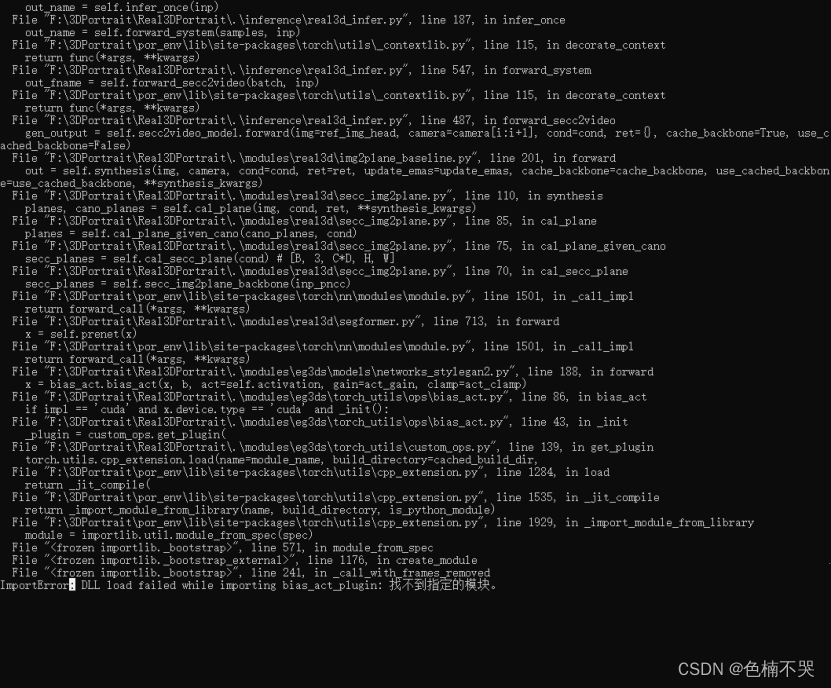
解决方案:可以先看一下https://github.com/NVlabs/stylegan3/issues/88,首先确定cuda版本,我之前装的是12.1好像不行(不确定,因为我没有按照如下方式添加环境变量,等我重新下载好11.7版本后这个问题还是在,然后找到了下面的解决方案),又重新装了个11.7,然后
设置环境变量CUDA_HOME=C:\Program Files\NVIDIA GPU Computing Toolkit\CUDA\v11.7 - error: (-215:Assertion failed) !_src.empty() in function ‘cv::cvtColor’
代码里面 cv2.cvtColor(img, cv2.COLOR_RGB2BGR)中的img参数的值为空了,原因是代码中涉及复制图片的命令在windows下是错误的,inference/real3d_infer.py中的crop_img_on_face_area_percent函数,out_name是路径要改为windows下路径格式:out_name = os.path.normpath(out_name),然后“cmd = f"cp {img_name} {out_name}"”中的cp命令要改为copy(同样代码中有“rm”命令也要改)。
 def crop_img_on_face_area_percent(img_name, out_name='temp/cropped_src_img.png', min_face_area_percent=0.2):
    out_name = os.path.normpath(out_name)
    try:
        os.makedirs(os.path.dirname(out_name), exist_ok=True)
    except: pass
    face_area_percent = cal_face_area_percent(img_name)
    if face_area_percent >= min_face_area_percent:
        print(f"face area percent {face_area_percent} larger than threshold {min_face_area_percent}, directly use the input image...")
        cmd = f"copy {img_name} {out_name}"
        os.system(cmd)
        return out_name
可能遇到的其他问题
我之前的CUDA版本是12.1,安装过程中各种出错,后来重新下载了11.7版本,删掉虚拟环境,从头开始。CUDA12.1版本遇到的问题如下
-
from pytorch3d import _C报错,no module named _C
没找到解决方案,11.7版本下没这个错了 -
阿萨德
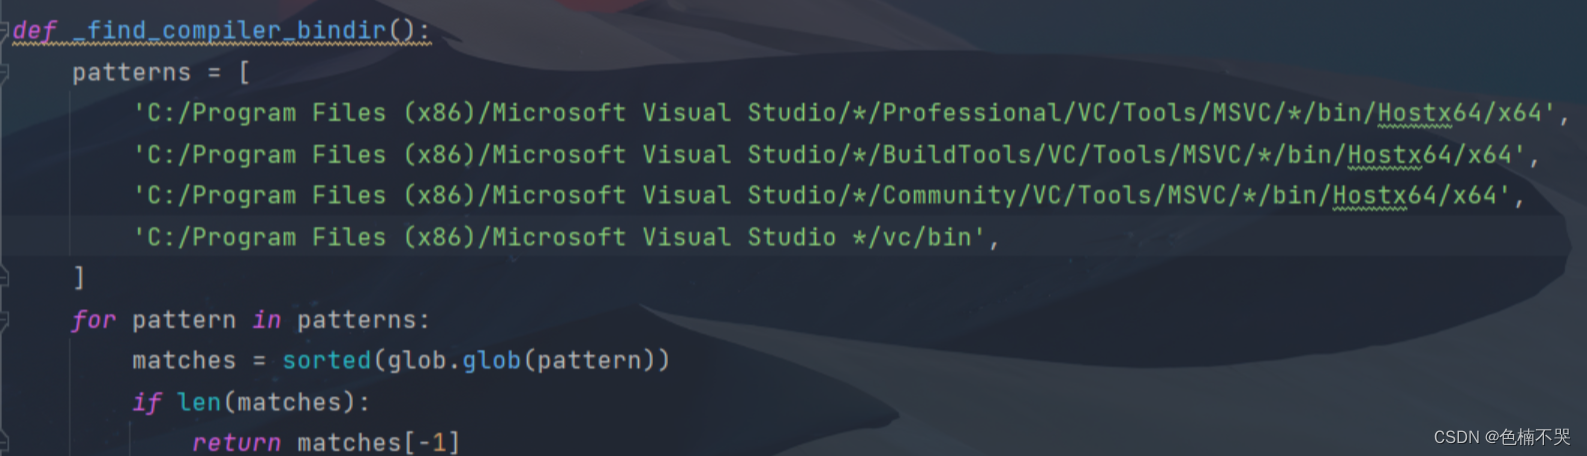
Could not find MSVC/GCC/CLANG installation on this computer.
解决方案:安装visualstudiohttps://visualstudio.microsoft.com/zh-hans/downloads/
将custom_ops.py中patterns的C++编译环境换成自己的。(可参考:https://blog.csdn.net/liuzi_hang/article/details/128063113)
-
‘parselmouth’ has no attribute ‘Sound’
好像是python包版本问题,途中更改其他版本没问题了,但是忘记哪个版本了。后来cuda切换到11.7重新安装所有依赖后没这个问题了。 -
multiple exception types must be parenthesized
也是python包版本问题。同上。 -
python3 cannot import name ‘quote’ from ‘urllib’
出现这个错误的原因是因为Python 3中的urllib模块被分为了几个子模块,包括urllib.request、urllib.parse、urllib.error、urllib.robotparser等。在Python 2中,所有这些子模块都包含在urllib中,但在Python 3中,它们被分离出来,以提高代码的可读性和可维护性。要解决这个问题,需要从urllib.parse模块中导入quote函数。同样是因为版本问题,切换cuda版本后未遇到该问题。 -
cannot import name “Mapping“ from “collection
3.10版本后对requests库有进行调整,collections中不能直接调用Mapping、MutableMapping
打开python解释器下的lib里的collections文件夹下的init文件,collections/init.py,调用方式改为:
from collections.abc import Mapping
from collections.abc import MutableMapping
同样是因为版本问题,切换cuda版本后未遇到该问题。 -
error in googleads setup command: use_2to3 is invalid
因为在setuptools 58之后的版本已经废弃了use_2to3,所以将setuptools回退到58以前的版本:pip install setuptools==57.5.0
切换cuda版本后未遇到该问题。
下载模型
https://github.com/yerfor/Real3DPortrait/blob/main/README-zh.md
下载预训练与第三方模型
3DMM BFM模型
下载3DMM BFM模型:BaiduYun Disk 提取码: m9q5
下载完成后,放置全部的文件到deep_3drecon/BFM里,文件结构如下:
deep_3drecon/BFM/
├── 01_MorphableModel.mat
├── BFM_exp_idx.mat
├── BFM_front_idx.mat
├── BFM_model_front.mat
├── Exp_Pca.bin
├── facemodel_info.mat
├── index_mp468_from_mesh35709.npy
├── mediapipe_in_bfm53201.npy
└── std_exp.txt
下载预训练模型
下载预训练的Real3D-Portrait:BaiduYun Disk 提取码: 6x4f
下载完成后,放置全部的文件到checkpoints里并解压,文件结构如下:
checkpoints/
├── 240210_real3dportrait_orig
│ ├── audio2secc_vae
│ │ ├── config.yaml
│ │ └── model_ckpt_steps_400000.ckpt
│ └── secc2plane_torso_orig
│ ├── config.yaml
│ └── model_ckpt_steps_100000.ckpt
└── pretrained_ckpts
└── mit_b0.pth
启动
python inference/app_real3dportrait.py
界面
左侧四个输入从上到下依次是:待转换图片,待转换音频,参考视频(图片将按照该视频语音、动作生成视频),背景图片。
中间参数:
blink mode:是否阶段性眨眼
min_face_area_percent:设置输出的视频帧最小脸部区域占比
temperature:代表audio2motion的采样温度,值越大结果越多样,但同时精确度越低
mouth amplitude:嘴部张幅参数,值越大张幅越大
output layout:选择最终输出的视频是否包含debug信息
Whether to map pose of first frame to initial pose:首帧的pose将被映射到source pose,后续帧也作相同变换
点击“generate”按钮生成视频


 879
879


 被折叠的 条评论
为什么被折叠?
被折叠的 条评论
为什么被折叠?
 到【灌水乐园】发言


