


一、前言
一般做前端很少直接接触后端服务和数据的事情,为了打破这种限制,同时也是一种尝试,因此我做了这个案例。本案例前端是选择vue3,状态管理库是vuex。
二、有哪些功能需求?
1、前端:
- 登录
- 注销
- 学生信息的增删改查功能
2、后端:
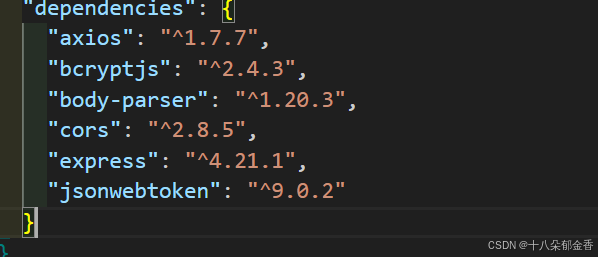
需要用到的第三方库
三、代码实现
注意:在此不演示vue3项目的创建过程,有需要请自行查找了解。
本次案例主要是给思路,展示部分代码,但部分文件的创建以及代码撰写,需要大家动手实现。
1、安装项目需要的包:
npm install axios bcryptjs body-parser cors express jsonwebtokenbcryptjs:主要是用于对登录的密码进行哈希加密
2、后端server.js
用于撰写接口,鉴权以及启动服务等。
const express = require('express');
const cors = require('cors');
const data = require('./data');
const jwt = require('jsonwebtoken');
const bcrypt = require('bcryptjs');

const app = express();

// 验证JWT令牌的中间件
const authenticate = (req, res, next) => {
  const token = req.header('Authorization').replace('Bearer ', '');
  if (!token) {
    return res.status(401).json({ message: 'Access denied. No token provided.' });
  }

  try {
    const decoded = jwt.verify(token, 'your_jwt_secret');
    req.user = decoded;
    next();
  } catch (ex) {
    res.status(400).json({ message: 'Invalid token.' });
  }
};

// 获取所有学生信息
app.get('/api/students', authenticate, (req, res) => {
  res.json(data.students);
});

// 添加学生信息
app.post('/api/students', authenticate, (req, res) => {
  const { name, age } = req.body;
  const newStudent = { id: Date.now(), name, age };
  data.students.push(newStudent);
  res.status(201).json(newStudent);
});

// 更新学生信息
app.put('/api/students/:id', authenticate, (req, res) => {
  const { id } = req.params;
  const { name, age } = req.body;
  const studentIndex = data.students.findIndex(s => s.id.toString() === id);
  if (studentIndex === -1) {
    return res.status(404).json({ message: 'Student not found' });
  }
  data.students[studentIndex] = { ...data.students[studentIndex], name, age };
  res.json(data.students[studentIndex]);
});

// 删除学生信息
app.delete('/api/students/:id', authenticate, (req, res) => {
  const { id } = req.params;
  const studentIndex = data.students.findIndex(s => s.id.toString() === id);
  if (studentIndex === -1) {
    return res.status(404).json({ message: 'Student not found' });
  }
  data.students.splice(studentIndex, 1);
  res.json({ message: 'Student deleted successfully' });
});

// 用户登录
app.post('/api/login', async (req, res) => {
  const { username, password } = req.body;
  const user = data.users.find(u => u.username === username);

  if (!user) {
    return res.status(400).json({ message: 'User not found' });
  }

  const isMatch = await bcrypt.compare(password, user.password);
  if (!isMatch) {
    return res.status(400).json({ message: 'Invalid credentials' });
  }

  const token = jwt.sign({ id: user.id }, 'your_jwt_secret', { expiresIn: '1h' });
  res.json({ token });
});

// 使用中间件
app.use(cors());
app.use(express.json());

// 全局错误处理中间件
app.use((err, req, res, next) => {
  console.error(err.stack);
  res.status(500).json({ message: 'Internal Server Error' });
});

// 启动服务
const PORT = process.env.PORT || 5000;
app.listen(PORT, () => console.log(`Server running on port ${PORT}`));
3、data.js:
用于存储学生信息数据以及用户数据
const bcrypt = require('bcryptjs')

const hashedPassword = bcrypt.hashSync('123', 10) // 生成哈希密码

module.exports = {
  students: [
    { id: 1, name: '张三', age: 20 },
    { id: 2, name: '李四', age: 21 },
    { id: 3, name: '王五', age: 22 },
  ],
  users: [
    { id: 1, username: 'admin', password: hashedPassword }, // 使用哈希密码
    { id: 2, username: 'user', password: hashedPassword }, // 使用哈希密码
  ],
}
4、运行调试:
在后端项目目录下打开终端,执行node server.js

看到这条语句则表示后端服务启动成功。
5、前端代码:
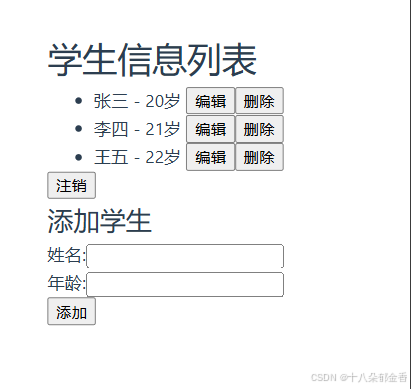
src/components/StudentList.vue:(学生信息展示页面)
<template>
<div>
<h1>学生信息列表</h1>
<ul>
<li v-for="student in students" :key="student.id">
{
{ student.name }} - {
{ student.age }}岁
<button @click="editStudent(student)">编辑</button>
<button @click="deleteStudent(student.id)">删除</button>
</li>
</ul>
<button @click="logout">注销</button>
<!-- 添加学生表单 -->
<div>
<h2>添加学生</h2>
<form @submit.prevent="addStudent">
<div>
<label for="name">姓名:</label>
<input type="text" id="name" v-model="newStudent.name" required />
</div>
<div>
<label for="age">年龄:</label>
<input type="number" id="age" v-model="newStudent.age" required />
</div>
<button type="submit">添加</button>
</form>
</div>
<!-- 编辑学生模态框 -->
<div v-if="editingStudent" class="modal">
<div class="modal-content">
<span class="close" @click="cancelEdit">×</span>
<h2>编辑学生信息</h2>
<form @submit.prevent="updateStudent">
<div>
<label for="edit-name">姓名:</label>
<input type="text" id="edit-name" v-model="editingStudent.name" required />
</div>
<div>
<label for="edit-age">年龄:</label>
<input type="number" id="edit-age" v-model="editingStudent.age" required />
</div>
<button type="submit">保存</button>
<button type="button" @click="cancelEdit">取消</button>
</form>
</div>
</div>
</div>
</template>
<script setup>
import { computed, ref } from 'vue'
import { useStore } from 'vuex'
import { useRouter } from 'vue-router'
const router = useRouter()
const store = useStore()
const students = computed(() => store.getters.getStudents)
const newStudent = ref({ name: '', age: '' })
const editingStudent = ref(null)
const addStudent = async () => {
try {
await store.dispatch('addStudent', newStudent.value)
newStudent.value = { name: '', age: '' } // 清空表单
} catch (error) {
console.error('添加学生失败:', error)
}
}
const editStudent = (student) => {
editingStudent.value = { ...student }
}
const updateStudent = async () => {
try {
await store.dispatch('updateStudent', editingStudent.value)
editingStudent.value = null // 关闭模态框
} catch (error) {
console.error('更新学生失败:', error)
}
}
const cancelEdit = () => {
editingStudent.value = null // 关闭模态框
}
const fetchStudents = () => {
store.dispatch('fetchStudents')
}
const logout = () => {
store.dispatch('logout')
router.replace('/')
}
const deleteStudent = async (id) => {
try {
await store.dispatch('deleteStudent', id)
} catch (error) {
console.error('删除学生失败:', error)
}
}
fetchStudents() // 在组件创建时获取学生信息
</script>
<style scoped>
.modal {
position: fixed;
z-index: 1;
left: 0;
top: 0;
width: 100%;
height: 100%;
overflow: auto;
background-color: rgb(0, 0, 0);
background-color: rgba(0, 0, 0, 0.4);
}
.modal-content {
background-color: #fefefe;
margin: 15% auto;
padding: 20px;
border: 1px solid #888;
width: 80%;
max-width: 500px;
}
.close {
color: #aaa;
float: right;
font-size: 28px;
font-weight: bold;
}
.close:hover,
.close:focus {
color: black;
text-decoration: none;
cursor: pointer;
}
</style>
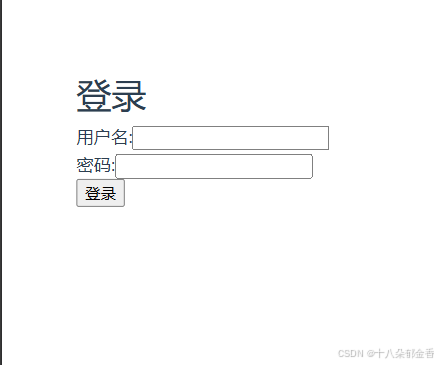
src/components/Login.vue:(登录页面)
<template>
  <div>
    <h1>登录</h1>
    <form @submit.prevent="handleLogin">
      <div>
        <label for="username">用户名:</label>
        <input type="text" id="username" v-model="username" required />
      </div>
      <div>
        <label for="password">密码:</label>
        <input type="password" id="password" v-model="password" required />
      </div>
      <button type="submit">登录</button>
    </form>
    <p v-if="error" class="error">{

  { error }}</p>
  </div>
</template>

<script setup>
import { ref } from 'vue'
import { useStore } from 'vuex'
import { useRouter } from 'vue-router'

const store = useStore()
const router = useRouter()

const username = ref('')
const password = ref('')
const error = ref('')

const handleLogin = async () => {
  try {
    await store.dispatch('login', { username: username.value, password: password.value })
    console.log('验证成功了', username.value, password.value, router)

    router.replace('/students') // 成功登录后跳转到学生列表页面
  } catch (error) {
    error.value = '登录失败,请检查用户名和密码。'
  }
}
</script>

<style>
.error {
  color: red;
}
</style>
src/store/index.js:
import { createStore } from 'vuex'
import axios from 'axios'

const apiClient = axios.create({
  baseURL: 'http://localhost:5000/api',
  withCredentials: false,
  // withCredentials: 这个选项决定了是否在跨域请求中发送凭据(如 cookies、HTTP 认证信息等)。
  // 默认值是 false,表示不发送凭据。
  headers: {
    Accept: 'application/json',  //客户端期望接收 JSON 格式的数据。
    'Content-Type': 'application/json',  //这个头告诉服务器,客户端发送的数据是 JSON 格式的
  },
})

// vuex用法
export default createStore({
  state: {
    students: [],
    token: localStorage.getItem('token') || null,
  },
  mutations: {
    setStudents(state, students) {
      state.students = students
    },
    setToken(state, token) {
      state.token = token
      localStorage.setItem('token', token)
    },
    clearToken(state) {
      state.token = null
      localStorage.removeItem('token')
    },
    addStudent(state, student) {
      state.students.push(student)
    },
    removeStudent(state, id) {
      state.students = state.students.filter((student) => student.id !== id)
    },
    updateStudent(state, updatedStudent) {
      state.students = state.students.map((student) =>
        student.id === updatedStudent.id ? updatedStudent : student,
      )
    },
  },
  actions: {
    // 获取学生信息数据
    async fetchStudents({ commit, state }) {
      try {
        const response = await apiClient.get('/students', {
          headers: {
            Authorization: `Bearer ${state.token}`,
          },
        })
        commit('setStudents', response.data)
      } catch (error) {
        console.error('There was an error fetching the students!', error)
      }
    },
    // 登录逻辑
    async login({ commit }, { username, password }) {
      try {
        const response = await apiClient.post('/login', { username, password })
        // 将登录成功得到的token存储在本地
        commit('setToken', response.data.token)
      } catch (error) {
        console.error('Login failed!', error)
        throw error // 重新抛出错误,以便在组件中捕获
      }
    },
    // 退出登录
    logout({ commit }) {
      console.log('退出了')
      commit('clearToken')
    },
    // 添加学生
    addStudent({ commit, state }, newStudent) {
      return apiClient
        .post('/students', newStudent, {
          headers: {
            Authorization: `Bearer ${state.token}`,
          },
        })
        .then((response) => {
          commit('addStudent', response.data)
        })
    },
    // 编辑/更新学生
    updateStudent({ commit, state }, updatedStudent) {
      return apiClient
        .put(`/students/${updatedStudent.id}`, updatedStudent, {
          headers: {
            Authorization: `Bearer ${state.token}`,
          },
        })
        .then(() => {
          commit('updateStudent', updatedStudent)
        })
    },
    // 删除学生信息
    deleteStudent({ commit, state }, id) {
      return apiClient
        .delete(`/students/${id}`, {
          headers: {
            Authorization: `Bearer ${state.token}`,
          },
        })
        .then(() => {
          commit('removeStudent', id)
        })
    },
  },
  getters: {
    getStudents: (state) => state.students,
    isLoggedIn: (state) => !!state.token,
  },
})
src/router/index.js
import { createRouter, createWebHistory } from 'vue-router'
import Login from '../components/Login.vue'
import StudentList from '../components/StudentList.vue'

const routes = [
  { path: '/', component: Login },
  { path: '/students', component: StudentList },
]

const router = createRouter({
  history: createWebHistory(),
  routes,
})

router.beforeEach((to, from, next) => {
  if (to.path === '/students' && !localStorage.getItem('token')) {
    next('/')
  } else {
    next()
  }
})

export default router
src/App.js
<template>
  <div id="app">
    <router-view></router-view>
  </div>
</template>

<script setup>
</script>
src/main.js
import './assets/main.css'

import { createApp } from 'vue'
import { createPinia } from 'pinia'

import App from './App.vue'
import router from './router/index'
import store from './store/index'
const app = createApp(App)
app.use(createPinia())
app.use(router)
app.use(store)

app.mount('#app')
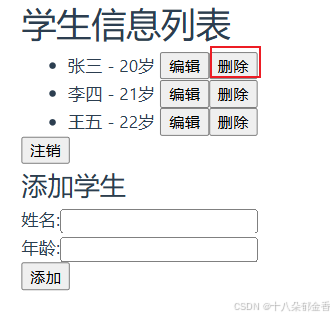
四、结果演示
注意:运行程序的时候,要确保后端文件server.js是启动的(也就是你打开的执行node server.js的终端不要关闭)
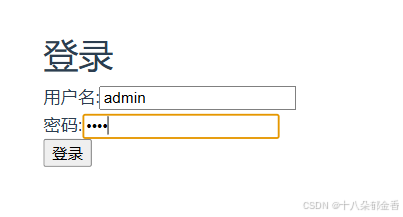
1、登录功能:
用户名:admin
密码:123
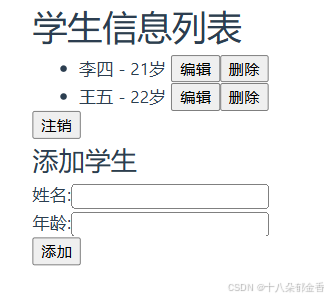
2、删除功能:
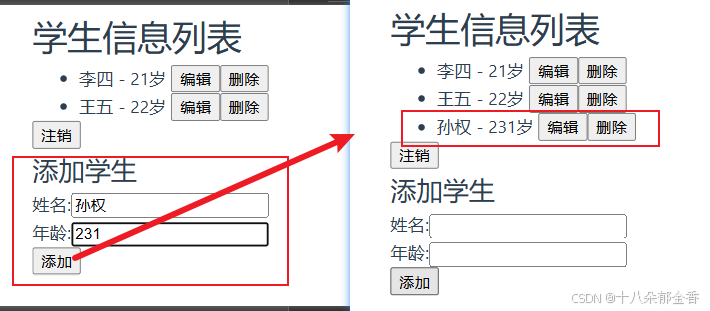
3、添加功能:
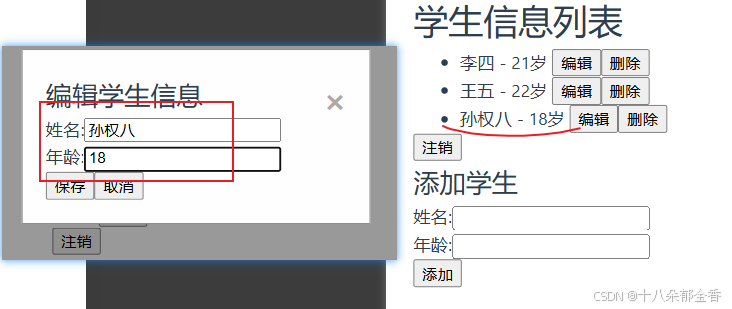
编辑功能:
五、后记
本次案例是使用了vuex作为状态管理库,主要是测试vuex知识点。这里也推荐大家使用pinia,比较容器上手。
后续再考虑将vuex迁移成pinia。
如果你喜欢这篇文章,请点赞收藏。
关注我,了解更多实用的知识和技术~


 2万+
2万+

 被折叠的 条评论
为什么被折叠?
被折叠的 条评论
为什么被折叠?
 到【灌水乐园】发言


