


开发工具:VS2010、cocos2d-2.0-x-2.0.4
step1:创建一个cocos2d-win32application,并命名为simpleGame;
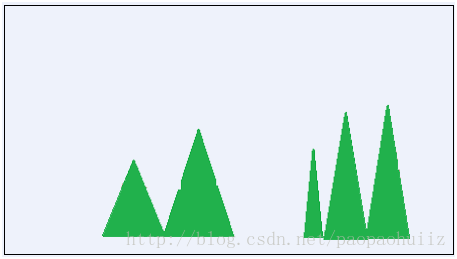
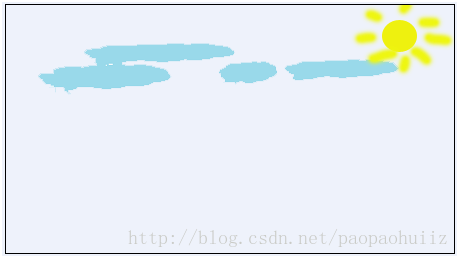
其中素材图片分别为:night.png、hill.png、cloud.png

Step2:在HelloWorldScene.h中添加LayerDay、LayerNight和MyScene三个类:
在HelloWorldScene.h文件中添加:
using namespacecocos2d;
//白天场景
class LayerDay:publicCCLayerColor
{
public:
LayerDay();
~LayerDay();
public:
virtualvoid onEnter();
};
//晚上场景
class LayerNight:publicCCLayerColor
{
public:
LayerNight();
~LayerNight();
public:
virtualvoid onEnter();
};
//自定义场景
class MyScene: publicCCScene
{
public:
MyScene();
public:
virtualvoid onEnter();
virtualvoid runThisTest();
voiddaySceneCallback(CCObject* pSender);
voidnightSceneCallback(CCObject* pSender);
};
在HelloWorldScene.cpp中修改HelloWorld::scene()如下:
CCScene*HelloWorld::scene()
{
CCScene * scene = NULL;
do
{
// 'scene' isan autorelease object
//scene =MyScene::create();
scene = new MyScene();
CC_BREAK_IF(! scene);
// 'layer' isan autorelease object
//HelloWorld *layer = HelloWorld::create();
//CC_BREAK_IF(! layer);
LayerDay* pLayer = new LayerDay();
// add layeras a child to scene
//addChild中的第二个参数为背景的次序,LayerHill在LayerCloud的上面,即表面。
//scene->addChild(layer);
scene->addChild(pLayer,0);
} while(0);
// return thescene
returnscene;
}
然后添加三个类的成员函数:
CCTransitionScene*createTransition(float t, CCScene* s)
{
//向右上波浪
//CCScene和CCLayer的初始化统一用create()函数进行创建。
//returnCCTransitionFadeUp::transitionWithDuration(t, s);
returnCCTransitionFadeTR::create(t, s);
}
//classLayerNight
LayerNight::LayerNight()
{
CCSize size =CCDirector::sharedDirector()->getWinSize();
this->initWithColor(ccc4(0,0,0,255));
CCSprite* pSpriteNight =CCSprite::create("night.png");
CCSprite* pSpriteHill =CCSprite::create("hill.png");
pSpriteNight->setPosition(ccp(size.width/2,size.height/2));
pSpriteHill->setPosition(ccp(size.width/2,size.height/2));
addChild(pSpriteNight);
addChild(pSpriteHill);
}
LayerNight::~LayerNight()
{
}
void LayerNight::onEnter()
{
CCLayer::onEnter();
}
//classLayerDay
LayerDay::LayerDay()
{
this->initWithColor(ccc4(255,255,255,255));
CCSize size =CCDirector::sharedDirector()->getWinSize();
CCSprite* pSpriteHill =CCSprite::create("hill.png");
CCSprite* pSpriteCloud =CCSprite::create("cloud.png");
pSpriteCloud->setPosition(ccp(size.width/2,size.height/2));
pSpriteHill->setPosition(ccp(size.width/2,size.height/2));
addChild(pSpriteCloud);
addChild(pSpriteHill);
}
LayerDay::~LayerDay()
{
}
void LayerDay::onEnter()
{
CCLayer::onEnter();
}
//自定义场景
MyScene::MyScene()
{
CCScene::init();
CCLabelTTF* labelDay =CCLabelTTF::create("Day","Arial",20);
CCLabelTTF* labelNight =CCLabelTTF::create("Night","Arial",20);
CCMenuItemLabel* pMenuDayItem =CCMenuItemLabel::create(
labelDay,this,menu_selector(MyScene::daySceneCallback));
CCMenuItemLabel* pMenuNightItem =CCMenuItemLabel::create(
labelNight,this,menu_selector(MyScene::nightSceneCallback));
CCMenu* pMenuDay =CCMenu::create(pMenuDayItem,NULL);
CCMenu* pMenuNight =CCMenu::create(pMenuNightItem,NULL);
CCSize size =CCDirector::sharedDirector()->getWinSize();
pMenuDayItem->setPosition(ccp(size.width/2-40,30));
pMenuNightItem->setPosition(ccp(size.width/2+40,30));
pMenuDay->setPosition(CCPointZero);
pMenuNight->setPosition(CCPointZero);
addChild(pMenuDay,2);
addChild(pMenuNight,2);
}
void MyScene::daySceneCallback(CCObject *pSender)
{
CCScene* scene = new MyScene();
CCLayer* pLayer = new LayerDay();
scene->addChild(pLayer,0);
CCScene* pScene =createTransition(1.2f, scene);
CCDirector::sharedDirector()->pushScene(pScene);
scene->release();
pLayer->release();
}
void MyScene::nightSceneCallback(CCObject* pSender)
{
CCScene* scene = new MyScene();
CCLayer* pLayer = new LayerNight();
scene->addChild(pLayer,0);
CCScene* pScene =createTransition(1.2f, scene);
CCDirector::sharedDirector()->pushScene(pScene);
scene->release();
pLayer->release();
}
void MyScene::onEnter()
{
CCScene::onEnter();
}
void MyScene::runThisTest()
{
CCLayer* pLayer = new LayerNight();
addChild(pLayer);
pLayer->release();
CCDirector::sharedDirector()->replaceScene(this);
}
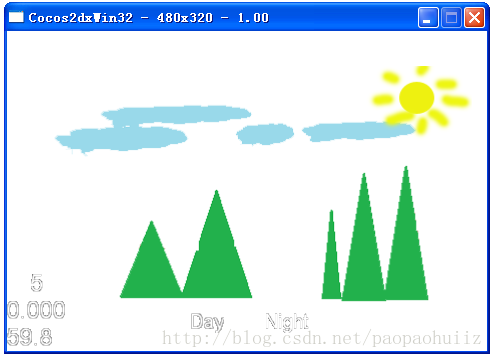
step3:编译运行程序,就会出现如下画面,通过点击画面上的 "Day"和"Night"两个字样,就可以对场景进行切换。

但是,场景在切换时给人感觉很生硬,要想让场景间过度得更更自然、更绚丽,我们在HelloWorldScene.cpp中对代码做一些修改,首先添加:
CCTransitionScene* createTransition(float t, CCScene* s)
{
//向右上波浪
return CCTransitionFadeTR::create(t,s);
}
再次运行程序,这次效果是不是好多了呢!


 136
136


 被折叠的 条评论
为什么被折叠?
被折叠的 条评论
为什么被折叠?
 到【灌水乐园】发言


