


将图片颜色值写入excel 并使用同样的背景色填充对应单元格背景 对分析图像提供可视化数据信息
,其中单元格数据是像素坐标和像素颜色值,给大家参考一下
import os.path
import sys
import datetime
import cv2
import xlsxwriter
from PIL import Image
import numpy as np


#基本思路 读入一张图片 把像素坐标及像素值写入excel对应单元格
def writeImageFile(imagefileName,excelfileName='test.xlsx'):
    curentDir = os.getcwd()
    if os.path.exists(excelfileName):
        if len(os.path.split(excelfileName)[0])==0:
            curentDir=os.getcwd()
        else:
            curentDir =os.path.split(excelfileName)[0]
    if not os.path.exists(imagefileName):
        print("图片不存在!")
        sys.exit()
  #判断 是否为图片 如果图片是四通道 转为三通道
    if os.path.splitext(imagefileName)[1] in ['.jpg','.jpeg','.bmp','.tif','.tiff','.png','webp']:
        imgg = Image.open(imagefileName)
        imgg = imgg.convert("RGB")
        imgg.save(imagefileName)
        # imgdata=cv2.cvtColor(imgg,cv2.COLOR_RGB2BGR)
        imgdata=cv2.imread(imagefileName)
        # imgdata=imgdata[:,:,[0,1,2]]
        # imgdata = cv2.cvtColor(imgdata, cv2.COLOR_BGR2RGB)
        # print('图片信息',imgdata.shape)
        workbook = xlsxwriter.Workbook(os.path.join(curentDir,excelfileName))
        worksheet = workbook.add_worksheet()

        imageHight=imgdata.shape[0]  #图片的高
        imageWidth=imgdata.shape[1]  #图片的宽
        # # #遍历费用元组 定义起始行,列 ,元组的索引从0开始
        # imageHight_index_Row=0
        # imageWidth_index_Column=0
        n=1
        total=imageHight*imageWidth
        print(datetime.datetime.now())
        print("写入中.....")
        for row in range(imageHight):  #遍历元组的每一个元素 因为每一个元素又是有两个元素的列表,所以使用两项拆包每个元素
         for column in range(imageWidth):
           n+=1
           progress=f'{(n/total *10000) // 100}%'
           print("完成 "+progress)
        #     #对于Excel单元格地址编号 xlsxWriter认为索引从0开始的行 索引从0开始的列
        #     #例如A1单元格 其索引为(0,0)  a5单元格 其索引为(4,0)
        #    print(row)
           colorString1=str(imgdata[row,column])[1:-1]
           colorString=[]
           for item in colorString1:
               if item!="" or item!=' ':
                   colorString.append(item)


           if len(colorString)==11:
               colorBlue=colorString[0]+colorString[1]+colorString[2]
               colorGreen=colorString[4]+colorString[5]+colorString[6]
               colorRed=colorString[8]+colorString[9]+colorString[10]
           else:
               pass

           # #获取十六进制字符串 不要前面的0X两个字符 所以从2号索引截取到最后
           #
               # colorBlueHex, colorGreenHex, colorRedHex=hex(int(colorBlue))[2:],hex(int(colorGreen))[2:],hex(int(colorRed))[2:]
           if len(hex(int(colorBlue))[2:])==1:
               colorBlueHex="0"+hex(int(colorBlue))[2:]
           else:
               colorBlueHex = hex(int(colorBlue))[2:]
           if len(hex(int(colorGreen))[2:])==1:
               colorGreenHex='0'+hex(int(colorGreen))[2:]
           else:
               colorGreenHex = hex(int(colorGreen))[2:]
           if len(hex(int(colorRed))[2:])==1:
               colorRedHex='0'+hex(int(colorRed))[2:]
           else:
               colorRedHex = hex(int(colorRed))[2:]

       # #组合十六进制字符串 在前面添加#号
           hexColorString="#"+colorRedHex+colorGreenHex+colorBlueHex

           bold = workbook.add_format({'bold': True,'border':1,'align':'center','fg_color':hexColorString})
           a="("+str(row)+","+str(column)+"):"+str(imgdata[row,column])
           worksheet.write(row,column,a,bold)

        print(datetime.datetime.now())
        print("写入结束.")
        workbook.close()

writeImageFile('3.png')
原图

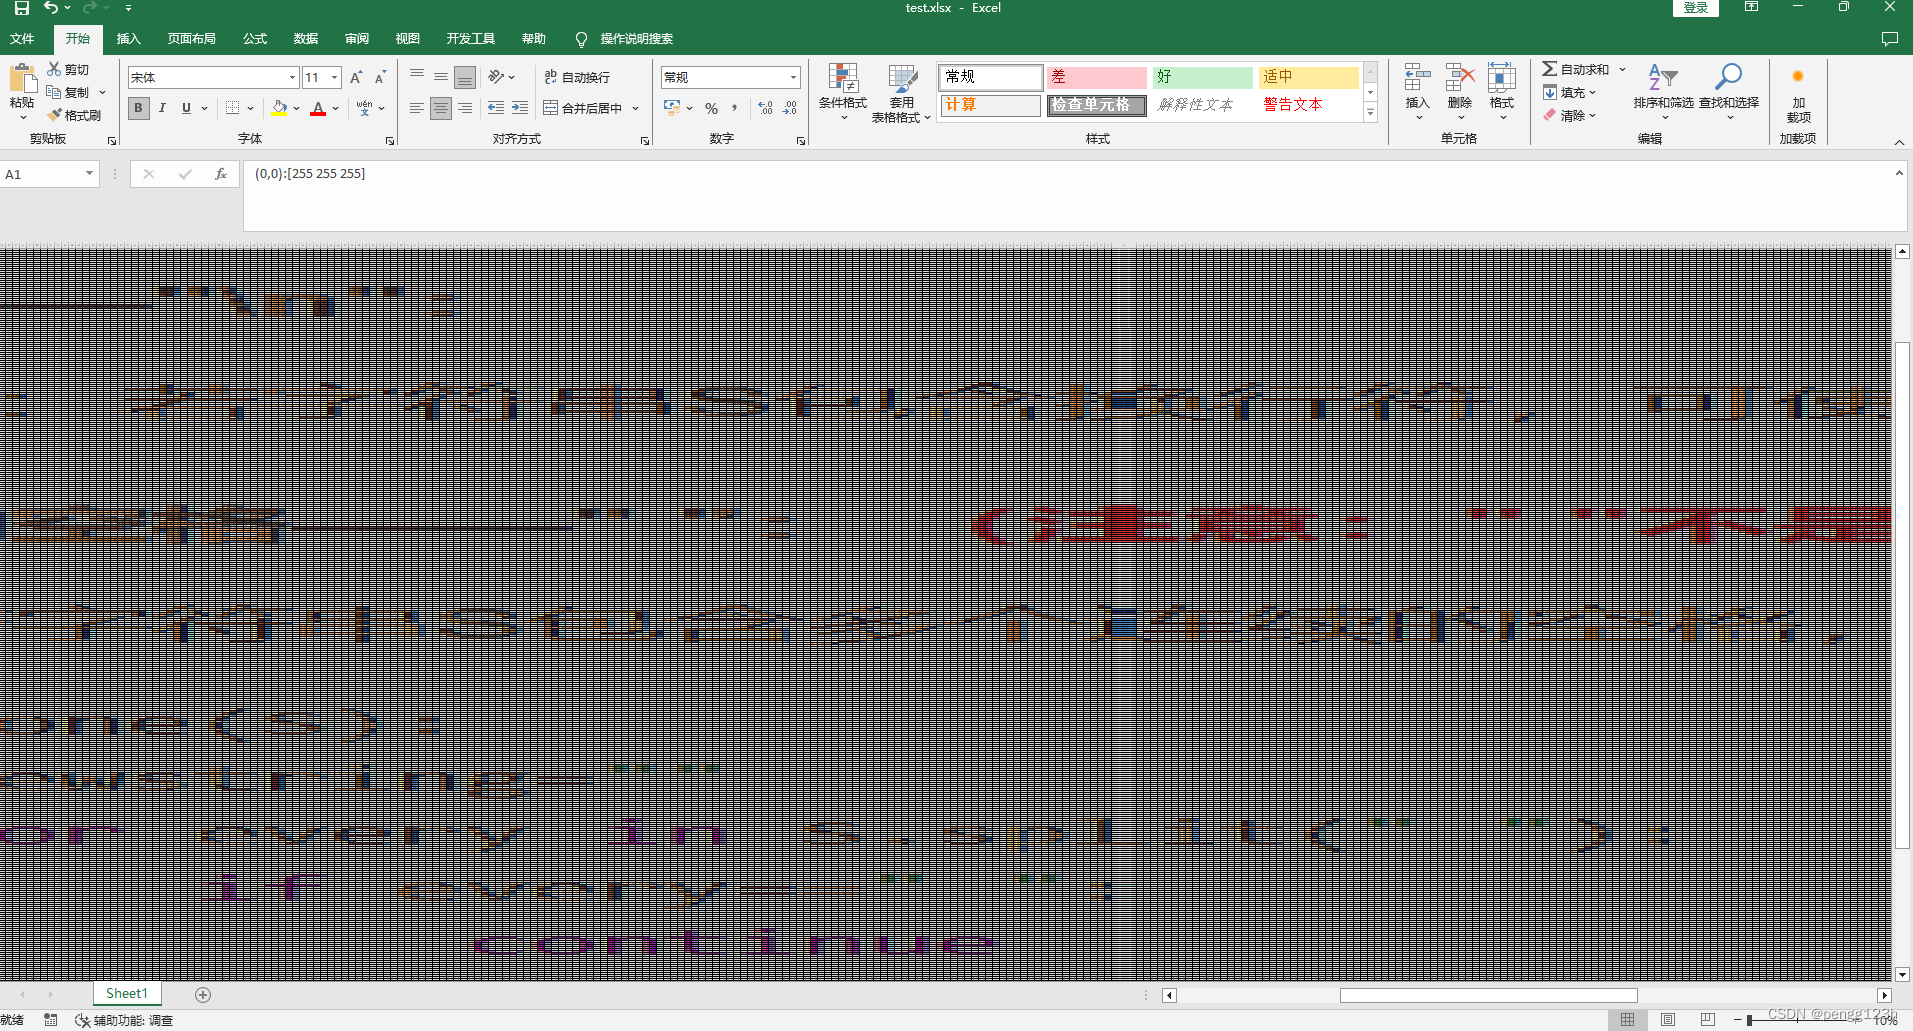
下面是写入excel效果图


 5895
5895


 被折叠的 条评论
为什么被折叠?
被折叠的 条评论
为什么被折叠?
 到【灌水乐园】发言


