


1. 安装Cygwin
Windows环境下编译OpenOCD可以是在MinGW-w64/MSYS或Cygwin下,这里选择Cygwin,下载安装Cygwin。
2. 进入OpenOCD源代码目录
打开Cygwin,进入OpenOCD源代码目录,例如代码放在D:\Temp\OpenOCD\openocd-code下,在Cygwin中的路径如下:
/cygdrive/d/Temp/OpenOCD/openocd-code3. 执行bootstrap
先要安装dos2unix工具包,重新点击Cygwin安装包,点击dos2unix安装这个工具包。

执行./bootstrap,提示:
./bootstrap: Error: libtool is required和安装dos2unix的方式一样安装libtool。
继续提示错误,安装automake(选没版本号的那个)
./bootstrap: line 29: aclocal: command not found继续提示错误,安装pkg-config。
 It is usually defined in file pkg.m4 provided by package pkg-config.
configure.ac:32: the top level
autom4te-2.71: error: /usr/bin/m4 failed with exit status: 1
aclocal-1.16: error: autom4te failed with exit status: 1
接下来可能会因为网络问题失败,多试几次。
提示错误:
Submodule path 'src/jtag/drivers/libjaylink': checked out '0d23921a05d5d427332a1
42d154c213d0c306eb1'
./autogen.sh: line 20: $'\r': command not found
./autogen.sh: line 23: $'\r': command not found
./autogen.sh: line 35: syntax error: unexpected end of file
将autogen.sh转换一下:
dos2unix src/jtag/drivers/libjaylink/autogen.sh提示错误:
libtoolize: putting auxiliary files in AC_CONFIG_AUX_DIR, 'build-aux'.
libtoolize: copying file 'build-aux/config.guess'
libtoolize: copying file 'build-aux/config.sub'
libtoolize: copying file 'build-aux/install-sh'
libtoolize: copying file 'build-aux/ltmain.sh'
libtoolize:   error: AC_CONFIG_MACRO_DIRS([m4]) conflicts with ACLOCAL_AMFLAGS=-. m4
仍然是因为格式的问题,将这个文件夹内的文件都用dos2unix转换一下。
find . -name \*.sh|xargs dos2unix
find . -name \*.m4|xargs dos2unix
find . -name \*.ac|xargs dos2unix
find . -name \*.am|xargs dos2unix
如果类似libjaylink无法从网络上下载下来,可以通过gitee下载(无效):
可以编辑文件.gitmodules,将对应url改为gitee的路径,例如:
url = https://gitlab.zapb.de/libjaylink/libjaylink.git改为:
url = https://gitee.com/sma365ffffff/libjaylink.git4. 执行configure
执行
./configure提示缺失gcc等编译器
checking for gcc... no
checking for cc... no
checking for cl.exe... no
checking for clang... no
和前面的方式一样,安装gcc-g++
- 提示警告:
configure: WARNING: libusb-1.x not found, trying legacy libusb-0.1 as a fallback; consider installing libusb-1.x instead安装libusb

- 提示错误:
config.status: error: Something went wrong bootstrapping makefile fragments
    for automatic dependency tracking.  If GNU make was not used, consider
    re-running the configure script with MAKE="gmake" (or whatever is
    necessary).  You can also try re-running configure with the
    '--disable-dependency-tracking' option to at least be able to build
    the package (albeit without support for automatic dependency tracking).
See `config.log' for more details
安装make(安装这个最好重启一下cygwin)

- 提示缺少库
checking for libftdi1... no
checking for libftdi... no
安装libftdi1
![]()
安装libhidapi

- 提示错误:
configure: running /bin/sh ./configure.gnu --disable-option-checking '--prefix=/usr/local'  --cache-file=/dev/null --srcdir=.
/cygdrive/d/Temp/OpenOCD/openocd-code/jimtcl/configure: line 4: /cygdrive/d/Temp/autosetup-find-tclsh: No such file or directory
/cygdrive/d/Temp/OpenOCD/openocd-code/jimtcl/configure: line 4: exec: : not found
configure: error: ./configure.gnu failed for jimtcl
安装tcsh, tcl-devel

安装autoconf

安装texinfo

安装gcc-objc
![]()
修改jimctl文件夹下configure
#!/bin/sh
dir="`dirname "$0"`/autosetup"
echo $dir
#@@INITCHECK@@#
#WRAPPER="$0"; export WRAPPER; exec "`"$dir/autosetup-find-tclsh"`" "$dir/autosetup" "$@"
WRAPPER="$0"; export WRAPPER; exec "./autosetup/autosetup-find-tclsh" "autosetup" "$@"
在这个目录内直接运行./configure,可以看到又发生需要dos2unix的情况,改了后jimctl的configure可以运行了。
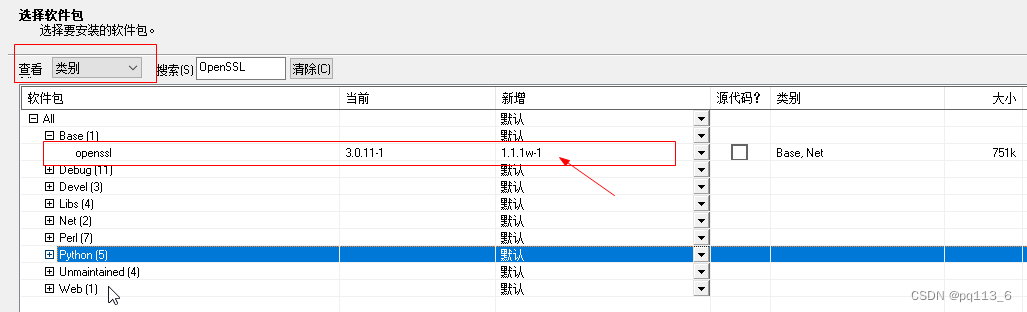
然后提示需要安装openssl,安装一个1.1.1w-1(原来有3.0.11版本)
还是提示没有找到ssl,看提示可能要下载源码编译,下载的网址如下:
https://www.openssl.org
下载3.x的版本(这个版本不可以)后Cygwin进对应的文件夹,执行:
./configure
make
make test
make install
在cygwin安装目录内usr\local\lib\pkgconfig,将2个pc文件(libssl.pc和openssl.pc)拷贝到\lib\pkgconfig,将2个库文件拷贝到lib\下,结果提示unusable。
下载1.1.1w重来一遍。
./config
make
make test
make install
其中make test应该可以不需要。
同样手动拷贝一下文件。
最后的结果:
OpenOCD configuration summary
--------------------------------------------------
MPSSE mode of FTDI based devices        yes (auto)
ST-Link Programmer                      yes (auto)
TI ICDI JTAG Programmer                 yes (auto)
Keil ULINK JTAG Programmer              yes (auto)
Altera USB-Blaster II Compatible        yes (auto)
Bitbang mode of FT232R based devices    yes (auto)
Versaloon-Link JTAG Programmer          yes (auto)
TI XDS110 Debug Probe                   yes (auto)
CMSIS-DAP v2 Compliant Debugger         yes (auto)
OSBDM (JTAG only) Programmer            yes (auto)
eStick/opendous JTAG Programmer         yes (auto)
Olimex ARM-JTAG-EW Programmer           yes (auto)
Raisonance RLink JTAG Programmer        yes (auto)
USBProg JTAG Programmer                 yes (auto)
Espressif JTAG Programmer               yes (auto)
CMSIS-DAP Compliant Debugger            yes (auto)
Nu-Link Programmer                      yes (auto)
Cypress KitProg Programmer              yes (auto)
Altera USB-Blaster Compatible           yes (auto)
ASIX Presto Adapter                     yes (auto)
OpenJTAG Adapter                        yes (auto)
Linux GPIO bitbang through libgpiod     no
SEGGER J-Link Programmer                no
Bus Pirate                              yes (auto)
Use Capstone disassembly framework      no
可以看到编译出来的有3个不支持,特别是不支持J-Link。其实就是缺3个库:
checking for capstone... no
checking for libgpiod... no
checking for libjaylink >= 0.2... no
5. libjaylink
如果下载libjaylink失败,可以直接下载libjaylink源码:
PS:如果github上下载不下来,可以通过gitee下载。
cygwin中进入下载的目录内,执行:
dos2unix autogen.sh
./autogen.sh
同样因为格式的问题,将这个文件夹内的文件都用dos2unix转换一下。
find . -name \*.sh|xargs dos2unix
find . -name \*.m4|xargs dos2unix
find . -name \*.ac|xargs dos2unix
find . -name \*.am|xargs dos2unix
运行:
./configure
make
make install
在cygwin安装目录内usr\local\lib\pkgconfig,将pc文件拷贝到\lib\pkgconfig,
将usr\local\lib下的三个库文件拷贝到lib\下
6. Capstone
下载capstone源码:
编译64位系统的lib(具体编译方式可以参考COMPILE.TXT里面的Compile from source部分)
./make.sh nix32提示没有lgcc
cannot find -lgcc: No such file or directory但是实际上有libgcc.a这个库,不确定哪里有问题。
7. make
执行make编译openocd即可
提示错误:
error: array subscript has type 'char' [-Werror=char-subscripts]有可能是gcc版本的问题,这里修改一下文件\src\pld\efinix.c,找到提示错误的地方,改为
if (!isxdigit((unsigned char)buffer[0]) || !isxdigit((unsigned char)buffer[1]))即buffer变量前加(unsigned char),后面会有一样的错误,照样改即可。
提示错误 :
/ld: ./jimtcl/libjim.a(jim-aio.o):jim-aio.c:(.text+0x37d): undefined reference to `SSL_get_peer_certificate'不知道哪里的问题,猜测是SSL库版本的问题。先重新编译一次ssl
./config --prefix=/usr/local --openssldir=/etc/ssl --libdir=lib enable-ssl3 enable-ssl3-method enable-weak-ssl-ciphers -DOPENSSL_NO_GOST zlib shared
make clean
make
make install
下载1.1.1o版本试试
Release OpenSSL_1_1_1o · openssl/openssl (github.com)
回到configure那里看一下jimctl配置错误时提示信息:
--disable-install-jim --with-ext=json --minimal --disable-ssl --disable-option-checking --prefix=/usr/local --cache-file=/dev/null --srcdir=.
看样子是要关闭ssl功能。
回到原来解决问题的地方,问题的核心是:
exec "`"$dir/autosetup-find-tclsh"`" "$dir/autosetup" "$@"这一句在Linux里面是可行的,在Cygwin(或者Windows)下不可行。把dir加{}:
exec "`"${dir}/autosetup-find-tclsh"`" "${dir}/autosetup" "$@"并且需要把这一行单独一行。
#!/bin/sh
dir="`dirname "$0"`/autosetup"
#@@INITCHECK@@#
WRAPPER="$0"; export WRAPPER;
exec "`"${dir}/autosetup-find-tclsh"`" "${dir}/autosetup" "$@"
再次执行make应该可以编译通过了,在\src文件夹下可以找到编译生成的openocd.exe


 7216
7216


 被折叠的 条评论
为什么被折叠?
被折叠的 条评论
为什么被折叠?
 到【灌水乐园】发言


