


全部代码:源码地址
大致流程
经过长达一个星期的研究,网上找了无数实例,大都只有客户端,或者用URLHttpConnection而不是OKHttp3,或者代码太过时根本调不通。经历了数不清的痛苦,东拼西凑总算找到方法跑通了,个中艰辛,真是无法言表。
1.登陆使用okhttp3来发送post,将用户名,密码封装成MAP在request里
2.服务器端来读取POST,与数据库验证成功再发回登陆成功消息,以JSON格式
在AndroidStudio中
1.添加网络权限
<uses-permission android:name="android.permission.INTERNET"></uses-permission>2.添加okhttp和GSON引用, 在build.gradle文件中添加
compile 'com.squareup.okhttp3:okhttp:3.2.0'
compile 'com.google.code.gson:gson:2.7'
3.登陆的layout文件
<LinearLayout xmlns:android="http://schemas.android.com/apk/res/android"
    xmlns:tools="http://schemas.android.com/tools"
    android:layout_width="match_parent"
    android:layout_height="match_parent"
    android:orientation="vertical"
    android:paddingBottom="@dimen/activity_vertical_margin"
    android:paddingLeft="@dimen/activity_horizontal_margin"
    android:paddingRight="@dimen/activity_horizontal_margin"
    android:paddingTop="@dimen/activity_vertical_margin"
    tools:context="com.example.logintest.LoginActivity" >

    <LinearLayout
        android:layout_width="fill_parent"
        android:layout_height="100dp"
        android:orientation="vertical" >

        <LinearLayout
            android:layout_width="wrap_content"
            android:layout_height="100dp"
            android:layout_gravity="center_horizontal"
            android:orientation="horizontal" >

            <ImageView
                android:layout_width="wrap_content"
                android:layout_height="wrap_content"
                android:layout_gravity="center_vertical"
                android:src="@drawable/ic_launcher" />
        </LinearLayout>
    </LinearLayout>

    <LinearLayout
        android:layout_width="match_parent"
        android:layout_height="100dp"
        android:orientation="vertical">

        <EditText
            android:id="@+id/username"
            android:layout_width="fill_parent"
            android:layout_height="40dp"
            android:hint="请输入用户名"
            android:text="daidai"
            android:inputType="textVisiblePassword"
            android:singleLine="true" />

        <View
            android:layout_width="wrap_content"
            android:layout_height="1dp"
            />
        <EditText
            android:id="@+id/password"
            android:layout_width="match_parent"
            android:layout_height="wrap_content"
            android:hint="请输入密码"
            android:text="123"
            android:inputType="textPassword"
            android:maxLines="1" />
    </LinearLayout>

    <View
        android:layout_width="wrap_content"
        android:layout_height="40dp" />

    <LinearLayout
        android:layout_width="wrap_content"
        android:layout_height="wrap_content"
        android:orientation="horizontal">

        <Button
            android:id="@+id/btn_login"
            android:layout_width="wrap_content"
            android:layout_height="wrap_content"
            android:text="登陆"/>

        <View
            android:layout_width="50dp"
            android:layout_height="40dp" />

        <Button
            android:id="@+id/btn_register"
            android:layout_width="wrap_content"
            android:layout_height="wrap_content"
            android:layout_weight="1"
            android:text="注册" />
    </LinearLayout>

    <TextView
        android:id="@+id/txtResult"
        android:layout_width="wrap_content"
        android:layout_height="wrap_content"
        android:layout_gravity="center_horizontal"
        android:text="Result:"/>

</LinearLayout>package com.example.logintest;
import android.content.Intent;
import android.os.Handler;
import android.os.Message;
import android.support.v7.app.AppCompatActivity;
import android.os.Bundle;
import android.util.Log;
import android.view.Menu;
import android.view.MenuItem;
import android.view.View;
import android.widget.Button;
import android.widget.EditText;
import android.widget.TextView;
import android.widget.Toast;
import com.example.logintest.model.LoginResult;
import com.example.logintest.utils.HttpUtils;
import com.google.gson.Gson;
import org.json.JSONException;
import org.json.JSONObject;
import java.io.IOException;
import java.io.UnsupportedEncodingException;
import java.util.HashMap;
import java.util.Map;
import okhttp3.Call;
import okhttp3.Callback;
import okhttp3.Response;
public class LoginActivity extends AppCompatActivity implements View.OnClickListener{
private Handler handler;
private EditText username;
private EditText password;
private Button btn_login;
private Button btn_register;
private TextView txtResult;
private String url = "http://192.168.0.101/myWorks/login.php";
private String url1 = "http://192.168.0.1/Test/json_array.php";
LoginResult m_result;
Map<String, String> map = new HashMap<String, String>();
@Override
protected void onCreate(Bundle savedInstanceState) {
super.onCreate(savedInstanceState);
setContentView(R.layout.activity_login);
//处理登录成功消息
handler = new Handler(){
@Override
public void handleMessage(Message msg)
{
super.handleMessage(msg);
switch (msg.what)
{
case 123:
try
{
//获取用户登录的结果
LoginResult result = (LoginResult)msg.obj;
String userName = result.getNicename();
txtResult.setText(userName+" 成功登录!");
Toast.makeText(LoginActivity.this, "您成功登录",Toast.LENGTH_SHORT).show();
//跳转到登录成功的界面
Intent intent = new Intent(LoginActivity.this, LoginActivity1.class);
startActivity(intent);
}
catch (Exception e)
{
e.printStackTrace();
}
break;
default:
break;
}
}
};
Bundle bundle = this.getIntent().getExtras();
username = (EditText)findViewById(R.id.username);
password = (EditText)findViewById(R.id.password);
btn_login = (Button)findViewById(R.id.btn_login);
btn_register = (Button)findViewById(R.id.btn_register);
txtResult = (TextView)findViewById(R.id.txtResult);
btn_login.setOnClickListener(this);
btn_register.setOnClickListener(this);
if (bundle != null)
{
username.setText(bundle.getString("empNo"));
password.setText(bundle.getString("pass"));
}
}
private LoginResult parseJSONWithGson(String jsonData)
{
Gson gson = new Gson();
return gson.fromJson(jsonData, LoginResult.class);
}
public void onClick(View v)
{
int id = v.getId();
switch (id)
{
case R.id.btn_login:
new Thread(new Runnable() {
@Override
public void run() {
try
{
//POST信息中加入用户名和密码
map.put("uid", username.getText().toString().trim());
map.put("pwd", password.getText().toString().trim());
//HttpUtils.httpPostMethod(url, json, handler);
HttpUtils.post(url, new Callback() {
@Override
public void onFailure(Call call, IOException e) {
Log.e("DaiDai", "OnFaile:",e);
}
@Override
public void onResponse(Call call, Response response) throws IOException {
String responseBody = response.body().string();
m_result = parseJSONWithGson(responseBody);
//发送登录成功的消息
Message msg = handler.obtainMessage();
msg.what = 123;
msg.obj = m_result; //把登录结果也发送过去
handler.sendMessage(msg);
}
}, map);
}
catch (Exception e) {
// TODO Auto-generated catch block
e.printStackTrace();
}
}
}).start();
break;
case R.id.btn_register:
Intent intent = new Intent(LoginActivity.this, RegisterActivity.class);
startActivity(intent);
break;
}
}
@Override
public boolean onCreateOptionsMenu(Menu menu) {
// Inflate the menu; this adds items to the action bar if it is present.
getMenuInflater().inflate(R.menu.main, menu);
return true;
}
@Override
public boolean onOptionsItemSelected(MenuItem item) {
int id = item.getItemId();
if (id == R.id.action_settings) {
return true;
}
return super.onOptionsItemSelected(item);
}
}从代码中可看到,在login按钮点击事件中开启了一个线程来发送OkHttp的异步网络请求(Android不允许在UI线程中进行网络操作,必须开个线程),然后OkHttp3的Callback会产生onResponse或onFailed响应来告诉用户网络请求是否成功,然后我们可以在onResponse使用了handler来发送消息告诉UI主线程,是否成功登陆,然后还是handler来处理这个Message,来通知UI页面是否登陆成功,并跳转到登陆后的页面。
这是handler和多线程在网络请求的经典用法 ,值得初学者学习掌握。
可以看到其中用到了HttpUtils类,这个类就是OKHttp3的封装,代码如下:
package com.example.logintest.utils;

import java.util.Map;

import okhttp3.FormBody;
import okhttp3.MediaType;
import okhttp3.OkHttpClient;
import okhttp3.Request;
import okhttp3.RequestBody;

/**
 * Created by Administrator on 2017/7/13.
 */

public class HttpUtils {

    /**
     * 向服务器发送post请求,包含一些Map参数
     * @param address
     * @param callback
     * @param map
     */
    public static void post(String address, okhttp3.Callback callback, Map<String, String> map)
    {
        OkHttpClient client = new OkHttpClient();
        FormBody.Builder builder = new FormBody.Builder();
        if (map!=null)
        {
            //添加POST中传送过去的一些键值对信息
            for (Map.Entry<String, String> entry:map.entrySet())
            {
                builder.add(entry.getKey(), entry.getValue());
            }
        }
        FormBody body = builder.build();
        Request request = new Request.Builder()
                            .url(address)
                            .post(body)
                            .build();
        client.newCall(request).enqueue(callback);
    }

    /**
     * 向服务器发送json数据
     * @param address 地址
     * @param callback 回调
     * @param jsonStr json数据
     */
    public static void postJson(String address, okhttp3.Callback callback, String jsonStr)
    {
        OkHttpClient client = new OkHttpClient();
        MediaType JSON = MediaType.parse("application/json; charset=utf-8");

        RequestBody body = RequestBody.create(JSON, jsonStr);
        Request request = new Request.Builder()
                            .url(address)
                            .post(body)
                            .build();
        client.newCall(request).enqueue(callback);
    }
}客户端完成后,看下服务端PHP的。Android+PHP是经典组合。网上大部分例子是J2EE的,不过恕我直言,J2EE学习成本和环境搭建的复杂程度,不适合初学者。
PHP搭建服务端是容易至极,只要搭建好APHACE+MYSQL就行了,可以用PhpStudy套件一键完成,自动集成了PHP+APACHE+MySQL,, 不然自己搭建搞死你。
首先MySQL建立数据库Mylocation,其中建表user
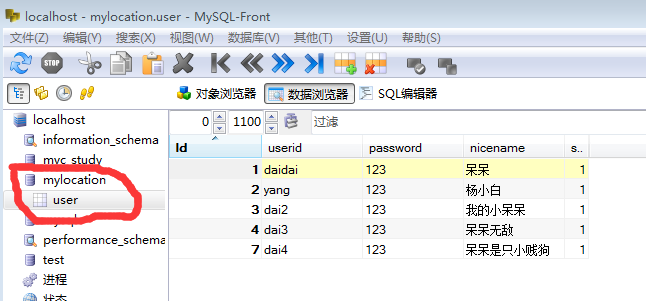

表结构如上,数据大家可以无视,呆呆是我养的爱犬,大家可无视
PHP大家可以用PhpStorm这个IDE编写,有自动完成功能,至于调试编译也是可以的,但是设置非常复杂,如果不是专门去学PHP没有设置的必要,大家只要记得编写好了后往你的phpStudy的安装目录下的WWW里一丢就行了,如我的是D:\phpStudy\WWW\myWorks里
作为测试你可以写个最简单的PHP:hello.php
<?php
echo "helloWorld";
?>
放在你的WWW目录下,如test\hello.php, 然后启动PhpStudy的Apache和MySQL服务,在浏览顺里输入网址:http://192.168.0.101/test/hello.php,能不能打开
192.168.0.101是你自己的IP地址,在Android编程中不能用127.0.0.1
登陆的php代码:login.php
<?php
/**
 * Created by PhpStorm.
 * User: Administrator
 * Date: 2017/7/12
 * Time: 17:07
 */
    include("conn.php"); //引用conn.php
    //mysql_select_db("lbs");
    $getid = $_POST['uid'];  //读取客户端的POST信息
    $getpwd = $_POST['pwd'];
    $sql = mysql_query("SELECT * FROM user WHERE userid = '$getid'");//数据库里查找有没有这个UID的用户
    $result = mysql_fetch_assoc($sql);
    if (!empty($result)) //不为空,说明有这个用户
    {
        if ($getpwd==$result['password']) //验证下密码对不对
        {
            mysql_query("UPDATE user SET status='1' WHERE id=$result[id]");
            //验证成功,封装一些键值对的信息,作为响应将发回客户端
            $back['status'] = "1";
            $back['info'] = "login success";
            $back['sex'] = $result['sex'];
            $back['nicename'] = $result['nicename'];
            echo(json_encode($back)); //将这些响应信息封装成json
        }
        else //密码错
        {
            $back['status']="-2";
            $back['info'] = "password error";
            echo(json_encode($back));
        }
    }
    else
    {
        //不存在该用户
        $back['status']="-1";
        $back['info'] = "user not exist";
        echo(json_encode($back));
    }

    mysql_close($conn);//关掉连接
?>
可以看出服务器端是将响应封装成json发回的,这里客户端是用gson包来解析的,客户端需要一个 LoginResult类来对应这个json包,代码如下:
package com.example.logintest.model;

/**
 * Created by Administrator on 2017/7/15.
 */

public class LoginResult {

    private String status;

    private String info;

    private String sex;

    private String nicename;

    public String getInfo() {
        return info;
    }

    public void setInfo(String info) {
        this.info = info;
    }

    public String getNicename() {
        return nicename;
    }

    public void setNicename(String nicename) {
        this.nicename = nicename;
    }

    public String getSex() {
        return sex;
    }

    public void setSex(String sex) {
        this.sex = sex;
    }

    public String getStatus() {
        return status;
    }

    public void setStatus(String status) {
        this.status = status;
    }
}
GSON如何使用可百度。其实简单结构又无嵌套又无数组形式的还是官方的JsonObject来的简单实在,Gson适用用复杂结构的json解析,在下面注册页面会用JsonObject。
登陆的功能完成了,再看注册的。注册主要牵扯使用客户端发来的数据来改动服务器的数据库,这一点也是有必要学习的。
注册的Layout文件:activity_register.xml
<?xml version="1.0" encoding="utf-8"?>
<LinearLayout xmlns:tools="http://schemas.android.com/tools"
    xmlns:android="http://schemas.android.com/apk/res/android"
    android:layout_width="fill_parent"
    android:layout_height="fill_parent"
    android:orientation="vertical"
    tools:context="com.example.logintest.RegisterActivity" >

    <LinearLayout
        android:layout_width="match_parent"
        android:layout_height="wrap_content"
        android:orientation="horizontal">

        <TextView
            android:layout_width="100dp"
            android:layout_height="wrap_content"
            android:paddingLeft="10dp"
            android:text="员  工  号 :"
            android:textSize="@dimen/activity_text_size" />

        <EditText
            android:id="@+id/et_empNo"
            android:layout_width="fill_parent"
            android:layout_height="wrap_content"
            android:maxLines="1"
            android:text="dai1"
            android:textSize="@dimen/activity_text_size" />

    </LinearLayout>

    <View
        android:layout_width="match_parent"
        android:layout_height="10dp" />

    <LinearLayout
        android:layout_width="match_parent"
        android:layout_height="wrap_content"
        android:orientation="horizontal" >

        <TextView
            android:layout_width="100dp"
            android:layout_height="wrap_content"
            android:paddingLeft="10dp"
            android:text="密       码:"
            android:textSize="@dimen/activity_text_size" />

        <EditText
            android:id="@+id/et_pass"
            android:layout_width="match_parent"
            android:layout_height="wrap_content"
            android:maxLines="1"
            android:inputType="textPassword"
            android:text="123"
            android:textSize="@dimen/activity_text_size" />
    </LinearLayout>

    <View
        android:layout_width="match_parent"
        android:layout_height="10dp" />

    <LinearLayout
        android:layout_width="match_parent"
        android:layout_height="wrap_content"
        android:orientation="horizontal" >

        <TextView
            android:layout_width="100dp"
            android:layout_height="wrap_content"
            android:paddingLeft="10dp"
            android:text="确认密码:"
            android:textSize="@dimen/activity_text_size" />

        <EditText
            android:id="@+id/et_passConfirm"
            android:layout_width="fill_parent"
            android:layout_height="wrap_content"
            android:maxLines="1"
            android:inputType="textPassword"
            android:text="123"
            android:textSize="@dimen/activity_text_size" />
    </LinearLayout>

    <View
        android:layout_width="fill_parent"
        android:layout_height="10dp" />

    <LinearLayout
        android:layout_width="fill_parent"
        android:layout_height="wrap_content"
        android:orientation="horizontal" >

        <TextView
            android:layout_width="100dp"
            android:layout_height="wrap_content"
            android:paddingLeft="10dp"
            android:text="姓       名:"
            android:textSize="@dimen/activity_text_size" />

        <EditText
            android:id="@+id/et_name"
            android:layout_width="fill_parent"
            android:layout_height="wrap_content"
            android:singleLine="true"
            android:text="我的小呆呆"
            android:textSize="@dimen/activity_text_size" />
    </LinearLayout>

    <View
        android:layout_width="fill_parent"
        android:layout_height="10dp" />

    <LinearLayout
        android:layout_width="fill_parent"
        android:layout_height="wrap_content"
        android:orientation="vertical" >

        <LinearLayout
            android:layout_width="match_parent"
            android:layout_height="wrap_content"
            android:orientation="horizontal"
            >

            <TextView
                android:layout_width="100dp"
                android:layout_height="wrap_content"
                android:paddingLeft="10dp"
                android:paddingTop="7dp"
                android:text="性       别:"
                android:textSize="@dimen/activity_text_size" />

            <RadioGroup
                android:id="@+id/radio_sex"
                android:layout_width="wrap_content"
                android:layout_height="wrap_content"
                android:orientation="horizontal" >

                <RadioButton
                    android:id="@+id/radio_male"
                    android:layout_width="wrap_content"
                    android:layout_height="wrap_content"
                    android:checked="true"
                    android:text="男"
                    android:textSize="@dimen/activity_text_size" />

                <RadioButton
                    android:id="@+id/radio_female"
                    android:layout_width="wrap_content"
                    android:layout_height="wrap_content"
                    android:text="女"
                    android:textSize="@dimen/activity_text_size" />
            </RadioGroup>
        </LinearLayout>

        <View
            android:layout_width="match_parent"
            android:layout_height="30dp" />

        <LinearLayout
            android:layout_width="fill_parent"
            android:layout_height="wrap_content">

            <TextView
                android:layout_width="100dp"
                android:layout_height="wrap_content"
                android:text="民      族:"
                android:textSize="@dimen/activity_text_size" />

            <EditText
                android:id="@+id/et_nation"
                android:layout_width="fill_parent"
                android:layout_height="wrap_content"
                android:singleLine="true"
                android:text="呆呆族"
                android:textSize="@dimen/activity_text_size" />
          </LinearLayout>
        </LinearLayout>

    <View
        android:layout_width="fill_parent"
        android:layout_height="40dp" />

    <LinearLayout
        android:layout_width="fill_parent"
        android:layout_height="wrap_content"
        android:orientation="horizontal" >

        <View
            android:layout_width="0dp"
            android:layout_height="match_parent"
            android:layout_weight="2"
            />

        <Button
            android:id="@+id/btn_submit"
            android:layout_width="wrap_content"
            android:layout_height="wrap_content"
            android:paddingLeft="10dp"
            android:layout_weight="1"
            android:text="提交"
            android:textSize="@dimen/activity_text_size" />

        <View
            android:layout_width="0dp"
            android:layout_height="match_parent"
            android:layout_weight="2"
            />

        <Button
            android:id="@+id/btn_reset"
            android:layout_width="wrap_content"
            android:layout_weight="1"
            android:layout_height="wrap_content"
            android:text="重置"
            android:textSize="@dimen/activity_text_size" />

        <View
            android:layout_width="0dp"
            android:layout_height="match_parent"
            android:layout_weight="2"
            />
    </LinearLayout>
</LinearLayout>package com.example.logintest;
import android.content.Intent;
import android.os.Handler;
import android.os.Message;
import android.support.v7.app.AppCompatActivity;
import android.os.Bundle;
import android.util.Log;
import android.view.View;
import android.widget.Button;
import android.widget.EditText;
import android.widget.Toast;
import com.example.logintest.utils.HttpUtils;
import org.json.JSONArray;
import org.json.JSONException;
import org.json.JSONObject;
import java.io.IOException;
import okhttp3.Call;
import okhttp3.Callback;
import okhttp3.Response;
public class RegisterActivity extends AppCompatActivity{
private EditText et_empNo;
private EditText et_pass;
private EditText et_passConfirm;
private EditText et_niceName;
private Button btn_Submit;
private int status;
private JSONObject json = new JSONObject();
private Handler handler;
private String url = "http://192.168.0.101/myWorks/register.php";
@Override
protected void onCreate(Bundle savedInstanceState) {
super.onCreate(savedInstanceState);
setContentView(R.layout.activity_register);
et_empNo = (EditText)findViewById(R.id.et_empNo);
et_pass = (EditText)findViewById(R.id.et_pass);
et_passConfirm = (EditText)findViewById(R.id.et_passConfirm);
et_niceName = (EditText)findViewById(R.id.et_name);
handler = new Handler(){
@Override
public void handleMessage(Message msg)
{
super.handleMessage(msg);
if (msg.what==123)
{
//跳转到登录成功的界面
Intent intent = new Intent(RegisterActivity.this, LoginActivity1.class);
startActivity(intent);
}
else if (msg.what == 234)
{
Toast.makeText(RegisterActivity.this, "您注册失败,可能是网络问题",Toast.LENGTH_SHORT).show();
}
}
};
btn_Submit = (Button)findViewById(R.id.btn_submit);
btn_Submit.setOnClickListener(new View.OnClickListener() {
@Override
public void onClick(View v) {
new Thread(new Runnable() {
@Override
public void run() {
try
{
json.put("empNo", et_empNo.getText().toString());
json.put("pass", et_pass.getText().toString());
json.put("name", et_niceName.getText().toString());
}
catch (JSONException e)
{
e.printStackTrace();
}
String jsonStr = json.toString();
HttpUtils.postJson(url, new Callback() {
@Override
public void onFailure(Call call, IOException e) {
Log.e("TAG", "NetConnect error!");
}
@Override
public void onResponse(Call call, Response response) throws IOException {
String responseStr = response.toString();
String responseBodyStr = response.body().string();
try
{
//获取返回的json数据,为{"success":"success"}形式.
//JSONArray jsonArray = new JSONArray(responseBodyStr);
JSONObject jsonData = new JSONObject(responseBodyStr);
String resultStr = jsonData.getString("success");
if (resultStr.equals("success")) //注册成功,发送消息
{
Message msg = handler.obtainMessage();
msg.what = 123;
handler.sendMessage(msg);
}
else //注册失败
{
Message msg = handler.obtainMessage();
msg.what = 234;
handler.sendMessage(msg);
}
}
catch(JSONException e)
{
e.printStackTrace();
}
}
}, jsonStr);
}
}).start();
}
});
}
}从代码中同样可以看到,是使用了handler来发送和处理网络消息,不同的是没有用到POST请求,而是直接向服务端发送JSON数据。
服务端register.php代码:
<?php
/**
 * Created by PhpStorm.
 * User: Administrator
 * Date: 2017/7/15
 * Time: 23:17
 */
include("conn.php");
//整体接收来自客户端的未处理的POST信息
$json = file_get_contents('php://input');
$obj = json_decode($json);
//插入数据库数据的SQL,注意因为数据表里有个id自增长字段,所以添加时要指定列排除掉这个id字段,这样就可以不用处理自增长列了,否则必然更新出错.
$sqlStr = "INSERT INTO user(userid, password, nicename) VALUES('".$obj->{'empNo'}."','".$obj->{'pass'}."', '".$obj->{'name'}."')";
$result = mysql_query($sqlStr, $conn);

if ($result) {
    $response ["success"] = "success";
} else {
    $response ["success"] = "failed".mysql_error();
}
header ( 'Content-type: application/json' );

echo json_encode($response);

mysql_close($conn);

?><?php
/**
* Created by PhpStorm.
* User: Administrator
* Date: 2017/7/12
* Time: 17:01
*/
error_reporting(E_ALL & ~E_NOTICE & ~E_DEPRECATED);
$conn = mysql_connect("localhost", "root", "root") or die("数据库连接错误".mysql_error());
mysql_select_db("mylocation",$conn) or die("数据库访问错误".mysql_error());
mysql_query("SET NAMES 'utf8'");
?>狗狗为你们献上友爱的祝福!


 1357
1357

 被折叠的 条评论
为什么被折叠?
被折叠的 条评论
为什么被折叠?
 到【灌水乐园】发言


