


Obj文件简介
OBJ文件是Alias|Wavefront公司为它的一套基于工作站的3D建模和动画软件"Advanced Visualizer"开发的一种标准3D模型文件格式,很适合用于3D软件模型之间的互导,也可以通过Maya读写。比如你在3dsMax或LightWave中建了一个模型,想把它调到Maya里面渲染或动画,导出OBJ文件就是一种很好的选择。目前几乎所有知名的3D软件都支持OBJ文件的读写,不过其中很多需要通过插件才能实现。
有一款开源的3D编辑,渲染软件,叫Blender,通过Blender建模,OpenGL导入,就可以更好的发挥想象,通过Linux+Blender+OpenGL这一套完全的开源平台,创造属于自己的3D世界。
OBJ文件导出
首先需要在系统中安装Blender,软件中心搜一下就可以找到了,2.62版本。也可以到官网下载最新的2.68版本。
安装好之后打开软件,已经建好了一个cubic,鼠标右键可以选定并且拖动模型,中键用于变换视角,滚轮用于放大和缩小视图。
选中方块之后按delete把它删掉,因为这个模型太简单了,之所以要用三维建模软件,就是为了应付复杂的模型,如果只是一个cubic,直接画一下就出来了。
接下来创建一个猴脸!
Add -> Mesh -> Monkey

File -> Export -> .obj

下面的选项一定要注意!

改一下名字,命名为monkey.obj, 回车~。
用gedit打开看一下:
# Blender v2.62 (sub 0) OBJ File: 'quit.blend'
# www.blender.org
o Monkey
v 0.576885 0.756494 -0.239630
v -0.298115 0.756494 -0.239630
v 0.639385 0.678369 -0.169318
v -0.360615 0.678369 -0.169318
... ...
vn 0.223706 0.722743 0.653910
vn -0.223706 0.722743 0.653910
vn -0.153610 0.967743 0.199693
... ...
f 96//81 152//81 150//81
f 153//82 99//82 97//82
f 153//82 97//82 151//82
f 98//83 100//83 154//83
#表示注释
v :顶点的坐标
vn :顶点法向量
f :面,96//81 152//81 150//81 指的是面的三个顶点,96指面的第一个顶点指的是前面定义的第96号顶点,81指的是第81个法向量,后面的两个顶点类推。
注:老版本的blender导出来的obj文件会有些许的不同,最好查看好obj的文件内容之后再进行解析!
简单的Parser
obj文件格式非常简单,用c++的vector可以很好的处理变长数组的问题。
bool loadOBJ(
        const char * path,
        std::vector<glm::vec3> & out_vertices,
        std::vector<glm::vec2> & out_uvs,
        std::vector<glm::vec3> & out_normals
){
        printf("Loading OBJ file %s...\n", path);

        std::vector<unsigned int> vertexIndices, uvIndices, normalIndices;
        std::vector<glm::vec3> temp_vertices;
        std::vector<glm::vec2> temp_uvs;
        std::vector<glm::vec3> temp_normals;


        FILE * file = fopen(path, "r");
        if( file == NULL ){
                printf("Impossible to open the file ! Are you in the right path ? See Tutorial 1 for details\n");
                return false;
        }

        while( 1 ){

                char lineHeader[128];
                // read the first word of the line
                int res = fscanf(file, "%s", lineHeader);
                if (res == EOF)
                        break; // EOF = End Of File. Quit the loop.

                // else : parse lineHeader

                if ( strcmp( lineHeader, "v" ) == 0 ){
                    cout<<"Get v"<<endl;
                        glm::vec3 vertex;
                        fscanf(file, "%f %f %f\n", &vertex.x, &vertex.y, &vertex.z );
                        temp_vertices.push_back(vertex);
                }else if ( strcmp( lineHeader, "vt" ) == 0 ){
                    cout<<"Get vt"<<endl;
                        glm::vec2 uv;
                        fscanf(file, "%f %f\n", &uv.x, &uv.y );
                        uv.y = -uv.y; // Invert V coordinate since we will only use DDS texture, which are inverted. Remove if you want to use TGA or BMP loaders.
                        temp_uvs.push_back(uv);
                }else if ( strcmp( lineHeader, "vn" ) == 0 ){
                    cout<<"Get vn"<<endl;
                        glm::vec3 normal;
                        fscanf(file, "%f %f %f\n", &normal.x, &normal.y, &normal.z );
                        temp_normals.push_back(normal);
                }else if ( strcmp( lineHeader, "f" ) == 0 ){
                    cout<<"Get f"<<endl;
                        std::string vertex1, vertex2, vertex3;
                        unsigned int vertexIndex[3], uvIndex[3], normalIndex[3];
                        int matches = fscanf(file, "%d//%d %d//%d %d//%d\n", &vertexIndex[0], &normalIndex[0], &vertexIndex[1], &normalIndex[1], &vertexIndex[2], &normalIndex[2]);
                        if (matches != 6){
                                printf("File can't be read by our simple parser :-( Try exporting with other options\n");
                                return false;
                        }
                        vertexIndices.push_back(vertexIndex[0]);
                        vertexIndices.push_back(vertexIndex[1]);
                        vertexIndices.push_back(vertexIndex[2]);
                        normalIndices.push_back(normalIndex[0]);
                        normalIndices.push_back(normalIndex[1]);
                        normalIndices.push_back(normalIndex[2]);
                }else{
                        // Probably a comment, eat up the rest of the line
                        char stupidBuffer[1000];
                        fgets(stupidBuffer, 1000, file);
                }


        }

        // For each vertex of each triangle
        for( unsigned int i=0; i<vertexIndices.size(); i++ ){

                // Get the indices of its attributes
                unsigned int vertexIndex = vertexIndices[i];
                unsigned int normalIndex = normalIndices[i];

                // Get the attributes thanks to the index
                glm::vec3 vertex = temp_vertices[ vertexIndex-1 ];
                glm::vec3 normal = temp_normals[ normalIndex-1 ];

                // Put the attributes in buffers
                out_vertices.push_back(vertex);
                out_normals .push_back(normal);

        }

        return true;
}
这里只处理顶点和法向量,uv坐标再议。
下面的代码可以用来加载monkey.obj , 并且打印坐标信息。
// Read our .obj file
vector<glm::vec3> vertices;
vector<glm::vec2> uvs;
vector<glm::vec3> normals;
bool res = loadOBJ("monkey.obj", vertices, uvs, normals);
cout<<vertices.size()<<endl;
for(int i=0; i<vertices.size(); i++)
{
    cout << vertices[i].x << " " << vertices[i].y << " " << vertices[i].z<<endl;
}
运行效果就想这样;

说明格式解析正确了。
安装glm库
由于C/C++标准库中没有几何数学库,这样造成在开发一个三维系统之初往往都需要自行实现一个实用的几何数学库,这样太费时费力了。Boost中有几何数学库,不过就这几行代码要用boost似乎有点牛刀小用了....GLM的出现可以很好的解决这个问题。
GLM设计上遵照OpenGL Shading Language风格,使用开放的MIT授权协议。会GLSL的人可以很快上手。因采用了数据结构与函数方法分离的方式,可以很容易扩充函数方法而不改变原文件(增加新的头文件即可,不过得在不同的头文件中找函数方法比较费力)。
顺便提一句,glm还可以很好的集成到cuda中去。
可以去官网( http://glm.g-truc.net/)下载最新的源码,无需编译,解压之后直接将里面的glm文件夹拷贝到/usr/local/include 目录下面就可以使用了。
官网可能被墙掉了,我自己上传了一份到csdn,点我下载。
封装代码
之前的一些代码都是用C来完成,因为代码的没几行,但现在我觉得需要花点时间来重构一下代码了,改用面向对象,我用的是CodeBlocks来构建项目的,觉得不想用IDE的可以用CMake的。
首先来看一下项目结构:
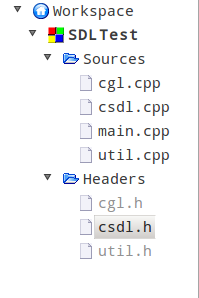
cgl 是对OpenGL的封装,csdl是对SDL的封装,util则是一个工具类。简单看一下头文件。
cgl.h
#ifndef CGL_H
#define CGL_H
#include <GL/glew.h>
#include <GL/gl.h>
#include <GL/glu.h>
#include <SDL/SDL.h>
#include "util.h"
class CGL
{
    public:
        CGL();
        CGL(int _width, int _height);
        virtual ~CGL();
        bool initGL();
        bool resizeGL(int width,int height);
        bool renderGL();
    protected:
    private:
        int width;
        int height;
};

#endif // CGL_H
csdl.h
#ifndef SDL_H
#define SDL_H
#include <SDL/SDL.h>
#include <GL/glew.h>
#include <GL/gl.h>
#include <GL/glu.h>
class CSDL
{
    public:
        CSDL();
        CSDL(int width, int height, int bpp, int flags);
        virtual ~CSDL();
        void init(Uint32 flags);
        void quit(int code);
        void toggle_fullscreen();
        void handleKeyEvent( SDL_keysym* keysym );
        void handleEvent();
        void setCaption(char *);
    protected:
    private:
        int screen_width;
        int screen_height;
        int screen_bpp;
        SDL_Surface *screen;
        //Whether the window is windowed or not
        bool windowed;
        //Whether the window is fine
        bool windowOK;
};

#endif // SDL_H
util.h
#ifndef UTIL_H
#define UTIL_H
#include <glm/glm.hpp>
#include <vector>
#include <string>
#include <cstring>
#include <iostream>
using namespace std;

class Util
{
    public:
        Util();
        virtual ~Util();
        bool loadOBJ(const char * path,std::vector<glm::vec3> & out_vertices,std::vector<glm::vec2> & out_uvs,std::vector<glm::vec3> & out_normals);
        char *textFileRead(char *fn);
    protected:
    private:
};

#endif // UTIL_H
cpp就不贴了,太长。
这样,main.cpp就非常简洁了~
#include <iostream>
#include "csdl.h"
#include "cgl.h"

using namespace std;
const int SCREEN_WIDTH = 800;
const int SCREEN_HEIGHT =800;
const int SCREEN_BPP = 32;
int main()
{
CGL *gl = new CGL(SCREEN_WIDTH, SCREEN_HEIGHT);
// Color depth in bits of our window.
int flags= SDL_OPENGL|SDL_RESIZABLE;
CSDL *sdl = new CSDL(SCREEN_WIDTH, SCREEN_HEIGHT, SCREEN_BPP,flags, gl);
sdl->setCaption("Load obj in OpenGL");
gl->initGL();
 while(true) {
   sdl->handleEvent(gl);
   gl->renderGL();
   }
return 0;}
需要修改渲染内容的话,直接修改cgl.cpp中的代码就可以了,要添加功能函数就在util中添加,而sdl类基本就不用修改了。
花了一个晚上了用面向对象的方式重构代码,这个时间是值得的——代码结构变得非常清晰,健壮性和可读性都有很大的提升,调试起来也更加方便。
接下来就要在OpenGL中导入obj文件了。
首先修改一下initGL函数,设置一下灯光和材质,同时导入obj文件。
bool CGL::initGL()
{

    float ratio = width / height;
    // Our shading model--Gouraud (smooth).
    glShadeModel( GL_SMOOTH );
    // Set the clear color.
    glClearColor( 0, 0, 0, 0 );
    // Setup our viewport.
    glViewport( 0, 0, width, height );
    glEnable(GL_DEPTH_TEST);
    //Change to the projection matrix and set our viewing volume.
    glMatrixMode( GL_PROJECTION );
    glLoadIdentity();
    gluPerspective( 60.0, ratio, 1.0, 100.0 );

    GLfloat light_position[] = {13.0, 13.0, 13.0, 0.0};
    GLfloat white_light[] = {1.0, 0.0, 0.0, 1.0};
    GLfloat lmodel_ambient[] = {0.1, 0.1, 0.1, 1.0};
    glLightfv(GL_LIGHT0,GL_POSITION,light_position);
    glLightfv(GL_LIGHT0,GL_DIFFUSE,white_light);
    glLightfv(GL_LIGHT0,GL_SPECULAR,white_light);

    GLfloat mat_specular[] = {1.0, 1.0, 1.0, 1.0};
    GLfloat mat_shininess[] = {50.0};
    glMaterialfv(GL_FRONT,GL_SPECULAR,mat_specular);
    glMaterialfv(GL_FRONT,GL_SHININESS,mat_shininess);
    glLightModelfv(GL_LIGHT_MODEL_AMBIENT,lmodel_ambient);

    glEnable(GL_LIGHTING);
    glEnable(GL_LIGHT0);

    Util util;
    //Read .obj file and store the infos
    bool res = util.loadOBJ("monkey.obj", vertices, uvs, normals);
    return( true );
}
接下来就可以进行渲染了:
glBegin(GL_TRIANGLES);
for(i = 0; i<nodesSize; i++)
{
glNormal3f(normals[i].x, normals[i].y, normals[i].z);
glVertex3f( vertices[i].x, vertices[i].y, vertices[i].z);
}
glEnd();
实际就是不断地绘制三角形...

当然,你也可以去一些网站下载一些模型来载入~搜 Blender model

代码下载
SDL C++ 编程框架 - http://download.csdn.net/detail/qp120291570/5856783
工程代码 - http://download.csdn.net/detail/qp120291570/5856935
参考:
《OpenGL编程指南》示例笔记(1)--渲染光照球体 - http://blog.csdn.net/norains/article/details/5684011Model loading - http://www.opengl-tutorial.org/beginners-tutorials/tutorial-7-model-loading/


 1596
1596

 被折叠的 条评论
为什么被折叠?
被折叠的 条评论
为什么被折叠?
 到【灌水乐园】发言


