


目录
一、SpringBoot整合静态资源访问
- 1.SpringBoot默认配置
- Spring Boot默认提供静态资源目录位置需置于classpath下,目录名需符合如下规则:
- /static、/public、/resources、/META-INF/resources
- Spring Boot默认提供静态资源目录位置需置于classpath下,目录名需符合如下规则:
- 2.案例
- 我们可以在src/main/resources/目录下创建static,在该位置放置一个图片文件。启动程序后,尝试访问http://localhost:8080/boot.jpg


二、yml与properties配置
在企业中采用application.yml方式配置应用的比较多,因为节省配置量
- 1.properties配置实现
- 在resources目录下新建文件application.properties
- 在HelloWorldService新增属性name、age并配置注解@Value
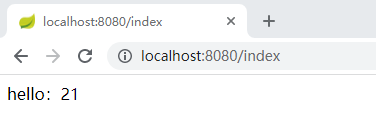
- 在HelloWorldService中使用index访问name和age
#application.properties
sjyl.name=hello
sjyl.age=21
@RestController
public class HelloWorldService {

    @Value("${sjyl.name}")
    private String name;
    @Value("${sjyl.age}")
    private int age;

    @RequestMapping("/index")
    public String index() {
        return name + ":" + age;
    }
}
- 2.yml配置实现
- 在resources目录下新建文件application.yml
- 新增如下配置属性(注意“:”后面都需要加一个空格,否则是错误的)
- HelloWorldService代码同上
sjyl:
  name: yml
  age: 22

三、SpringBoot渲染Web页面
- 1.引出
- 在之前的示例中,我们都是通过@RestController来处理请求,所以返回的内容为json对象。那么如果需要渲染html页面的时候,要如何实现呢?
- 2.模板引擎
- 在动态HTML实现上Spring Boot依然可以完美胜任,并且提供了多种模板引擎的默认配置支持,所以在推荐的模板引擎下,我们可以很快的上手开发动态网站
- 3.Spring Boot提供了默认配置的模板引擎
- a)Thymeleaf
- b)FreeMarker
- c)Velocity
- d)Groovy
- e)Mustache
当你使用上述模板引擎中的任何一个,它们默认的模板配置路径为:src/main/resources/templates
Spring Boot建议使用这些模板引擎,避免使用JSP,若一定要使用JSP将无法实现Spring Boot的多种特性
四、SpringBoot整合Freemarker
- 1.pom依赖
<!-- 引入freeMarker的依赖包. -->
<dependency>
	<groupId>org.springframework.boot</groupId>
	<artifactId>spring-boot-starter-freemarker</artifactId>
</dependency>
- 2.前台ftl页面创建
- 在resources下新建目录“templates”,新建文件“freemarkerIndex.ftl”
<!DOCTYPE html>
<html>
<head lang="en">
<meta charset="UTF-8" />
<title></title>
</head>
<body>
	  ${name}
</body>
</html>
- 3.后端controller创建
- 在controller包下新建FreemarkerIndexController
@Controller
public class FreemarkerIndexController {
@RequestMapping("/freemarkerIndex")
public String freemarkerIndex(Map<String,String> result){
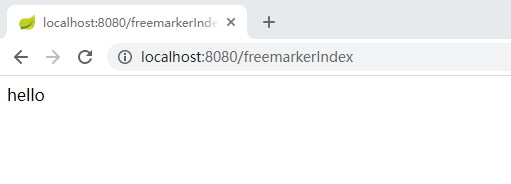
//转发到页面展示数据 name -> hello
result.put("name","hello");
return "freemarkerIndex";
}
}
页面访问:http://localhost:8080/freemarkerIndex
五、ftl模板引擎条件判断用法
- 1.SpringBoot整合Freemarker配置文件
- resources下配置application.yml文件
sjyl:
  name: yml
  age: 22
spring:
  http:
    encoding:
      force: true
      ### 模版引擎编码为UTF-8
      charset: UTF-8
  freemarker:
    allow-request-override: false
    cache: false
    check-template-location: true
    charset: UTF-8
    content-type: text/html; charset=utf-8
    expose-request-attributes: false
    expose-session-attributes: false
    expose-spring-macro-helpers: false
    ## 模版文件结尾.ftl
    suffix: .ftl
    ## 模版文件目录
    template-loader-path: classpath:/templates
- 2.FreemarkerIndexController新增页面展示数据
@Controller
public class FreemarkerIndexController {

    @RequestMapping("/freemarkerIndex")
    public String freemarkerIndex(Map<String,Object> result){
        //转发到页面展示数据 name -> hello
        result.put("name","hello");
        // 0是为男 1是为女
        result.put("sex", "0");
        result.put("age", 22);
        ArrayList<String> userlist = new ArrayList<>();
        userlist.add("zhangsan");
        userlist.add("wangwu");
        result.put("userList", userlist);
        return "freemarkerIndex";
    }
}
- 3.freemarkerIndex.ftl
<!DOCTYPE html>
<html>
<head lang="en">
<meta charset="UTF-8"/>
<title></title>
</head>
<body>
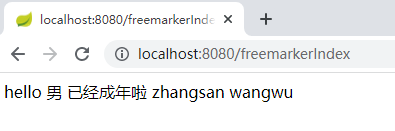
${name}
<#if sex=='0'>
男
<#elseif sex=='1'>
女
<#else>
其他
</#if>
<#if age gt 17>
已经成年啦
<#else>
未成年
</#if>
<#list userList as user>
${user}
</#list>
</body>
</html>
浏览器访问:http://localhost:8080/freemarkerIndex
六、SpringBoot整合thymeleaf
- 1.什么是thymeleaf
- thymeleaf是一款用于渲染XML/XHTML/HTML5内容的模板引擎,类似JSP,Velocity,FreeMaker等,它也可以轻易的与Spring MVC等Web框架进行集成作为Web应用的模板引擎
- 2.pom依赖
<!--引入thymeleaf的依赖-->
<dependency>
    <groupId>org.springframework.boot</groupId>
    <artifactId>spring-boot-starter-thymeleaf</artifactId>
</dependency>
- 3.application.yml
###ThymeLeaf配置
spring:
  thymeleaf:
    #prefix:指定模板所在的目录
    prefix: classpath:/templates/
    #check-tempate-location: 检查模板路径是否存在
    check-template-location: true
    #cache: 是否缓存,开发模式下设置为false,避免改了模板还要重启服务器,线上设置为true,可以提高性能。
    cache: true
    suffix:  .html
    encoding: UTF-8
    mode: HTML5
- 4.实体类UserEntity
public class UserEntity {
    private String userName;
    private Integer age;

    public UserEntity(String userName, Integer age) {
        this.userName = userName;
        this.age = age;
    }
    //GET...SET...省略
- 5.后端MyThymeleafController
@Controller
public class MyThymeleafController {
@RequestMapping("/myThymeleaf")
public String myThymeleaf(HttpServletRequest request, Map<String, Object> result) {
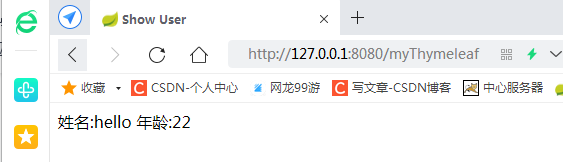
request.setAttribute("user",new UserEntity("hello", 22));
return "myThymeleaf";
}
}
- 6.前端myThymeleaf.html
<!DOCTYPE html>
<!--需要在HTML文件中加入以下语句: -->
<html lang="en" xmlns:th="http://www.thymeleaf.org">
<head>
    <meta charset="UTF-8">
    <title>Show User</title>
</head>
<body>
<table>
    姓名:<span th:text="${user.userName}"></span>
    年龄:<span th:text="${user.age}"></span>
</table>
</body>
</html>
项目目录:

浏览器访问:
七、thymeleaf循环和if判断用法
- 1.thymeleaf误报问题
- 在上面代码使用request对象来转发页面数据的时候才会产生这个误报
- 建议实际项目开发中使用Map来进行页面数据的转发

- 2.解决thymeleaf误报
- 修改MyThymeleafController使用Map传递
@Controller
public class MyThymeleafController {
    @RequestMapping("/myThymeleaf")
    public String myThymeleaf(Map<String,Object> result) {
        result.put("user",new UserEntity("hello",22));
        return "myThymeleaf";
    }
}

- 3.thymeleaf判断语法
<span th:if="${user.age>17}">已经成年啦</span>
<span th:if="${user.age<17}">未成年</span>
- 4.thymeleaf循环语法
<ul th:each="user:${userList}">
    <li th:text="${user.userName}"></li>
    <li th:text="${user.age}"></li>
    <br>
</ul>
- 5.案例
MyThymeleafController
@Controller
public class MyThymeleafController {

    @RequestMapping("/myThymeleaf")
    public String myThymeleaf(Map<String,Object> result) {
        result.put("user",new UserEntity("hello",18));
        ArrayList<UserEntity> userEntities = new ArrayList<>();
        userEntities.add(new UserEntity("hello1", 21));
        userEntities.add(new UserEntity("hello2", 22));
        userEntities.add(new UserEntity("hello3", 23));
        result.put("userList", userEntities);
        return "myThymeleaf";
    }
}
<!--myThymeleaf.html -->
<!DOCTYPE html>
<!--需要在HTML文件中加入以下语句: -->
<html lang="en" xmlns:th="http://www.thymeleaf.org">
<head>
    <meta charset="UTF-8">
    <title>Show User</title>
</head>
<body>
<table>
    姓名:<span th:text="${user.userName}"></span>
    年龄:<span th:text="${user.age}"></span>
    <span th:if="${user.age>17}">已经成年啦</span>
    <span th:if="${user.age<17}">未成年啦</span>

    <ul th:each="user:${userList}">
        <li th:text="${user.userName}"></li>
        <li th:text="${user.age}"></li>
    </ul>
</table>
</body>
</html>


 297
297


 被折叠的 条评论
为什么被折叠?
被折叠的 条评论
为什么被折叠?
 到【灌水乐园】发言


