


背景知识
先科普一下profile&level。(这里讨论最常用的H264)
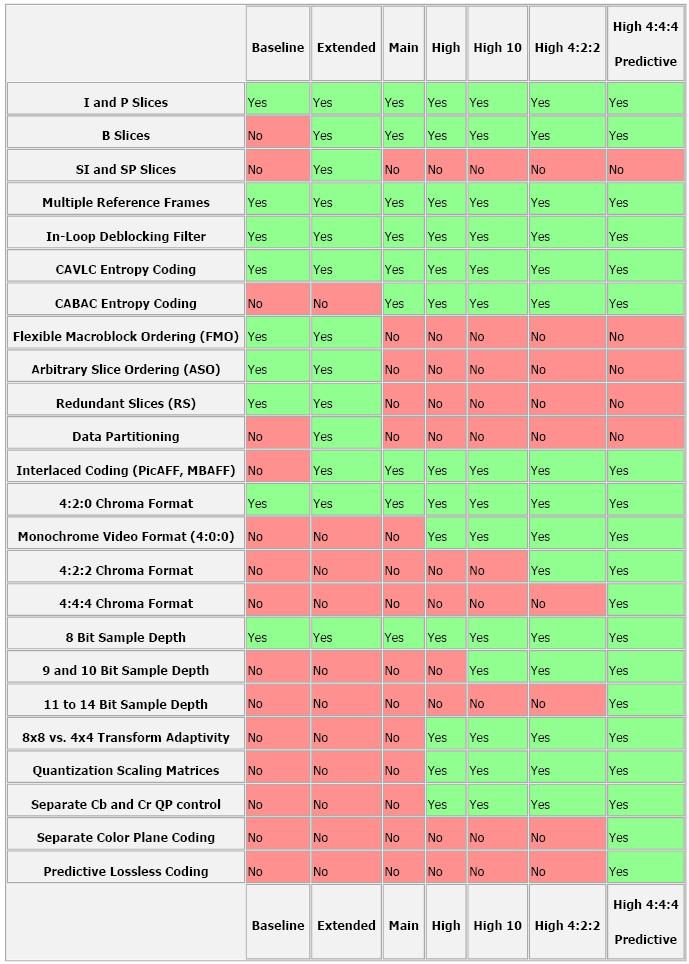
H.264有四种画质级别,分别是baseline, extended, main, high:
1、Baseline Profile:基本画质。支持I/P 帧,只支持无交错(Progressive)和CAVLC;
2、Extended profile:进阶画质。支持I/P/B/SP/SI 帧,只支持无交错(Progressive)和CAVLC;(用的少)
3、Main profile:主流画质。提供I/P/B 帧,支持无交错(Progressive)和交错(Interlaced),
也支持CAVLC 和CABAC 的支持;
4、High profile:高级画质。在main Profile 的基础上增加了8x8内部预测、自定义量化、 无损视频编码和更多的YUV 格式;
H.264 Baseline profile、Extended profile和Main profile都是针对8位样本数据、4:2:0格式(YUV)的视频序列。在相同配置情况下,High profile(HP)可以比Main profile(MP)降低10%的码率。
根据应用领域的不同,Baseline profile多应用于实时通信领域,Main profile多应用于流媒体领域,High profile则多应用于广电和存储领域。
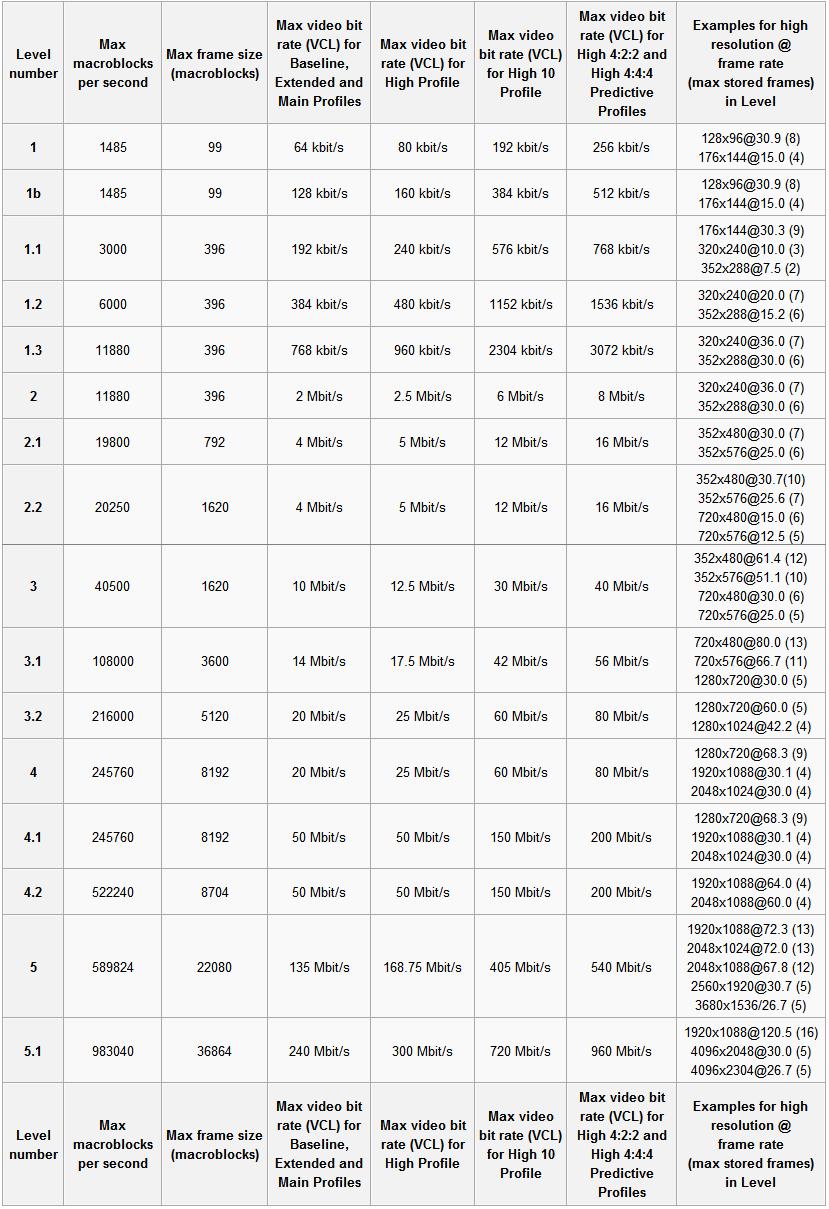
下图清楚的给出不同的profile&level的性能区别。
profile
level
2.1 ffmpeg如何控制profile&level
举3个例子吧
ffmpeg -i input.mp4 -profile:v baseline -level 3.0 output.mp4

ffmpeg -i input.mp4 -profile:v main -level 4.2 output.mp4

ffmpeg -i input.mp4 -profile:v high -level 5.1 output.mp4
如果ffmpeg编译时加了external的libx264,那就这么写:
ffmpeg -i input.mp4 -c:v libx264 -x264-params "profile=high:level=3.0" output.mp4
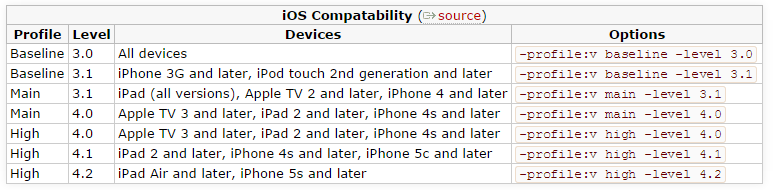
从压缩比例来说,baseline< main < high,对于带宽比较局限的在线视频,可能会选择high,但有些时候,做个小视频,希望所有的设备基本都能解码(有些低端设备或早期的设备只能解码 baseline),那就牺牲文件大小吧,用baseline。自己取舍吧!
苹果的设备对不同profile的支持。
2.2. 编码效率和视频质量的取舍(preset, crf)
除了上面提到的,强行配置biterate,或者强行配置profile/level,还有2个参数可以控制编码效率。
一个是preset,一个是crf。
preset也挺粗暴,基本原则就是,如果你觉得编码太快或太慢了,想改改,可以用profile。
preset有如下参数可用:
ultrafast, superfast, veryfast, faster, fast, medium, slow, slower, veryslow and placebo.
编码加快,意味着信息丢失越严重,输出图像质量越差。
CRF(Constant Rate Factor): 范围 0-51: 0是编码毫无丢失信息, 23 is 默认, 51 是最差的情况。相对合理的区间是18-28.
值越大,压缩效率越高,但也意味着信息丢失越严重,输出图像质量越差。
举个例子吧。
ffmpeg -i input -c:v libx264 -profile:v main -preset:v fast -level 3.1 -x264opts crf=18
(参考自:https://trac.ffmpeg.org/wiki/Encode/H.264)
2.3. H265 (HEVC)编码tile&level控制
背景知识
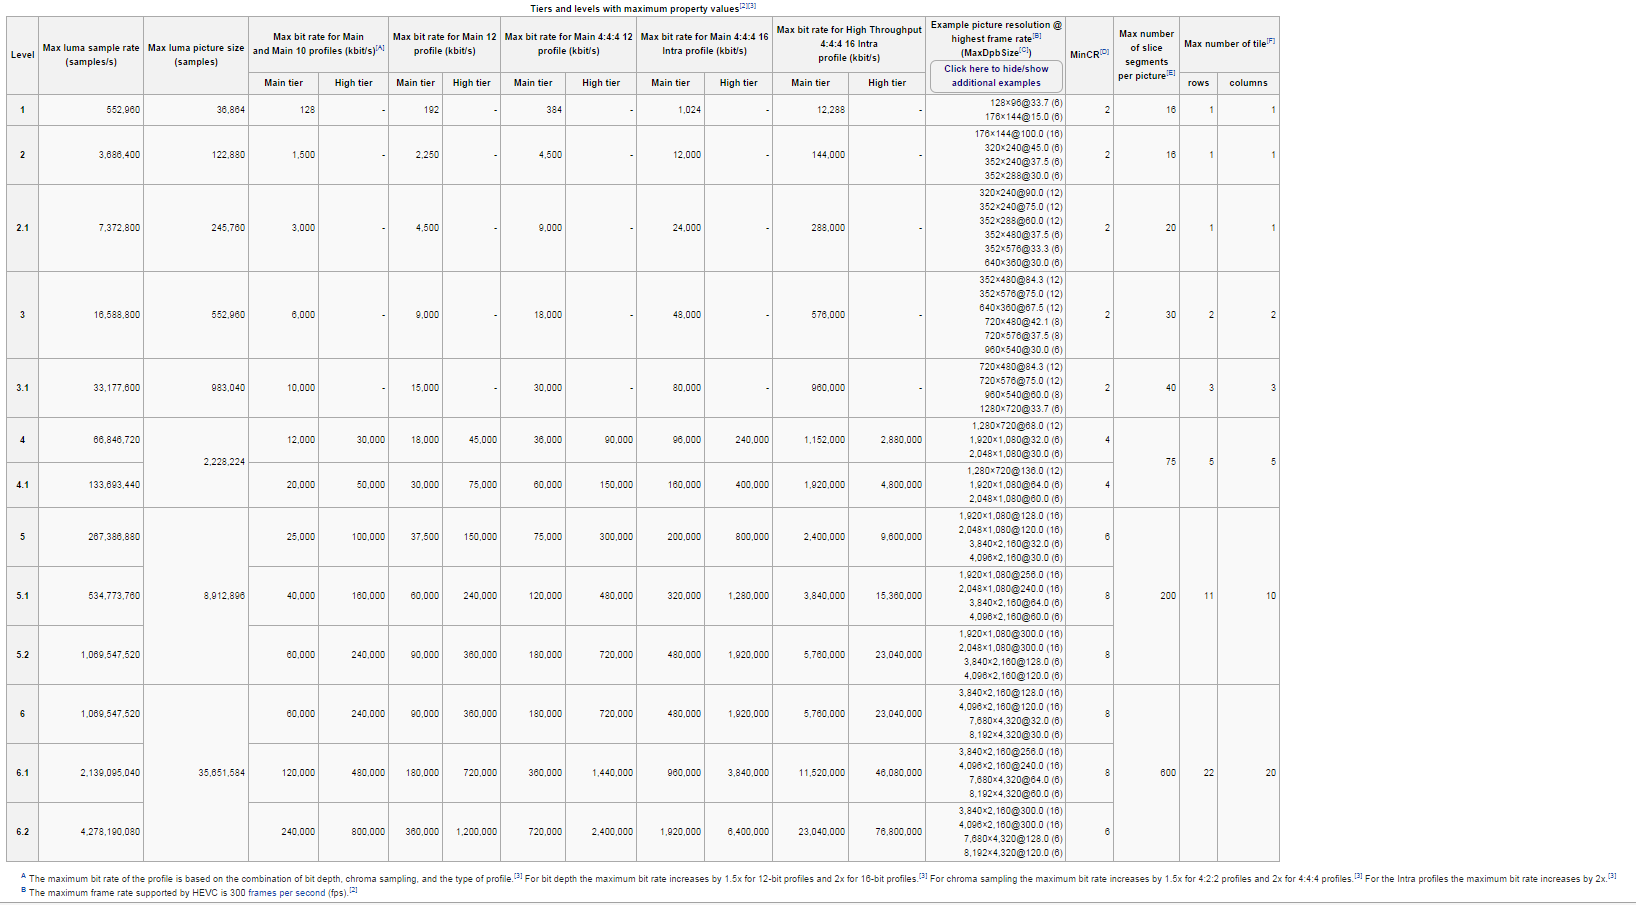
和H264的profile&level一样,为了应对不同应用的需求,HEVC制定了“层级”(tier) 和“等级”(level)。
tier只有main和high。
level有13级,如下所示:
不多说,直接给出怎么用。(supposed你用libx265编码)
ffmpeg -i input.mp4 -c:v libx265 -x265-params "profile=high:level=3.0" output.mp4


 1144
1144

 被折叠的 条评论
为什么被折叠?
被折叠的 条评论
为什么被折叠?
 到【灌水乐园】发言


