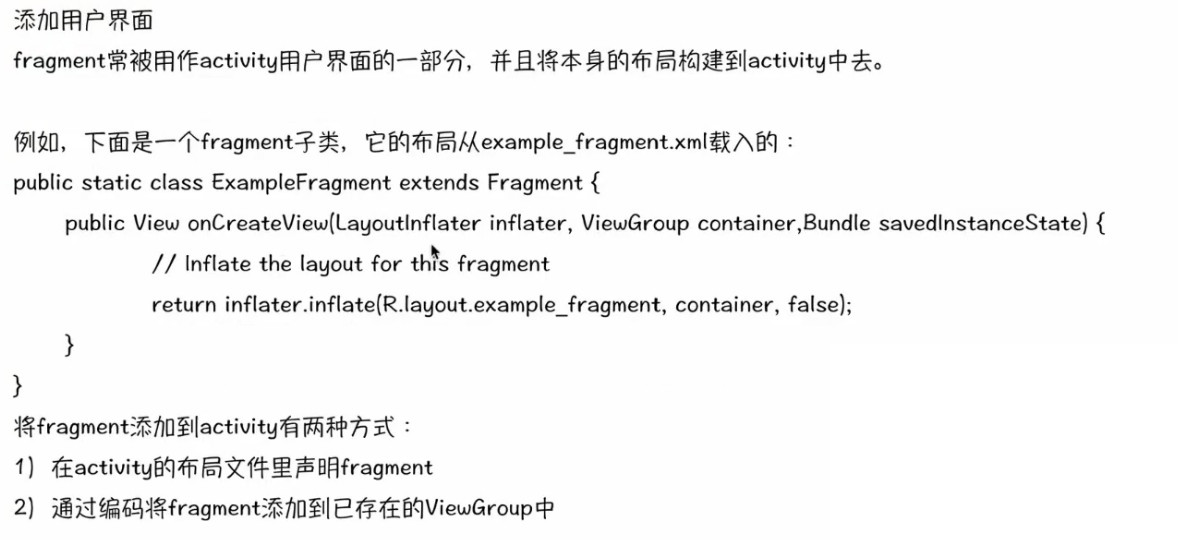
布局文件添加:
<fragment
android:layout_width="0dip"
android:layout_height="match_parent"
android:layout_weight="0.41"
android:name="com.example.zhangjb.myapplication6.TitleFragment"
android:id="@+id/title_fragment"
></fragment>
<fragment
android:layout_width="0dip"
android:layout_height="match_parent"
android:layout_weight="1.32"
android:name="com.example.zhangjb.myapplication6.ContentFragment"
android:id="@+id/content_fragment"
></fragment>
实例为布局xml,fragment子类:
public class TitleFragment extends Fragment {
@Nullable
@Override
public View onCreateView(LayoutInflater inflater, ViewGroup container, Bundle savedInstanceState) {
View view = inflater.inflate(R.layout.title_layout,container,false);
return view;
}
}
-----------------------
public class ContentFragment extends Fragment {
@Nullable
@Override
public View onCreateView(LayoutInflater inflater, ViewGroup container, Bundle savedInstanceState) {
View view = inflater.inflate(R.layout.content_layout, container, false);
return view;
}
}
activity类:在主activity中显示这两个fragment
public class MainActivity extends ActionBarActivity {
TitleFragment titleFragment;
ContentFragment contentFragment;
@Override
protected void onCreate(Bundle savedInstanceState) {
super.onCreate(savedInstanceState);
setContentView(R.layout.activity_main);
titleFragment = (TitleFragment) getFragmentManager().findFragmentById(R.id.title_fragment);
contentFragment = (ContentFragment) getFragmentManager().findFragmentById(R.id.content_fragment);
}
1.activity布局文件中:
<fragment
android:layout_width="0dp"
android:layout_height="match_parent"
android:id="@+id/title_fragment"
android:layout_weight="1"
android:name="com.example.zhangjb.myapplication6.TitleFragment"></fragment>
<FrameLayout
android:layout_width="0dp"
android:layout_height="match_parent"
android:id="@+id/content_layout"
android:layout_weight="3"
></FrameLayout>
2.在activity中利用代码将其它的fragment添加到指定的布局组件中
public class MainActivity2Activity extends Activity {
ContentFragment contentFragment;
@Override
protected void onCreate(Bundle savedInstanceState) {
super.onCreate(savedInstanceState);
setContentView(R.layout.activity_main_activity2);
addContentLayout();
}
/***
*
* 通过代码添加Fragment
*
* @param
*/
private void addContentLayout(){
FragmentManager fm = getFragmentManager();
FragmentTransaction ft = fm.beginTransaction();
contentFragment = new ContentFragment();
ft.add(R.id.content_layout,contentFragment);
Log.i("Layout","添加frament");
ft.commit();
}
}
<Button
android:layout_width="wrap_content"
android:layout_height="wrap_content"
android:text="one"
android:id="@+id/button4"
android:layout_below="@+id/textView2"
android:layout_alignParentStart="true"
android:onClick="oneClick"
/>
<Button
android:layout_width="wrap_content"
android:layout_height="wrap_content"
android:text="two"
android:id="@+id/button5"
android:layout_below="@+id/textView2"
android:layout_alignParentEnd="true"
android:layout_marginEnd="25dp"
android:onClick="twoClick"
/>
<FrameLayout
android:layout_width="fill_parent"
android:layout_height="fill_parent"
android:layout_below="@+id/button4"
android:layout_alignParentEnd="true"
android:layout_alignParentBottom="true"
android:layout_alignParentStart="true"
android:id="@+id/content"
></FrameLayout>
2.activity类:
public class PopBackTaskActivity extends ActionBarActivity {
@Override
protected void onCreate(Bundle savedInstanceState) {
super.onCreate(savedInstanceState);
setContentView(R.layout.activity_pop_back_task);
}
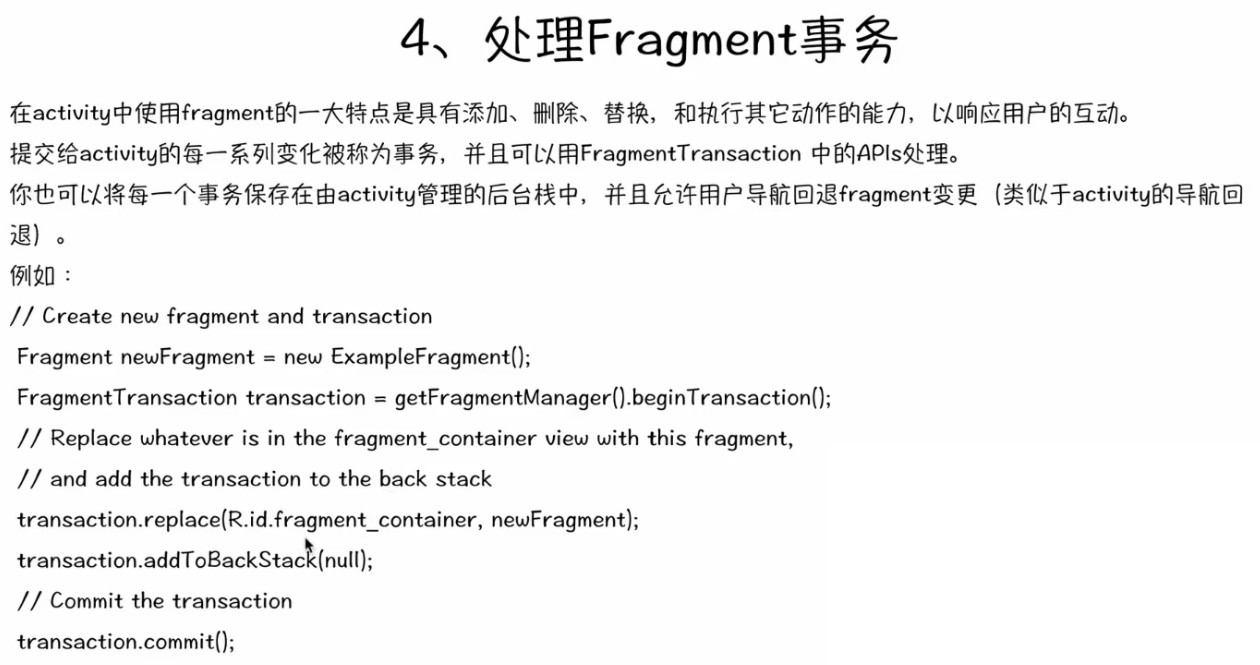
public void oneClick(View v){
PopBackFragment p1 = new PopBackFragment("two");
FragmentTransaction ft = getFragmentManager().beginTransaction();
ft.replace(R.id.content,p1);
ft.addToBackStack(null);
ft.commit();
}
public void twoClick(View v){
PopBackFragment p2 = new PopBackFragment("one");
FragmentTransaction ft = getFragmentManager().beginTransaction();
ft.replace(R.id.content,p2);
ft.addToBackStack(null);
ft.commit();
}
@Override
public boolean onKeyDown(int keyCode, KeyEvent event) {
if(keyCode == KeyEvent.KEYCODE_BACK){
if(getFragmentManager().getBackStackEntryCount() == 0){
finish();
}else {
getFragmentManager().popBackStack();
}
return true;
}
return super.onKeyDown(keyCode,event);
}
}
public class PopBackFragment extends Fragment {
String title;
public PopBackFragment() {
}
public PopBackFragment(String title){
this.title = title;
}
@Override
public View onCreateView(LayoutInflater inflater, ViewGroup container,
Bundle savedInstanceState) {
View view = inflater.inflate(R.layout.fragment_pop_back, container, false);
TextView tx = (TextView) view.findViewById(R.id.textViw_text);
tx.setText(title);
return view;
}
}
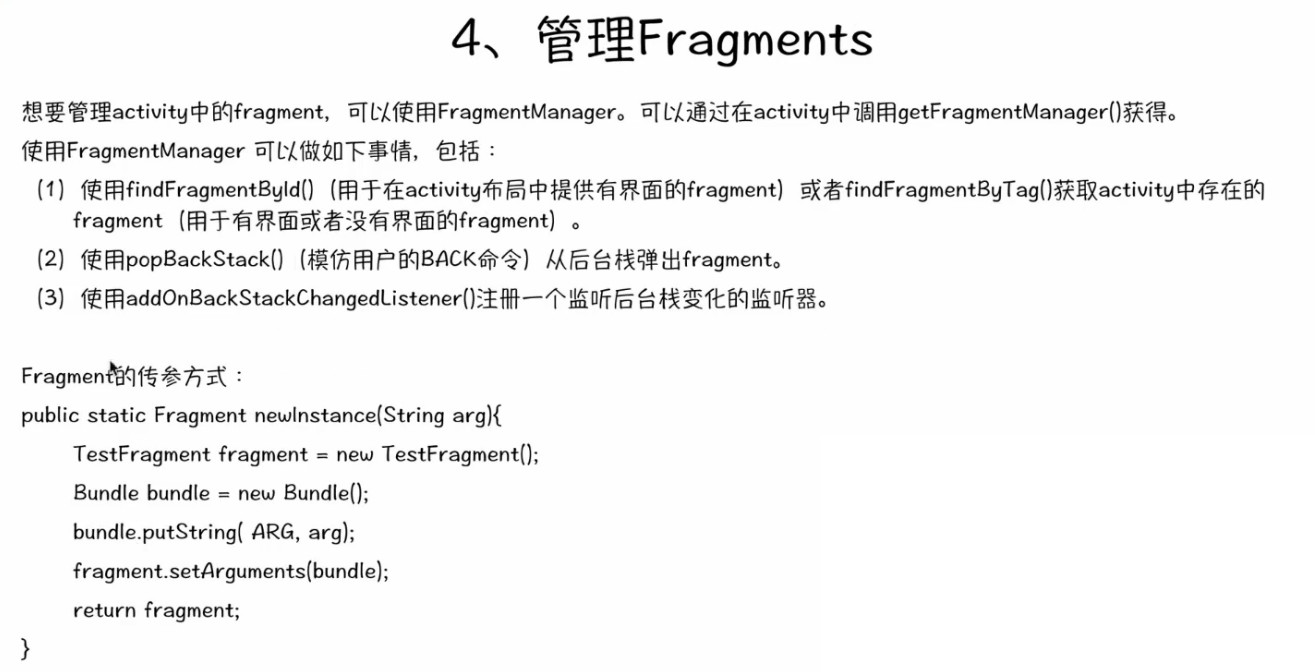
优化上面的方法:原因:fragment传参问题,上面的结果导致手机屏幕旋转时,frangment会丢失传入的参数
public class PopBackFragment extends Fragment {
public PopBackFragment() {
}
public static PopBackFragment getInstance(String title){
PopBackFragment p = new PopBackFragment();
Bundle bundle = new Bundle();
bundle.putString("title",title);
p.setArguments(bundle);
return p;
}
@Override
public View onCreateView(LayoutInflater inflater, ViewGroup container,
Bundle savedInstanceState) {
View view = inflater.inflate(R.layout.fragment_pop_back, container, false);
TextView tx = (TextView) view.findViewById(R.id.textViw_text);
tx.setText(getArguments().getString("title"));
return view;
}
}
public class PopBackTaskActivity extends ActionBarActivity {
@Override
protected void onCreate(Bundle savedInstanceState) {
super.onCreate(savedInstanceState);
setContentView(R.layout.activity_pop_back_task);
}
public void oneClick(View v){
PopBackFragment p1 =PopBackFragment.getInstance("one");
FragmentTransaction ft = getFragmentManager().beginTransaction();
ft.replace(R.id.content,p1);
ft.addToBackStack(null);
ft.commit();
}
public void twoClick(View v){
PopBackFragment p2 = PopBackFragment.getInstance("two");
FragmentTransaction ft = getFragmentManager().beginTransaction();
ft.replace(R.id.content,p2);
ft.addToBackStack(null);
ft.commit();
}
@Override
public boolean onKeyDown(int keyCode, KeyEvent event) {
if(keyCode == KeyEvent.KEYCODE_BACK){
if(getFragmentManager().getBackStackEntryCount() == 0){
finish();
}else {
getFragmentManager().popBackStack();
}
return true;
}
return super.onKeyDown(keyCode,event);
}
}
1.创建两个 fragment
<Button
android:layout_width="wrap_content"
android:layout_height="wrap_content"
android:text="新闻"
android:id="@+id/button1"
/>
<Button
android:layout_width="wrap_content"
android:layout_height="wrap_content"
android:text="音乐"
android:id="@+id/button2"
android:layout_gravity="left|top"
/>
-------------------------
<TextView
android:layout_width="match_parent"
android:layout_height="match_parent"
android:id="@+id/value"
android:text="no data"
android:layout_gravity="center"
/>
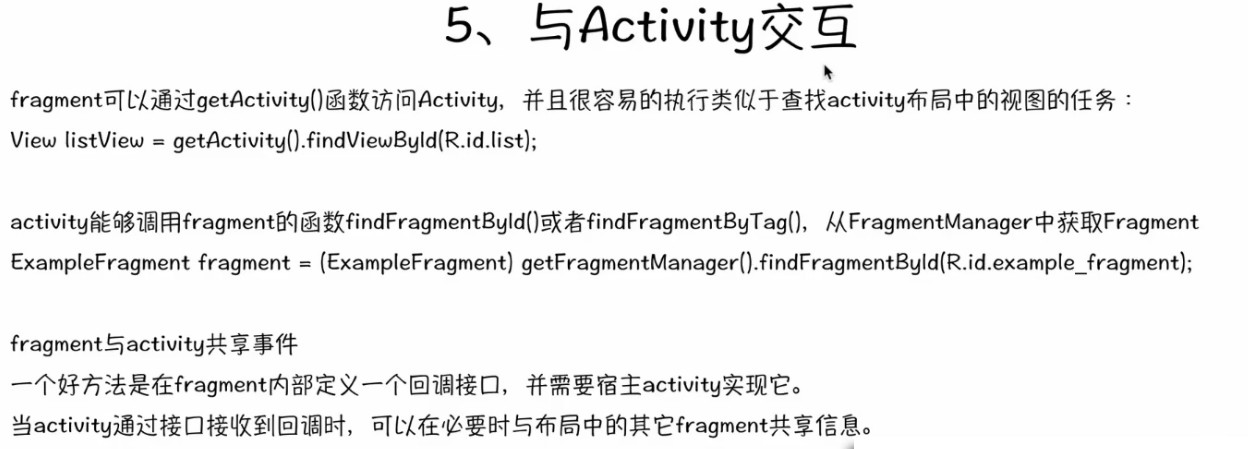
----fragment事件源中创建一个回调接口,得到activity并调用实现接口的方法-------
public class MainFragment extends Fragment implements View.OnClickListener {
private MainLister mainLister;
public MainFragment() {
}
@Override
public void onAttach(Activity activity) {
super.onAttach(activity);
mainLister = (MainLister) activity;
}
@Override
public View onCreateView(LayoutInflater inflater, ViewGroup container,
Bundle savedInstanceState) {
View V = inflater.inflate(R.layout.fragment_main, container, false);
V.findViewById(R.id.button1).setOnClickListener(this);
V.findViewById(R.id.button2).setOnClickListener(this);
return V;
}
@Override
public void onClick(View v) {
switch (v.getId()){
case R.id.button1:
mainLister.changeValue("news");
break;
case R.id.button2:
mainLister.changeValue("music");
break;
}
}
public static interface MainLister{
public void changeValue(String value);
}
}
------要改变的fragmen---------
public class MentFragment extends Fragment {
private TextView textView_value;
public MentFragment() {
}
@Override
public View onCreateView(LayoutInflater inflater, ViewGroup container,
Bundle savedInstanceState) {
View v = inflater.inflate(R.layout.fragment_ment, container, false);
textView_value= (TextView) v.findViewById(R.id.value);
return v;
}
public void changeTextValue(String value){
textView_value.setText(value);
}
}
---------activity,并实现接口------------
public class MainActivity extends ActionBarActivity implements MainFragment.MainLister {
private MentFragment mentFragment;
private MainFragment mainFragment;
@Override
protected void onCreate(Bundle savedInstanceState) {
super.onCreate(savedInstanceState);
setContentView(R.layout.activity_main);
mainFragment = (MainFragment) getFragmentManager().findFragmentById(R.id.main);
mentFragment = (MentFragment) getFragmentManager().findFragmentById(R.id.ment);
}
@Override
public void changeValue(String value) {
mentFragment.changeTextValue(value);
}
}
1.新建 activity:
<fragment
android:layout_width="match_parent"
android:layout_height="match_parent"
android:id="@+id/perfs_fragment"
android:name="com.example.zhangjb.myapplication3.PrefsFragment"
></fragment>
public class MainActivity2Activity extends ActionBarActivity {
@Override
protected void onCreate(Bundle savedInstanceState) {
super.onCreate(savedInstanceState);
setContentView(R.layout.activity_main_activity2);
SharedPreferences sp = PreferenceManager.getDefaultSharedPreferences(this);
String name = sp.getString("checkbox_preference","");
Log.i("msg",name);
}
}
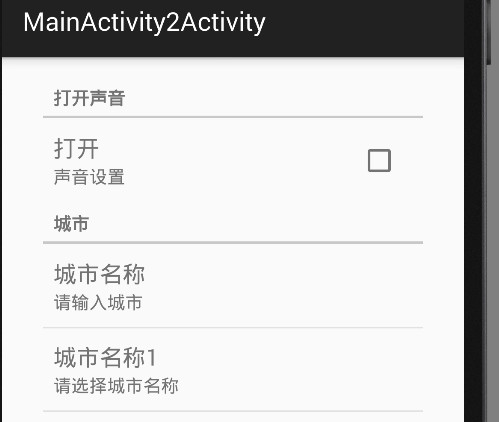
2.新建xml:文件名:preferences.xml
<?xml version="1.0" encoding="utf-8"?>
<PreferenceScreen xmlns:android="http://schemas.android.com/apk/res/android">
<PreferenceCategory
android:title="打开声音">
<CheckBoxPreference
android:key="checkbox_preference"
android:title="打开"
android:summary="声音设置" />
</PreferenceCategory>
<PreferenceCategory
android:title="城市">
<EditTextPreference
android:key="edittext_preference"
android:title="城市名称"
android:summary="请输入城市"
android:dialogTitle="城市标题" />
<ListPreference
android:key="list_preference"
android:title="城市名称1"
android:summary="请选择城市名称"
android:entries="@array/city"
android:entryValues="@array/city"
android:dialogTitle="城市名称" />
</PreferenceCategory>
</PreferenceScreen>
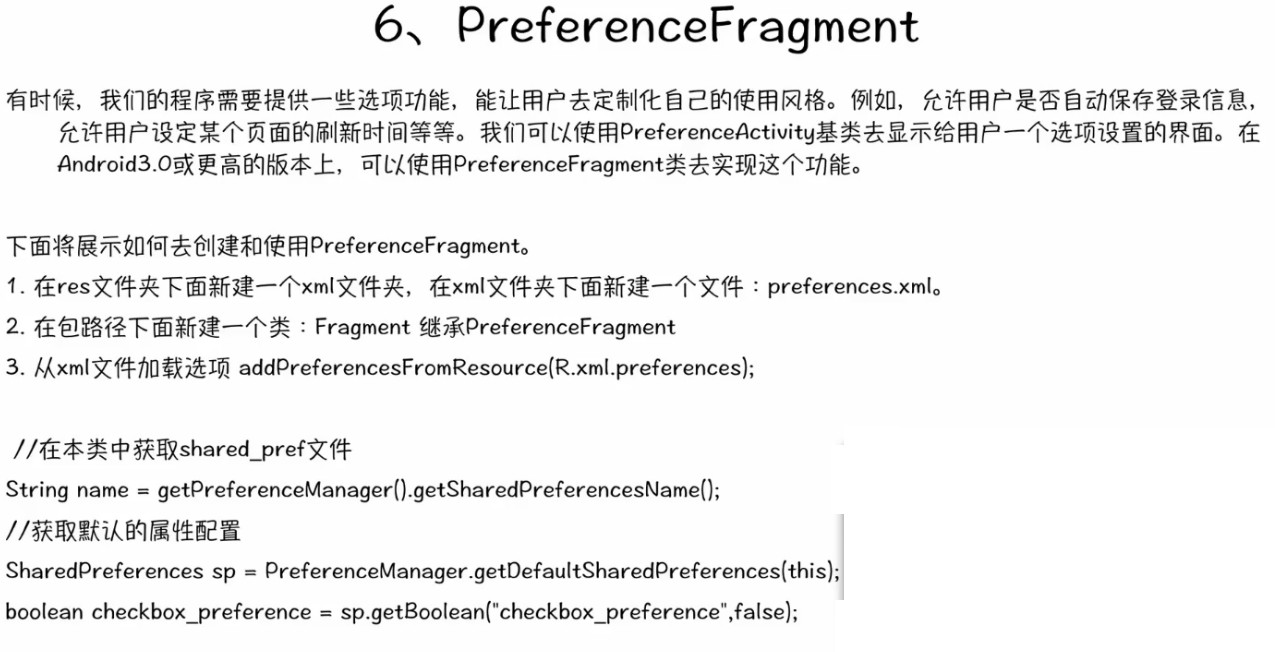
3.新建fragemnt:
public class PrefsFragment extends PreferenceFragment {
@Override
public void onCreate(Bundle savedInstanceState) {
super.onCreate(savedInstanceState);
addPreferencesFromResource(R.xml.preferences);
}
}


 569
569

 被折叠的 条评论
为什么被折叠?
被折叠的 条评论
为什么被折叠?
 到【灌水乐园】发言


