


TableLayout 和 GridLayout 的区别
一. TableLayout
- 继承LinearLayout
- 不需要明确的申明包含多少行多少列
- 通过添加 TableRow / 其他组件 来控制表格的行数和列数
- 单元格设置格式有3种:Shrinkable(可收缩),Stretchable(可拉伸),Collapsed(隐藏的)
运用TableLayout只能通过添加TableRow或者组件来增加行和列。当直接添加组件的时候,组件独自占用一行。当添加TableRow时,该布局增加了一行,并且在TableRow里每添加一个组件,便增加一列。
TableLayout无法做出跨行跨列的效果,每行每列都是挨着的,就算是单元格设置Collapsed属性,如果后面有组件,也会填充上来。
<!--定义一个表格布局,指定第2 列可收缩,第3 列隐藏,第4列可拉伸-->
    <TableLayout
        android:layout_width="match_parent"
        android:layout_height="wrap_content"
        android:id="@+id/table01"
        android:shrinkColumns="1"
        android:collapseColumns="2"
        android:stretchColumns="3">

<!--直接添加一个按钮,会直接占用一行-->
           <Button android:id="@+id/ok1"
            android:layout_width="wrap_content"
            android:layout_height="wrap_content"
            android:text="独自一行的按钮ok1"/>


<!--在TableRow添加加一个按钮,会添加一列-->
        <TableRow>
            <Button android:id="@+id/ok2"
                android:layout_width="wrap_content"
                android:layout_height="wrap_content"
                android:text="普通按钮"/>
            <Button android:id="@+id/ok3"
                android:layout_width="wrap_content"
                android:layout_height="wrap_content"
                android:text="shrink收缩按钮"/>
            <Button android:id="@+id/ok4"
                android:layout_width="wrap_content"
                android:layout_height="wrap_content"
                android:text="collapsed隐藏按钮"/>
            <Button android:id="@+id/ok5"
                android:layout_width="wrap_content"
                android:layout_height="wrap_content"
                android:text="stretch拉伸按钮"/>

        </TableRow>
    </TableLayout>
效果如下图:
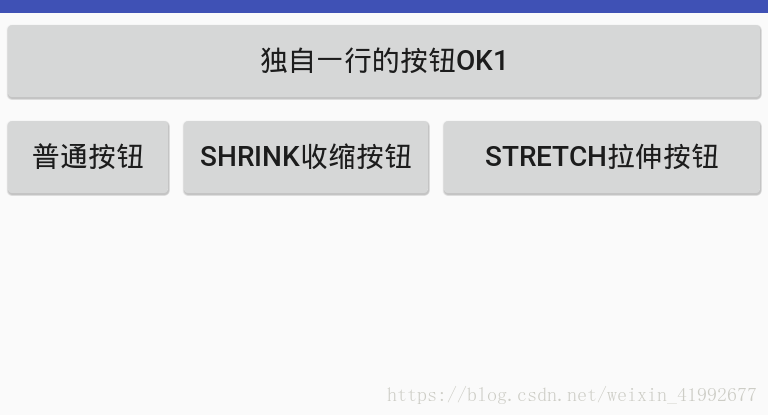
可以看出:
- 隐藏的按钮不会空着,会被后面的组件填上去
- 收缩会使该列宽度可以被收缩,以保证该table能适应父容器的宽度
- 拉伸可以使该列的所有单元格宽度可以被拉伸,以保证组件能完全填满表格空余空间
二. GridLayout
- Android4.0之后新加的布局管理器
- 能够把整个容器划分为rows*columns的网格,每个网格可以放置一个组件
- 可以设置一个组件横跨多少列或者纵跨多少行
- 当单元格大小大于组件大小时,可以通过设置layout_grativity属性值,设置组件在单元格里的位置
- 通过设置layout_columnWeight/layout_rowWeight属性值,可以设置各个组件的大小比例
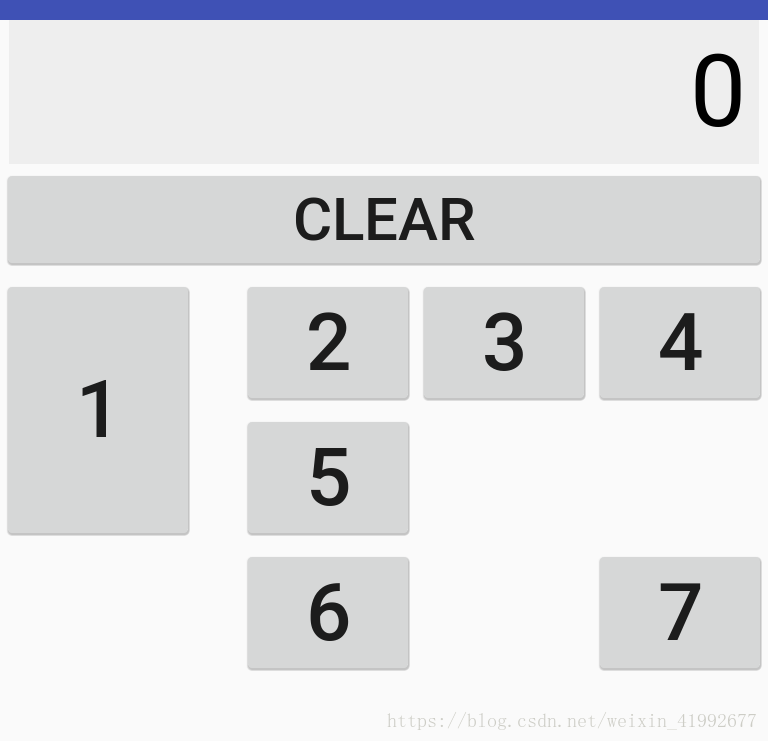
2.1 隔行/列的效果
方法1.设置margin等属性值
方法2.让组件占两列或者两行,设置layout_grativity为left/right
代码如下:
<?xml version="1.0" encoding="utf-8"?>
<GridLayout xmlns:android="http://schemas.android.com/apk/res/android"
    android:layout_width="match_parent" android:layout_height="match_parent"
    android:rowCount="6"
    android:columnCount="4"
    android:id="@+id/root">

    <TextView
        android:layout_width="match_parent"
        android:layout_height="wrap_content"
        android:layout_columnSpan="4"
        android:textSize="50sp"
        android:layout_marginLeft="2pt"
        android:layout_marginRight="2pt"
        android:padding="3pt"
        android:gravity="right"
        android:layout_gravity="right"
        android:background="#eee"
        android:textColor="#000"
        android:text="0" />

    <Button
        android:layout_width="match_parent"
        android:layout_height="wrap_content"
        android:layout_columnSpan="4"
        android:text="Clear"
        android:textSize="30sp"/>

    <Button
        android:layout_width="wrap_content"
        android:layout_height="wrap_content"
        android:layout_column="0"
        android:layout_row="2"
        android:layout_rowSpan="2"
        android:layout_gravity="fill"
        android:layout_marginRight="10pt"
        android:text="1"
        android:textSize="40dp"
        />
    <Button
        android:layout_width="wrap_content"
        android:layout_height="wrap_content"
        android:layout_columnSpan="2"
        android:layout_gravity="left"
        android:text="2"
        android:textSize="40dp"
        />

    <Button
        android:layout_width="wrap_content"
        android:layout_height="wrap_content"
        android:text="3"
        android:textSize="40dp"
        />
    <Button
        android:layout_width="wrap_content"
        android:layout_height="wrap_content"
        android:layout_columnSpan="2"
        android:layout_gravity="left"
        android:text="4"
        android:textSize="40dp"
        />
    <Button
        android:layout_width="wrap_content"
        android:layout_height="wrap_content"
        android:text="5"
        android:textSize="40dp"
        />

    <Button
        android:layout_width="wrap_content"
        android:layout_height="wrap_content"
        android:layout_column="1"
        android:layout_row="4"
        android:layout_columnSpan="2"
        android:layout_gravity="left"
        android:text="6"
        android:textSize="40dp"
        />
    <Button
        android:layout_width="wrap_content"
        android:layout_height="wrap_content"
        android:text="7"
        android:textSize="40dp"
        />
</GridLayout>
效果图:
三. 总结
- TableLayout可以通过设置layout_margin参数做出隔行隔列的效果,GridLayout不仅可以通过layout_margin,还可以利用rowSpan/columnSpan合并单元格以及设置layout_grativity来达成效果。这第二种方法的效果更好。
- TableLayout不能跨行跨列,不灵活,GridLayout能够更好实现隔行/隔列效果也是因为这个特点。
- 不能同时向水平和垂直方向做控件的对齐
TableLayout继承了LinearLayout,因此只能向一个方向做控件的对齐。.


 1327
1327

 被折叠的 条评论
为什么被折叠?
被折叠的 条评论
为什么被折叠?
 到【灌水乐园】发言


