


1、下载地址:http://mosquitto.org/download/
2、安装过程:

Openssl依赖库:http://slproweb.com/products/Win32OpenSSL.html

安装:
下载:pthreads依赖库:ftp://sources.redhat.com/pub/pthreads-win32/dll-latest/dll/x86/ 下载pthreadVC2.dll
4、最后拷贝Openssl路径下的libeay32.dll ssleay32.dll 和pthreads依赖库pthreadVC2.dll,到mosquitto安装路径即可。
5、开启mosquitto(需要到mosquitto安装目录bin下)
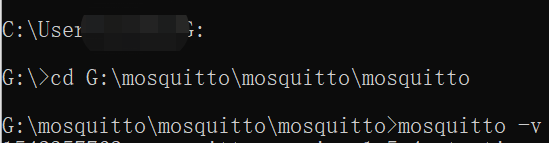
命令:mosquitto -v 开启命令
6、同时打开两个命令窗口一个传输一个接收信息
订阅消息:mosquitto_sub -v -t # 发布消息:mosquitto_pub -t topic -m "hello world"
7、设置用户名和密码
找到用户密码文件在安装bin下:

1: 打开mosquitto.conf文件,找到allow_anonymous节点,这个节点作用是,是否开启匿名用户登录,默认是true。打开此项配置(将前面的 # 号去掉)之后将其值改为true
修改前:#allow_anonymous
修改后:allow_anonymous false
2: 找到password_file节点,这个节点是告诉服务器你要配置的用户将存放在哪里。打开此配置并指定pwfile.example文件路劲(注意是绝对路劲)
修改前:#password_file
修改后:password_file /etc/mosquitto/pwfile.example (这里的地址根据自己文件实际位置填写)
3: 创建用户名和密码、打开命令窗口 键入如下命令:
mosquitto_passwd -c /etc/mosquitto/pwfile.example admin提示连续两次输入密码、创建成功。命令解释: -c 创建一个用户、/etc/mosquitto/pwfile.example 是将用户创建到 pwfile.example 文件中、admin 是用户名。
4: 创建mosquitto用户。在命令窗口键入如下命令:
mosquitto_passwd /etc/mosquitto/pwfile.example mosquitto同样连续会提示连续输入两次密码。注意第二次创建用户时不用加 -c 如果加 -c 会把第一次创建的用户覆盖。
至此两个用户创建成功,此时如果查看 pwfile.example 文件会发现其中多了两个用户。
mosquitto_sub.exe -h 127.0.0.1 -p 1883 -u admin -P 111 --cafile G:/mosquitto/InstallMosquitto/OpenSSL-Win64/bin/ca.crt -v -t #
mosquitto_pub.exe -h 127.0.0.1 -p 1883 -u admin -P 111 --cafile G:/mosquitto/InstallMosquitto/OpenSSL-Win64/bin/ca.crt -t topic -m "hello world"
mosquitto.exe -v -c mosquitto.conf


 874
874


 被折叠的 条评论
为什么被折叠?
被折叠的 条评论
为什么被折叠?
 到【灌水乐园】发言


