


这里写自定义目录标题
qml 利用 Component 组建生成自己的 delegate
为了使整个ui的风格统一,我们很多控件的形状、颜色之类的都是统一的,为了避免写太多重复代码,经常会自定义一个控件。也就是,写一个qml文件作为控件,在另外的qml中直接调用。
但有时候也会碰到一些问题,例如很多控件的外形相似,但中间的控件可能不同,比如有的控件中间是一个图片、文字、列表等。
那就想到在写一些例如ListView控件时,里面的delegate可以随便自己更改控件类型,那如果我们也把这个方式用起来,不就很方便了?
Component 可以定义一个组件,这个组件在没有被调用前是不会显示也不会运行的,那我们在自定义控件上放一个 Component,这样在不同的情况下,就可以定义不一样的组建了。
我们先自定义一个简单的控件:
// MyControl.qml
import QtQuick 2.0

Item {
    id: root
    property Component delegate: myComp

    Loader{
        anchors.fill: parent
        sourceComponent: delegate
    }

    Component {
        id: myComp
        Rectangle {
            anchors.fill: parent
            Text {
                anchors.centerIn: parent
                font.pixelSize: 23
                text: qsTr("占位符")
            }
        }
    }

}
然后来到main.qml中调用这个控件:
// main.qml
import QtQuick 2.12
import QtQuick.Window 2.12

Window {
    width: 640
    height: 480
    visible: true
    title: qsTr("Hello World")
    color: "#fed98d"


    MyControl{
        width: parent.width - 100
        height: parent.height - 100
        anchors.centerIn: parent
    }
}
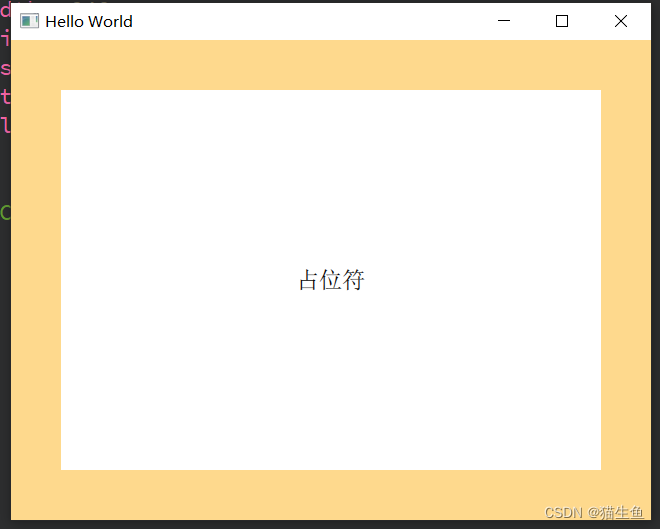
在不更改 delegate 的情况下是这样的:
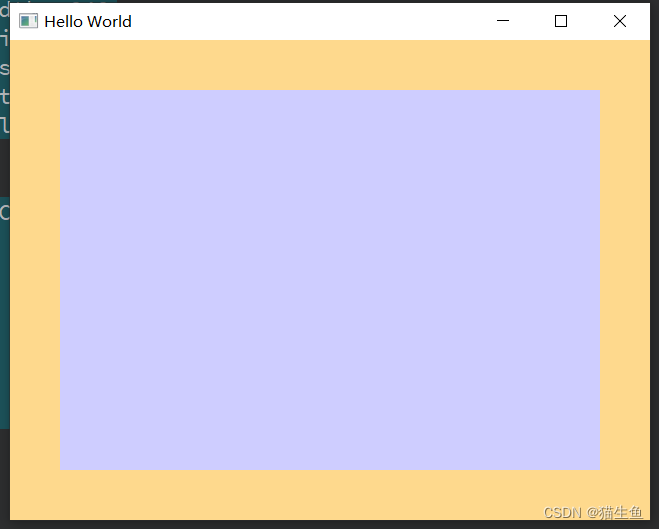
现在我们来把 delegate 改动一下:
// main.qml
import QtQuick 2.12
import QtQuick.Window 2.12

Window {
    width: 640
    height: 480
    visible: true
    title: qsTr("Hello World")
    color: "#fed98d"


    MyControl{
        width: parent.width - 100
        height: parent.height - 100
        anchors.centerIn: parent
        delegate: Rectangle {
            anchors.fill: parent
            color: "#cecdff"
        }
    }

}
那,delegate控件里的属性值要怎么更改呢?毕竟子控件里的id是不可以调用的。
可以使用值绑定的方式,比如我通过点击界面,修改color属性:
// main.qml
import QtQuick 2.12
import QtQuick.Window 2.12

Window {
    width: 640
    height: 480
    visible: true
    title: qsTr("Hello World")
    color: "#fed98d"
    property string mycolor: "#cecdff"

    MyControl {
        width: parent.width - 100
        height: parent.height - 100
        anchors.centerIn: parent
        delegate: Rectangle {
            anchors.fill: parent
            color: mycolor
        }
    }


    MouseArea {
        anchors.fill: parent
        onClicked: {
            // 随机十六进制颜色值
            mycolor = "#"
            + ("0" + Math.floor(Math.random() * 256).toString(16)).substr(-2)
            + ("0" + Math.floor(Math.random() * 256).toString(16)).substr(-2)
            + ("0" + Math.floor(Math.random() * 256).toString(16)).substr(-2)
        }
    }

}


 944
944

 被折叠的 条评论
为什么被折叠?
被折叠的 条评论
为什么被折叠?
 到【灌水乐园】发言


